


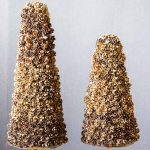
This is another throwback to my herbal gift shop days. A Styrofoam base, plenty of hot glue, and a bag full of mini pine cones are all you really need to create a pine cone Christmas tree.
We have a whole row of Eastern Hemlock trees separating our property and the house next door. We also have some at the back of our property, so I have been gathering bags full of these cute little pine cones for a while. I thought they would be perfect for making cute little mini trees for Christmas.
This post contains some affiliate links (that means if you make a purchase after clicking a link, there’s no additional cost to you, but I will earn a very small commission. ) i.e. as an Amazon Associate, I earn from qualifying purchases. Click here to read my full disclosure policy.
Be the first to receive new posts and get access to our Subscribers Only Page.

Pine Cone Christmas Tree
Supplies
Styrofoam Cone(s)
Mini Pine Cones
Small Clay Pot
Floral Foam
Kraft Paper
Moss to cover the foam
Dowel Rod or Branch for trunk

Making a Mini Christmas Tree with Pine Cones
All you need to do is start at the bottom of the cone and run a line of hot glue about 2 inches long.
Then place your cones on the glue as close together as possible.
Continue around the cone, gluing small sections at a time.
Then move up just above your first row, again gluing small sections at a time, until the cone is completely covered.
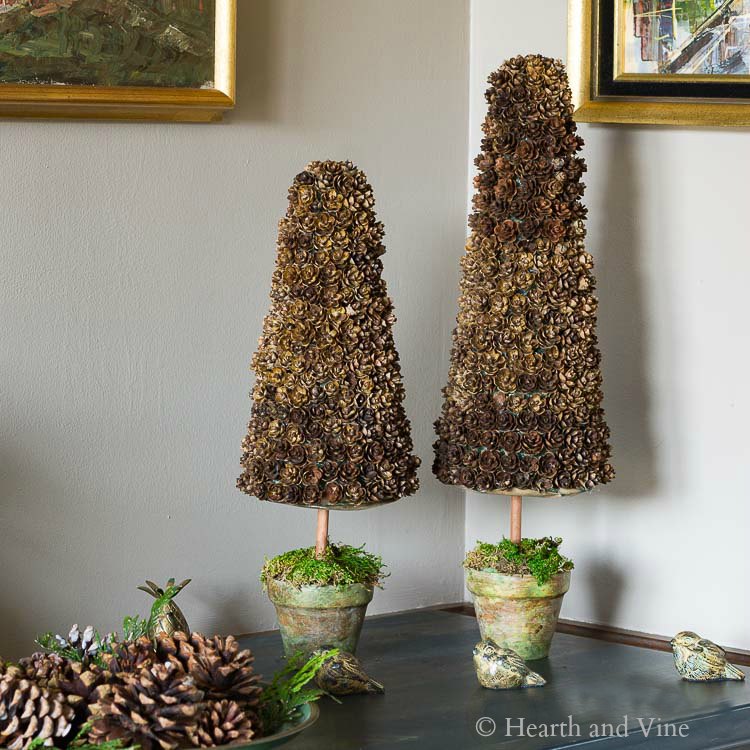
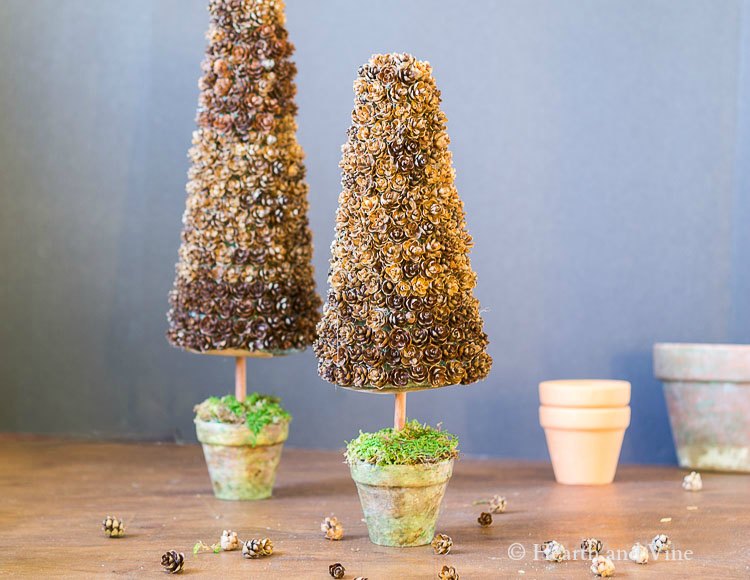
You can stop there. I didn't. I added a circle of craft paper to hide the bottom of the cone and added a dowel rod to act as a trunk. A branch from the yard would work just as well, maybe better.

Next, I whitewashed a couple of clay pots. They were pretty but I wanted a more rustic look, so I used a few different shades of brown and green acrylic paint to make them look old and mossy.

Pieces of floral foam were inserted into the pots to hold the dowel in place.
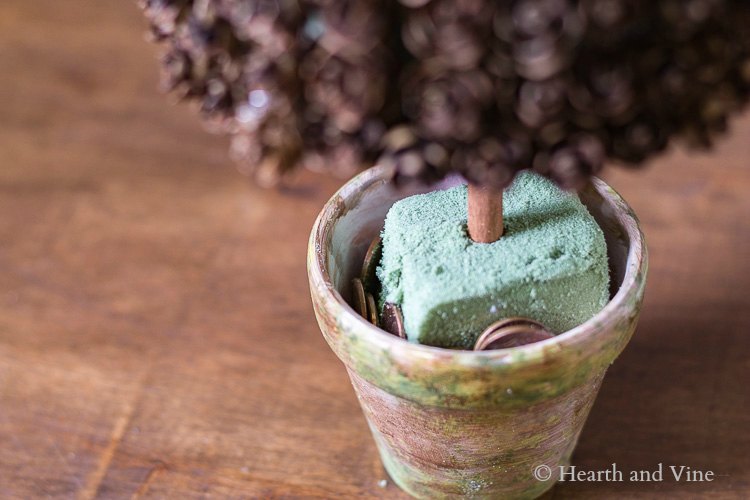
The cones were so top-heavy, so I added a few pennies inside to weigh them down. You can use pebbles or small stones instead of pennies. They were handy for me.
Then I covered the floral foam with a little leftover sheet moss.
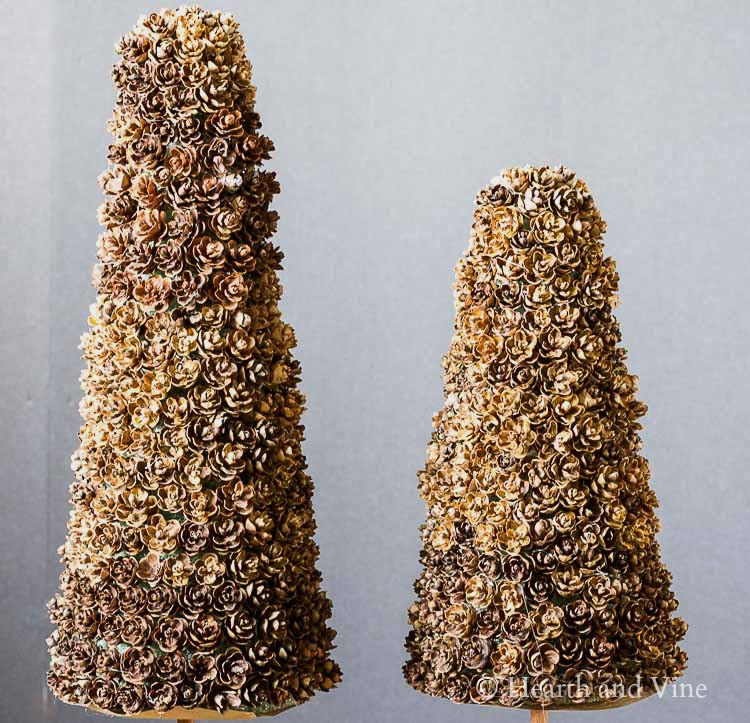
Here's a close-up of the pinecone trees. Can you see the hot glue strands? I'm still working on removing them. They are hard to see, but the camera picks up everything. I've heard that you can remove them with a hot hairdryer. I'm going to have to try that next.
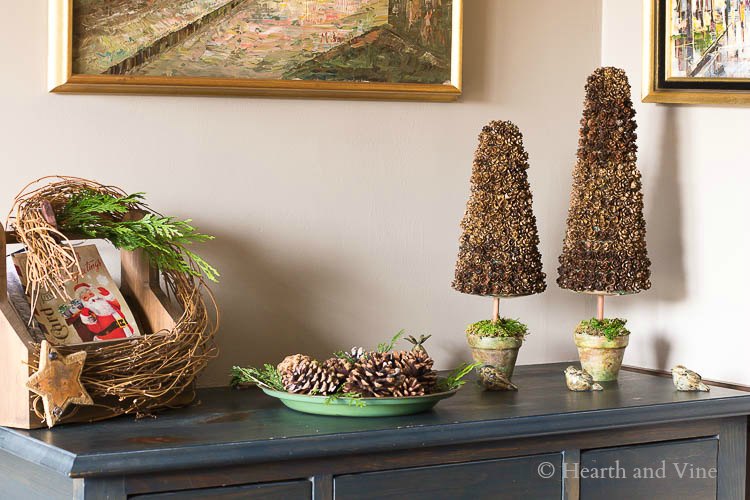
I made two pine cone Christmas trees. As you can see I did add a dowel rod for the trunk and planted them in a cute little clay pot. However, you could forego the trunk and the pot, because the trees look really nice on their own as a tabletop Christmas tree.
They are a great addition to our Christmas decor. I paired them with a tray of scented pine cones and cedar in our foyer, along with a few ceramic birds, and our Christmas Card toolbox.
This pine cone Christmas tree craft has that natural beauty that I love to decorate with, and though delicate, the trees should keep for a long time.

More Mini Christmas Tree Projects
Pine Cone Christmas Tree for Your Holiday Home
Equipment
- Hot glue gun
Materials
- Small Clay Pot
- Floral Foam
- Kraft Paper
- Moss to cover the foam
- Dowel Rod or Branch for trunk
- Styrofoam Cone
- Mini Pine Cones
- Paint - white green, brown
Instructions
- Gather mini pine cones.
- Start securing them to the foam cone. Run a line of hot glue at the bottom of the foam cone about 2 inches long.
- Place your cones on the glue as close together as possible.
- Continue around the cone, gluing small sections at a time.
- Move up just above your first row.
- Repeat the process in small sections, until the cone is completely covered.
- Add a circle of craft paper to hide the bottom of the cone.
- Add a dowel rod to act as a trunk.
- Whitewash a couple of clay pots.
- Then add a little green and brown paint to make it look like moss.
- Insert floral foam into the pots to hold the dowel in place.
- Add a few pennies inside the pots to weigh them down.
- Cover the floral foam with sheet moss.
Theresa
Thanks for sharing at the Inspiration Spotlight party. Shared. Happy Holidays!
Rhonda
I love these pinecone trees. I'm a lover of pinecones, and try to incorporate them into my Christmas displays. Thanks for sharing on Sunday's Best.
Christine
I am loving this DIY Craft you did Patti! It looks amazing. Thanks for joining us at the DI & DI Link Party, we love having you.
Merry Christmas!
Carole @ Garden Up Green
Simple and beautiful and adding the pennies was a smart solution. Those pine cones are hard to find and they're so fun to work with. Back in my floral shop days we ordered them and used on smaller indoor projects like bird cages or birch birdhouses. Loved working with them but I really like how you turned them into trees. The finish on the pots is excellent too I'm thinking I may try that technique on a piece of wood. Everything you do Patti is so lovely..
Patti Estep
Hi Carole,
I know what you mean about the pine cones but we have them in abundance here so I'm using what I have. I'm sure you know that you can buy them in bags online but I'm hoping this tutorial inspires other to try this or some other material that they have access to. Faux moss painting on wood is a super idea. Can't wait to see what you create.
Thanks as always for stopping by and your very kind words,
Patti
Beth Stansell
Patti,
I love your beautiful, practical, easy ideas. I love using nature's gifts when it comes to decorating especially for Christmas. Thanks for sharing another wonderful idea again! Very much enjoy your blog.
Patti Estep
Hi Beth,
Always great to hear from another nature lover.
Have a great Christmas holiday!
Patti