

Learn how to make this fun and colorful pinecone flower wreath. Perfect for your fall decor, this pine cone wreath will look great on your front door to greet your guests all season long.

You may have seen the bottom of pine cones painted to look like pretty dahlias. They are so pretty. However, I noticed that pinecones with some of their tops cut off look a lot like daisy flowers so I decided to make a pinecone flower wreath.
This post contains some affiliate links (that means if you make a purchase after clicking a link, there's no additional cost to you, but I will earn a very small commission. ) i.e. as an Amazon Associate, I earn from qualifying purchases. Click here to read my full disclosure policy.
Be the first to receive new posts and get access to our Subscribers Only Page.
How to Make a Pinecone Flower Wreath


Start by removing some of the scales from the center stem of the pine cone. I used wire cutters for this but you could try strong scissors or pliers.
Next, you need to cut the pinecone in half. I tried to do this with the wire cutters but it was too hard. Then I tried a hand saw but it took too long.
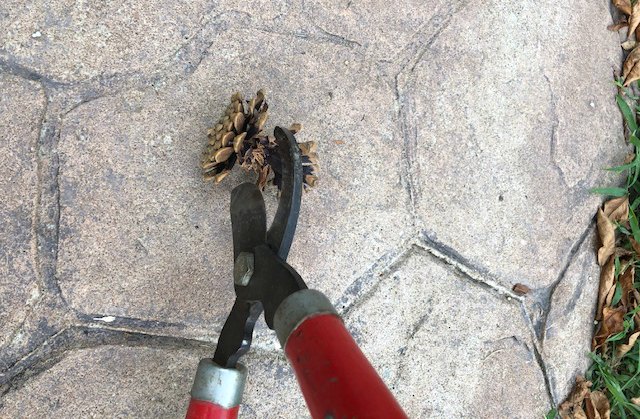
Finally, I used a pair of tree loppers and it was juuuuusstt right. Fast and efficient.
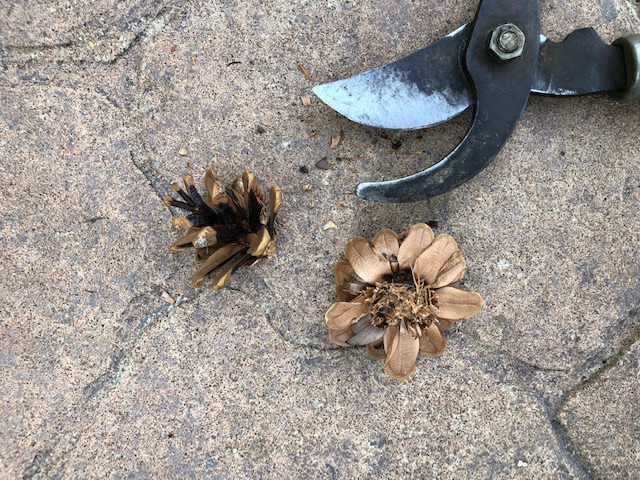
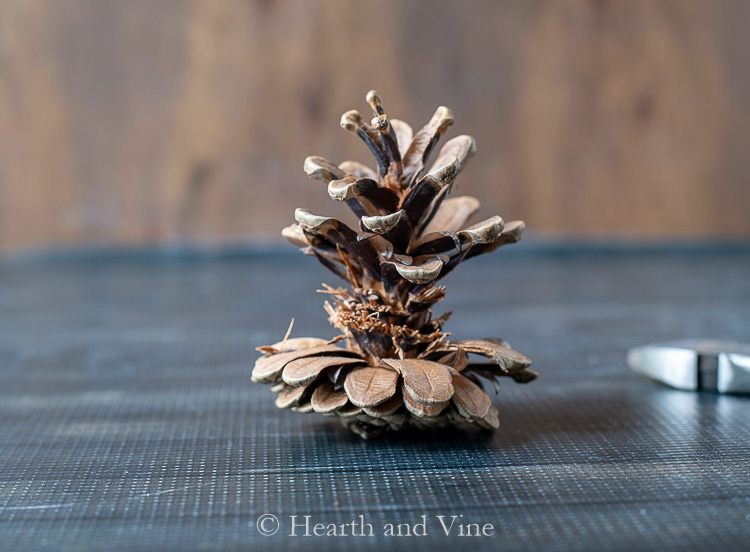
See how the bottom of the pinecone looks like a flower? The top also has a flower quality but not as much. I ended up using both parts for this wreath.
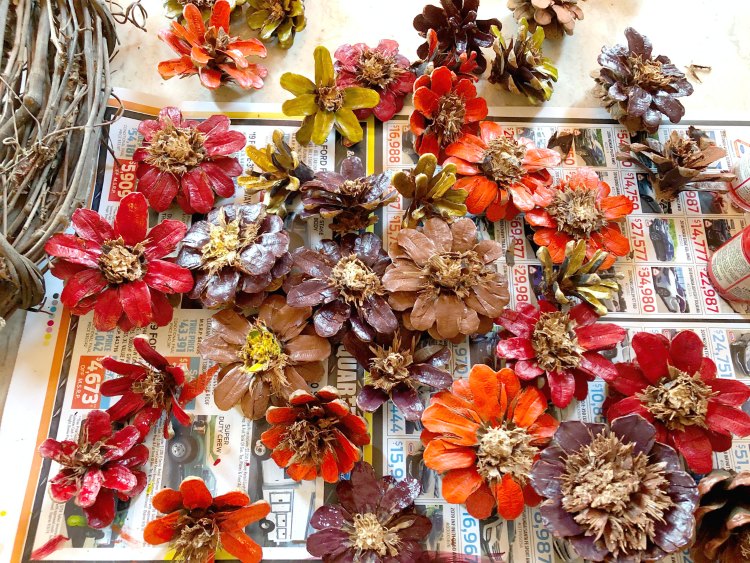
Now for the fun part. Painting the pine cone flowers. I went back and forth on this part. On some, I painted the middle with gold metallic paint. Then I switched to yellow. In the end, I left most of them natural and only painted the petals.
Use hot glue to attach the flowers to a grapevine wreath.
Concentrating on the bottom middle section first then work your way up the sides.
Sometimes when I'm making something like this I will lay out the flowers without glue and take a photo with my phone. That way I can play around a bit to get them just the way I want them before using glue to permanently set them in place, and I have the picture to refer back to.
Great Reader Tip:
Jill writes: "May I suggest putting the pine cones in the oven at 300 for a few minutes on a foil-lined cookie sheet or a quick dip in bleach water just to be sure that all uninvited guests (bugs) are dead."
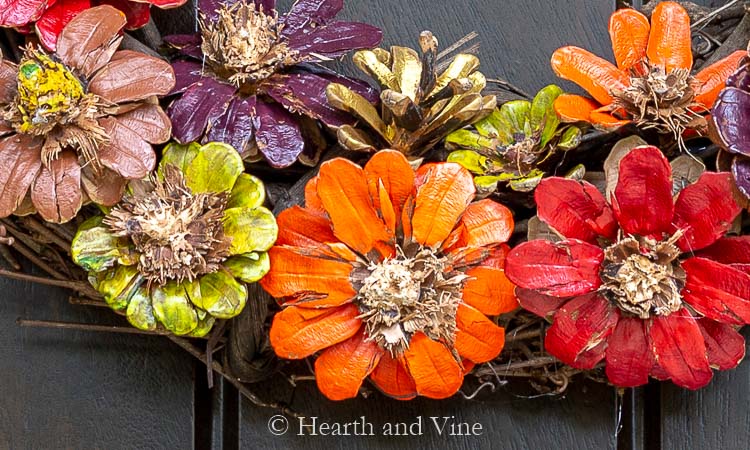
This wreath will hang on my front door for fall so I used lots of orange and red. However, I think it would look great with different colors such as spring colors or bright colors for the summer. You could even choose no color at all for a pretty natural look. The choice is yours.

A little burlap bow tops off the wreath and is ready for fall.

More Pine Cone Crafts


Make A Pinecone Flower Wreath
Equipment
- Wire Cutters
- Loppers
- Hot glue gun and glue sticks
- Paint brushes
Materials
- Pine cones
- Grapevine Wreath
- Acrylic paints
- Burlap Ribbon
Instructions
- Remove some of the scales from the middle of the pine cone with wire cutters.
- Cut the pinecone in half. I used a pair of tree loppers.
- Next, clean them up by brushing away any dirt or pine cone debris.
- Paint the flowers in whatever colors you like. You can also leave some natural.
- Use hot glue to attach the flowers to a grapevine wreath.
- Start at the bottom middle section first, then work your way up the sides.
- Now it's ready for hanging.
Marie Holmes
I have a whole laundry basket FULL of different sizes of pine cones. They've all been baked and are ready to do for this project. I just need to start cutting them up!!
Patti Estep
Enjoy crafting with them Marie.
Doris
Hi Patti, Love this wreath!! How many pine cones do you need for this project? Can you get more than one flower from each pine cone? Thanks
Patti Estep
Doris, I'm so glad you like the wreath. The number of pine cones you need will depend on how big of a wreath you make. I believe mine is an 18 inch wreath and I probably used approximately 2 dozen pine cones. You can get two pinecone flowers from each pine cone. However, the tops are spikier and less flower shaped but if you look close you can see that I some of each, mostly the bottoms.
Daphne Webb
I made one, I wanted to use as much foraged material
As I could do I made the palm frond fish into a ribbon. I picked the pine ones outside and added lights! I love it. Thanks for the inspiration and tips!
Patti Estep
Daphne, that sounds great! I love it when people take an idea and make it their own. Thanks for sharing.
Cathi
Love the color pallet you chose! And good call on leaving the centers natural. I'd hang this on my front door.
Patti Estep
Thanks Cathi, I think I'm going to try something without any paint next.
Barbara Chapman
This wreath is beautiful, Patti! Thank you for showing us how to make it.
Hoping for fall weather soon,
Barb 🙂
Patti Estep
Thanks Barbara. Me too. I love fall.
Julie Briones
Such a great idea! Love that you can paint these any color your heart desires! Pinned!
Patti Estep
Thanks Julie. I was even thinking of not painting them at all but with fall just around the corner I just had to go with color.
Loren
Very pretty. Very creative and the colors you picked look very nice.
Patti Estep
Thanks Loren. I'm so ready for fall.
ROBIN LAMONTE
Patti,
What a wonderful idea!
I have so many large pinecones this will be a wonderful DIY project!
Hugs,
Robin
Patti Estep
Thanks Robin. So glad to hear others like it too.
Jill
Patti,
What a super cute idea! I love a pine cone project and I can’t wait to try it! May I suggest putting the pine cones in the oven at 300 for a few minutes on a foil lined cookie sheet or a quick dip in bleach water just to be sure that all uninvited guests (bugs) are dead.
I love how you see the beauty in the everyday!
Patti Estep
Thanks Jill, and great point about baking any pine cones you find outside.
Susan M.
This is such a creative use of pinecones - they look so pretty! Great tip to use the tree lobbers.
Patti Estep
Thanks Susan. The loppers were my husband's idea. A saw worked but it took to long and was messy. Since I have no patience the loppers were the way to go for me.