
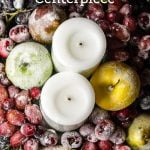
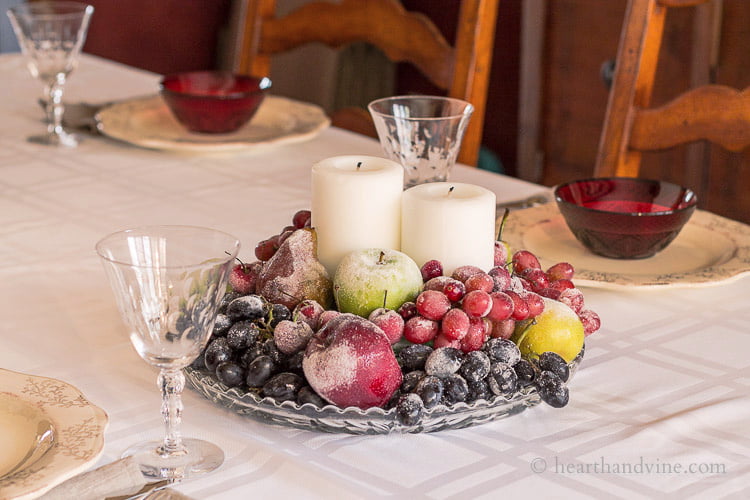
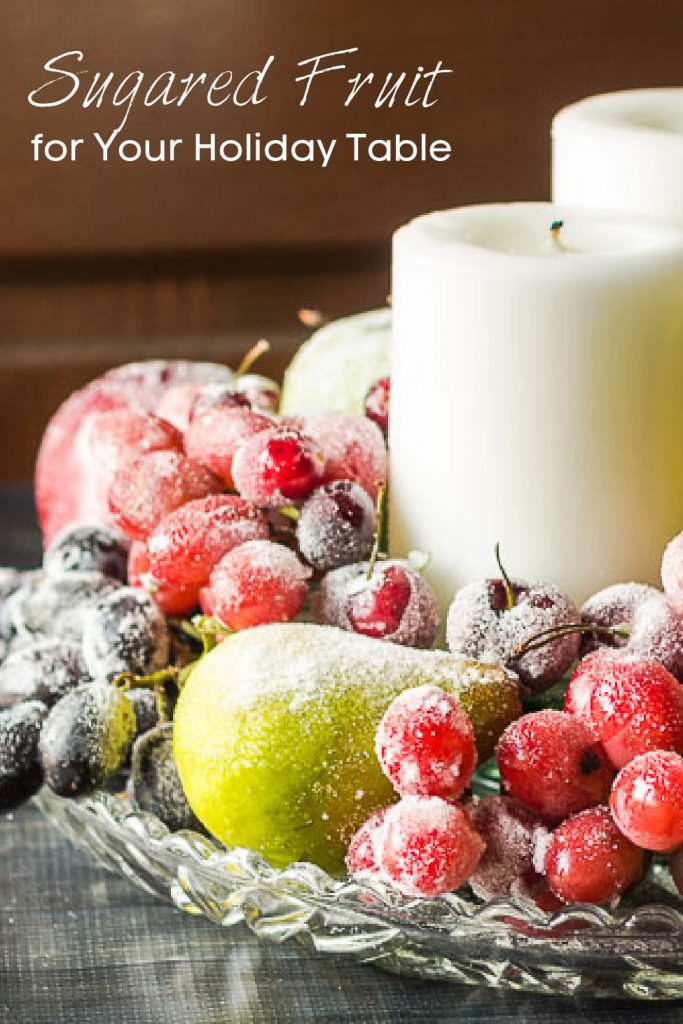
A sugared fruit centerpiece looks great on your holiday table or any time you want to dress your table for a festive occasion.
The holidays, or any special occasion for that matter, require a little something special for the table. Although I love using my flowers for a centerpiece, there are times, like during the winter, or even certain times during the growing season, where I just don't have the right materials available. You can always buy flowers at the store, but today I'm going to show you how to make a sugared fruit centerpiece that your guests will love.
Sugared Fruit Centerpiece
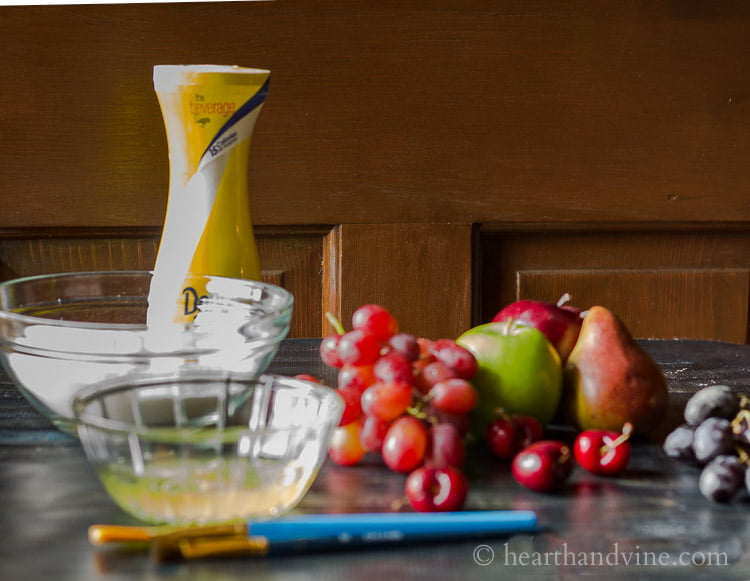
Supplies
Fruit - best choices are those with smooth skin such as grapes, cherries, apples, pears, peaches, nectarines, etc..
Superfine sugar
Egg whites or powdered egg whites (in case you want to eat the fruit)
Be the first to receive new posts and get access to our Subscribers Only Page.
How to Sugar Fruit
First, make sure it is washed and dried well.
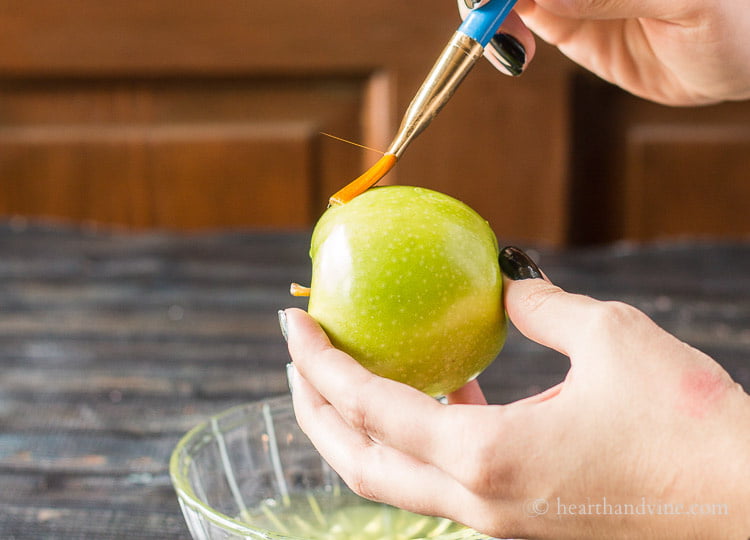
Paint on, or dip the fruit into some egg whites. If you want to eat the fruit and are worried at all about the possibility of salmonella poisoning, I suggest you purchase powdered egg whites. In this case, I am creating this centerpiece purely for decorative purposes and will make sure to keep it out of reach of small hands. However, you could just use powdered egg whites or switch out the arrangments with a simple edible centerpiece to eat for dessert.
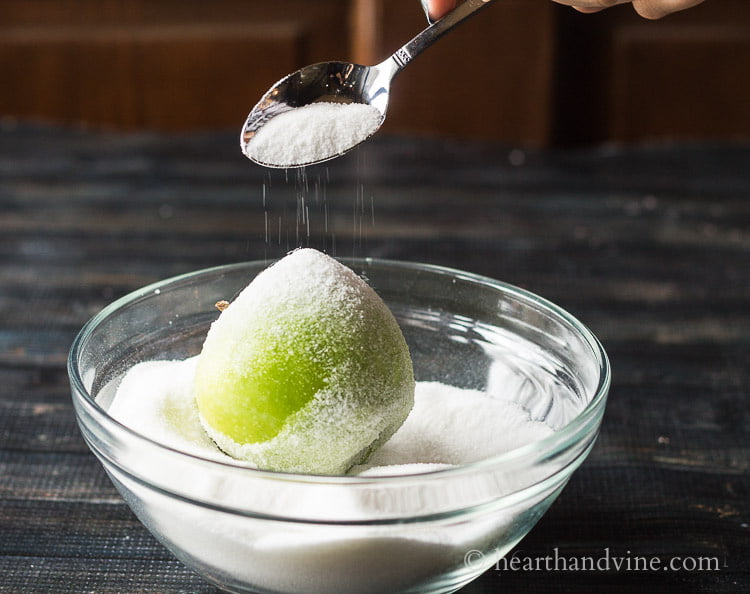
After you dip or paint on the egg white, you can spoon on the sugar, or roll the fruit in it. I found that dipping the cherries and rolling them in the sugar worked well. However, that was a little harder to do with the larger pieces of fruit.
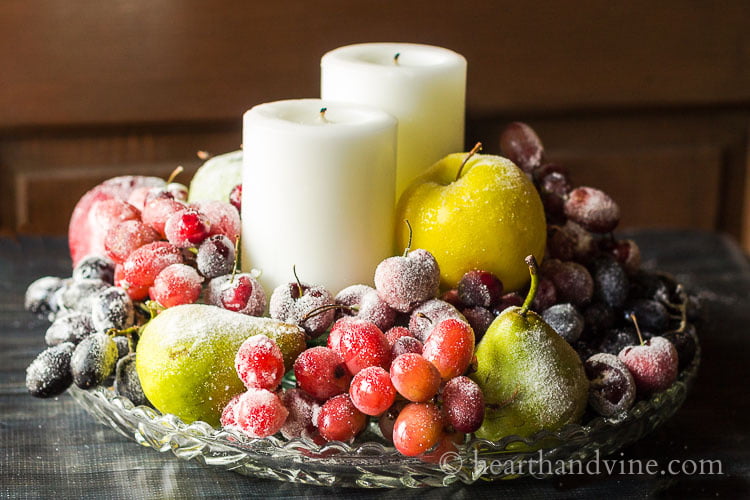
Creating the Centerpiece
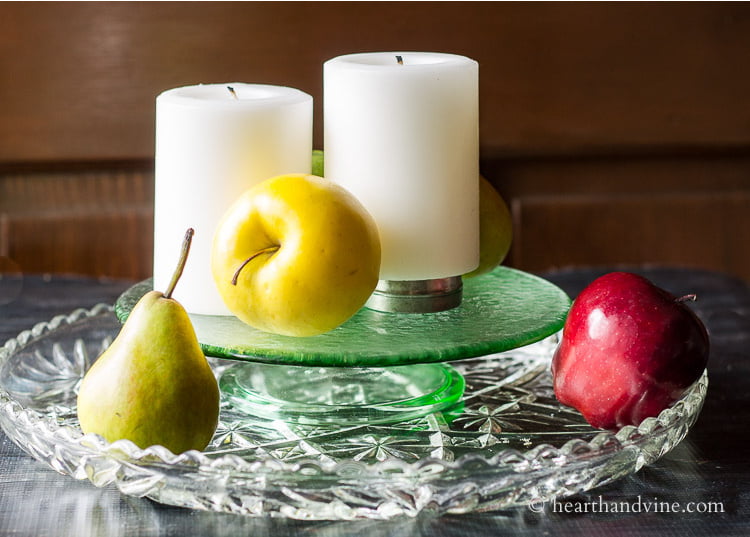
First, you need to find something for the foundation. I'm using an old crystal tray with a slight lip on the edge. This is nice because you can remove it from the table pretty easily. Other trays or even cutting boards would work well.
Next, you want some items to add height. I'm using a small cake stand and a little tin to offset the height of the candles. Play around with the larger pieces to get a feel of how you want to display the fruit.
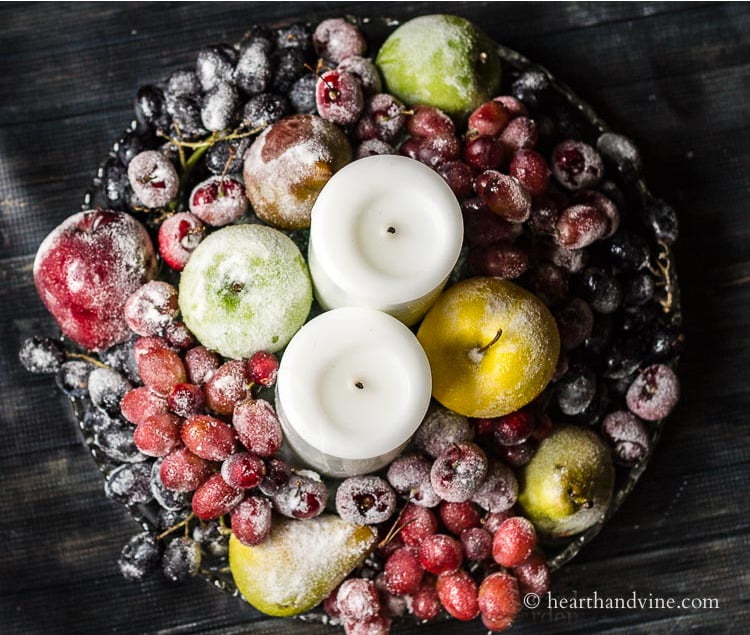
Work with the largest pieces first and then fill in with the smaller fruit. Don't worry about it looking perfect. I don't think mine is, but I really like it and feel it adds something a little different and a nice sparkle to our holiday table.
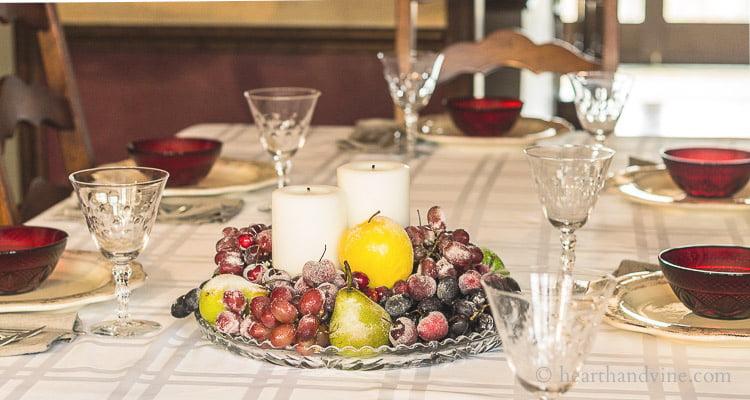
Once dinner is served, I plan on moving the whole centerpiece to the buffet next to the table.
This sugared fruit centerpiece should last for several days, up to a week, depending on the heat and humidity of your home.
It's one of those satisfying creative projects, where the beauty of nature makes it easy to create something beautiful. I hope you try it. I think you will love the results.

How to Make a Sugared Fruit Centerpiece
Equipment
- Small paintbrush
- bowl for sugaring the fruit
Materials
- Fresh fruit of different sizes and colors - Smooth skin is best
- Serving tray
- Superfine sugar
- Egg Whites or powdered egg whites if you want to eat the fruit
- Candles
Instructions
- Wash and dry the fruit.
- Paint on or dip the fruit in egg whites.
- Spoon on the sugar, or roll the fruit in it.
- Find a base for your centerpiece a serving tray, low bowl, or a pretty cutting board works well.
- Create your centerpiece by adding the candles first. You can use a small tin can or a short cake plate to raise the height of the candles if you want.
- Then add the larger pieces of sugared fruit around the candles.
- Add smaller pieces of fruit around and on top of the larger pieces, turning the base to see all sides.
Rhonda
This centerpiece is beautiful. Unique and will be a conversation piece for sure. Thanks for sharing on Sunday's Best.
Julie Christiansen
This is so beautiful and surprisingly simple to replicate. Thanks for sharing!
Janet Vinyard
Hi Patti. I haven't seen sugared fruit in a long time but your arrangement shows it off beautifully! It looks like it's just received a light dusting of snow! Thanks for sharing and bringing back some memories! Blessings, Janet
Melissa
This makes a really pretty vintage inspired centerpiece. I love it! Thanks for sharing at the Family Joy Blog Link Party this week!
creativejewishmom/sara
Gorgeous, thanks for sharing on craft schooling Sunday! Have a wonderful holiday season and see you again in 2017!
Pamela Groppe
This is beautiful. I think it is the best kind of centerpiece, gorgeous as well as practical (if you plan on eating it). My grandmother used to do this and I always loved it, I don't know why I never tried it myself.
nancy kreischer
My Mom use to do this 50 years ago. Boy whay memories seeing your display has brought back!
It looks lovely.
Nancy K.
Carole @ Garden Up Green
I love this idea it so clean looking and festive. Everything lately has been all about clean lines here I guess it's all the downsizing I've been doing. I This is just so elegant and your entire table looks fantastic - Hope you enjoy a wonderful dinner Patti.
Patti Estep
Hi Carole,
As I'm sure you know this is something that can be as big or small as you want it.
Thanks for stopping by,
Patti