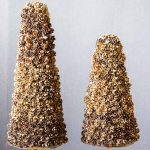
Pine Cone Christmas Tree for Your Holiday Home
Make a lovely mini pine cone Christmas tree to display in your holiday home, or all year long as a fun nature craft.
Yield: 1 Tree
Cost: $20
Equipment
- Hot glue gun
Materials
- Small Clay Pot
- Floral Foam
- Kraft Paper
- Moss to cover the foam
- Dowel Rod or Branch for trunk
- Styrofoam Cone
- Mini Pine Cones
- Paint - white green, brown
Instructions
- Gather mini pine cones.
- Start securing them to the foam cone. Run a line of hot glue at the bottom of the foam cone about 2 inches long.
- Place your cones on the glue as close together as possible.
- Continue around the cone, gluing small sections at a time.
- Move up just above your first row.
- Repeat the process in small sections, until the cone is completely covered.
- Add a circle of craft paper to hide the bottom of the cone.
- Add a dowel rod to act as a trunk.
- Whitewash a couple of clay pots.
- Then add a little green and brown paint to make it look like moss.
- Insert floral foam into the pots to hold the dowel in place.
- Add a few pennies inside the pots to weigh them down.
- Cover the floral foam with sheet moss.
Tried this project?Tag @hearthnvine on Instagram
