Making Beeswax Candles
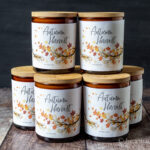
Have fun making beeswax candles for fall in these pretty amber jars with a printable label using this easy tutorial.
Yield: 10
Cost: $40
Equipment
- Large old pot
- Candle Pitcher
- Wooden skewer or plastic knife
- Hot glue gun and glue sticks
- Color printer
- Scissors
- White glue
- Straws or clothespins or metal wick holders
Materials
- Candle jars 7 oz - holds 6 oz wax
- Cotton wicks with a base
- Beeswax Pellets 3 pounds
- Fragrance Oil 6 ounces
Instructions
- Attach the wicks to the bottom of the jars with a dot of hot glue or a glue candle sticker.
- Melt the beeswax over medium heat in a candle pitcher and set in about an inch of water in the old large pot creating a double boiler
- Once melted remove from heat and let cool slightly before adding the fragrance oil.
- Stir the oil and begin pouring the wax into the containers.
- After a few minutes add a wick holder, straw, or clothespin to the top to hold the wick in the center.
- Once the wax has hardened trim it to 1/4 inch.
Notes
I used beeswax pellets however you could use a beeswax block and cut it up into chunks or grate it with a box grater.
If your wicks sink after cooling you can use a heat gun to melt the wax to the edge and let it cool.
Use anywhere between 6 - 10% fragrance oil to 1 ounce of wax. The one I used is a blend of apple fragrance oils with natural essential oils, including cinnamon, nutmeg, clove, orange, and cedarwood.
Tried this project?Tag @hearthnvine on Instagram