Homemade Booklet Tutorial
Enjoy this fun and creative way to make a paper book with scrap paper and fabric.
Yield: 1
Equipment
- Sewing Machine
- Scissors
Materials
- scrap fabric
- scrap paper
- fabric tac or other glue
Instructions
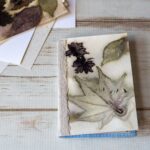
- Pick out or print some heavier paper for your cover.
- If the cover paper has a bad side make that side the inside and cover it by gluing another piece of patterned paper to it.
- Repeat on the back cover.
- Cut a piece of sturdy fabric the height of the cover paper and about 1 inch wide.
- Glue the cover sheets to the fabric leaving about 1/4 inch open in the middle.
- Place several pieces of paper slightly shorter than the width and height of the covers and fabric binding when open.
- Sew down the center of the open booklet using a large stitch through the papers and the fabric binding.
- Fold close and enjoy.
Notes
Use a heavy weight paper or cardboard for your cover. You can paste a thin piece of printed paper on top for a nice look. You can also use your printer to print out a photo or favorite print on cardstock for a cover.
You can use a needle and thread to hand stitch the binding together. You can also try using a small paper punch to create holes down the fabric and pages and thread a thin ribbon through them to hold the book together.
Or you can use staples to bind the middle section.
Use stamps, stickers, small bits of fabric, and markers to embellish your booklet and make it your own.
Tried this project?Tag @hearthnvine on Instagram