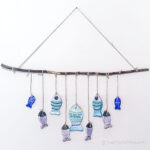
Easy Clay Fish Craft
Enjoy making pretty clay fish to use as a wind chime or wall hanging with this easy tutorial.
Equipment
- Scissors
- Fish Cookie Cutters and a round lid for wind chimes
- Paint brushes
- Plastic Mat
Materials
- Air Dry Clay
- A long, thin branch for a wall hanging.
- Acrylic Paints
- Acrylic Paint Pens optional
- Polyurethane Spray
- Twine or Cording
- Round Ring or D-ring for hanging
Instructions
- Roll out the clay to about 1/4 inch thick. Flip the clay as you go to keep it from sticking too much.
- Use the fish cookie cutters to cut out as many fish in the sizes you want.
- If you want to make a wind chime, cut out a round disc with a lid or cup.
- Smooth edges with your fingers.
- Use the flat end of the skewer to make a hole where an eye would be. For the wind chime, make a center hole and holes around the edges for fish.
- Let the clay dry completely. Flip the pieces over every 12 hours or so. This will take a good 2 days. You will be able to see and feel if they are dry.
- Plan out the fish sizes and layout. Take a pic with your phone.
- Paint the fish on one side with acrylic paints. Let them dry before turning over and painting the other side. Do the same to the disc for the wind chimes.
- Spray all the pieces on both sides with polyurethane.
- For the wall hanging, refer to your pic and tie the fish to the branch. Then tie more twine to the ends of the branch and hang it from the middle.
- For the wind chimes, tie the cording to a ring, then slide the round disc on and tie a knot below it to hold it in place. Then tie a larger fish to the bottom of the same cord.
- Tie the other fish onto the remaining holes at various lengths as you like.
Tried this project?Tag @hearthnvine on Instagram