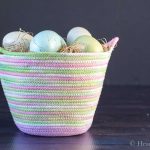
DIY Dyed Rope Easter Basket
This dyed rope basket is a great beginner sewing project. One that you can easily create in an afternoon, and is perfect for your Easter decor.
Yield: 1
Cost: $10
Equipment
- Sewing Machine
- Scissors
Materials
- Cotton clothesline rope
- Food coloring
- Vinegar
- Thread - white or any color
- Large hat pin
Instructions
- Pre-dye sections of the clothesline rope with food coloring and vinegar just like easter egg dyeing.
- Let dry.
- Make a coil at one end of the rope using a large pin to hold it in place.
- Use a zigzag stitch to hold the coil together.
- Keep your coil flat, and sew as much as you want, to create the bottom of the basket.
- Then turn the coil 90 degrees and continue sewing, just as you did before to create sides.
- When you get to the height you want, stop to make handles. Do this by simply leaving sections of rope untouched for a couple of inches, and then start sewing again at the end of the handle, making sure to back-stitch or double stitch to secure the ends.
- Finish the basket at the end of the second handle.
Notes
Use a piece of scrap fabric to get the width and length of the zigzag stitch you need. It needs to be wide enough to cover some of the two pieces of rope, and you don't want it too long. Also if you make the stitches very close together, it will take a long time to sew and it's not necessary.
You can use different colored threads to give the basket an even more colorful look.
Tried this project?Tag @hearthnvine on Instagram