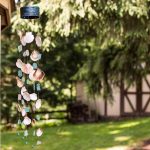
How to Make a Seashell and Sea Glass Wind Chime
Create a beautiful and inexpensive seashell and sea glass wind chime with this easy project.
Yield: 1 Wind Chime
Cost: $10
Equipment
- Screwdriver or hammer
- Hot glue gun and glue sticks
Materials
- Clear Fishing Line
- Seashells
- Sea glass pieces
- Small empty can with the lid removed
- Chain for hanging
- Beads optional
- Paint to cover the can optional
Instructions
- Layout your shells and sea glass in a pattern.
- Puncture a hole just large enough to fit the chain through, using a screwdriver and hammer.
- Use a little tape to secure the chain.
- Measure the can, and divide the circumference by the number of strands you want to make.
- Place a dot just past 2 inches all around.
- Make a hole at each dot.
- Make a small hole at the top of each shell with a thin nail and a hammer. Do this from the inside with the shell on a table to prevent breakage. Start with a shell you don't like to practice and then continue with the rest. Or use a drill to make the holes.
- Cut a piece of fishing line to a length several inches above your shell pattern and below.
- Tape down the fishing line leaving several inches above the tape, to a table.
- Thread your first shell, starting at the top.
- Place a drop of hot glue on the inside of the drilled hole, on top of the fishing line.
- Take the next shell and space it a few inches below the first one, leaving room for the sea glass, and place a drop of glue over the inside hole and fishing line.
- Continue until you are finished with the strand. Repeat the process with the other strands.
- Add the sea glass by placing a line of hot glue on the glass and setting it in place under the fishing line.
- Add additional glue on top of the fishing line.
- At the bottom, you can add a bead, by threading through the fishing line and tying it off with a double knot.
- Paint the can with craft paint if desired, then once dry thread the top of the strands through the holes in the can at the length you want and tie off with a couple of knots.
Notes
You could use a heavy adhesive such as E6000 however you will need to wait longer for the glue to dry.
Tried this project?Tag @hearthnvine on Instagram
