

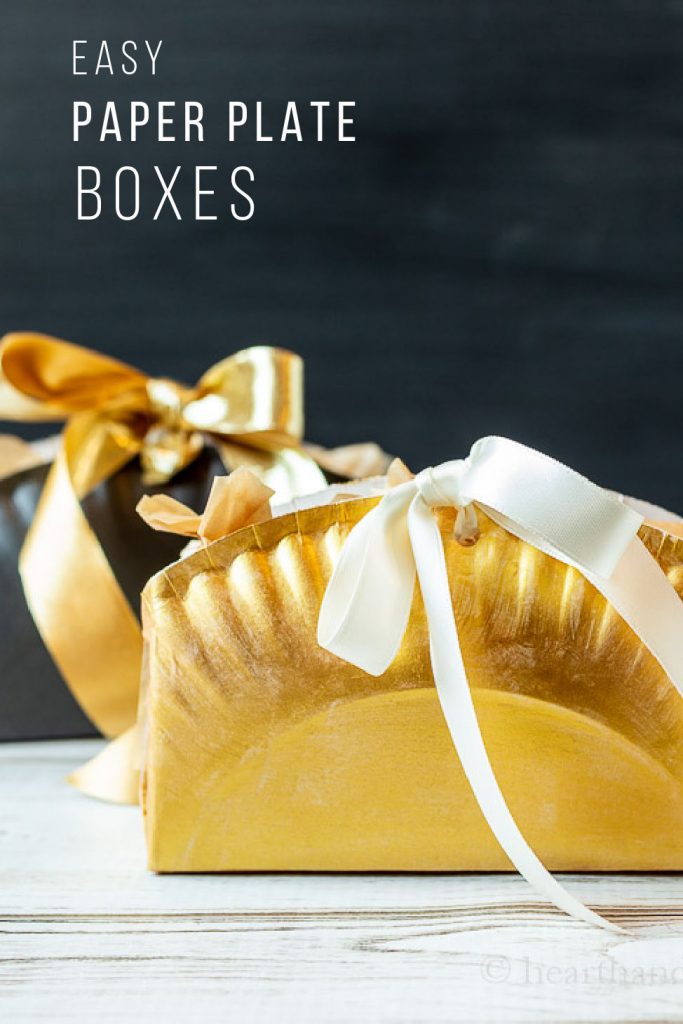
For just pennies, you can make these fun paper plate boxes to hold small gifts or goodies in no time. A simple hack using items you probably already have around the house.

I found this fun paper plate hack and I had to try it. I guess you could consider this origami but it's really very basic. What a fun and inexpensive way to make cute little boxes with paper plates that costs only pennies. I'm talking about the paper plates that come in 100 or more per pack for something like $5.00. That's $.05 per box.
I know most of you already have lots of paint and ribbon in the house. That, scissors, and a paper punch are all you need to make these fun little gift boxes. I think they would be perfect for cookie boxes, other baked goods, or candies like the salted caramel candies I made earlier this week.
How to Make Paper Plate Boxes
Supplies
- Cheap thin paper plates
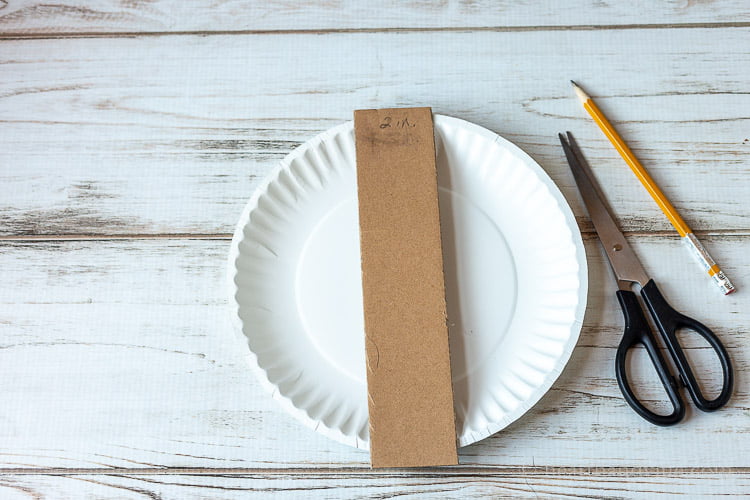
- A 2 x 9 inch cardboard
- Pencil
- Scissors
- Paint
- Ribbon
- Hole Punch
Find a piece of cardboard to create lines that will be at the bottom of your box. You could just use a ruler or straight edge to do this step. However, if you are going to make a bunch of them a piece of cardboard makes it easier. I made mine 2 inches wide but you can experiment a little here too.
Draw a line on each side of the cardboard template.
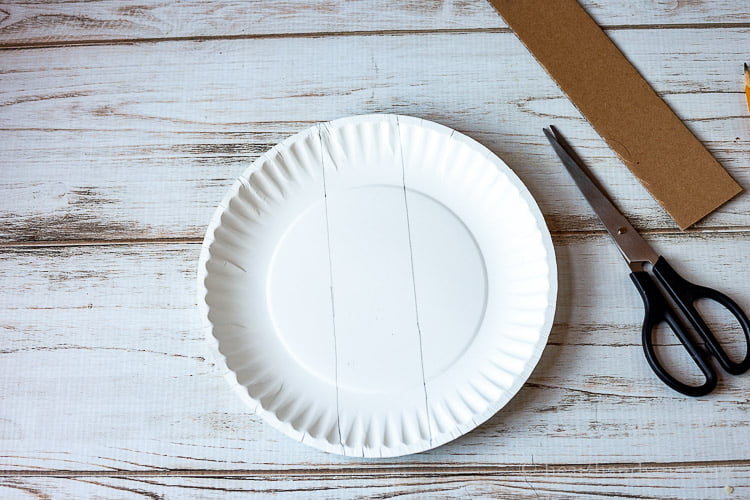
Next, you want to fold the paper plate from the bottom of the inner circle across the width of the plate as shown above.
Then you are going to cut along the lines at the bottom and top just until you get to the fold.
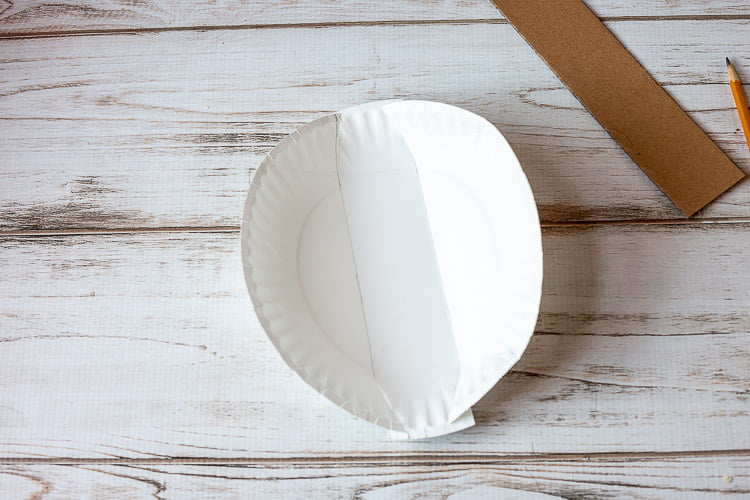
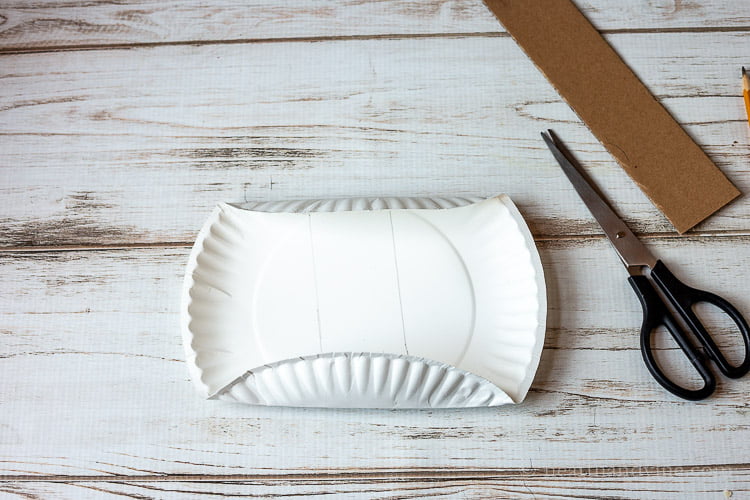
Next fold in the sides along the pencil lines.
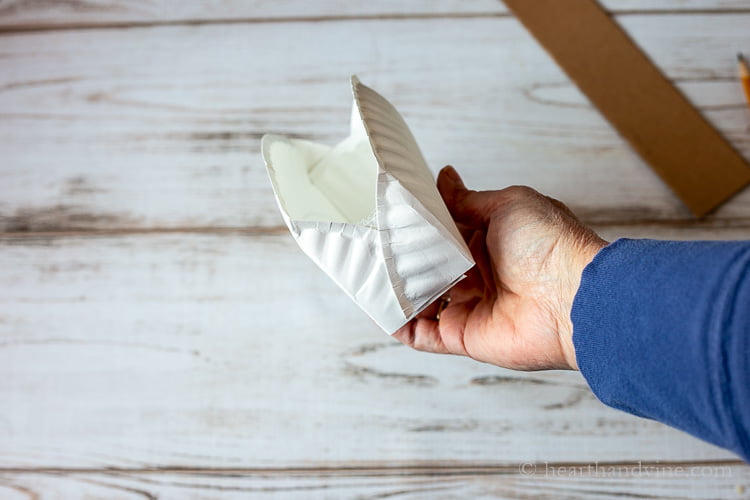
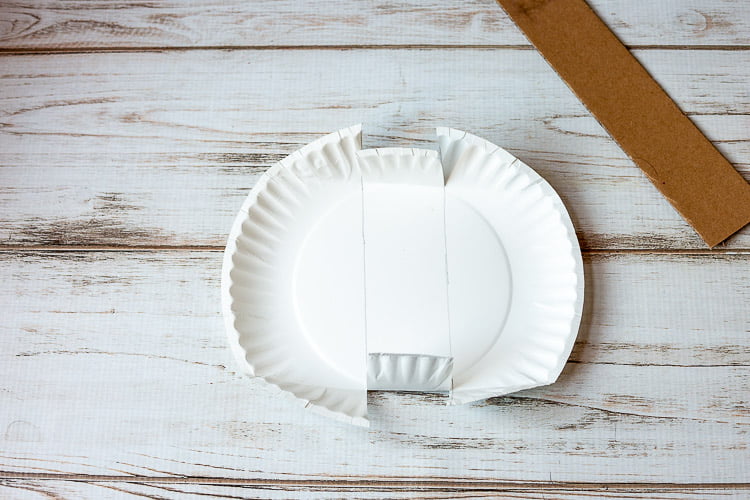
Tuck the cut pieces up and overlap the triangle shapes to cover. Use a piece of clear tape to hold it all in place. You could also staple the sections into place.
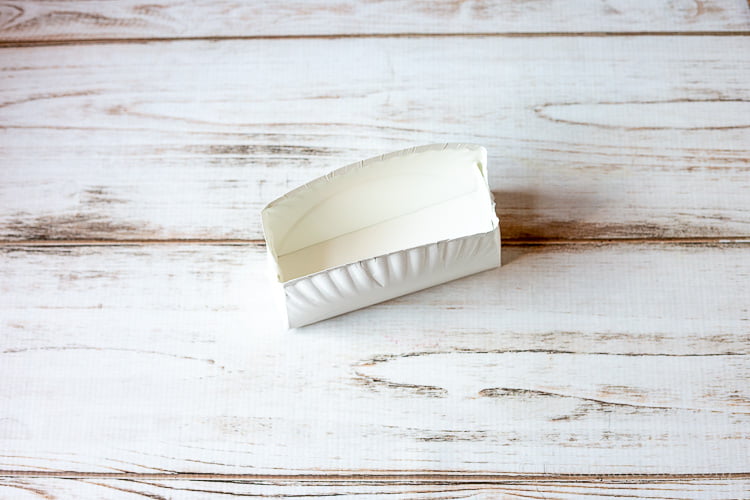
Simple, huh?
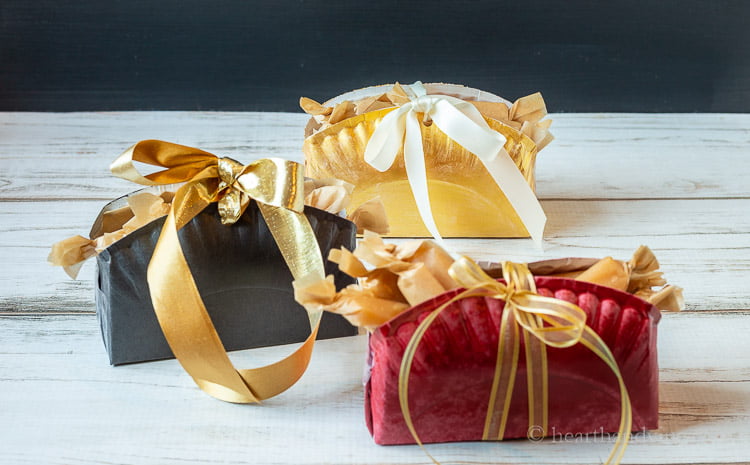
To make them a little fancy experiment with spray paint, paints, or any decorations on the outside. Then, punch holes at the top to thread a ribbon through.
Tip: You may want to line the box with some parchment especially if you are going to put cookies or other baked goods inside.
These cute gift boxes are so easy, cheap, and fun to make. Definitely a good one to get the kids involved.


Paper Plate Boxes Hack
Equipment
- Scissors
- Straight edge
- pencil
- Paper punch
Materials
- paper plates the thin ones you buy in packages of 100 or more
- 2 x 9-inch piece of cardboard
- craft paint or spray paint
- ribbon
Instructions
- For color spray paint or use craft paint on the outside of the plate.
- Use a piece of cardboard about 2 inches wide and long enough to cover the plate to draw two lines down the middle of the plate.
- Fold one edge up to meet the inner circle.
- Cut along the line from the outer edge to the fold.
- Turn the paper 90 degrees and fold the other edges along the drawn lines.
- Tuck the short cut sides up and wrap the triangular pieces over top to create an open box.
- Use tape to hold the sides together.
- Punch a hole at the middle top edge on both sides.
- Cut pieces of parchment or waxed paper to line the box if desired.
- Slide ribbon through the punched holes and tie.
Heather
What a fun, budget and eco-friendly way to personalize a gift. So nice to do with kids too.
Patti Estep
Thanks Heather. They really are easy and fun.
Jo-Anne Lemaire
Thanks for this cute little box idea. I'll be sure to try it next time I need a small box to give someone a little treat - like when I share some Christmas goodies with my wonderful next door neighbour. Hope you and yours, Patti, will have a great holiday season.
Patti Estep
Thanks Jo-Anne. Wishing you a great holiday season too.
Paula Harris
What a fun idea Patti! Good idea for sending goodies to work. Thanks for sharing.
Patti Estep
So glad you like it Paula. I'm sure everyone at work will love them.
MrsSW
Very clever, Patti - a nice way to package all those neighbor gifts.
Sheila
MrsSW
also - pinned
Patti Estep
Much appreciated Sheila. ♥
Patti Estep
Thanks Sheila. Makes them a little more special.