• Skip to primary navigation
  • Skip to main content
  • Skip to primary sidebar
  • Home
  • DIY Projects
    • Homemade Bath and Body
    • Sewing - Fabric Crafts
    • Flower Crafts/Decor
    • Thrift Store/Vintage
  • Gardening
    • Flower Gardens
    • Container Gardening
    • Houseplants
    • Indoor Gardening
    • Landscaping
    • DIY Garden Art
  • Decorate
    • Spring Decor
    • Summer Decor
    • Fall Decor
    • Winter Decor
    • Home Decor Projects
  • Recipes
    • Breakfast Recipes
    • Lunch Recipes
    • Dinner Recipes
    • Dessert
    • Salad Recipes
    • Soups and Stews
    • Side Dish Recipes
    • Appetizers and Snacks
    • Healthy Recipes
  • Holidays
    • Valentine's Day
    • Easter
    • Mother's Day
    • Halloween
    • Thanksgiving
    • Christmas
Hearth and Vine
menu icon
go to homepage
  • About
  • DIY
    • ...Flower/Gardening Crafts
    • ... Bath and Body
    • ...Sewing/Fabric Crafts
    • ...Thrift Store/Upcycle
  • Gardening
    • ...Flower Gardens
    • ...Container Gardening
    • ...Indoor Gardening
    • ...DIY Garden Art
  • Decorate
    • ...Home Decor Projects
    • ...Spring Decor
    • ...Summer Decor
    • ...Fall Decor
    • ...Winter Decor
    • ...Room Makeovers
  • Recipes
    • ...Appetizers and Snacks
    • ...Dinner Recipes
    • ...Side Dish Recipes
    • ...Salad Recipes
    • ...Dessert
    • ...Drinks
  • Holidays
    • ...Valentine's Day
    • ...Easter
    • ...Mother's Day
    • ...Halloween
    • ...Thanksgiving
    • ...Christmas
  • Subscribe
  • Instagram
    • Facebook
    • Instagram
    • Pinterest
    • Twitter
  • subscribe
    search icon
    Homepage link
    • About
    • DIY
      • ...Flower/Gardening Crafts
      • ... Bath and Body
      • ...Sewing/Fabric Crafts
      • ...Thrift Store/Upcycle
    • Gardening
      • ...Flower Gardens
      • ...Container Gardening
      • ...Indoor Gardening
      • ...DIY Garden Art
    • Decorate
      • ...Home Decor Projects
      • ...Spring Decor
      • ...Summer Decor
      • ...Fall Decor
      • ...Winter Decor
      • ...Room Makeovers
    • Recipes
      • ...Appetizers and Snacks
      • ...Dinner Recipes
      • ...Side Dish Recipes
      • ...Salad Recipes
      • ...Dessert
      • ...Drinks
    • Holidays
      • ...Valentine's Day
      • ...Easter
      • ...Mother's Day
      • ...Halloween
      • ...Thanksgiving
      • ...Christmas
    • Subscribe
    • Instagram
    • Facebook
    • Instagram
    • Pinterest
    • Twitter
  • ×
    Home » DIY Projects

    DIY Tabletop Fire Pit

    by Patti Estep · Sep 30, 2024

    Jump to How-to Card
    Tabletop fire pit roasting marshmallows over an aerial view of the same fire pit.

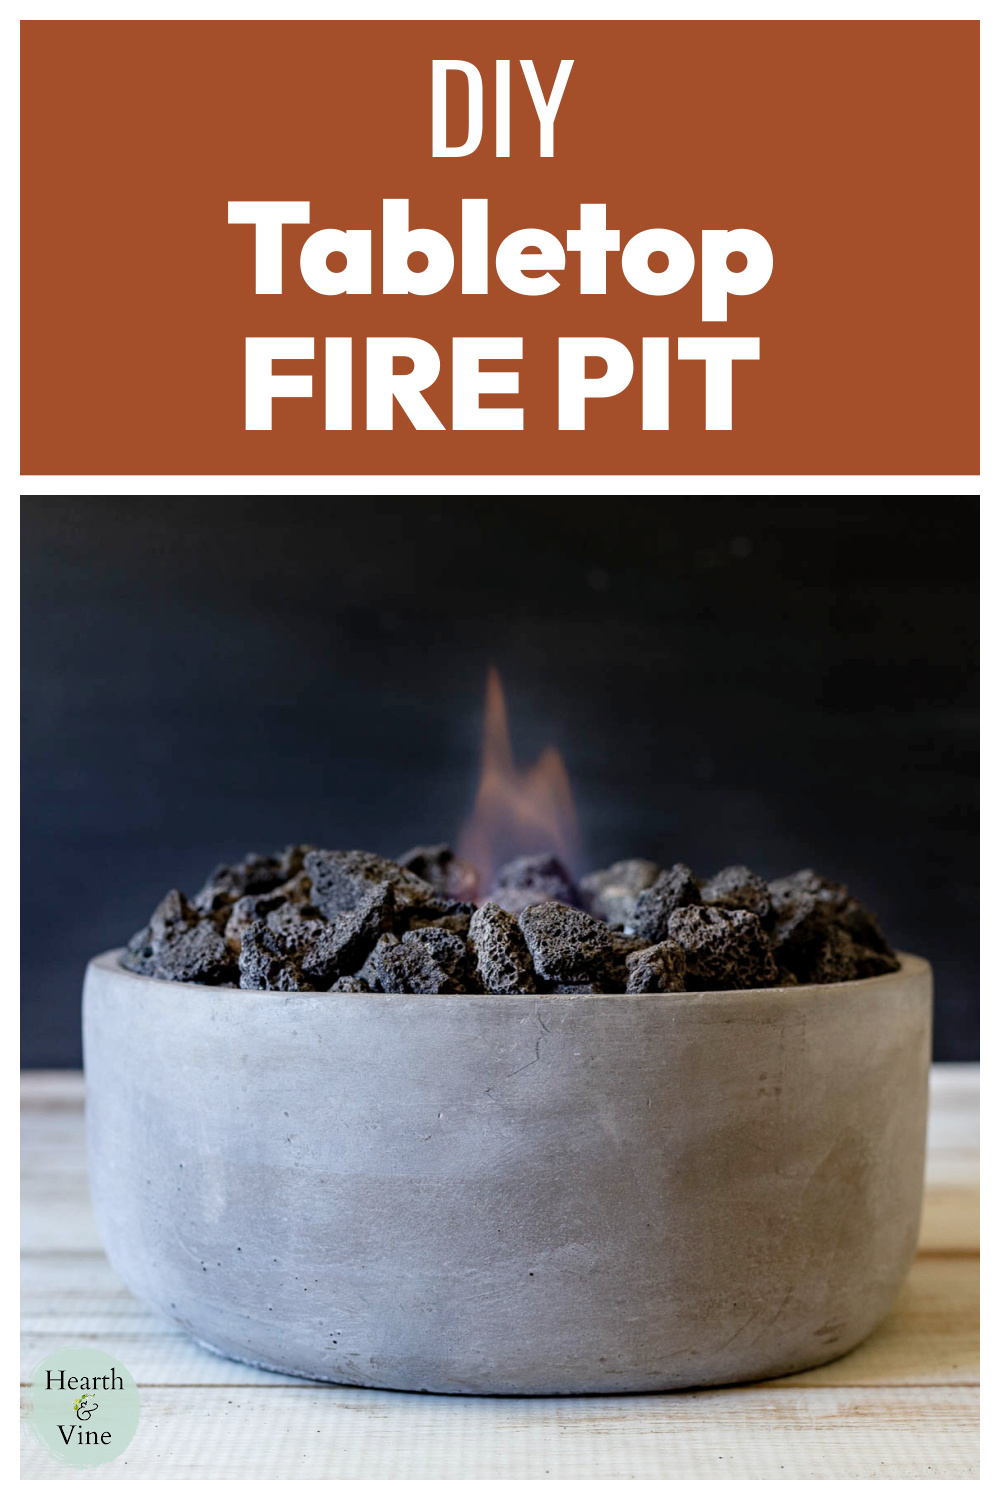
    Make a cute DIY tabletop fire pit with just a few materials that you can enjoy outdoors on your patio or porch.

    Small gray tabletop fire pit with fire.

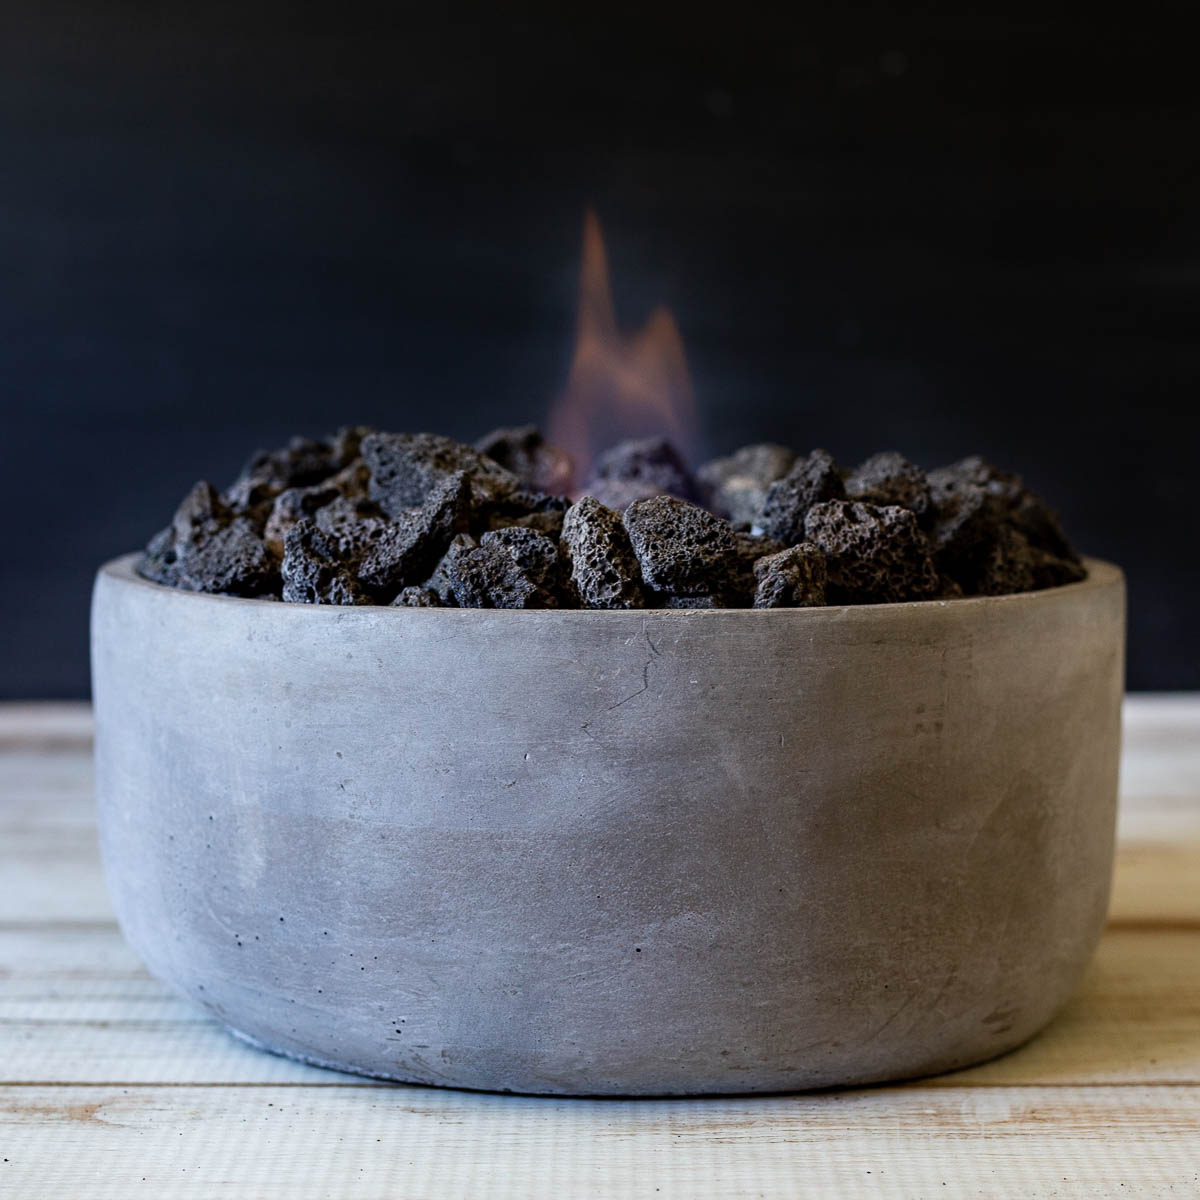
    Sitting outside and enjoying a fire doesn't have to include a huge fire building undertaking. This simple fire pit craft can be just the ticket if you want to enjoy the look of flames or even roast a marshmallow on a table sitting on your outdoor patio or porch.

    This post contains some affiliate links (that means if you make a purchase after clicking a link, there’s no additional cost to you, but I will earn a very small commission. ) i.e. as an Amazon Associate, I earn from qualifying purchases.  Click here to read my full disclosure policy.

    Materials to make firepit including lava rock, a cement pot, metal mesh, aluminun tape, wire cutters, and a fuel can.

    How to Make a Tabletop Firepit

    Supplies

    • Short Wide Pot or Planter with Drainage Holes (cement or concrete)
    • Wire Mesh
    • Metal Tape
    • Fireglass Lava Rock or other fire-resistant rock
    • Sterno Smores Heat Fuel Can
    Cement pot with a hole in the bottom.

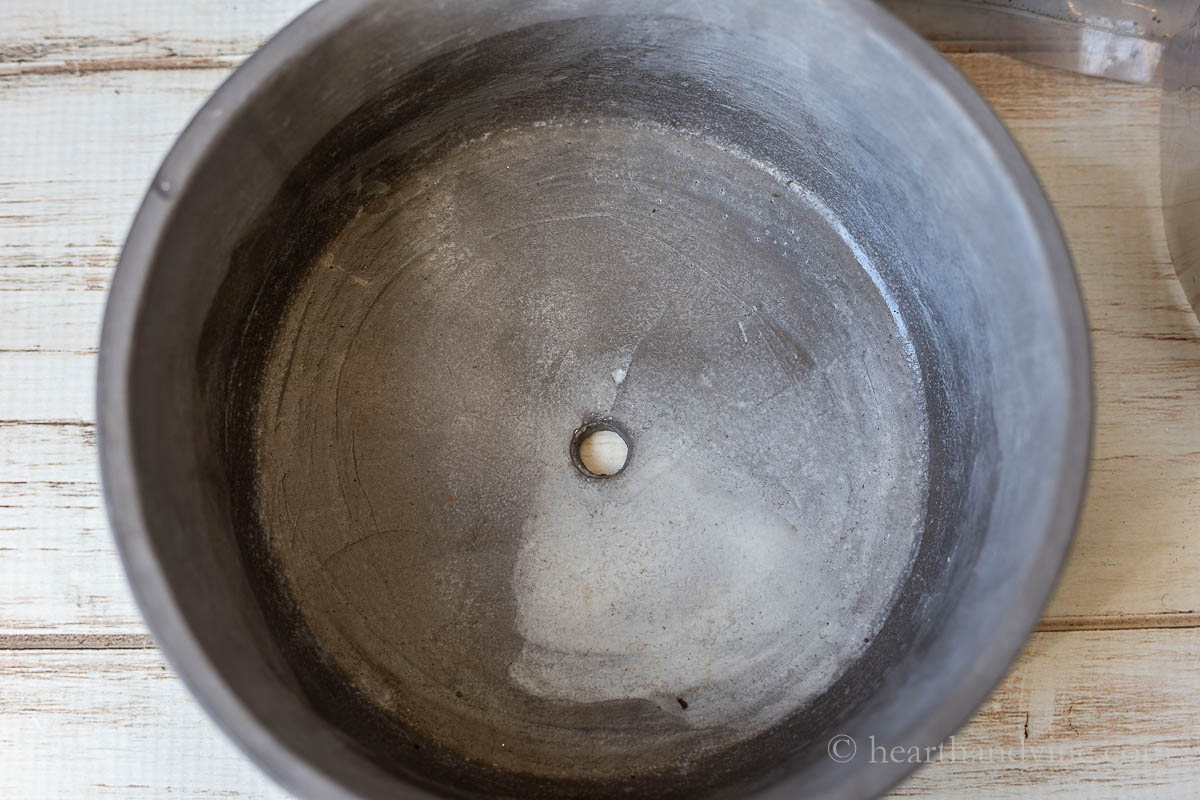
    Step 1. - Start with a cement or concrete pot with drainage. This is especially needed if you are going to leave it outdoors in the rain when you are not using it. You can find these in garden centers or other home improvement stores, or you may have one at home you can upcycle.

    Measuring the height of a pot with a ruler.

    Step 2. - Measure the height of your vessel.

    Cutting wire mesh.

    Step 3. Cut some wire metal mesh that can withstand high temperatures slightly shorter (about 1/4 inch) than the height and long enough to wrap around a gel fuel can.

    Fitting wire mesh around a fuel can.

    Step 4. - Wrap the wire mesh around your fuel can and hold it in place until you can cover and seal it with aluminum tape.

    Newsletter Signup
    Join Our Newsletter List!

    Be the first to receive new posts and get access to our Subscribers Only Page.

    Taping the wire mesh together to create a cylinder.

    I covered the entire inside and outside seam with tape to make sure it was secure.

    Setting the cylinder in the pot centered in the middle.

    Step 5. - Set the wire cylinder in the middle of your pot or vessel.

    Filling the pot with lava rock around the cylinder of wire.

    Step 6. - Start filling the pot with lava rock around the wire cylinder.

    Setting the fuel can in the wire cylinder and lighting the fuel with a fire stick.

    Step 7. - Set the fuel can into the wire cylinder and continue to fill in with rocks.

    Tip: You may need to add a few rocks to the bottom of the cylinder to lift up the fuel can.

    Safety Notes: Light the fire with a long-handled lighter. Keep the fire pit away from any flammable materials. Never leave the fire burning unattended and make sure there is plenty of ventilation around the fire pit. Also don't forget to extinguish the flame when you are done by placing the cap back on the fuel can.

    Roasting marshmallows above the firepit.

    The Smore's sterno fuel is food-safe and meant to be used for roasting marshmallows. However, be careful as I noticed my marshmallows seemed to immediately catch fire so you'll need to practice with keeping the marshmallows further away from the flame.

    Side view of the homemade tabletop fire pit.

    If you are not interested in cooking on your fire pit then you can use standard Sterno fuel gel cans or even a small torch for the flame.

    Sitting and watching a flame from a pretty vessel creates a lovely ambiance and is certainly a relaxing way to enjoy the evening.

    Patti signature

    More Patio Projects

    • DIY Patio Oil Lantern
    • DIY Tiki Torch Wine Bottle
    • Sea Glass and Seashell Windchimes
    Tabletop fire pit with fire.
    Print

    DIY Fire Pit Table Top

    Here's an easy tutorial that will show you how to create a diy tabletop fire bowl or fire pit for your backyard patio.
    Active Time29 minutes mins
    Total Time29 minutes mins
    Yield: 1

    Equipment

    • Wire Cutters
    • Ruler

    Materials

    • Short Pot with Drainage
    • Wire Mesh
    • Metal Tape
    • Fireglass Lava Rock
    • Sterno Smores Heat Fuel Can

    Instructions

    • Measure the height of your pot.
    • Cut the wire mesh slightly less than the height of the pot.
    • Wrap the wire mesh around the sterno can and tape it together with aluminum tape.
    • Set the wire mesh cylinder in the middle of the pot.
    • Fill in with lava rock around the cylinder.
    • Set the sterno fuel in the wire cylinder. Add a few rocks in the bottom if needed.
    • Continue to fill with rocks to the top of the can and hide the edges.
    • Remove the fuel cap, light it with a long lighter, and enjoy.
    • To put out the flame cover with the can lid.

    Notes

    Options and Substitutions
    If you don't want to cook with the fire pit you can use regular fuel cans and enjoy the fire.
    You can also use a small tiki torch instead of a fuel can.
    You can use sand or other non-flammable filler such as pea gravel or fire pebbles to hold the can in place. Fill it most of the way then add a small layer of fire glass rocks on top.
    Choose a container that can withstand heat such as concrete, cement, terra cotta, clay, or other fire resistant rock.
    Tried this project?Tag @hearthnvine on Instagram
    Side view of a tabletop fire pit on fire.
    « Baked Rigatoni with Sausage
    DIY Trinket Dishes with Alcohol Inks »

    About Patti Estep

    Patti is the creator of Hearth and Vine, a home and garden blog filled with projects to inspire your creative side. She loves crafting, gardening, decorating and entertaining at her home in Pennsylvania. When she is not working on a project at home or searching for treasures at nurseries and thrift stores with her girlfriends, you’ll probably find her with family and friends, at a restaurant, or home party enjoying new and different food adventures.

    Reader Interactions

    Leave a Reply Cancel reply

    Your email address will not be published. Required fields are marked *

    Recipe Rating


    Primary Sidebar

    Patti Estep Profile Picture

    Hi!

    I'm Patti

    Join me to create lots of fun DIY projects, including crafts, gardening, home decor, and tasty recipes

    More about me

    Popular Posts

    • Baked zucchini bite on a slated tray with a bowl of horseradish sauce.
      Make Tasty Zucchini Bites in Under an Hour
    • Three tin cans in descending sizes hanging from twine.
      DIY Wind Chimes with Tin Cans
    • Blue jean crossover bag
      DIY Crossbody Bag from Jeans
    • Ham barbecue sandwich on plate
      Chipped Ham Barbecue Sandwiches - A Pittsburgh Favorite
    • Echievera planter
      What to do With a Stretched Succulent
    • Make a Mason Jar Oil Candle Lamp with botanicals and essential oils. ~ gardenmatter.com
      DIY Oil Candle - Gifts for the Holidays

    Footer

    ^ back to top

    About
    Contact
    Privacy Policy
    Disclosure Policy
    Terms of Service

    Sign Up Here!
    for our
    newsletter &
    special offers

    Follow Me

    facebook
    Pinterest
    instagram

    As an Amazon Associate, I earn from qualifying purchases. i.e. as an Amazon Associate, I earn from qualifying purchases.

    Copyright © 2025 Hearth and Vine

    Rate This Recipe

    Your vote:


    A rating is required
    A name is required
    An email is required