• Skip to primary navigation
  • Skip to main content
  • Skip to primary sidebar
  • Home
  • DIY Projects
    • Homemade Bath and Body
    • Sewing - Fabric Crafts
    • Flower Crafts/Decor
    • Thrift Store/Vintage
  • Gardening
    • Flower Gardens
    • Container Gardening
    • Houseplants
    • Indoor Gardening
    • Landscaping
    • DIY Garden Art
  • Decorate
    • Spring Decor
    • Summer Decor
    • Fall Decor
    • Winter Decor
    • Home Decor Projects
  • Recipes
    • Breakfast Recipes
    • Lunch Recipes
    • Dinner Recipes
    • Dessert
    • Salad Recipes
    • Soups and Stews
    • Side Dish Recipes
    • Appetizers and Snacks
    • Healthy Recipes
  • Holidays
    • Valentine's Day
    • Easter
    • Mother's Day
    • Halloween
    • Thanksgiving
    • Christmas
Hearth and Vine
menu icon
go to homepage
  • About
  • DIY
    • ...Flower/Gardening Crafts
    • ... Bath and Body
    • ...Sewing/Fabric Crafts
    • ...Thrift Store/Upcycle
  • Gardening
    • ...Flower Gardens
    • ...Container Gardening
    • ...Indoor Gardening
    • ...DIY Garden Art
  • Decorate
    • ...Home Decor Projects
    • ...Spring Decor
    • ...Summer Decor
    • ...Fall Decor
    • ...Winter Decor
    • ...Room Makeovers
  • Recipes
    • ...Appetizers and Snacks
    • ...Dinner Recipes
    • ...Side Dish Recipes
    • ...Salad Recipes
    • ...Dessert
    • ...Drinks
  • Holidays
    • ...Valentine's Day
    • ...Easter
    • ...Mother's Day
    • ...Halloween
    • ...Thanksgiving
    • ...Christmas
  • Subscribe
  • Instagram
    • Facebook
    • Instagram
    • Pinterest
    • Twitter
  • subscribe
    search icon
    Homepage link
    • About
    • DIY
      • ...Flower/Gardening Crafts
      • ... Bath and Body
      • ...Sewing/Fabric Crafts
      • ...Thrift Store/Upcycle
    • Gardening
      • ...Flower Gardens
      • ...Container Gardening
      • ...Indoor Gardening
      • ...DIY Garden Art
    • Decorate
      • ...Home Decor Projects
      • ...Spring Decor
      • ...Summer Decor
      • ...Fall Decor
      • ...Winter Decor
      • ...Room Makeovers
    • Recipes
      • ...Appetizers and Snacks
      • ...Dinner Recipes
      • ...Side Dish Recipes
      • ...Salad Recipes
      • ...Dessert
      • ...Drinks
    • Holidays
      • ...Valentine's Day
      • ...Easter
      • ...Mother's Day
      • ...Halloween
      • ...Thanksgiving
      • ...Christmas
    • Subscribe
    • Instagram
    • Facebook
    • Instagram
    • Pinterest
    • Twitter
  • ×
    Home » DIY Projects

    DIY Fabric Bowls from Scrap Fabric

    by Patti Estep · Jul 5, 2023

    Jump to How-to Card
    Three small fabric pots on their side.
    Three fabric bowls on a side angle over the same three from the top.

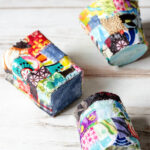
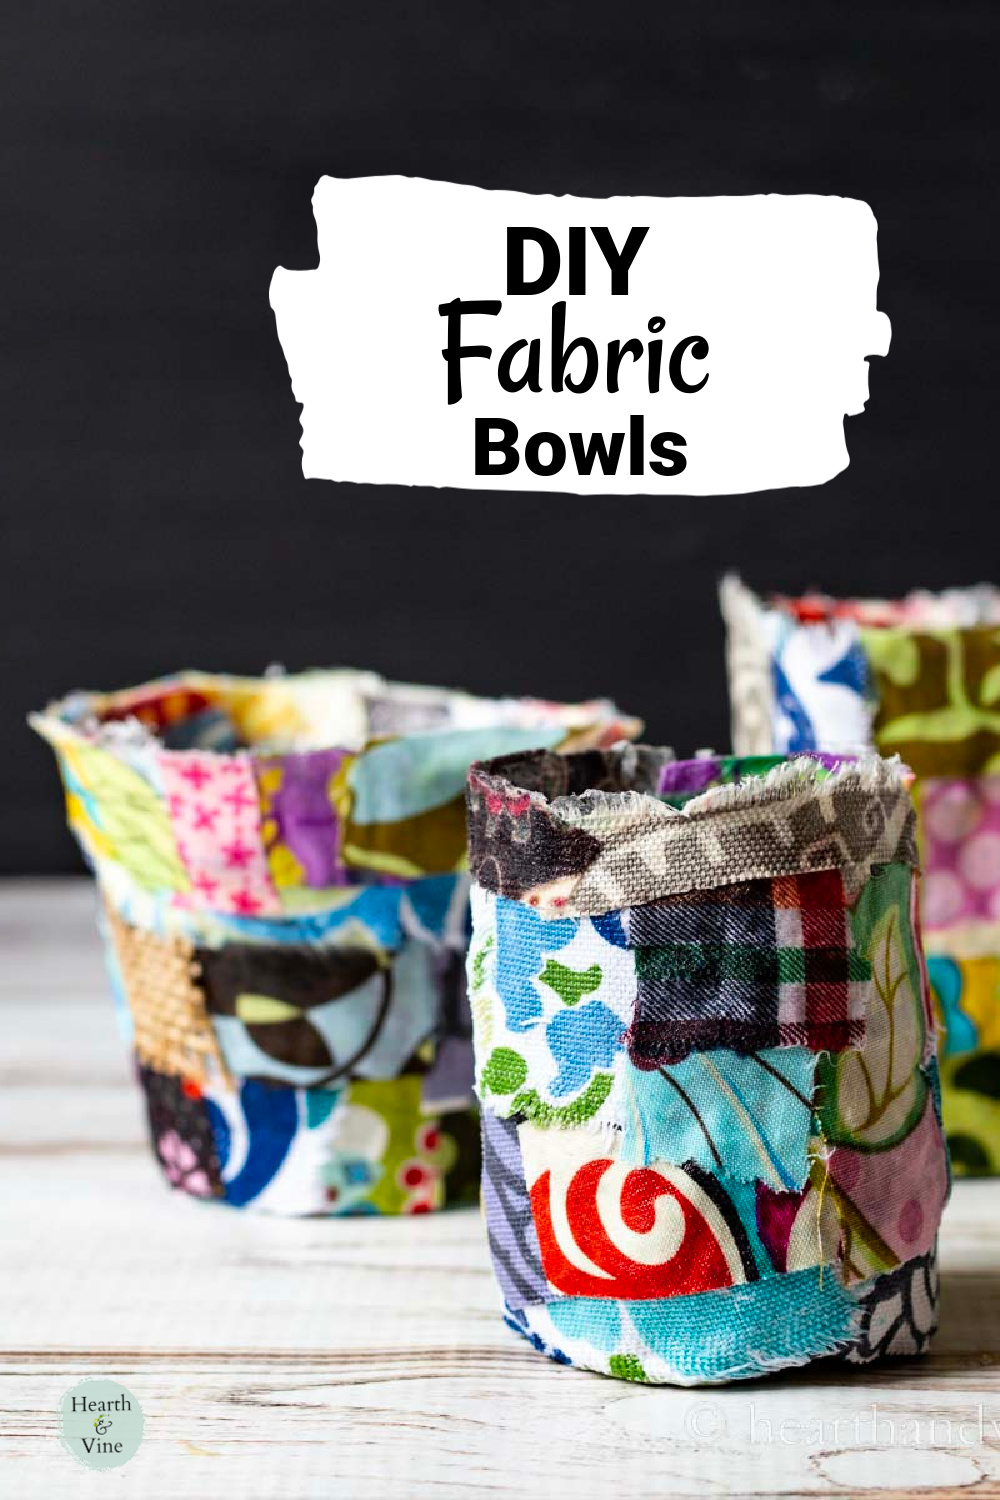
    Learn how to make fabric bowls with pieces of leftover fabric scraps. It's a fun art project that lets your creativity flow.

    Small fabric bowls from scrap material.

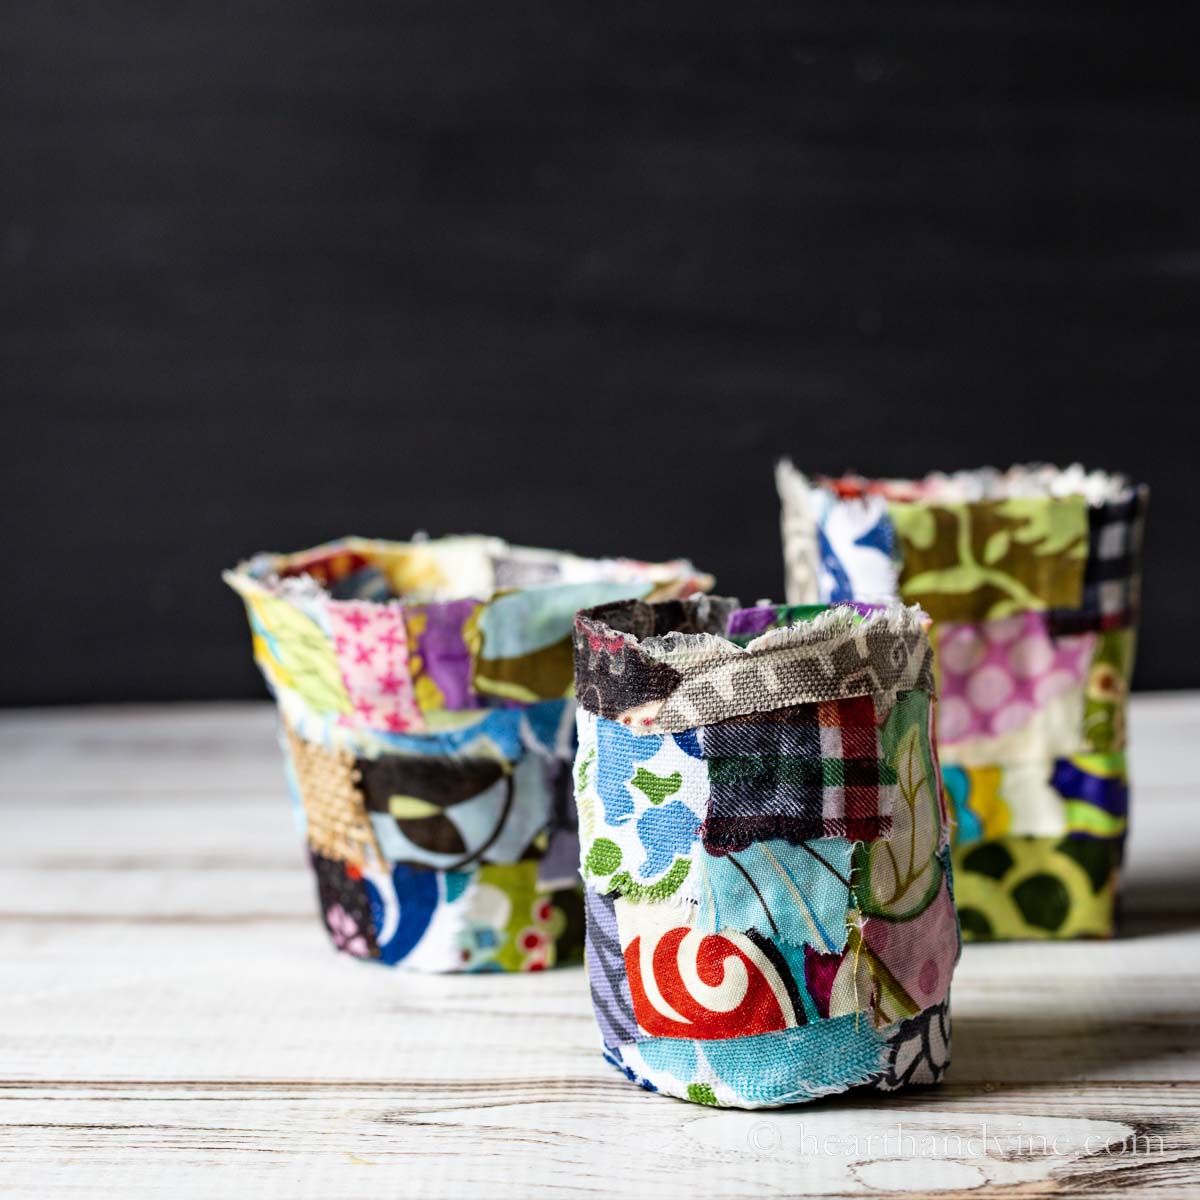
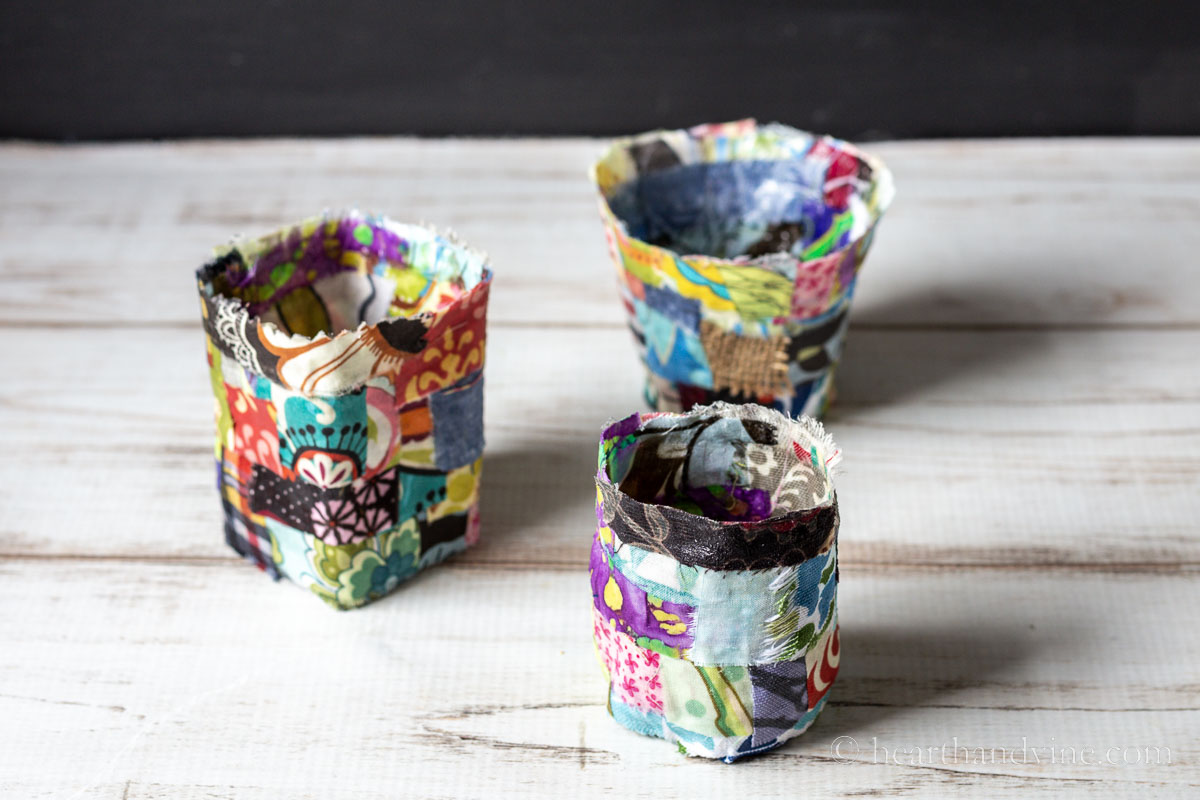
    How cute are these little fabric pots/bowls? I love the way they turned out. This is one of those failproof projects that though messy is a good way to feel creative.

     It reminds me of paper mache but it's more of a fabric scrap mache bowl.

    This post contains some affiliate links (that means if you make a purchase after clicking a link, there’s no additional cost to you, but I will earn a very small commission. ) i.e. as an Amazon Associate, I earn from qualifying purchases. Click here to read my full disclosure policy.
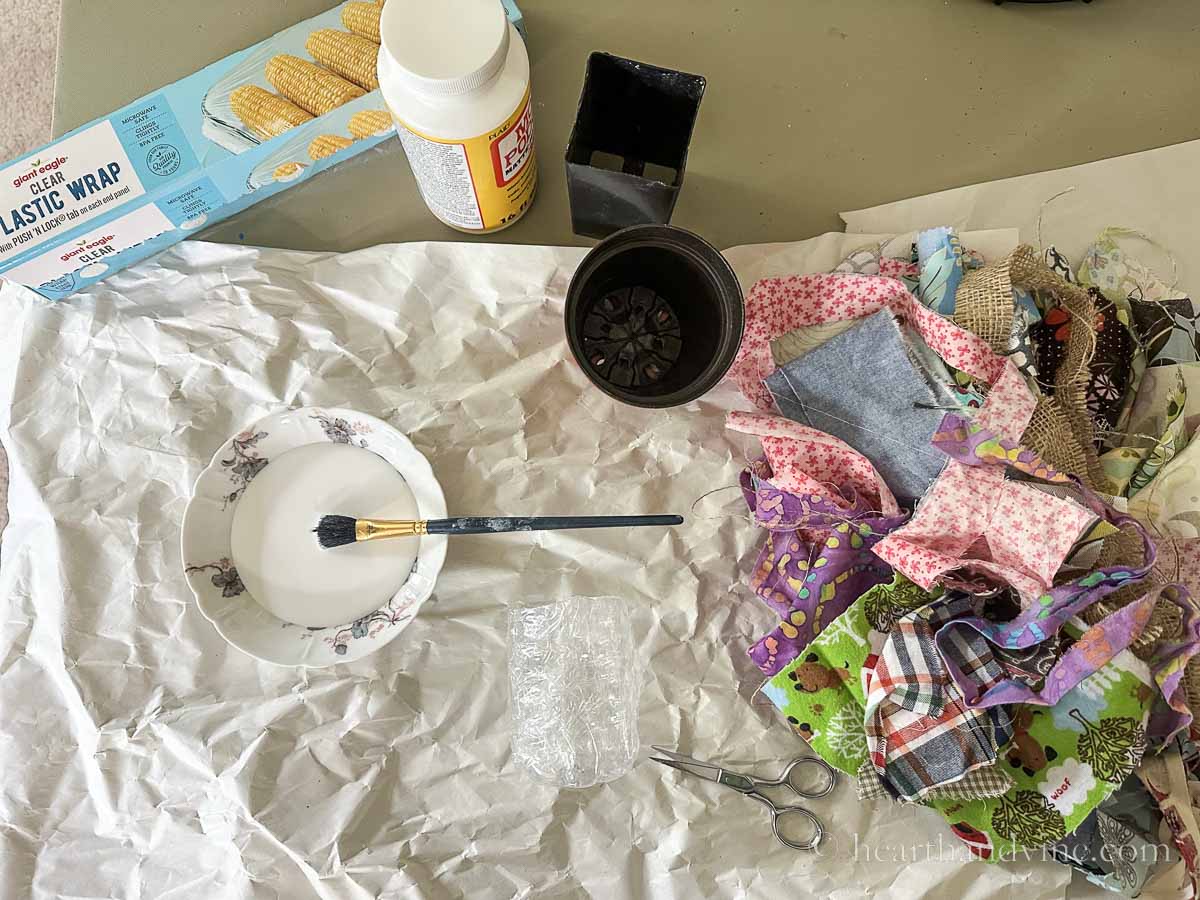
    Supplies to make fabric bowls including mod podge, scrap fabric, plastic wrap, small pots and a paintbrush.

    Supplies

    • Scraps of fabric of all kinds - I mainly used cotton fabric.
    • White glue such as Mod Podge or Elmers - Anything that dries clear.
    • Paintbrush
    • Scissors for trimming or cutting fabric as you go
    • Plastic wrap
    • Structure vessel or mold - I used a plastic water bottle that I cut down and a couple of plastic plant pots. However, you can use jars or bowls too. I liked something that was a little flexible because that made it easy to remove from the fabric once it dried.
    Plastic covered water bottle bottom upsidedown with a piece of fabric covering the bottom with glue.

    How to Make Fabric Bowls

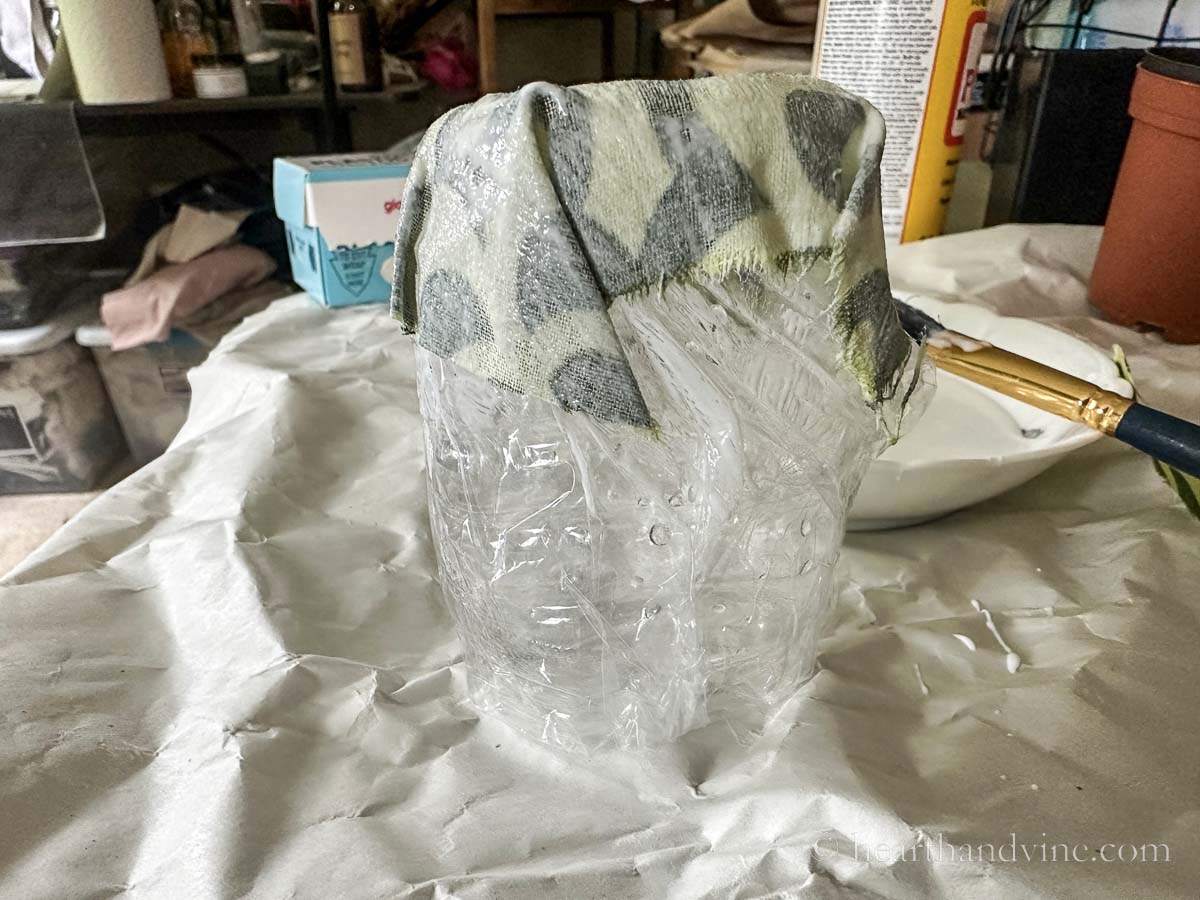
    Cover your structure with plastic wrap. In the image above you can see that I cut a 16 oz plastic water bottle about 4 inches tall and covered it with plastic wrap.

    Then I turned it upside down and applied a piece of fabric that covered the bottom with glue. Note: I made sure to place the patterned side down so that when you look inside you will see the pretty print.

    Cover it with more glue.

    Newsletter Signup
    Join Our Newsletter List!

    Be the first to receive new posts and get access to our Subscribers Only Page.

    Note: You will use a lot of glue for this project.

    Strips of fabric with right side down glued all over a plastic covered cut water bottle.

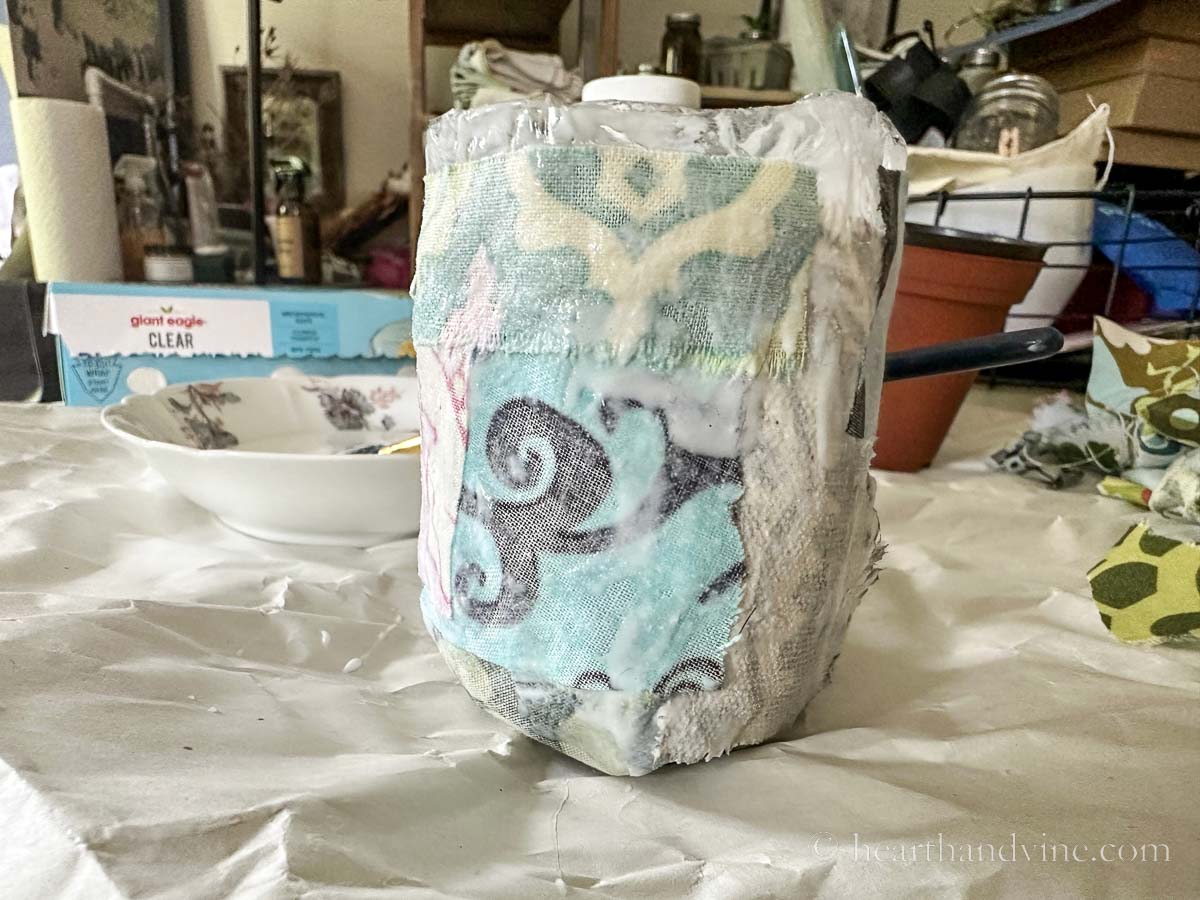
    Then start adding small pieces of fabric to the sides, making sure to place the "right" side down again and overlap all the pieces.

    Once you have covered the bottle, start over on the sides, but this time place the patterned side of the fabric up so you can see it. You end up with two layers of fabric that will give it some extra weight.

    Finished fabric pot next to the plastic wrap covered cut bottom portion of a water bottle.

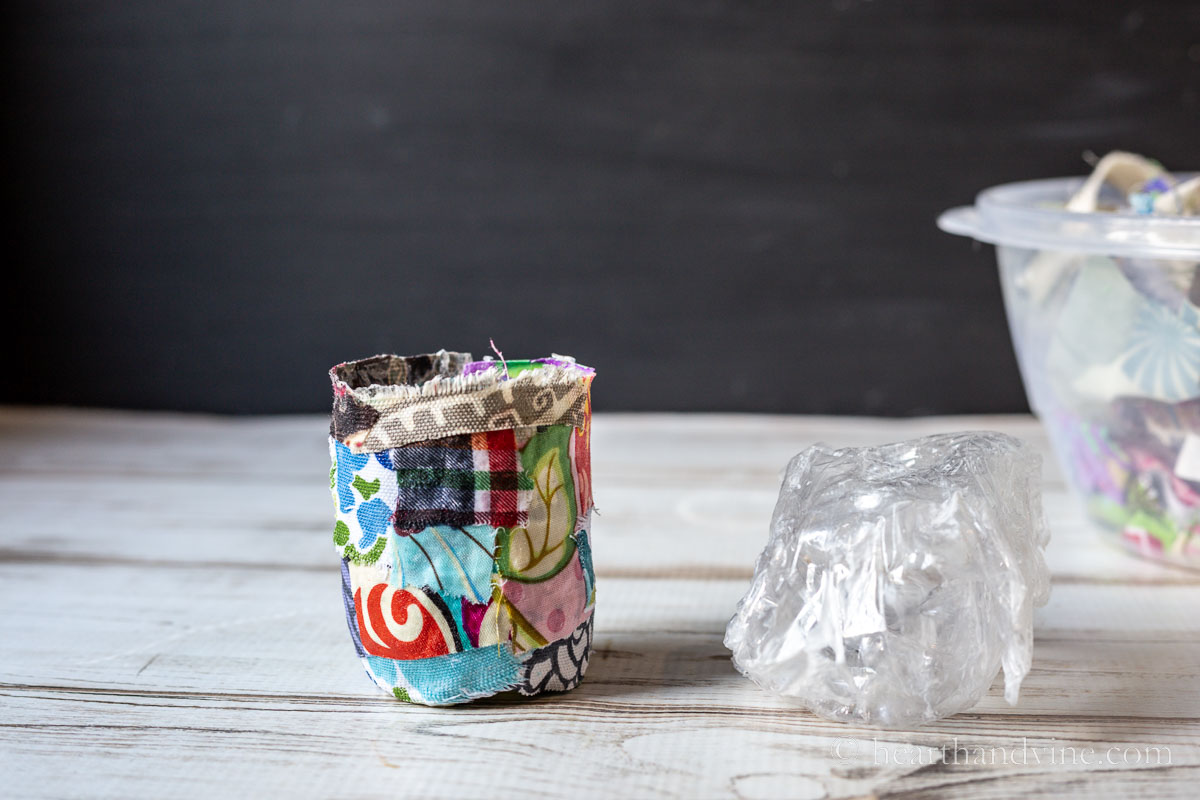
    Allow the project to sit overnight. Then simply wiggle the bottle and plastic out to reveal your masterpiece.

    Two fabric pots made with basic plastic nursery pots.

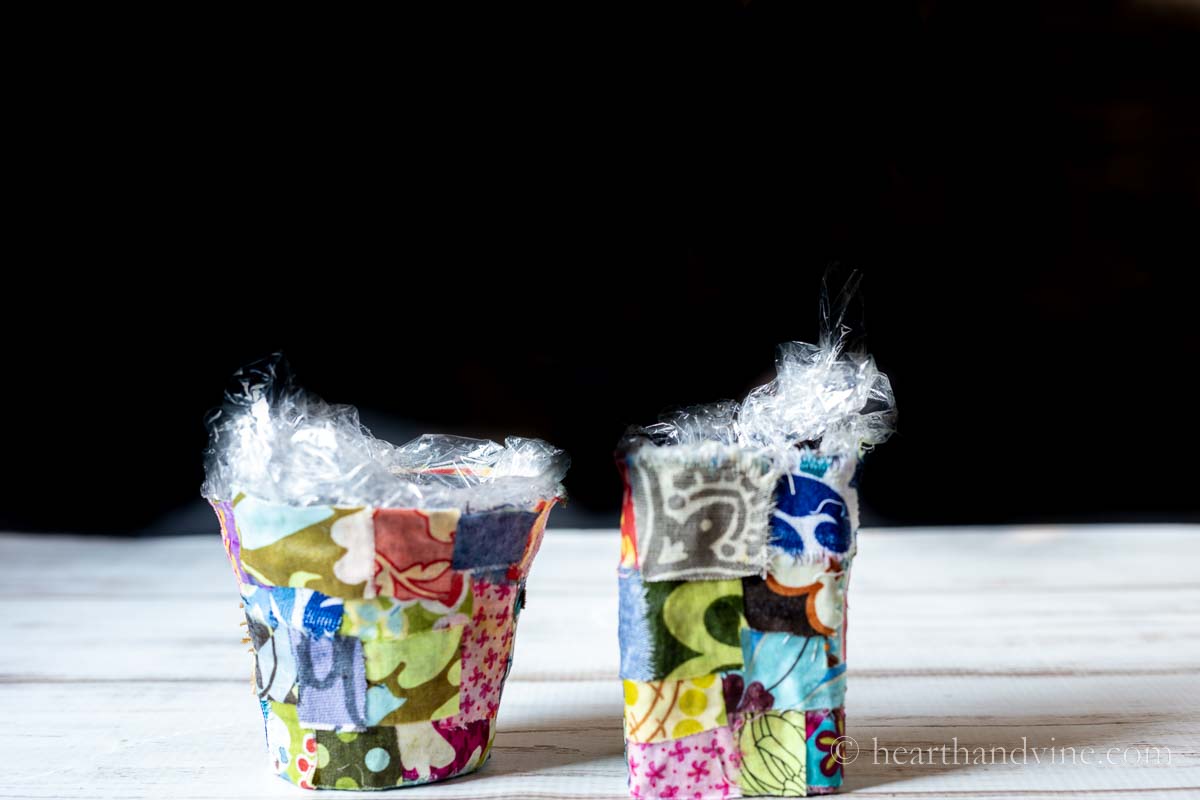
    Here I used two nursery pots. Since they were plastic they had some give making them easy to remove but still firm enough to create a pretty shape.

    Aerial view of fabric bowls to show the bright fabric inside.

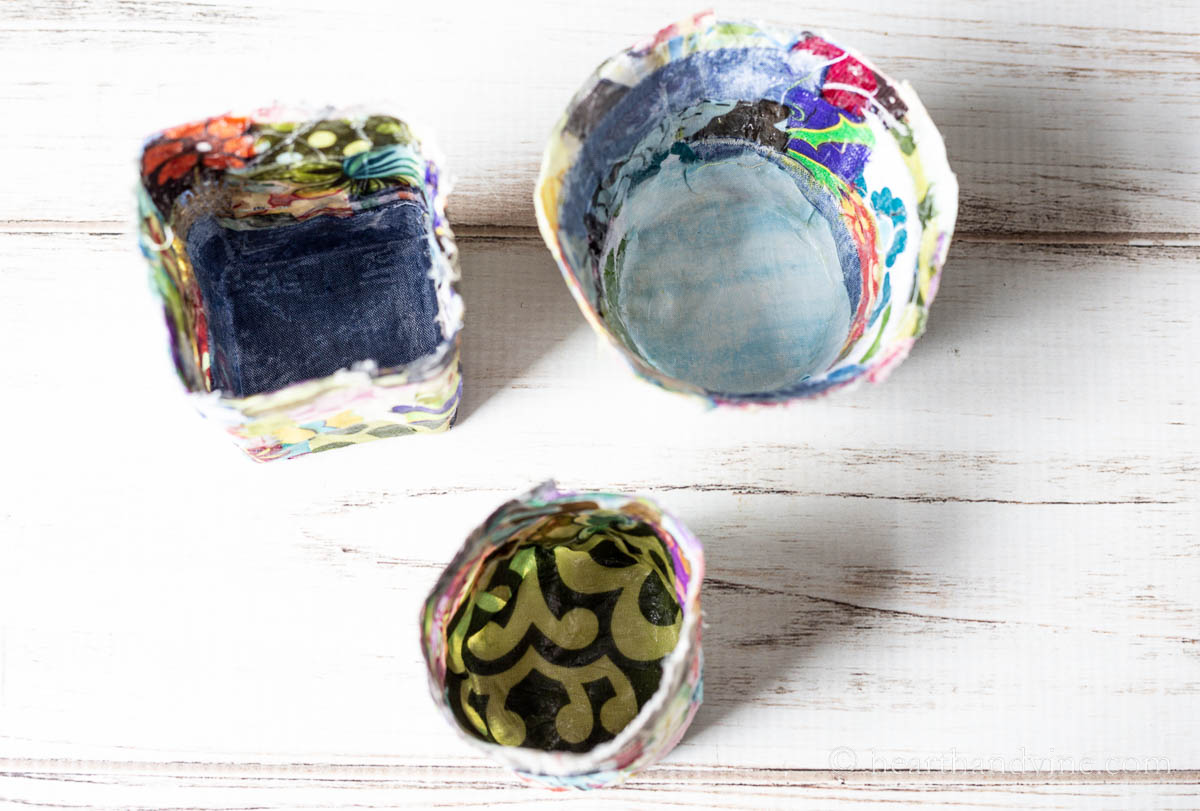
    Look at the inside of the bowls and you can see why you want to place your first layer with the pattern side down.

    Ways to use Fabric Bowls

    • Use them to hold office supplies such as paper clips, pencils, and brushes.
    • Place a small gift inside and use them as a gift box. It's a gift holding a gift.
    • Set a small plant inside. Leave it in its original pot and remove it when watering.

    Three dried fabric pots on a table.

    I thought it might be fun to take it a step further and stitch the top edge of the bowl with some embroidery thread in a pretty color to give them a more finished look. However, so far I haven't done it.

    Overall, this was a really fun project and I love the way they turned out.

    Patti signature

    More Fabric Craft Ideas

    • Fabric Covered Coat Hangers
    • Fabric Twine Coasters
    • DIY Wrist Comfort Cuff
    • Fabric Covered Plastic Drawers
    Multi-colored fabric scraps turned into pots or bowls.
    Print

    Fabric Bowl or Pot Tutorials

    Enjoy getting creative with your favorite fabric scraps to make these adorable fabric bowls that you can house all kinds of things.
    Prep Time20 minutes mins
    Active Time45 minutes mins
    1 day d
    Total Time1 day d 1 hour hr 5 minutes mins
    Cost: 0 - $5

    Equipment

    • 1 Paintbrush
    • 1 pair of scissors

    Materials

    • water bottles, plant pots or bowls
    • plastic wrap
    • glue that dries clear such as Mod Podge or Elmers
    • lots of fabric scraps

    Instructions

    • Cut up some fabric strips into small squares and rectangles
    • Cut a plastic water bottle to the height you like.
    • Cover the outside of the bottle with plastic wrap tucking extra inside the bottle.
    • Turn the bottle upside down.
    • Brush glue all over the bottom and the lower sides.
    • Place a larger piece of fabric right side down to cover the bottom of the bottle.
    • Use more glue on top of the fabric and press down the edges with glue and the paintbrush until it is formed onto the bottle.
    • Start gluing more fabric scraps (right side down) on the sides of the bottle overlapping each other.
    • Once the bottle is covered start adding a second layer of scraps to the sides but this time make them right side up so that you can see the pattern.
    • Finish by adding an additional coat of glue over top.
    • Allow the glue to dry for several hours or overnight.
    • Remove the bottle and plastic wrap.

    Notes

    The inside of the pot/bowl may still be a little wet when you remove the bottle and plastic. It will continue to dry over the next few hours.
    You can use this same technique with larger bowls, and bottles, however, they may be a little harder to remove from the fabric as they are not flexible.
    You could also try a balloon set on a mug to create a round bowl shape.
     
     
    Tried this project?Tag @hearthnvine on Instagram
    « Growing Scented Geraniums
    Roasted Asparagus and Broccoli Recipe »

    About Patti Estep

    Patti is the creator of Hearth and Vine, a home and garden blog filled with projects to inspire your creative side. She loves crafting, gardening, decorating and entertaining at her home in Pennsylvania. When she is not working on a project at home or searching for treasures at nurseries and thrift stores with her girlfriends, you’ll probably find her with family and friends, at a restaurant, or home party enjoying new and different food adventures.

    Reader Interactions

    Leave a Reply Cancel reply

    Your email address will not be published. Required fields are marked *

    Recipe Rating


    Primary Sidebar

    Patti Estep Profile Picture

    Hi!

    I'm Patti

    Join me to create lots of fun DIY projects, including crafts, gardening, home decor, and tasty recipes

    More about me

    Popular Posts

    • Baked zucchini bite on a slated tray with a bowl of horseradish sauce.
      Make Tasty Zucchini Bites in Under an Hour
    • Three tin cans in descending sizes hanging from twine.
      DIY Wind Chimes with Tin Cans
    • Blue jean crossover bag
      DIY Crossbody Bag from Jeans
    • Ham barbecue sandwich on plate
      Chipped Ham Barbecue Sandwiches - A Pittsburgh Favorite
    • Echievera planter
      What to do With a Stretched Succulent
    • Make a Mason Jar Oil Candle Lamp with botanicals and essential oils. ~ gardenmatter.com
      DIY Oil Candle - Gifts for the Holidays

    Footer

    ^ back to top

    About
    Contact
    Privacy Policy
    Disclosure Policy
    Terms of Service

    Sign Up Here!
    for our
    newsletter &
    special offers

    Follow Me

    facebook
    Pinterest
    instagram

    As an Amazon Associate, I earn from qualifying purchases. i.e. as an Amazon Associate, I earn from qualifying purchases.

    Copyright © 2025 Hearth and Vine

    Rate This Recipe

    Your vote:


    A rating is required
    A name is required
    An email is required