• Skip to primary navigation
  • Skip to main content
  • Skip to primary sidebar
  • Home
  • DIY Projects
    • Homemade Bath and Body
    • Sewing - Fabric Crafts
    • Flower Crafts/Decor
    • Thrift Store/Vintage
  • Gardening
    • Flower Gardens
    • Container Gardening
    • Houseplants
    • Indoor Gardening
    • Landscaping
    • DIY Garden Art
  • Decorate
    • Spring Decor
    • Summer Decor
    • Fall Decor
    • Winter Decor
    • Home Decor Projects
  • Recipes
    • Breakfast Recipes
    • Lunch Recipes
    • Dinner Recipes
    • Dessert
    • Salad Recipes
    • Soups and Stews
    • Side Dish Recipes
    • Appetizers and Snacks
    • Healthy Recipes
  • Holidays
    • Valentine's Day
    • Easter
    • Mother's Day
    • Halloween
    • Thanksgiving
    • Christmas
Hearth and Vine
menu icon
go to homepage
  • About
  • DIY
    • ...Flower/Gardening Crafts
    • ... Bath and Body
    • ...Sewing/Fabric Crafts
    • ...Thrift Store/Upcycle
  • Gardening
    • ...Flower Gardens
    • ...Container Gardening
    • ...Indoor Gardening
    • ...DIY Garden Art
  • Decorate
    • ...Home Decor Projects
    • ...Spring Decor
    • ...Summer Decor
    • ...Fall Decor
    • ...Winter Decor
    • ...Room Makeovers
  • Recipes
    • ...Appetizers and Snacks
    • ...Dinner Recipes
    • ...Side Dish Recipes
    • ...Salad Recipes
    • ...Dessert
    • ...Drinks
  • Holidays
    • ...Valentine's Day
    • ...Easter
    • ...Mother's Day
    • ...Halloween
    • ...Thanksgiving
    • ...Christmas
  • Subscribe
  • Instagram
    • Facebook
    • Instagram
    • Pinterest
    • Twitter
  • subscribe
    search icon
    Homepage link
    • About
    • DIY
      • ...Flower/Gardening Crafts
      • ... Bath and Body
      • ...Sewing/Fabric Crafts
      • ...Thrift Store/Upcycle
    • Gardening
      • ...Flower Gardens
      • ...Container Gardening
      • ...Indoor Gardening
      • ...DIY Garden Art
    • Decorate
      • ...Home Decor Projects
      • ...Spring Decor
      • ...Summer Decor
      • ...Fall Decor
      • ...Winter Decor
      • ...Room Makeovers
    • Recipes
      • ...Appetizers and Snacks
      • ...Dinner Recipes
      • ...Side Dish Recipes
      • ...Salad Recipes
      • ...Dessert
      • ...Drinks
    • Holidays
      • ...Valentine's Day
      • ...Easter
      • ...Mother's Day
      • ...Halloween
      • ...Thanksgiving
      • ...Christmas
    • Subscribe
    • Instagram
    • Facebook
    • Instagram
    • Pinterest
    • Twitter
  • ×
    Home » DIY Projects

    How to Make Resin Coasters with Seashells and Sea Glass

    by Patti Estep · Aug 7, 2024

    Jump to How-to Card
    Two resin coasters made with shells and sea glass from the beach.

    This easy to follow tutorial will show you how to make resin coasters that preserve your seashell and sea glass collection from your latest beach vacation.

    Two resin coasters with seashells and sea glass inside.

    Do you like to collect sea shells and sea glass when you go to the beach? Why not preserve them in some resin and make cute coasters?

    Sand path to the ocean.

    We recently went to South Carolina for a family vacation. The beach was beautiful and I thought I'd gather some shells for a craft when I returned home. I also added some sea glass that I had in my stash for color.

    Silicone mold and sea shells for the tutorial.

    How to Make Seashell Coasters with Resin

    Supplies

    • scale or small measuring cups
    • disposable cups
    • nitrile disposable gloves
    • wooden craft sticks
    • resin coaster mold
    • heat gun
    • seashells and sea glass clean and dry
    • clear resin kit

    Safety Tips: Read the instructions on the resin product. It states that you should wear gloves, work in a well-ventilated room, and wear eye-protection. They even suggest wearing a full face respirаtor if you don't have good ventilation in your work area.

    A seashell and sea glass rubber coaster.

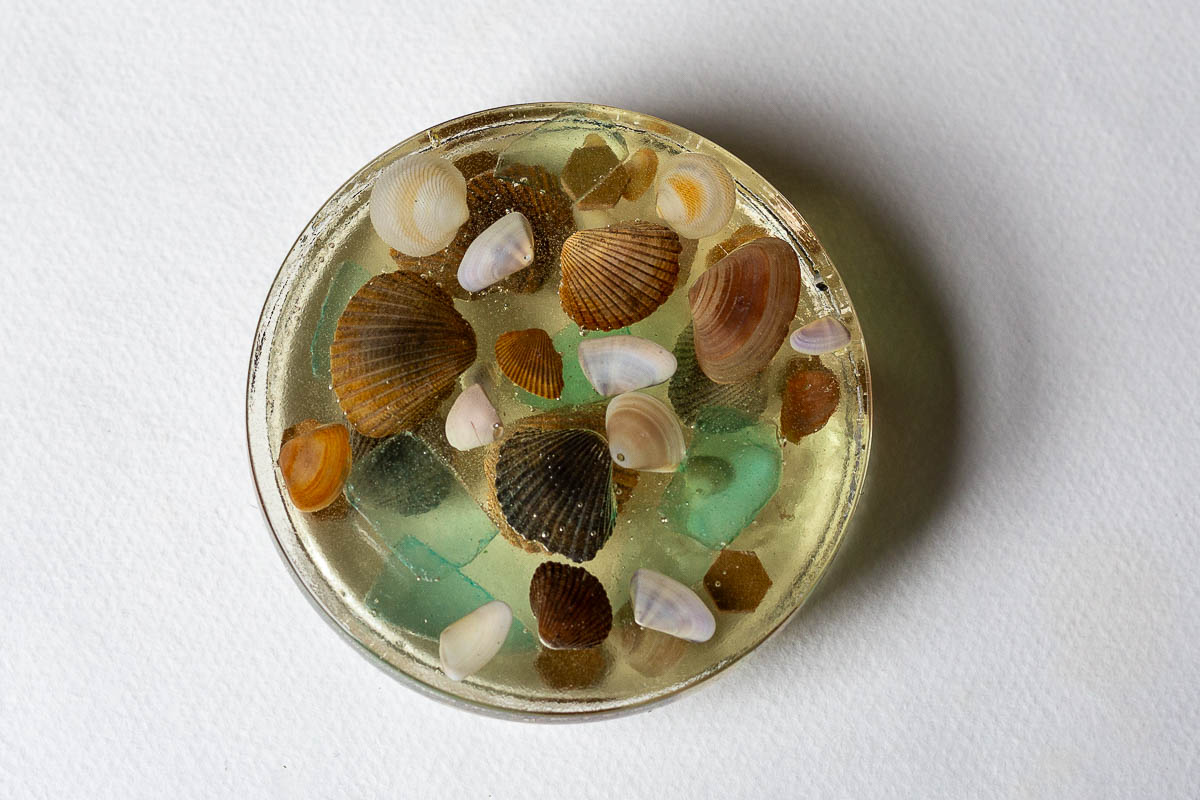
    The first time I made these I bought a translucent rubber resin (see above). That's not what I wanted at all and I ended up using a lot of my shells. Also, you can see that some of the shells are popping through the top so the second time I created a thin layer first.

    Weighing the resin components in a plastic cup.

    Step 1 - Measure and Mix the Resin

    The resin comes in two bottles. You need to mix them in a 1:1 ratio. I didn't have any small measuring cups and the product I bought did not supply them so I used a food scale.

    Newsletter Signup
    Join Our Newsletter List!

    Be the first to receive new posts and get access to our Subscribers Only Page.

    First, you need to zero out the scale with your cup on it. Then pour a little of one of the resin bottles in. Then add the second resin bottle mixture carefully to double the amount on the scale.

    Slowly mix the two together for 3 minutes. Then let it sit in the cup for 2 minutes to let the bubbles settle.

    The first pour of the resin mix into the mold with bubbles.

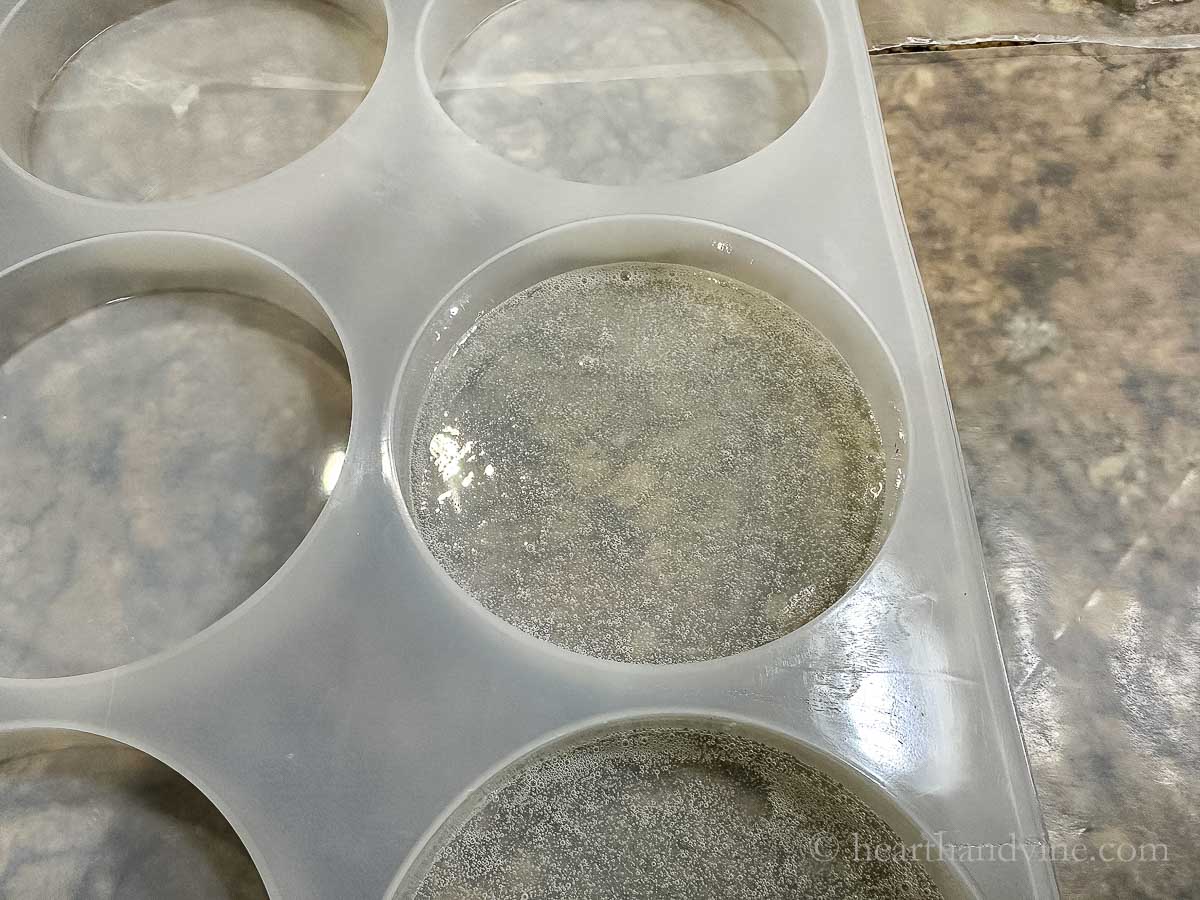
    Step 2. Pour Mixture Into Molds

    Pour the mix slowly and evenly into the silicone mold. You will see bubbles. Use a heat gun to remove as many of the bubbles as you can. If you don't have a heat gun you can try using a barbecue lighter. However, don't let the flame actually touch the resin or the mold.

    Let this thin layer rest for 2 hours.

    Setting the seashells and sea glass upside down on the first layer of resin.

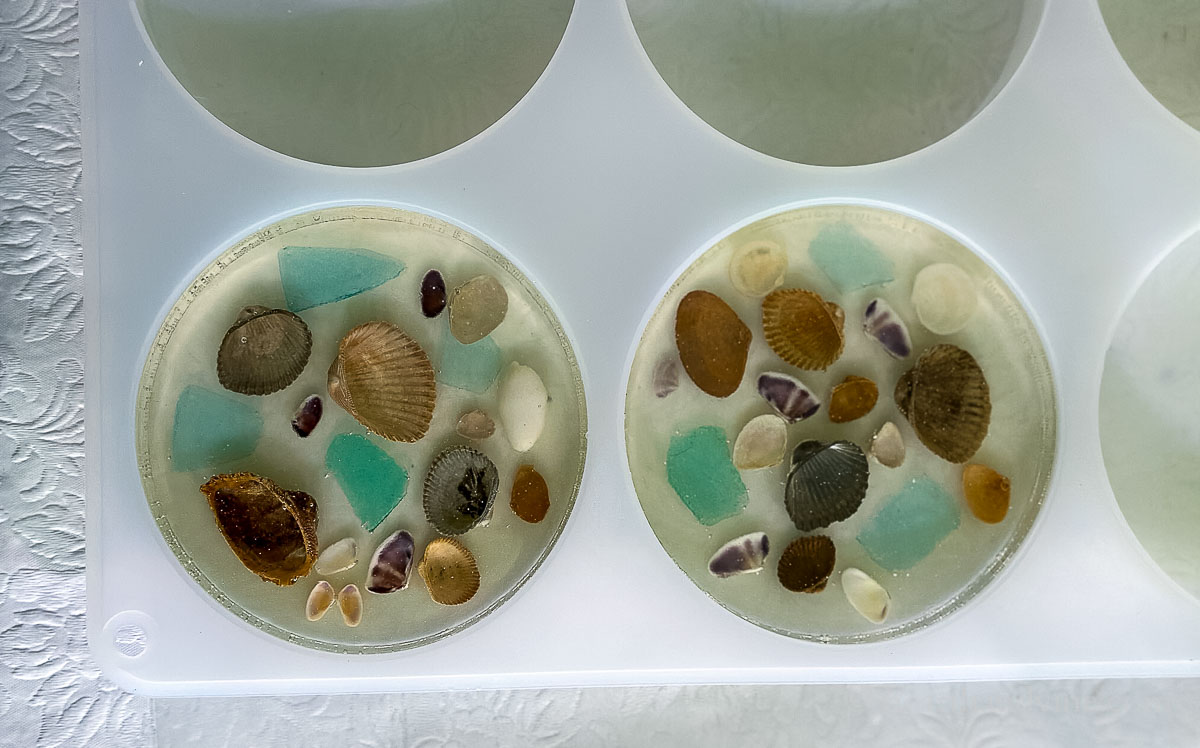
    Step 3. Add Seashells and Sea Glass

    Once the first thin layer has a chance to harden you can start setting your shells and glass gently on top. The idea is to have a buffer layer between the top of the coaster and the shells/glass which can be heavy and tend to sink.

    Make sure that you place them upside-down as the mold is slightly rounded on the bottom making that the better side for the top.

    Note: I didn't have too many left after my experiments but if I did I would have used more shells over-lapping slightly. However too many may cause them to sink and that wouldn't work well either.

    The second mix of resin in a cup with a wooden craft stick.

    Step 4. Mix the Remaining Resin

    Next mix all the remaining resin together again, slowly, for 3 minutes. Let it rest for 2 minutes and slowly pour it over the two molds.

    Bubbles forming after the second pour of resin.

    Step 5. Removing Bubbles

    You will see more bubbles so carefully remove them with the heat gun. Also, they may appear for the next hour so check back every 5-10 minutes and remove any bubbles before the resin hardens.

    Note: I still ended up with a few tiny bubbles but luckily since this is an ocean related craft it works.

    Lifting the coasters out of the molds.

    Step 5. Removing the Coasters from the Mold

    Wait at least 4 hours before checking to see if the resin is hard enough to remove from the molds. Once you remove them you should let them set overnight to finish curing.

    You may find that the bottom has a ridge or a sharp edge. You can try to cut it off with scissors or use some fine grit sandpaper to remove it if you like.

    Adding soft rubber feet to the bottom of the coaster.

    You can also add little cushioned feet to the bottom. I had some extra from our kitchen cabinets and used them.

    A water glass set on one of the coasters.

    Here you can see how they look with a glass of water.

    Two shell resin coasters stacked together.

    I think they make a nice paperweight or simple piece of decor too.

    Other Ideas to Embed

    • Sand would go great with the seashells
    • Glitter or gold leaf flakes
    • Dried flowers or pressed flowers
    Two seashell and sea glass resin coasters on a table.

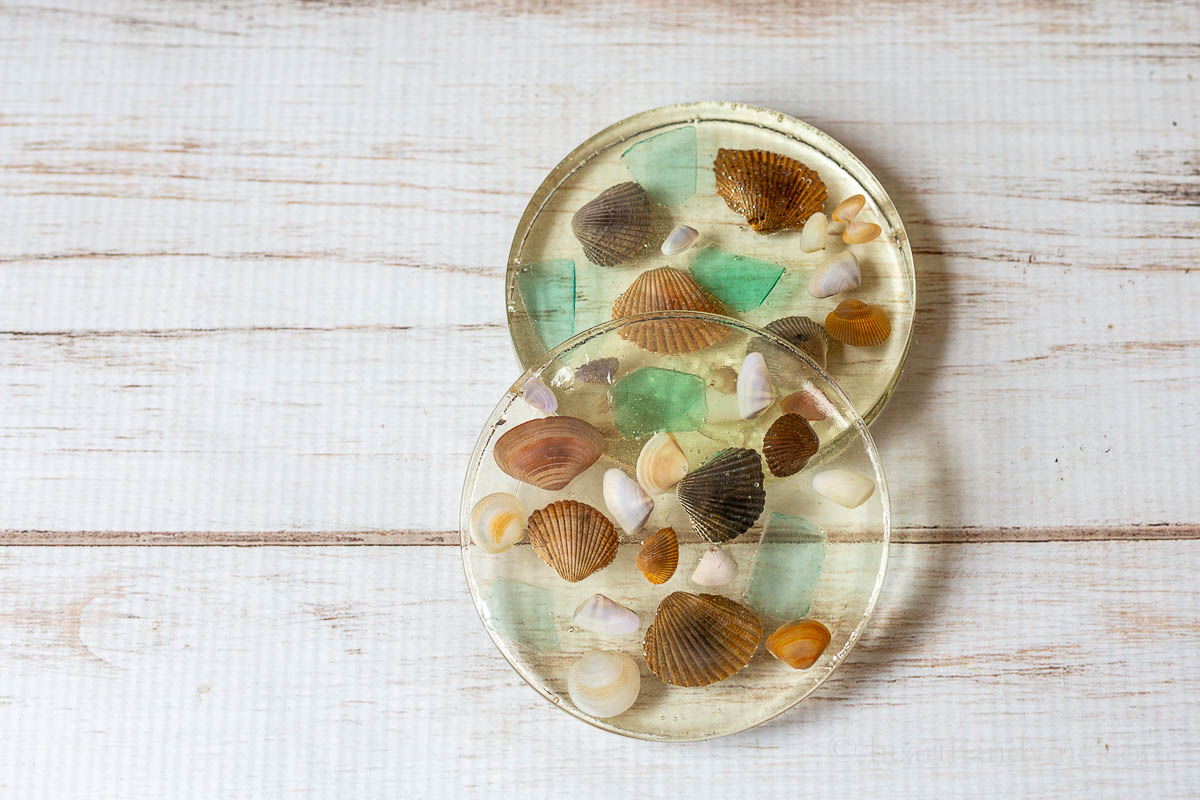
    I think they are so pretty and a nice reminder of our family's trip to the beach.

    Patti signature

    Two resin coasters with seashells and sea glass inside.
    Print

    DIY Seashell Coasters

    Learn how to make resin coasters with seashells and sea glass you've collected from the beach.
    Active Time1 hour hr
    Drying Time8 hours hrs
    Total Time9 hours hrs
    Yield: 2

    Equipment

    • scale
    • disposable cups
    • popsicle sticks
    • coaster mold
    • Heat Gun

    Materials

    • seashells and sea glass clean and dry
    • clear epoxy resin kit

    Instructions

    • Slowly mix equal parts of the resin in a plastic disposable cup. Just a little to cover the bottom of the mold for 3 minutes with a popsicle stick.
    • Then let it sit for 2 minutes.
    • Pour half into one mold and the rest in the other.
    • Use a heat gun to remove any bubbles.
    • Let the resin slightly harden for about 2 hours.
    • Set the sea glass and the shells upside down gently on top of the resin.
    • Mix the remaining resin solutions together slowly for 3 minutes.
    • Allow the resin to sit in the cup to settle for 2 minutes.
    • Then gently pour the resin equally over the two molds prepared with shells.
    • Wait for at least 4 hours for the resin to harden before removing them from the molds.
    • Then let the resin coasters continue to cure for 24 hours.
    • If desired place rubber pads on the bottom for protection.
    Tried this project?Tag @hearthnvine on Instagram
    Two seashell and sea glass resin coasters.
    « DIY Leaf Pillow
    Cherry Pistachio Granola - A Sweet and Delicious Healthy Snack »

    About Patti Estep

    Patti is the creator of Hearth and Vine, a home and garden blog filled with projects to inspire your creative side. She loves crafting, gardening, decorating and entertaining at her home in Pennsylvania. When she is not working on a project at home or searching for treasures at nurseries and thrift stores with her girlfriends, you’ll probably find her with family and friends, at a restaurant, or home party enjoying new and different food adventures.

    Reader Interactions

    Leave a Reply Cancel reply

    Your email address will not be published. Required fields are marked *

    Recipe Rating


    Primary Sidebar

    Two resin coasters made with shells and sea glass from the beach.
    Patti Estep Profile Picture

    Hi!

    I'm Patti

    Join me to create lots of fun DIY projects, including crafts, gardening, home decor, and tasty recipes

    More about me

    Popular Posts

    • Baked zucchini bite on a slated tray with a bowl of horseradish sauce.
      Make Tasty Zucchini Bites in Under an Hour
    • Three tin cans in descending sizes hanging from twine.
      DIY Wind Chimes with Tin Cans
    • Blue jean crossover bag
      DIY Crossbody Bag from Jeans
    • Ham barbecue sandwich on plate
      Chipped Ham Barbecue Sandwiches - A Pittsburgh Favorite
    • Echievera planter
      What to do With a Stretched Succulent
    • Make a Mason Jar Oil Candle Lamp with botanicals and essential oils. ~ gardenmatter.com
      DIY Oil Candle - Gifts for the Holidays

    Footer

    Two resin coasters made with shells and sea glass from the beach.

    ^ back to top

    About
    Contact
    Privacy Policy
    Disclosure Policy

    Sign Up Here!
    for our
    newsletter &
    special offers

    Follow Me

    facebook
    Pinterest
    instagram

    As an Amazon Associate, I earn from qualifying purchases. i.e. as an Amazon Associate, I earn from qualifying purchases.

    Copyright © 2025 Hearth and Vine

    Rate This Recipe

    Your vote:


    A rating is required
    A name is required
    An email is required