• Skip to primary navigation
  • Skip to main content
  • Skip to primary sidebar
  • Home
  • DIY Projects
    • Homemade Bath and Body
    • Sewing - Fabric Crafts
    • Flower Crafts/Decor
    • Thrift Store/Vintage
  • Gardening
    • Flower Gardens
    • Container Gardening
    • Houseplants
    • Indoor Gardening
    • Landscaping
    • DIY Garden Art
  • Decorate
    • Spring Decor
    • Summer Decor
    • Fall Decor
    • Winter Decor
    • Home Decor Projects
  • Recipes
    • Breakfast Recipes
    • Lunch Recipes
    • Dinner Recipes
    • Dessert
    • Salad Recipes
    • Soups and Stews
    • Side Dish Recipes
    • Appetizers and Snacks
    • Healthy Recipes
  • Holidays
    • Valentine's Day
    • Easter
    • Mother's Day
    • Halloween
    • Thanksgiving
    • Christmas
Hearth and Vine
menu icon
go to homepage
  • About
  • DIY
    • ...Flower/Gardening Crafts
    • ... Bath and Body
    • ...Sewing/Fabric Crafts
    • ...Thrift Store/Upcycle
  • Gardening
    • ...Flower Gardens
    • ...Container Gardening
    • ...Indoor Gardening
    • ...DIY Garden Art
  • Decorate
    • ...Home Decor Projects
    • ...Spring Decor
    • ...Summer Decor
    • ...Fall Decor
    • ...Winter Decor
    • ...Room Makeovers
  • Recipes
    • ...Appetizers and Snacks
    • ...Dinner Recipes
    • ...Side Dish Recipes
    • ...Salad Recipes
    • ...Dessert
    • ...Drinks
  • Holidays
    • ...Valentine's Day
    • ...Easter
    • ...Mother's Day
    • ...Halloween
    • ...Thanksgiving
    • ...Christmas
  • Subscribe
  • Instagram
    • Facebook
    • Instagram
    • Pinterest
    • Twitter
  • subscribe
    search icon
    Homepage link
    • About
    • DIY
      • ...Flower/Gardening Crafts
      • ... Bath and Body
      • ...Sewing/Fabric Crafts
      • ...Thrift Store/Upcycle
    • Gardening
      • ...Flower Gardens
      • ...Container Gardening
      • ...Indoor Gardening
      • ...DIY Garden Art
    • Decorate
      • ...Home Decor Projects
      • ...Spring Decor
      • ...Summer Decor
      • ...Fall Decor
      • ...Winter Decor
      • ...Room Makeovers
    • Recipes
      • ...Appetizers and Snacks
      • ...Dinner Recipes
      • ...Side Dish Recipes
      • ...Salad Recipes
      • ...Dessert
      • ...Drinks
    • Holidays
      • ...Valentine's Day
      • ...Easter
      • ...Mother's Day
      • ...Halloween
      • ...Thanksgiving
      • ...Christmas
    • Subscribe
    • Instagram
    • Facebook
    • Instagram
    • Pinterest
    • Twitter
  • ×
    Home » Recipes

    Patriotic Cherry Slab Pie

    by Patti Estep · Jul 18, 2025

    Jump to Recipe

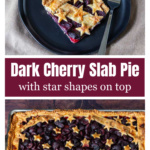
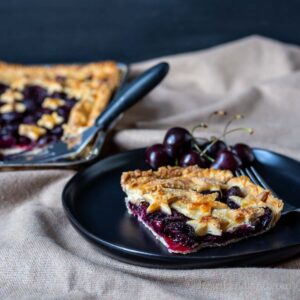
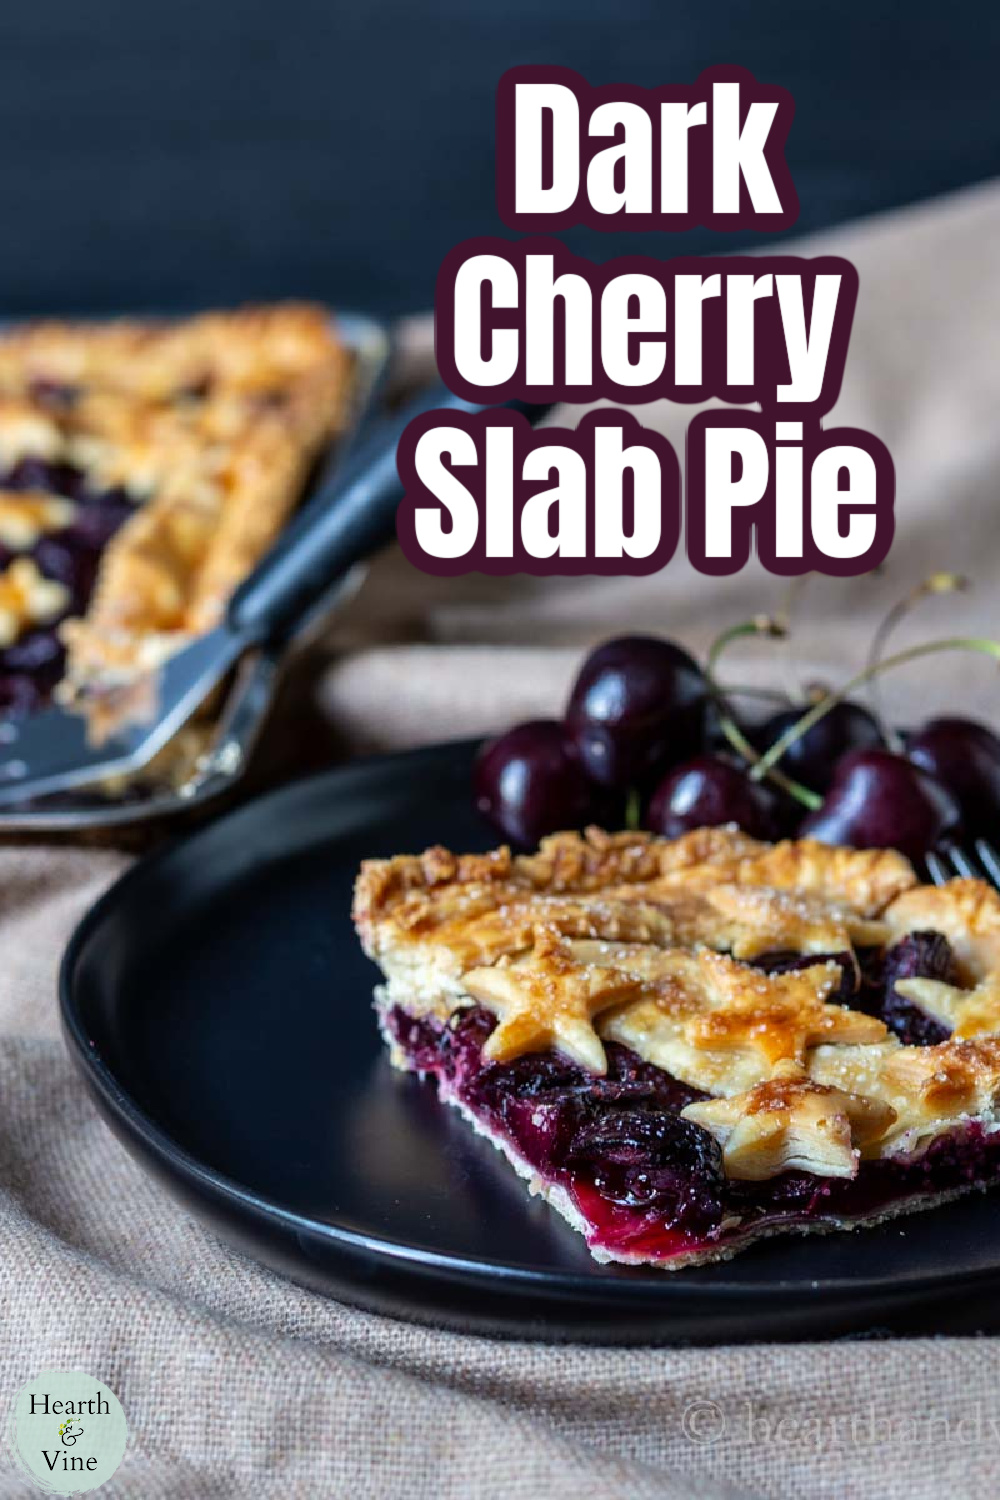
    This cherry slab pie is the perfect choice for a tasty and easy dessert. With a flaky crust including cut-out stars and a sweet dark cherry filling, it's sure to be a hit with family and friends.

    Corner slice of cherry slab pie on a black plate with a few fresh cherries and the entire slab in the background.

    Next to peaches, black cherries are my favorite summer fruit. We love snacking on them, enjoying their sweet and tart flavor.

    I made this patriotic cherry slab pie for a party at my sister's on July 4th.  I used store-bought pie crust to save time, but you can use your favorite pie crust recipe; just know this one used two packages, or four pie shells.

    I like a slab pie because it can feed a crowd, and the ratio of filling to crust is better, in my opinion.

    Pitting a cherry with a straw.
    Paper straw
    Pitting a cherry with a wooden skewer.
    Wooden skewer

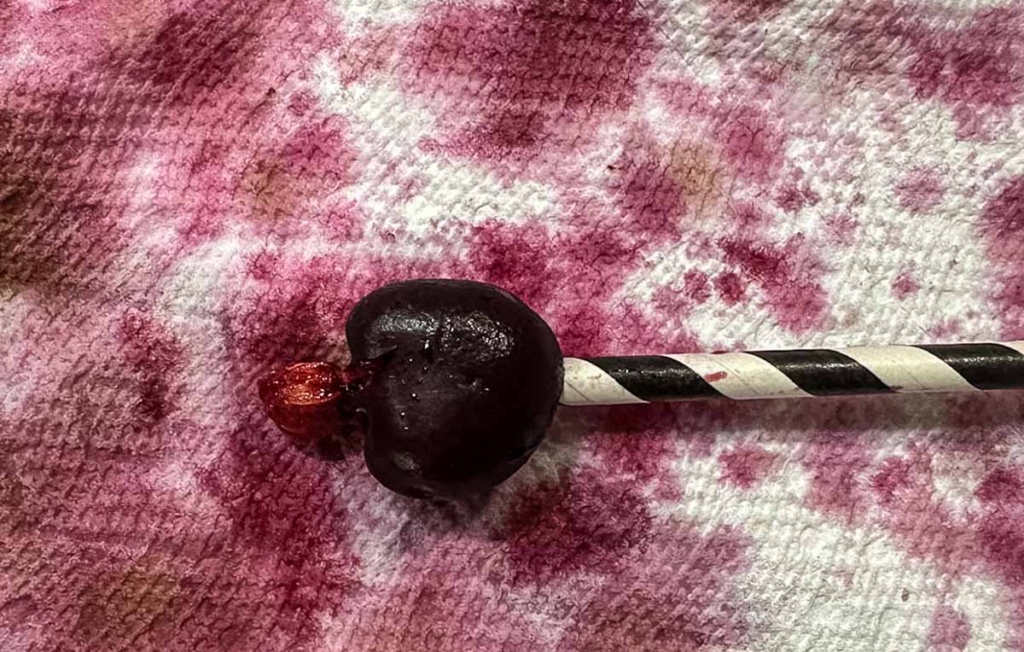
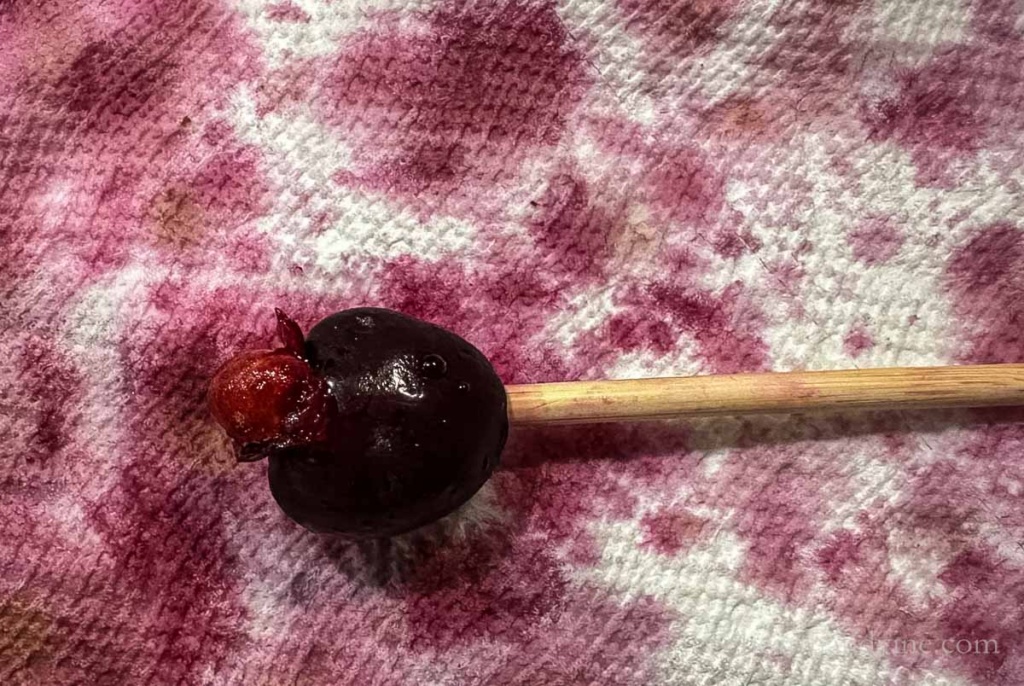
    However, working with cherries is slightly difficult as you need to pit them. I used a paper straw to start, but it didn't hold up long, so I switched to a wooden skewer. With both, I pushed up through the bottom of the cherry until the seed came out the top. Of course, you can always use a professional cherry pitter.

    Two bowls. One with pitted cherries and one with the stems and pits.

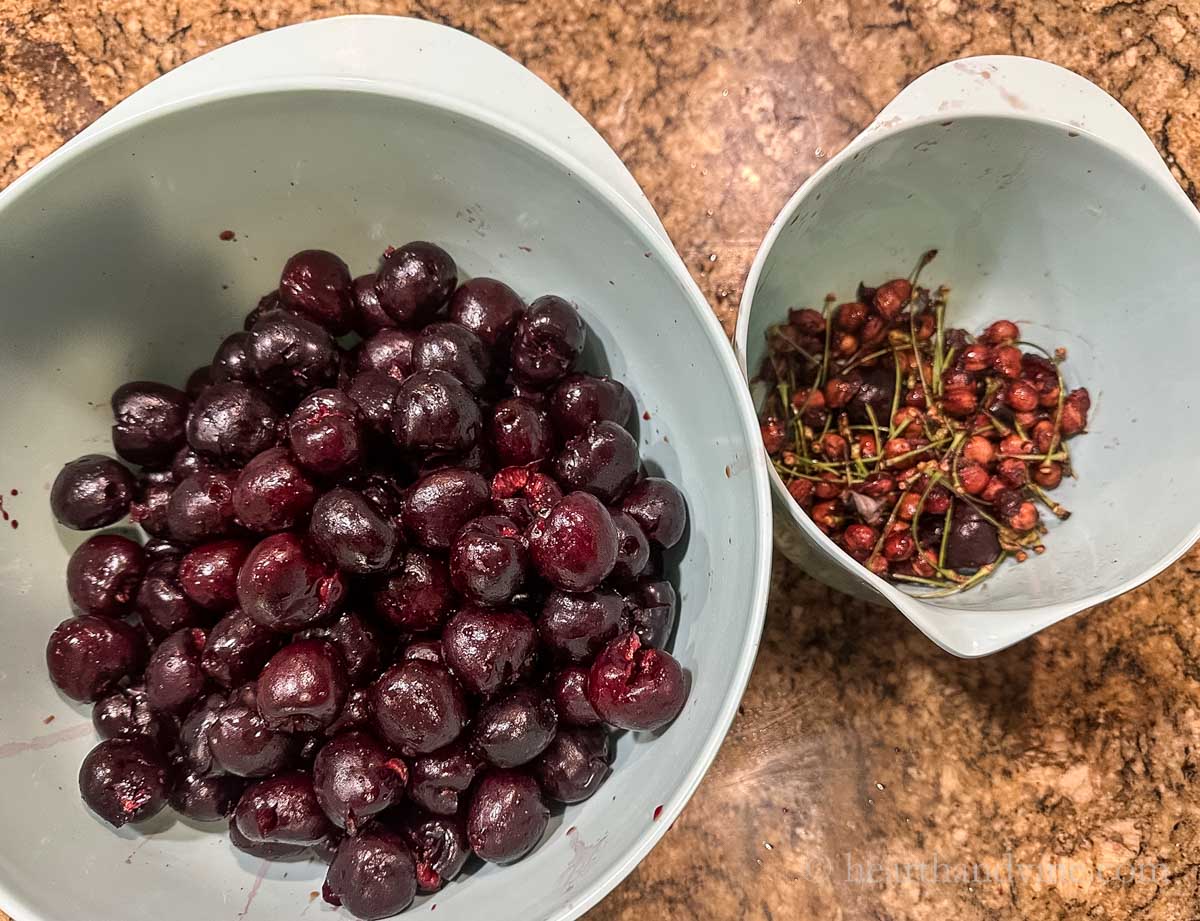
    Here's what 3 pounds of pitted cherries look like.

    Newsletter Signup
    Join Our Newsletter List!

    Be the first to receive new posts and get access to our Subscribers Only Page.

    More Great Cherry Recipes

    • Black Cherry Crisp
    • Cherry Loaf Cake
    • Cherry Pistachio Granola

    Ingredients

    • 2 packages Pie Dough (refrigerated)
    • 3 pounds Dark Cherries (pitted) about 6 cups
    • 2 tablespoons Lemon juice
    • 1/4 cup Cornstarch
    • 1 egg plus 1 T of water to make an egg wash
    • 2 tablespoons Coarse sugar
    Pitted cherries with lemon juice, sugar and cornstarch.

    How to Make a Cherry Slab Pie

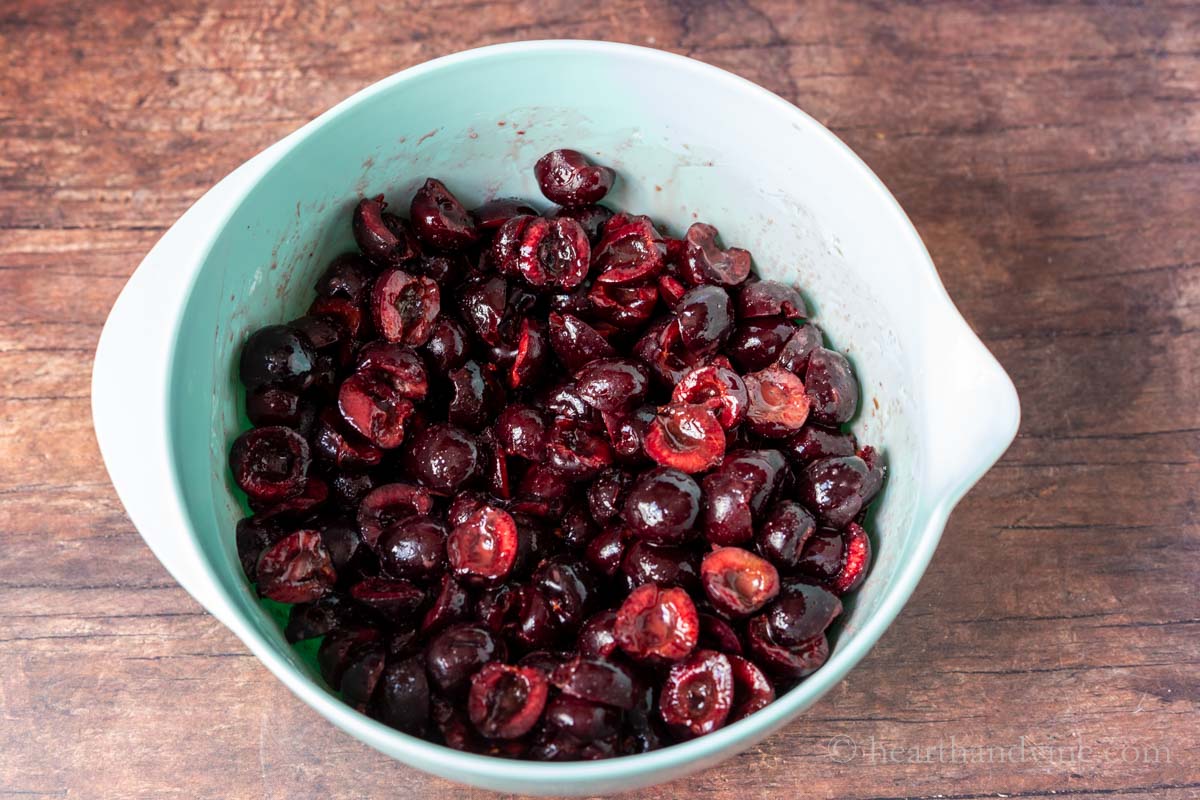
    Step 1. Pit the cherries. Cut them in half and place them into a large bowl with lemon juice, sugar, and cornstarch. Stir well, then let them sit while you work on the crust.

    I like adding a little lemon juice; however, you could also add a pinch of cinnamon or almond extract to enhance the cherry filling.

    Three refrigerated pie crusts used to cover the bottom and sides of a 10 x 15 inch baking pan.

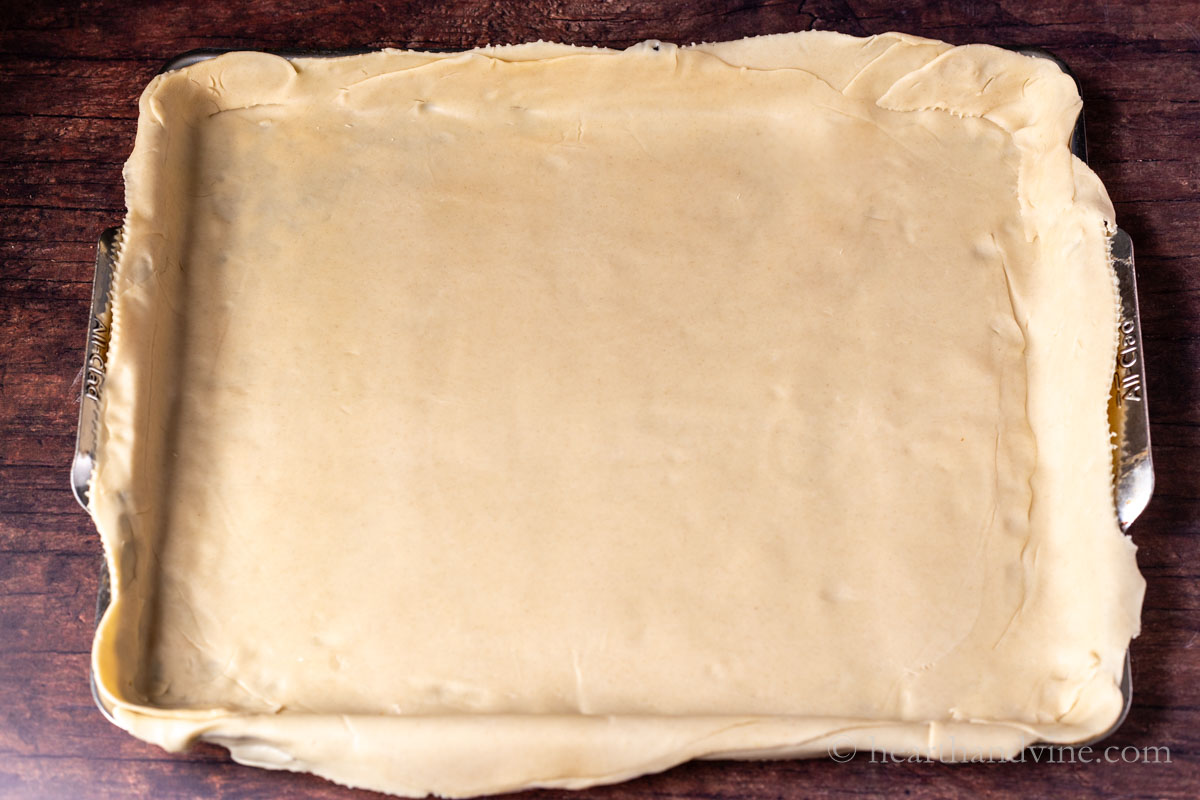
    Step 2. Roll out two shells into a rectangle and use a third to add to it so that you can completely cover a jelly roll pan. (15" x 10") You can do this on a lightly floured surface or on a piece of parchment paper.

    Cherry pie filling placed into a dough covered pan.

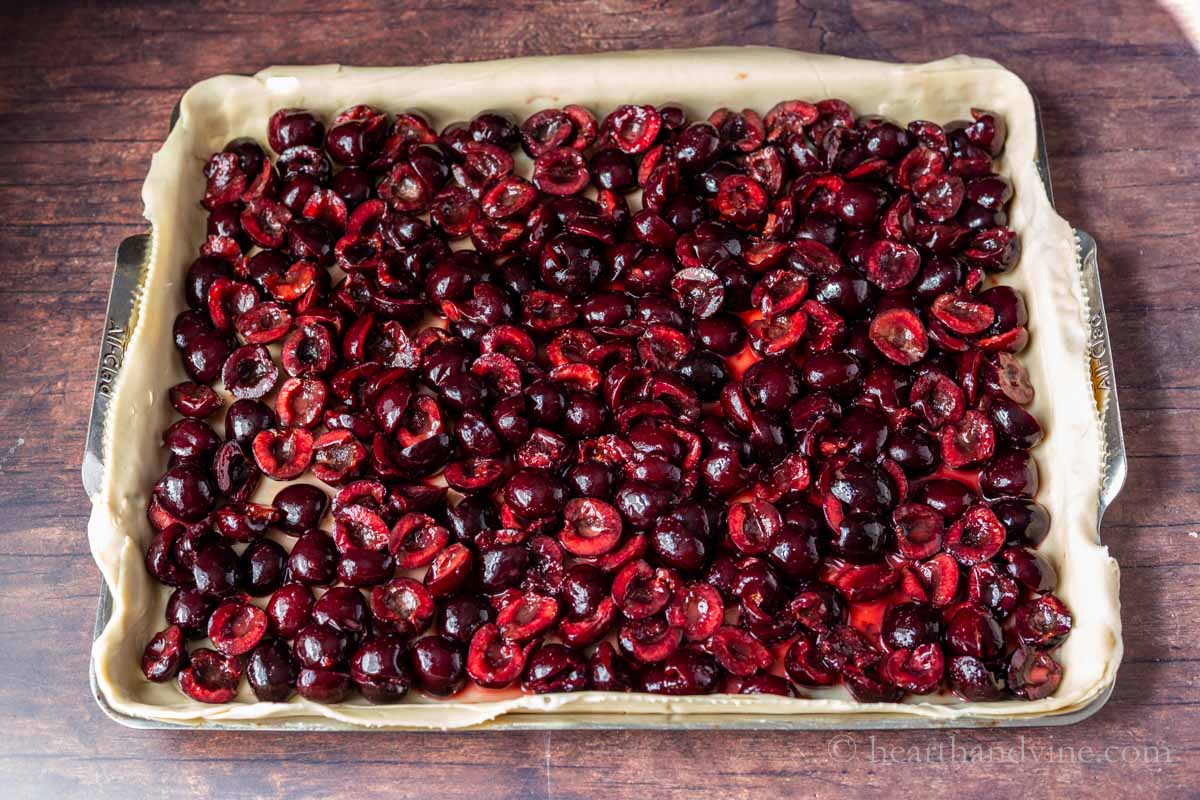
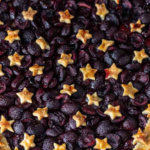
    Step 3. Add the cherry pie filling. Spread them out as evenly as possible, but don't worry if you have a little bare space.

    The pie just before being baked.

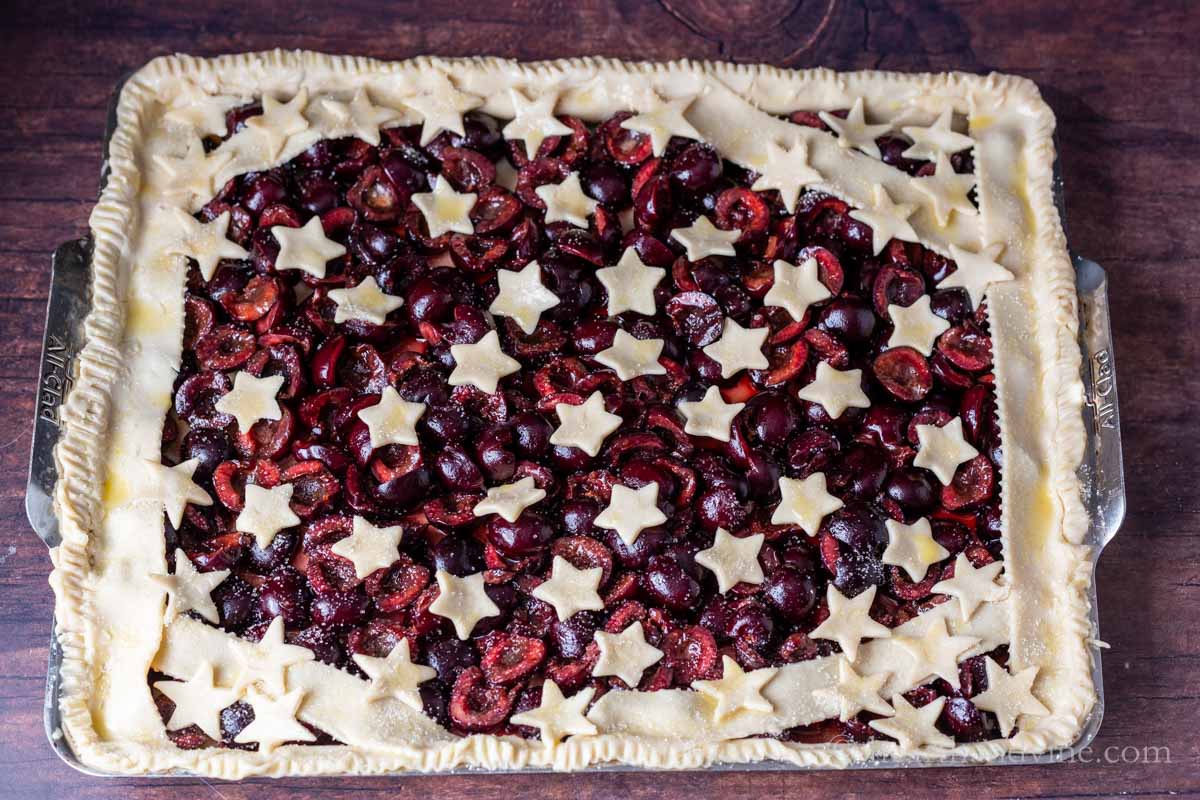
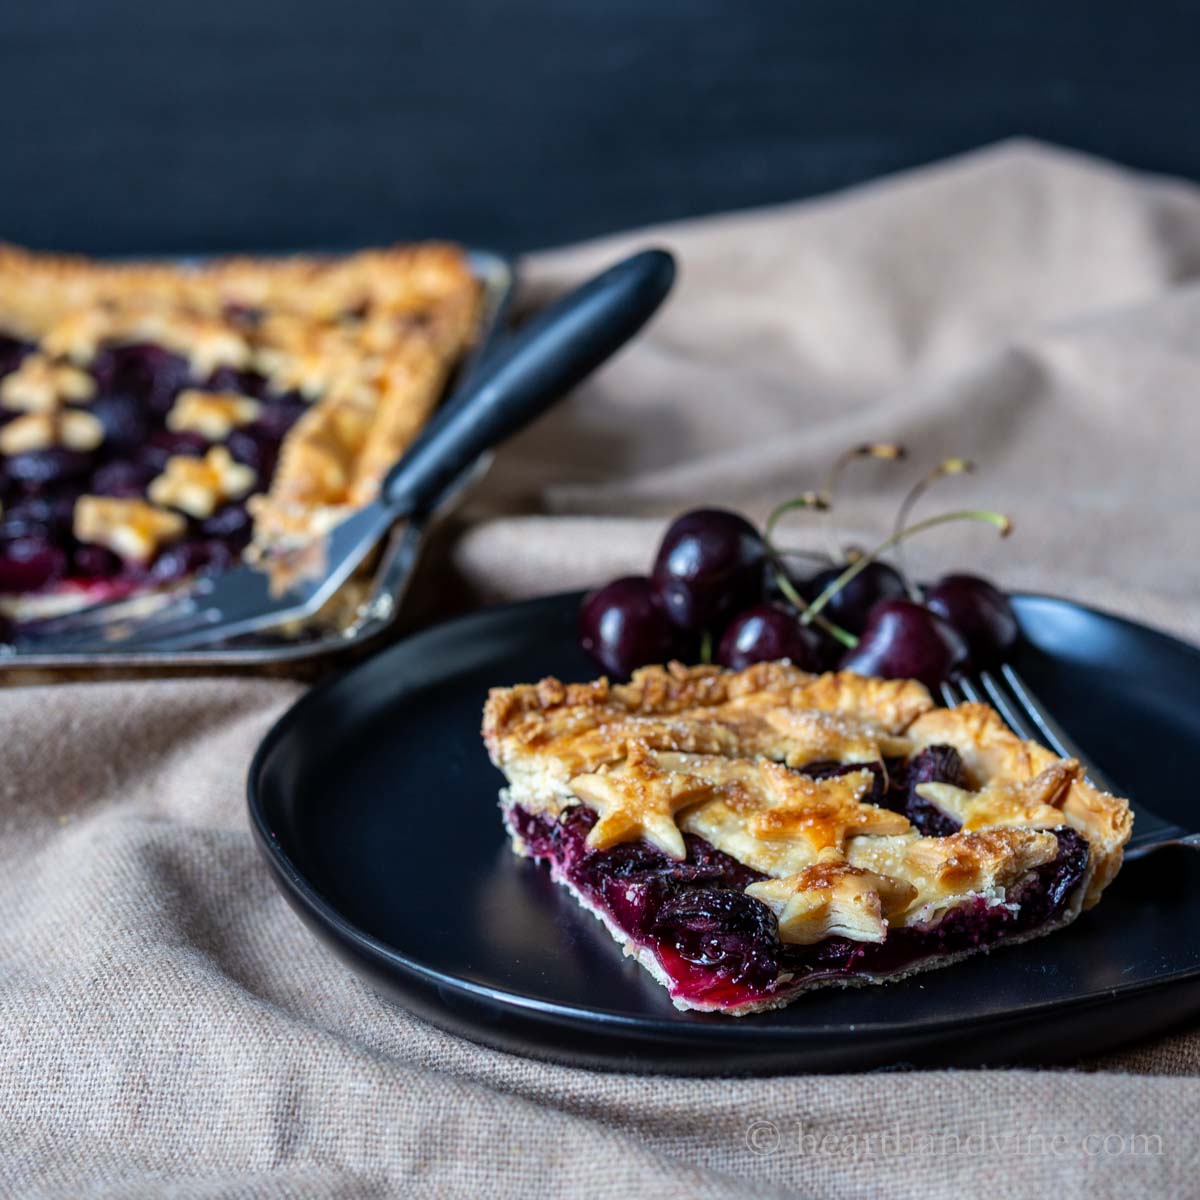
    Step 4. Instead of using a full top crust, I used the last pie crust shell to cut strips and stars to decorate the sides and top. You can use a little water with your fingers to help the edges stick together.

    Step 5. Then use a fork or your fingers to crimp the edges.

    Step 6. Whisk an egg with one tablespoon of water to brush on all of the dough, including the stars. Then, drizzle coarse sugar over the top.

    Aerial view of the full cherry slab pie after being baked in a jelly roll pan.

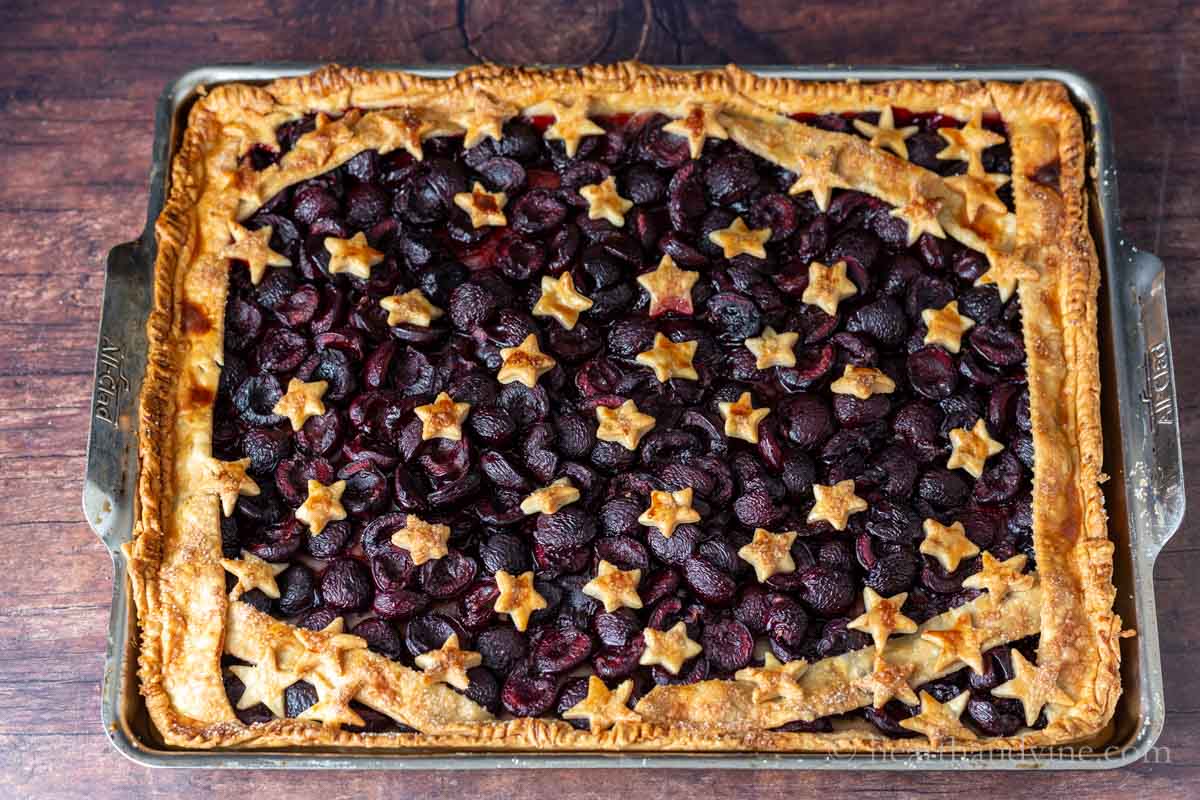
    Step 7. Bake the pie for 50 minutes at 375 degrees until the crust is golden brown and the filling is bubbling.

    Serving of cherry slab pie with a fork lifting a bite.

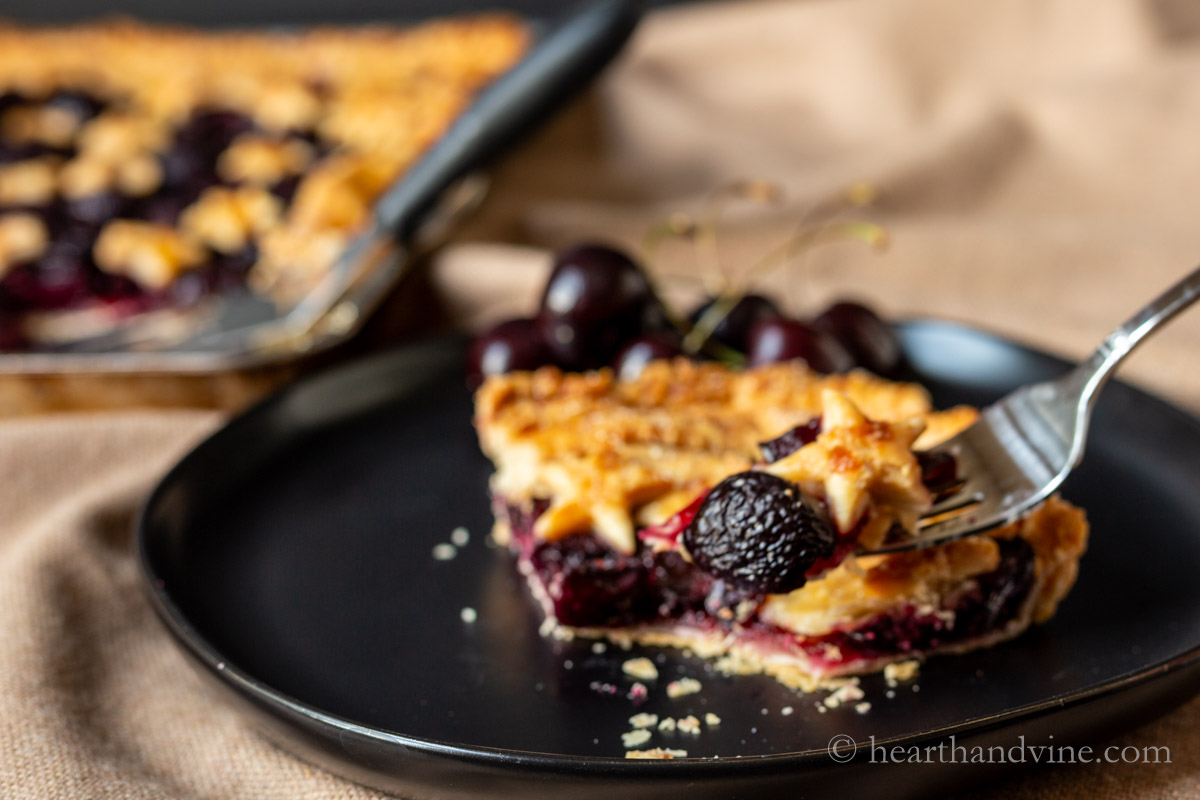
    I like to let the pie cool slightly before covering it with plastic wrap and setting it in the refrigerator to firm up.  Then I'll bring it back out to get to room temperature for serving.

    Serve it with a scoop of vanilla ice cream on the side if you wish. Just know that it's pretty fantastic all on its own.

    Patti signature
    Corner slice of cherry slab pie.

    Cherry Slab Pie Recipe that Feeds a Crowd

    This cherry slab pie recipe has a great filling to crust ratio and makes enough to serve 20 large or 40 small portions.
    Print Recipe Pin Recipe
    Prep Time 1 hour hr
    Cook Time 50 minutes mins
    refrigeration 1 hour hr
    Total Time 2 hours hrs 50 minutes mins
    Course Dessert
    Cuisine American
    Servings 20
    Calories 273 kcal

    Equipment

    • jelly roll pan
    • Small star shape cookie cutters

    Ingredients
      

    • 2 packages Pie Dough (refrigerated)
    • 3 pounds Dark Cherries (pitted) about 6 cups
    • 2 tablespoons Lemon juice
    • 1/4 cup Cornstarch
    • 1 egg plus 1 T of water to make an egg wash
    • 2 tablespoons Coarse sugar

    Instructions
     

    • Pit clean cherries and cut them in half.
    • Place the cherries in a large bowl then add sugar, lemon juice, and cornstarch. Mix well. Set aside.
    • Preheat the oven to 375 degrees
    • Roll out two pie shells in a rectangular shape to cover most of the jelly roll pan. Use a third shell to add to the top and bottom to complete the coverage.
    • Press the rolled pie shells into the pan and cut off any excess dough.
    • Add the cherry filling mixture to the pie dough.
    • Use the final pie shell to cut a couple of strips for the edges and several stars in different shapes.
    • Add the cut pie dough and star shapes to the pan using a little water where the dough meets to help it stick together. Crimp the sides with a fork or your fingers.
    • Make an egg wash by whisking an egg and 1 tablespoon of water together in a small bowl. Brush all over the crust and star shapes.
    • Sprinkle coarse sugar all over the top.
    • Bake for 50 minutes until the crust is golden and the filling is bubbling.
    • Remove and allow the pie to cool for 30 minutes before setting it into the refrigerator for 1 hour to set up.
    • Bring the cherry slab pie out an hour before serving to come back to room temperature.

    Notes

    You can keep the slab pie covered on the counter for a day or two.
    Or, you can refrigerate it for a few extra days.

    Nutrition

    Serving: 1gCalories: 273kcalCarbohydrates: 35gProtein: 5gFat: 13gSaturated Fat: 4gPolyunsaturated Fat: 2gMonounsaturated Fat: 6gTrans Fat: 0.004gCholesterol: 45mgSodium: 197mgPotassium: 212mgFiber: 3gSugar: 10gVitamin A: 110IUVitamin C: 5mgCalcium: 24mgIron: 2mg

    Nutritional information is provided as a courtesy and is an estimate only. This information comes from online calculators. Although attempts have been made to provide accurate nutritional information, these figures are only estimates.

    Tried this recipe?Tag @hearthnvine on Instagram
    Corner serving of a cherry slab pie on a black plate with a few fresh cherries.
    « DIY Wood Essential Oil Diffuser
    How to Make an Herbal Tea Infusion »

    About Patti Estep

    Patti is the creator of Hearth and Vine, a home and garden blog filled with projects to inspire your creative side. She loves crafting, gardening, decorating and entertaining at her home in Pennsylvania. When she is not working on a project at home or searching for treasures at nurseries and thrift stores with her girlfriends, you’ll probably find her with family and friends, at a restaurant, or home party enjoying new and different food adventures.

    Reader Interactions

    Leave a Reply Cancel reply

    Your email address will not be published. Required fields are marked *

    Recipe Rating


    Primary Sidebar

    Patti Estep Profile Picture

    Hi!

    I'm Patti

    Join me to create lots of fun DIY projects, including crafts, gardening, home decor, and tasty recipes

    More about me

    Popular Posts

    • Baked zucchini bite on a slated tray with a bowl of horseradish sauce.
      Make Tasty Zucchini Bites in Under an Hour
    • Three tin cans in descending sizes hanging from twine.
      DIY Wind Chimes with Tin Cans
    • Blue jean crossover bag
      DIY Crossbody Bag from Jeans
    • Ham barbecue sandwich on plate
      Chipped Ham Barbecue Sandwiches - A Pittsburgh Favorite
    • Echievera planter
      What to do With a Stretched Succulent
    • Make a Mason Jar Oil Candle Lamp with botanicals and essential oils. ~ gardenmatter.com
      DIY Oil Candle - Gifts for the Holidays

    Footer

    ^ back to top

    About
    Contact
    Privacy Policy
    Disclosure Policy

    Sign Up Here!
    for our
    newsletter &
    special offers

    Follow Me

    facebook
    Pinterest
    instagram

    As an Amazon Associate, I earn from qualifying purchases. i.e. as an Amazon Associate, I earn from qualifying purchases.

    Copyright © 2025 Hearth and Vine

    Rate This Recipe

    Your vote:


    A rating is required
    A name is required
    An email is required