• Skip to primary navigation
  • Skip to main content
  • Skip to primary sidebar
  • Home
  • DIY Projects
    • Homemade Bath and Body
    • Sewing
    • Flower Crafts/Decor
    • Thrift Store/Vintage
  • Gardening
    • Flower Gardens
    • Container Gardening
    • Houseplants
    • Indoor Gardening
    • Landscaping
    • DIY Garden Art
  • Decorate
    • Room Makeovers
    • Spring Decor
    • Summer Decor
    • Fall Decor
    • Winter Decor
    • Home Decor Projects
  • Recipes
    • Breakfast Recipes
    • Lunch Recipes
    • Dinner Recipes
    • Dessert
    • Salad Recipes
    • Soups and Stews
    • Side Dish Recipes
    • Appetizers and Snacks
    • Healthy Recipes
  • Holidays
    • Valentine's Day
    • Easter
    • Mother's Day
    • Halloween
    • Thanksgiving
    • Christmas
Hearth and Vine
menu icon
go to homepage
subscribe
search icon
Homepage link
  • Home
  • About Hearth and Vine
  • DIY Projects
    • ...Flower/Gardening Crafts
    • ... Bath and Body
    • ...Sewing/Fabric Crafts
    • ...Thrift Store/Upcycle
  • Gardening
    • ...Flower Gardens
    • ...Container Gardening
    • ...Indoor Gardening
    • ...DIY Garden Art
  • Decorate
    • ...Home Decor Projects
    • ...Spring Decor
    • ...Summer Decor
    • ...Fall Decor
    • ...Winter Decor
    • ...Room Makeovers
  • Recipes
    • ...Appetizers and Snacks
    • ...Dinner Recipes
    • ...Side Dish Recipes
    • ...Salad Recipes
    • ...Dessert
    • ...Drinks
  • Holidays
    • ...Valentine's Day
    • ...Easter
    • ...Mother's Day
    • ...Halloween
    • ...Thanksgiving
    • ...Christmas
  • Subscribe
  • Instagram
    • Email
    • Facebook
    • Instagram
    • Pinterest
    • Twitter
  • ×

    Home » DIY Projects

    How to Make Dipped Candles

    November 23, 2022 by Patti Estep Leave a Comment

    Jump to How-to Card
    Two bundles of hand dipped candles wrapped with raffia.

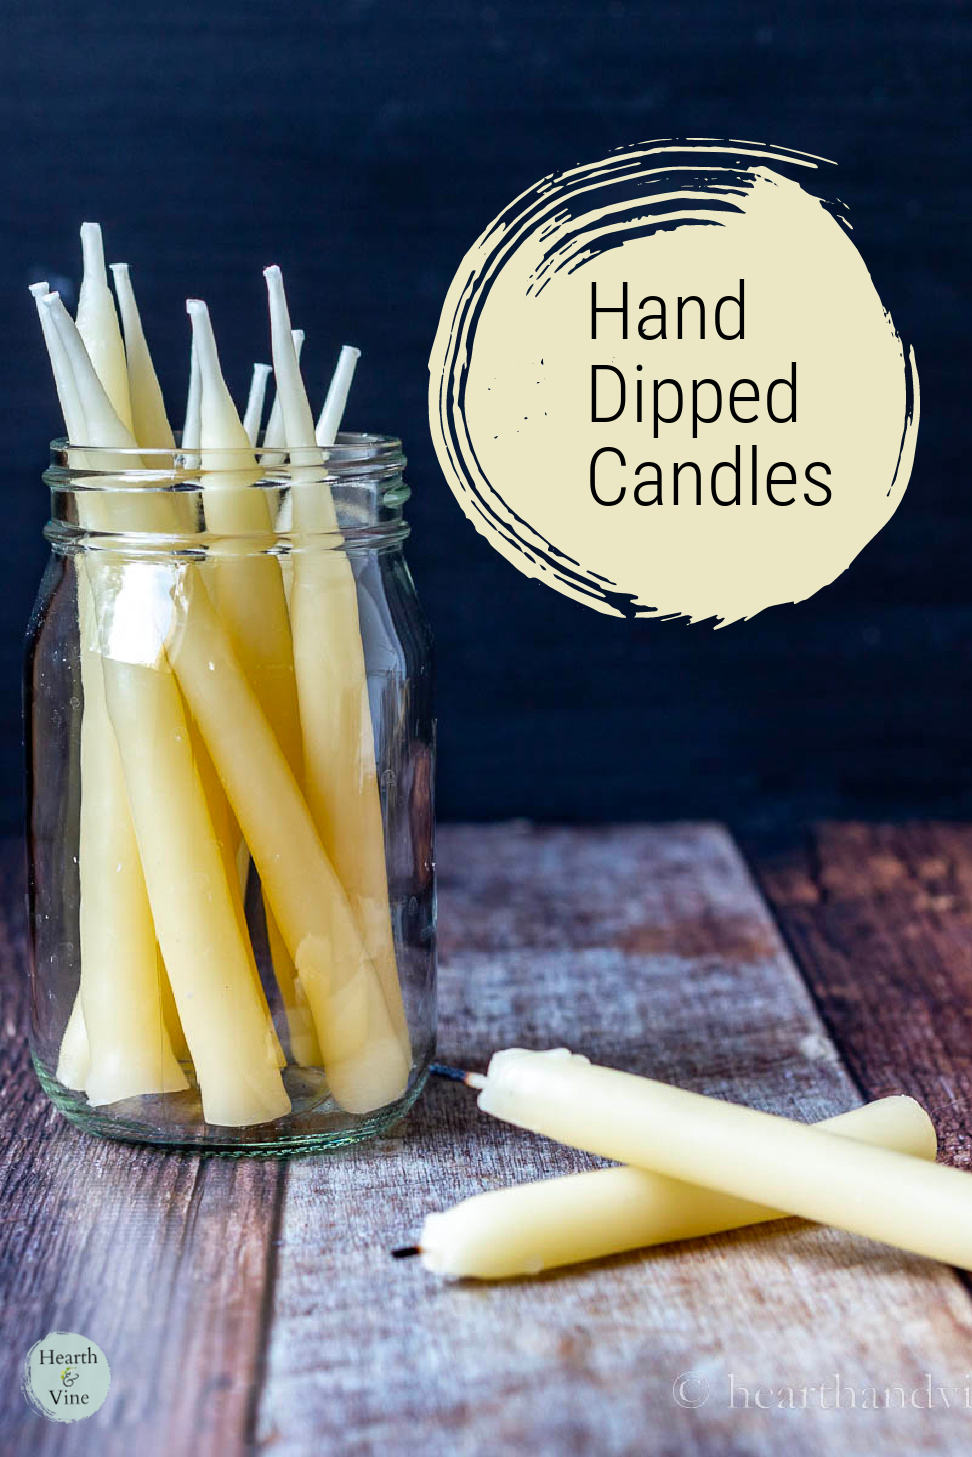
    Have you ever tried hand dipping candles with beeswax? This old-fashioned craft is a fun and easy way to spend the afternoon. Great for holiday gift giving or just enjoying their natural beauty at home.

    Two bundles of hand dipped beeswax taper candles.

    Here's another old fashioned craft that I have never tried but always wanted to. Making your own taper candles with beeswax that are hand dipped.

    This post contains some affiliate links (that means if you make a purchase after clicking a link, there’s no additional cost to you, but I will earn a very small commission. ) i.e. as an Amazon Associate, I earn from qualifying purchases. Click here to read my full disclosure policy.

    Newsletter Signup
    Join Our Newsletter List!

    Be the first to receive new posts and get access to our Subscribers Only Page.

    Pot with tall can, spool of wicking, scissors, bag of beeswax pellets and a candle pitcher.

    The biggest problem is finding a can or metal container that is tall because your candles can only be as long as the height of the wax. I ended up using a 46 ounce tomato juice can and it worked pretty well but as you can see the candles are only about 6-7 inches long.

    Tall can with beeswax pellets in a pot of water on the stove.

    You also have to melt a fair amount of wax in the can and that can get pretty pricey. Especially considering you won't be using it all. However, you can save it for other projects. You could try soy wax or paraffin wax but all natural beeswax seemed like the right choice for this craft.

    Small piece of wood with wicking wrapped around it.

    Hand-Dipping Candles

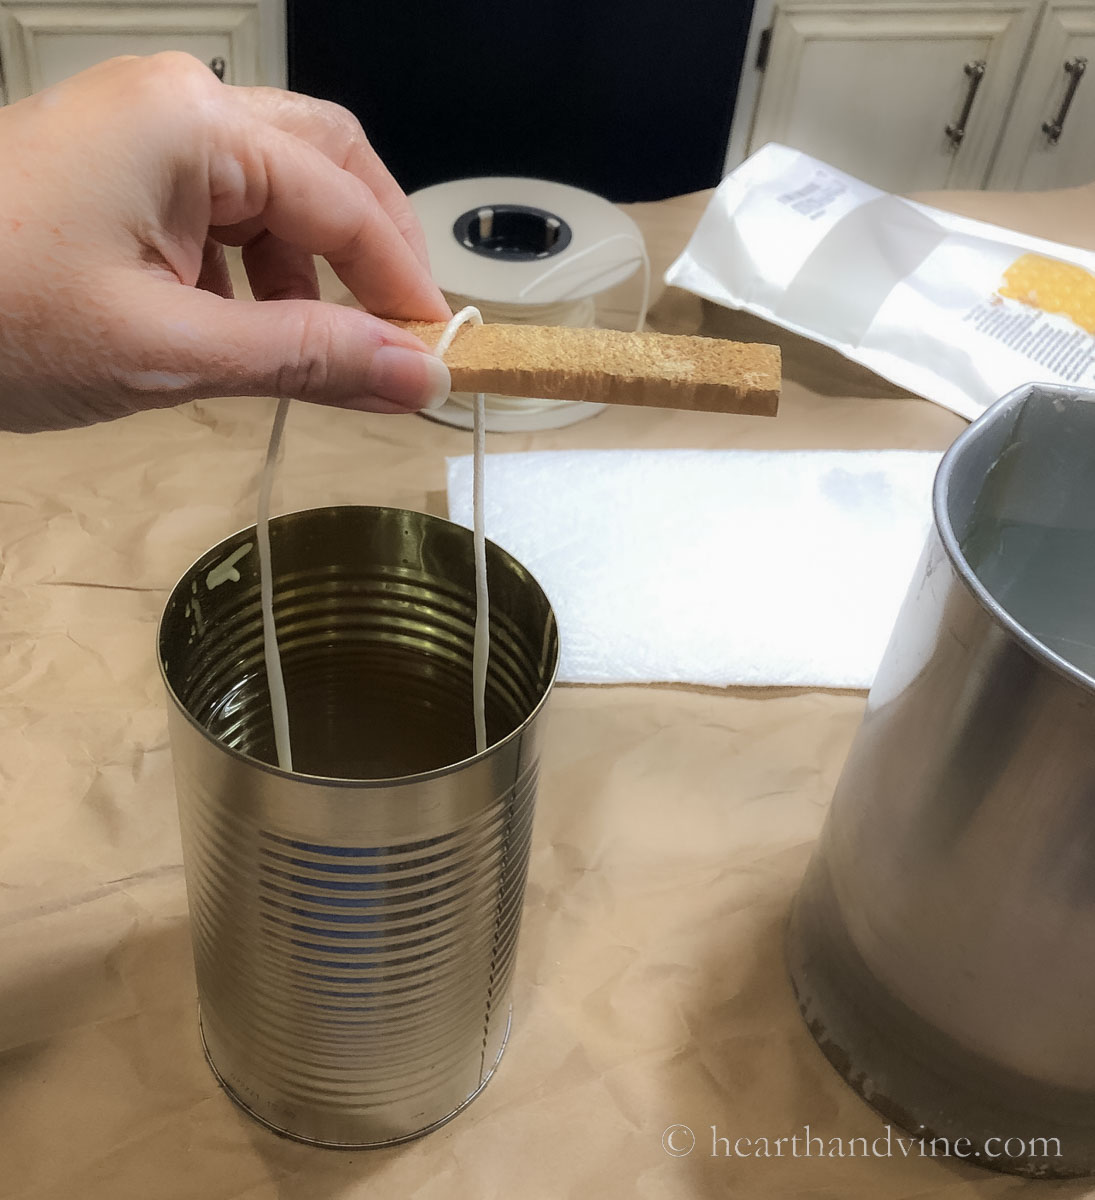
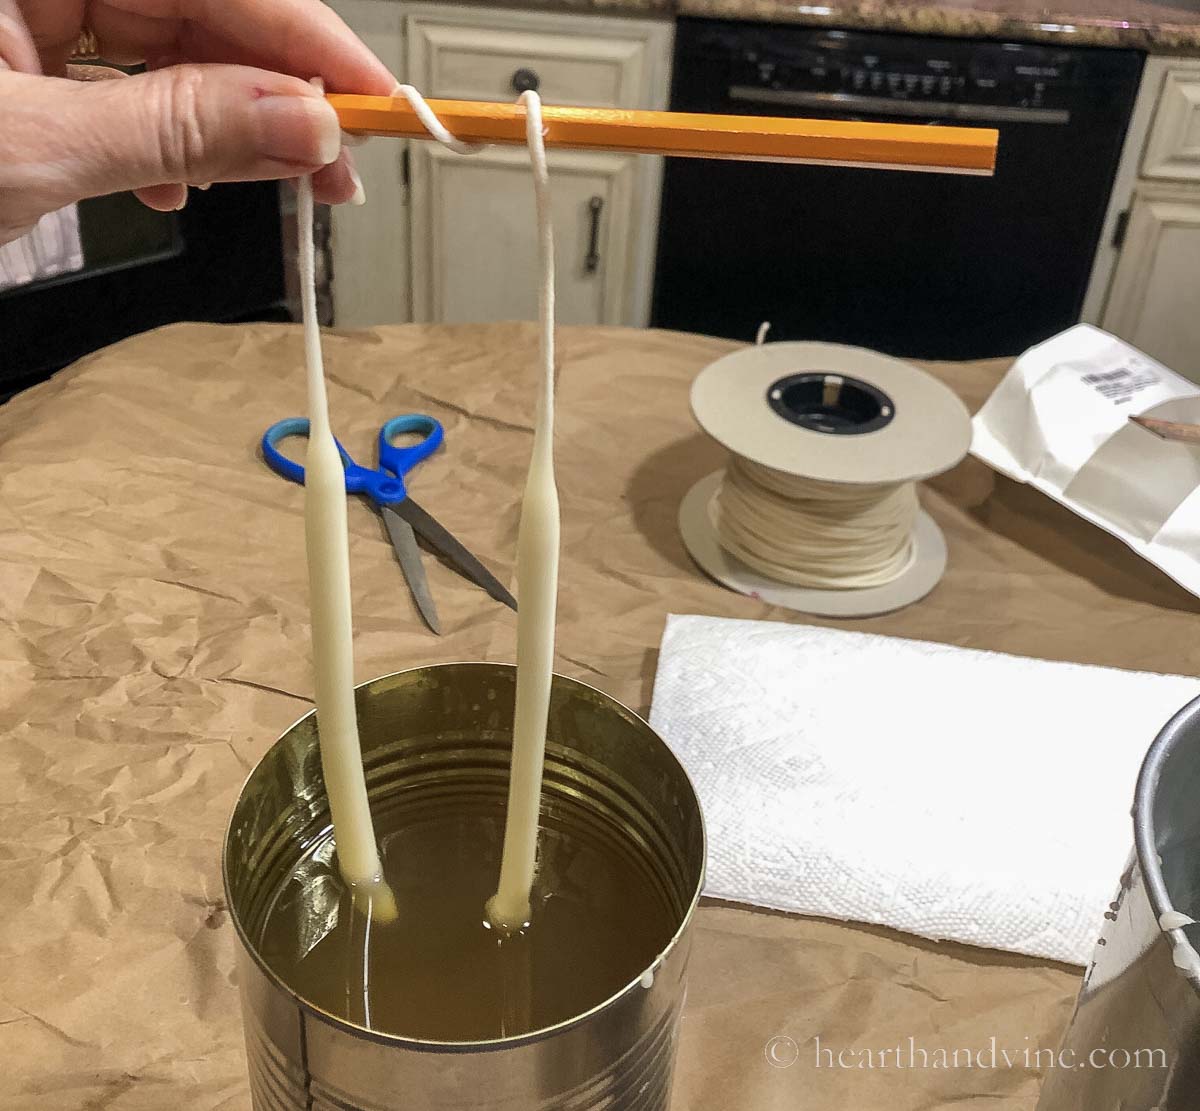
    Start by making a holder with a long length of wick wrapped around it as shown above. My wick was about 20 inches and I had a piece of wood but you could use something as simple as a pencil.

    Make sure each length of the wick is even and a little longer than the melted wax so that you can dip it all the way down to the end of the can.

    Wicking dipped into melted wax.

    Dip the wicks into the beeswax and then lift it up. Let the wax drip a little before dipping them into another can of cold water. Then repeat.

    Hand dipping candles into beeswax several times coating it to create a candle.

    After several dips, you will see the candles emerging with layer upon layer of wax. They may get a little crooked but you can easily straighten them out with your fingers.

    Some tutorials suggest tying hardware nuts or washers to the end. The weight of the nut helps keep it straight. However, I didn't use a weight and it didn't seem to be a problem.

    Six paint cans stacked three and three about 15 inches apart with a piece of wood across the top to hang the candles for drying.

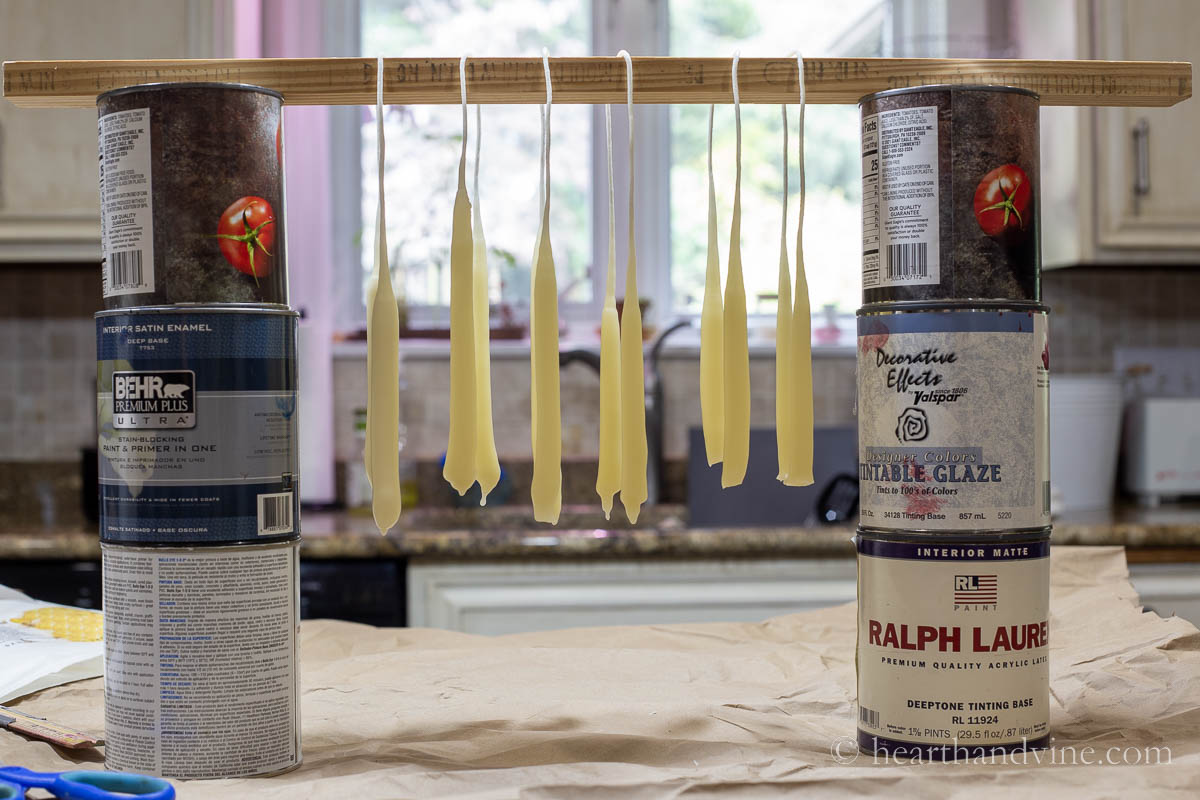
    Create a makeshift drying rack with some cans and a piece of wood. I was able to hang six pairs easily on the wood and could have added several more.

    A set of hand dipped candles on slate and a knife cutting the ends.

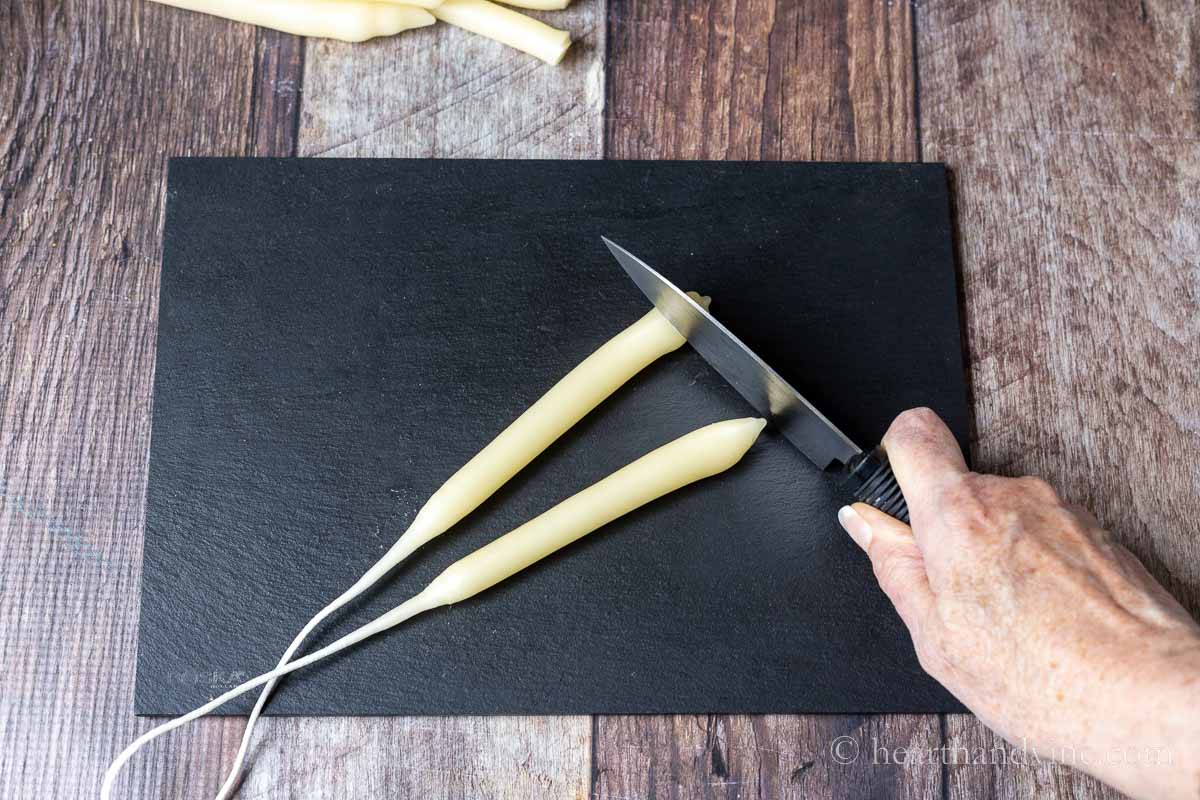
    When the candles have cooled and hardened a bit you can trim excess wax from the bottoms and cut the wicks. Or you could leave the wicks attached just as you might see in country stores.

    Two taper beeswax candles lit in small candle holders.

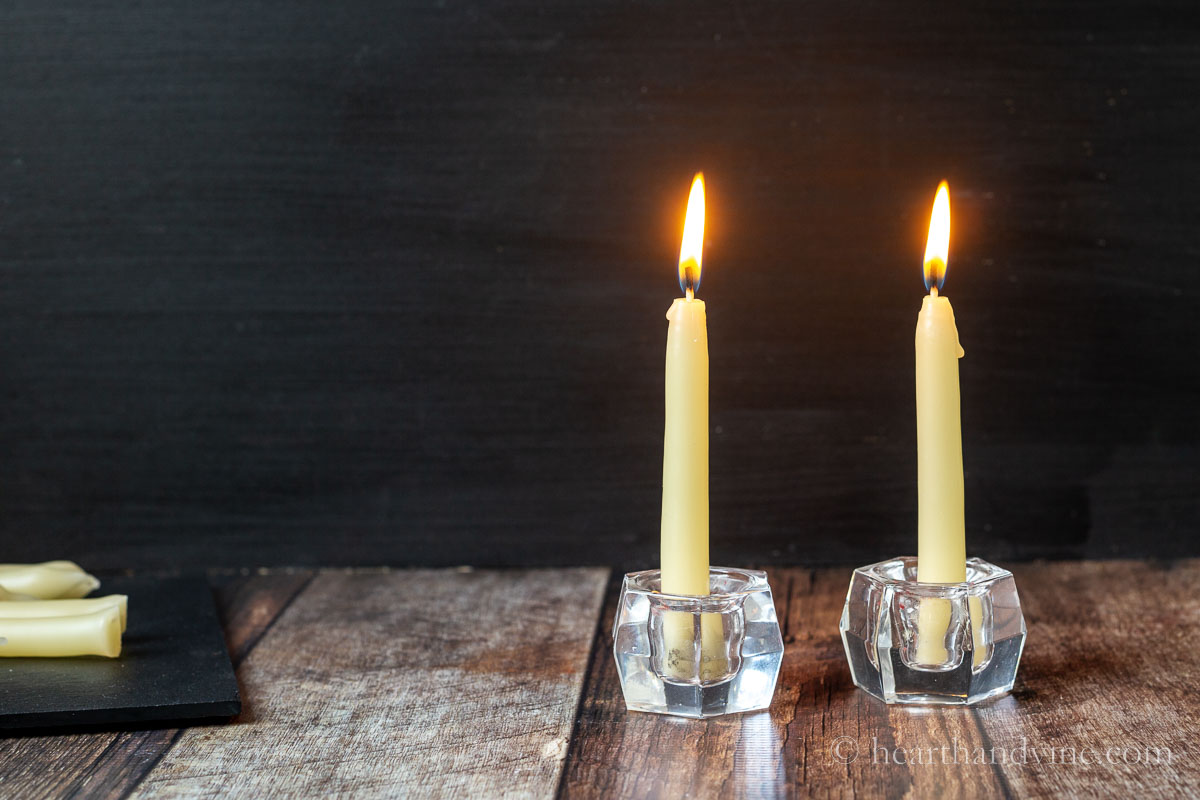
    If you want to place them into candle holders but find that they are a little too thin try lighting one and letting some of the wax drip into the holder. Then place the candle in and hold it in place. After a minute, the wax will harden and keep the candle upright.

    Here's another way to display them in teacups.

    Bundles of hand dipped candles and two in front with burnt wicks.

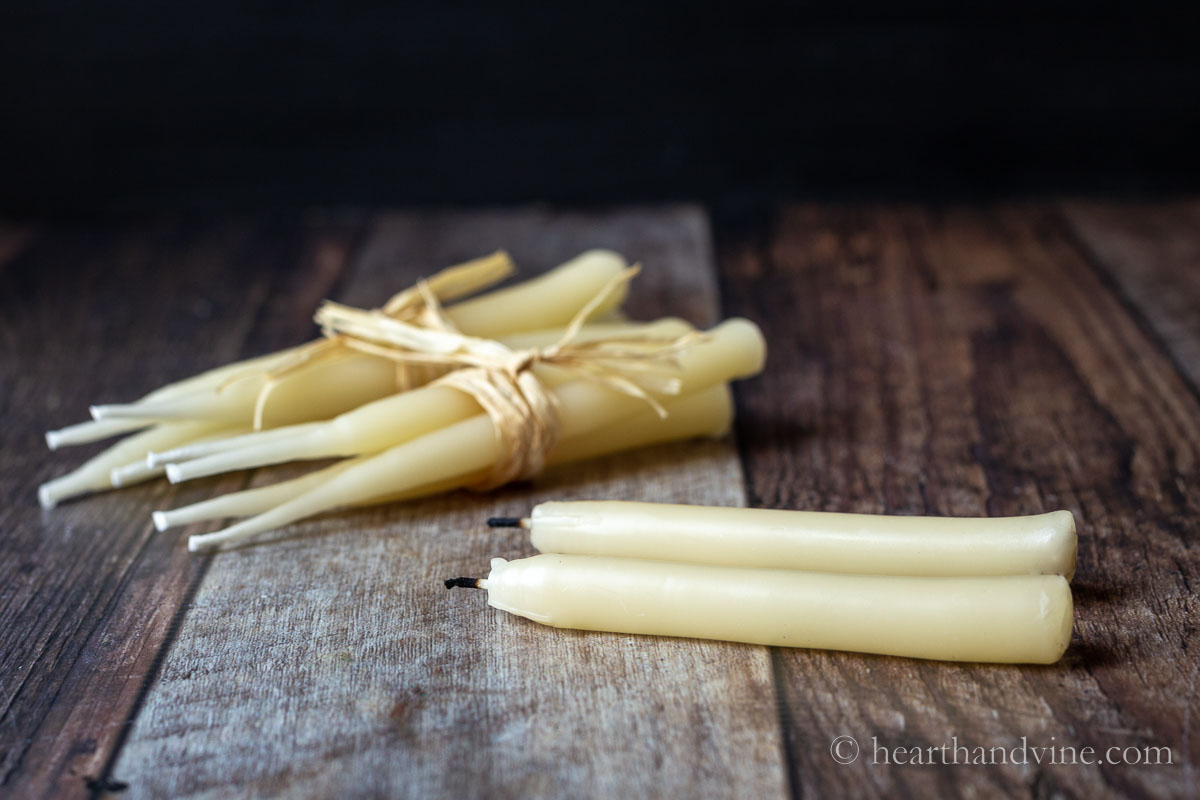
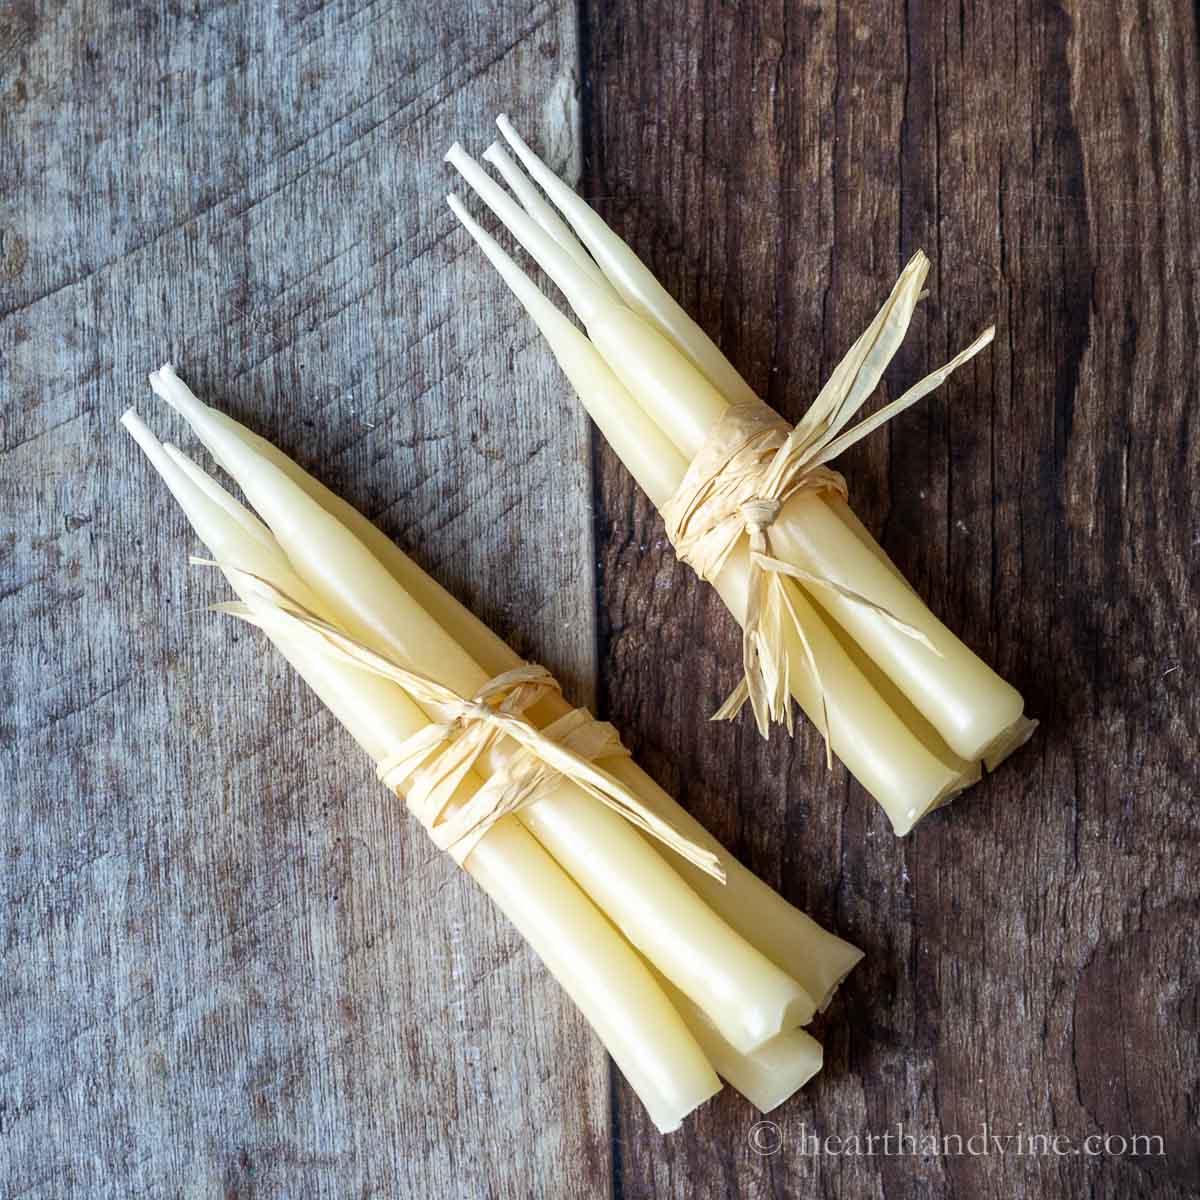
    You might want to wrap these beeswax taper candles in bundles for gift giving but should definitely keep some for yourself.

    Patti signature

    More Unique Candle Crafts

    • DIY Oil Candle Lamp
    • Orange Peel Candles
    • Wine Bottle Candles
    • Pressed Lavender Candles
    A jar of hand dipped beeswax candles and two on the table.
    Two bundles of hand dipped beeswax taper candles.
    Print
    5 from 1 vote

    How to Make Dipped Candles with Beeswax
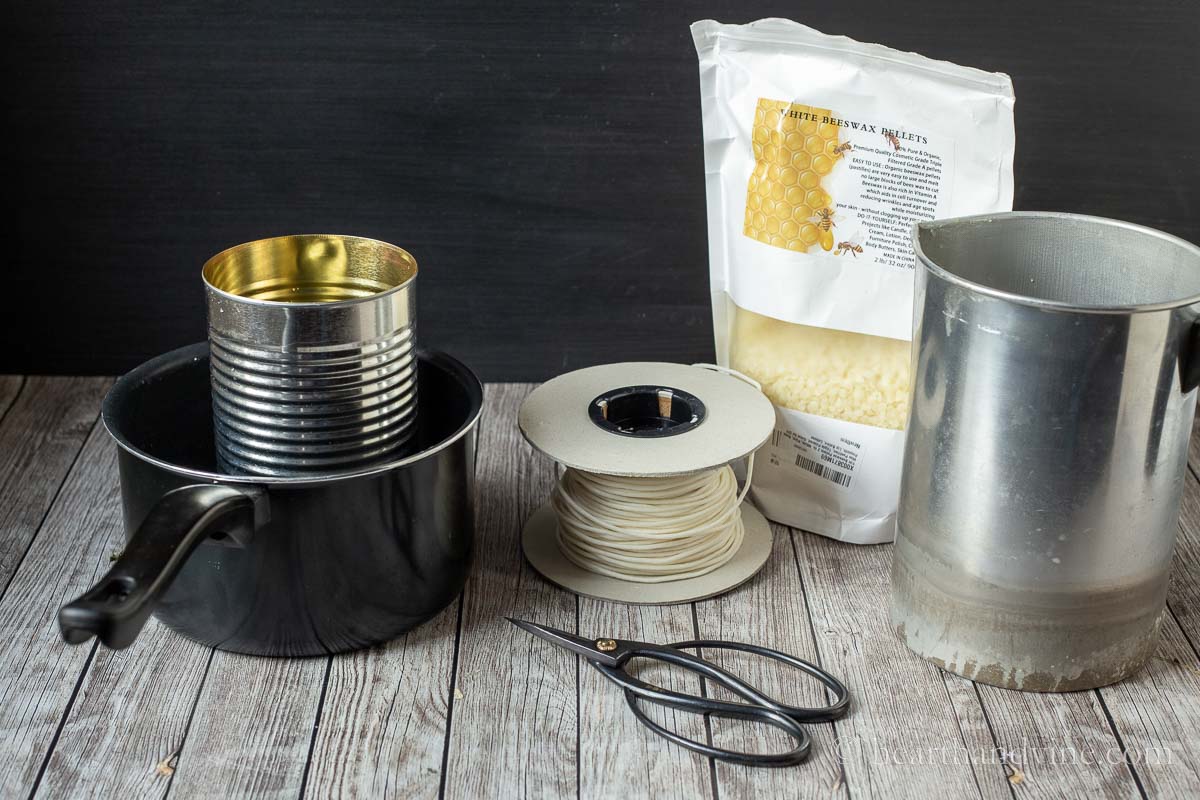
    Learn how to make dipped candles with beeswax, wicking and a couple of pots in your own home.
    Prep Time10 mins
    Active Time1 hr
    Additional Time2 hrs
    Total Time3 hrs 10 mins
    Course: DIY Projects
    Yield: 12
    Author: Patti Estep
    Cost: $10

    Equipment

    • Old pot
    • Two tall empty tin cans or another metal container like a candle pitcher
    • scissors
    • Knife
    • Small piece of wood or a pencil
    • Wood stick
    • 4 paint cans or similar size for drying station

    Materials

    • Beeswax pellets
    • Wicking

    Instructions

    • Cut a piece of wicking. Twice the length of your can's height and a few inches more. Mine was about 20 inches long.
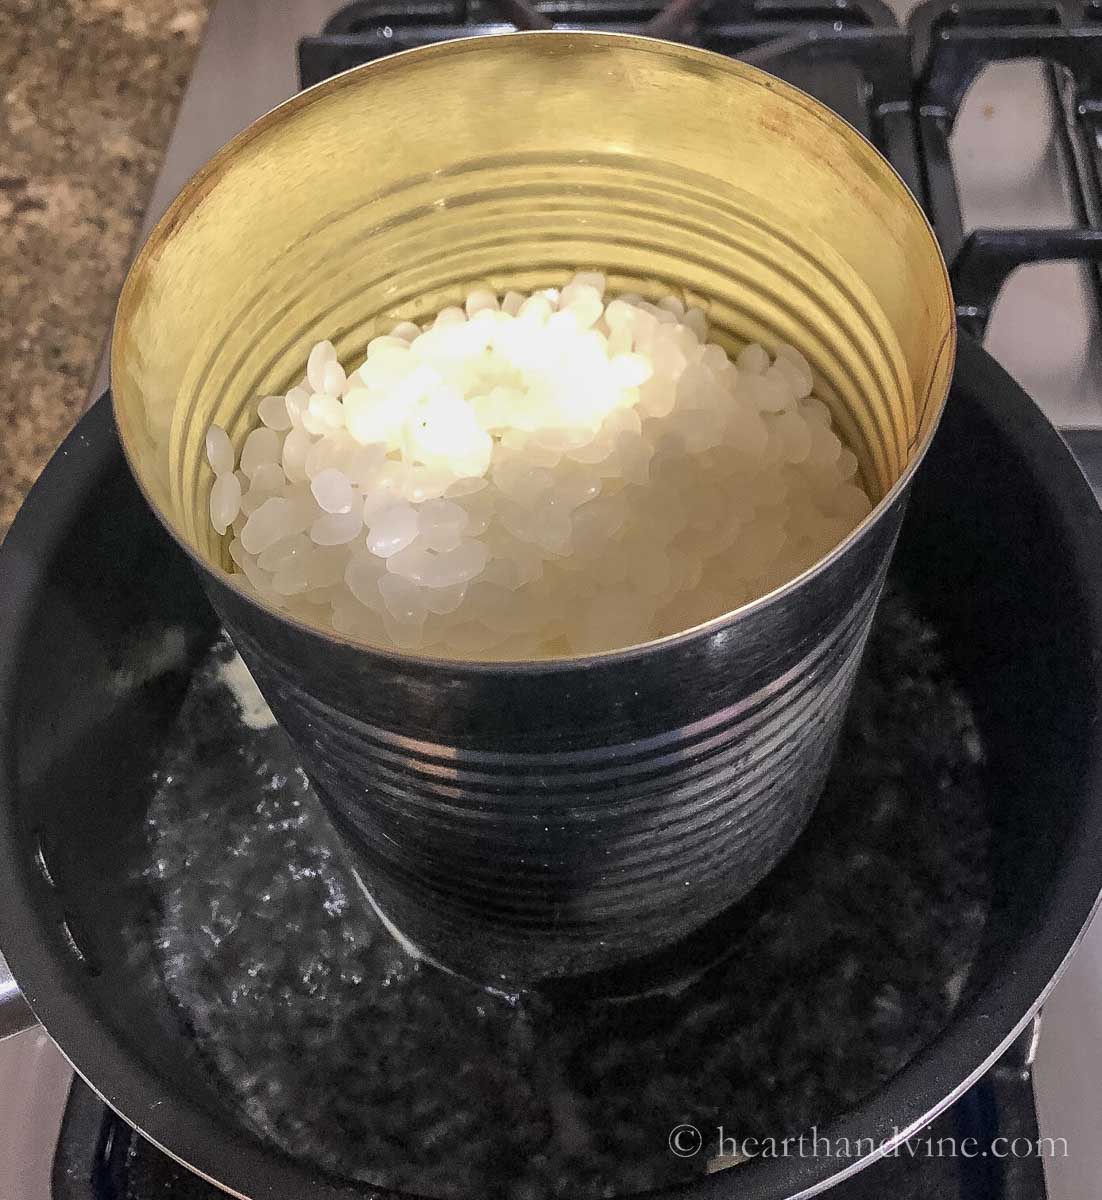
    • Melt the beeswax in a tall can set in an old pot of hot simmering water creating a double boiler on the stove.
    • Wrap the middle of the wick around a wooden stick or pencil making sure the lengths of the wick are even on each side.
    • Once the wax has melted take the second can and fill it with cold water.
    • Place the melted wax next to the can with water.
    • Then dip the two ends of the wick into the melted wax.
    • Lift up and let the wax drip a little before placing the wicks into the cold water can.
    • Continue placing the wicks into the wax and then the water until you build up enough layers of wax to create the size candle you like.
    • Allow the candles to cool on a drying rack made up of two stacked cans and a wooden stick across the top.
    • Once they have a chance to cool and harden trim the wax ends to create a nice neat bottom. Then trim the candle wicks if desired.

    Notes

    You can make the taper candles thicker by dipping them more.
    You can only make the candles as long as the can is tall so you might look around for something taller for longer candles.
    If you want to place them in candle holders but they are a little small light one, and let the wax drip into the holder then set the candle in holding with your hand until it sets up.
    You can also make these with soy wax or paraffin wax.
    You could add scent to the candles with essential oils or fragrance oils but the natural beeswax has a nice light scent of its own.
    You could also add a bit of color by adding in bits of old colored candles you no longer use.
    « Christmas Cactus: Another Holiday Bloomer You'll Want to Grow
    Cheesy Spinach Dip Recipe »

    About Patti Estep

    Patti is the creator of Hearth and Vine, a home and garden blog filled with projects to inspire your creative side. She loves crafting, gardening, decorating and entertaining at her home in Pennsylvania. When she is not working on a project at home or searching for treasures at nurseries and thrift stores with her girlfriends, you’ll probably find her with family and friends, at a restaurant, or home party enjoying new and different food adventures.

    Reader Interactions

    Leave a Reply Cancel reply

    Your email address will not be published. Required fields are marked *

    Recipe Rating


    Primary Sidebar

    Follow Me

    • Email
    • Facebook
    • Instagram
    • Pinterest
    • Twitter

    Patti profile pic

    Hi! I'm Patti

    Join me to create lots of fun DIY projects including crafts, gardening, home decor and tasty recipes.

    more about me

    Popular Posts

    Blue jean crossover bag

    DIY Crossbody Bag from Jeans

    tabletop water gardens

    How to Make an Indoor Water Garden

    Echievera planter

    What to do With a Stretched Succulent

    Fabric bowl covers in 3 prints

    How to Make Fabric Bowl Covers

    Collage of flowers including russian sage, pink hydrangeas, coneflower and yarrow.

    10+ Long Blooming Plants

    Chicken black bean tortilla casserole

    Chicken Black Bean Casserole Recipe

    Footer

    ^ back to top

    About
    Privacy Policy
    Disclosure Policy

    Sign Up Here!
    for our
    newsletter &
    special offers

    • Shop
    • Web Stories

    As an Amazon Associate, I earn from qualifying purchases. i.e. as an Amazon Associate, I earn from qualifying purchases.

    Copyright © 2021 Hearth and Vine