

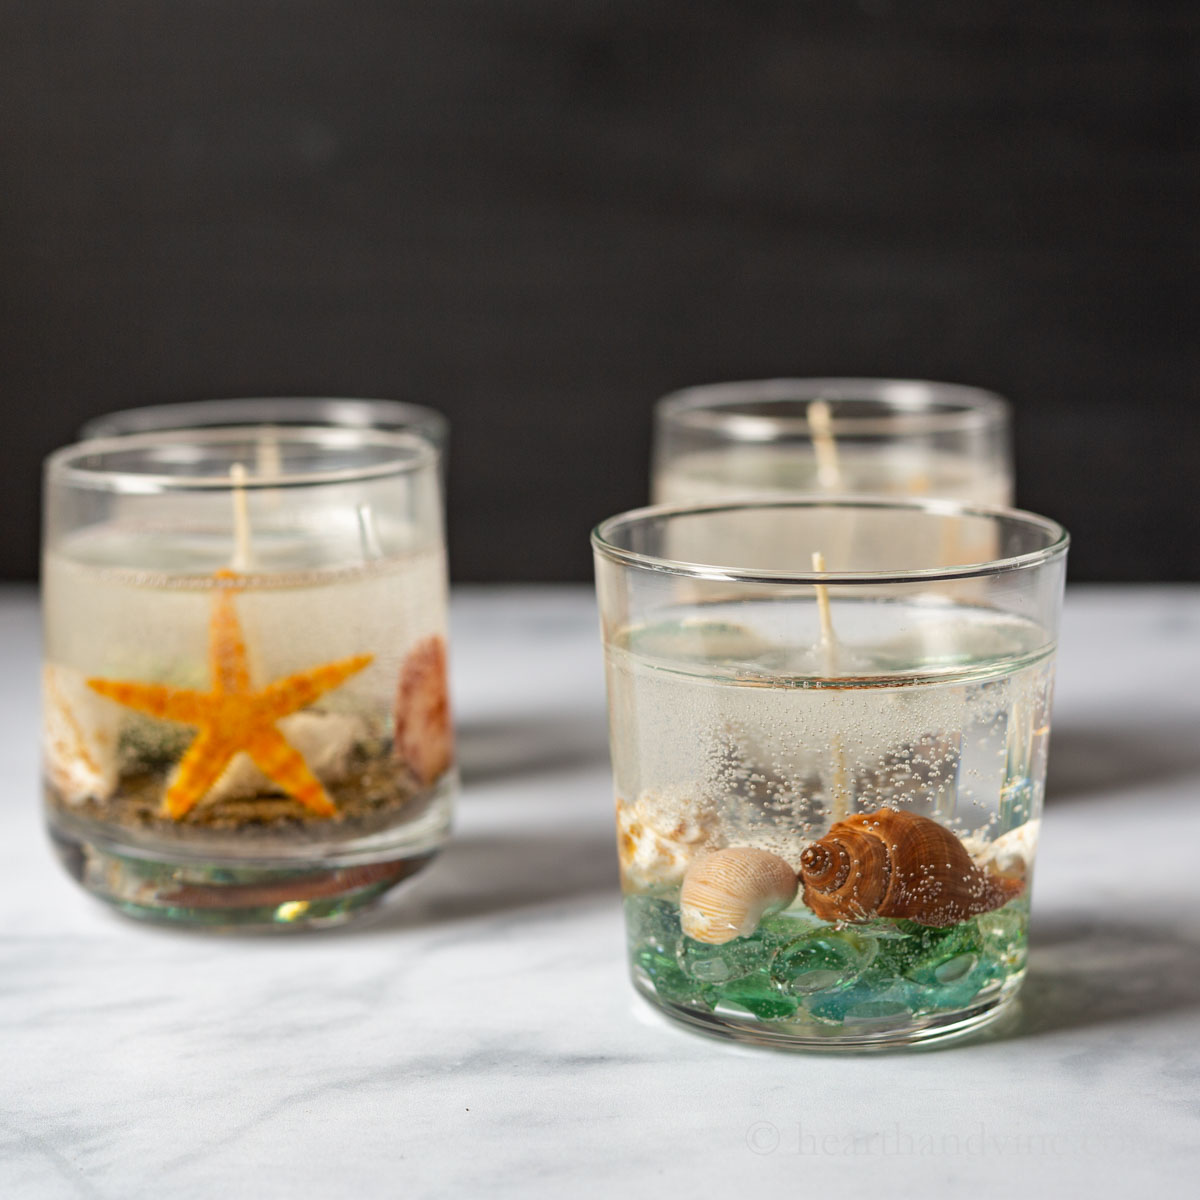
Learn how to make gel candles with shells found at the beach. It's a pretty way to preserve your vacation, creating a beautiful decorative memory.
I've made a lot of candles on this blog. Most are made with soy wax and a few with beeswax, but I've never worked with gel wax.
They turned out really pretty. However, the gel wax is a whole different animal. Some say that it's dangerous, so I'm going to keep mine for decoration purposes and not burn them.
This post contains some affiliate links (that means if you make a purchase after clicking a link, there’s no additional cost to you, but I will earn a very small commission. ) i.e. as an Amazon Associate, I earn from qualifying purchases. Click here to read my full disclosure policy.
SAFETY FIRST: These candles are best used as decorative elements. They burn hotter and longer than regular candle wax. Use caution when burning. Do not burn them near anything flammable or combustible. Avoid burning these candles for more than 1-2 hours to avoid overheating. Do not leave candles unattended and let them cool completely before moving.

What You'll Need
- Old pot for crafting
- Plastic disposable knife or skewer
- Hot glue gun and glue sticks
- Play sand and/or Glass pebbles
- Clear glasses or vases - heat resistant if you want to burn the candles
- Gel candle Wax 32 ounces
- Zinc candle wicks
- Seashells or other non-flammable embeds

How to Make Gel Candles
Step 1. Clean and dry the glasses. Then, hot glue the wicks to the center bottom of the containers. As I mentioned, mine will be used for decorative purposes and will not be burned. In this case, you can use any ordinary glass. However, if you want to burn them, look for heat resistant glass from a candle making supply company.
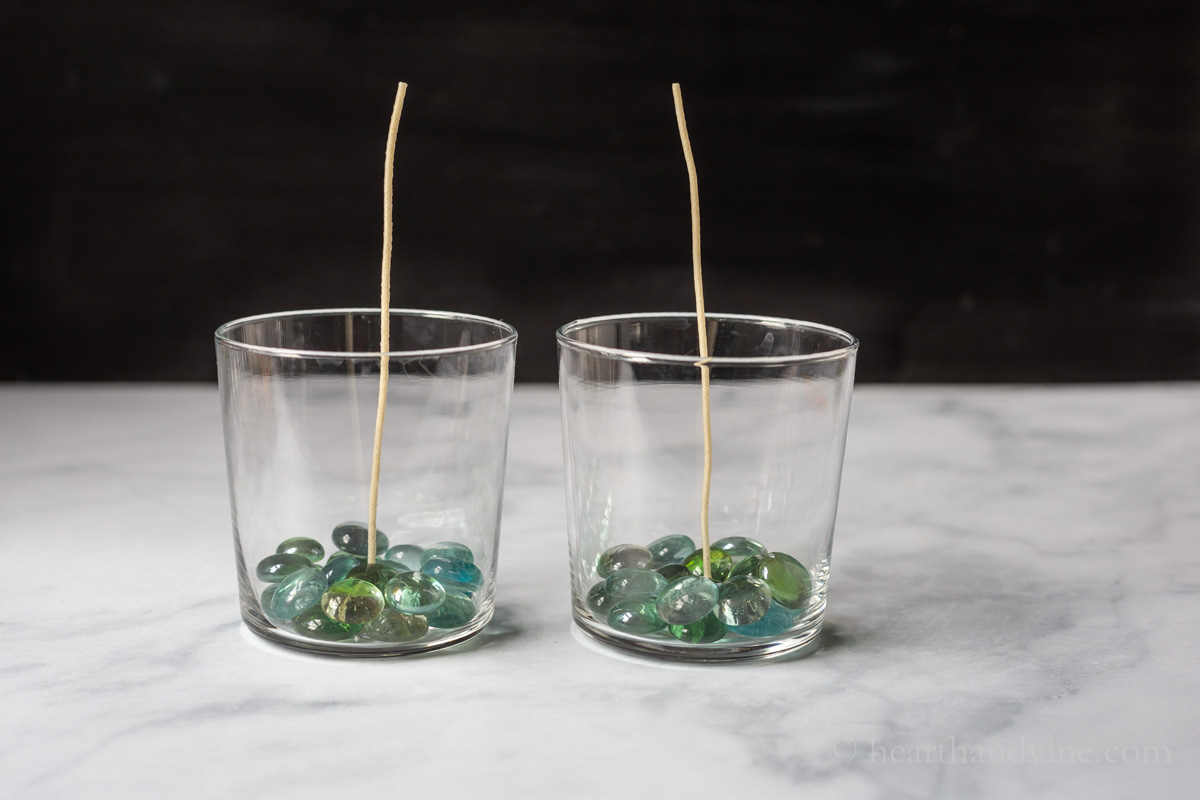
Step 2. Add some decorative glass pebbles to act as a base and hide the bottom of the wick.

Or try adding some play sand instead.

Step 3. Melt the wax. This wax will not melt in a double boiler. If you try to melt it that way, it will take more than an hour. I tried it. Instead, use an old pot directly on a heat source.
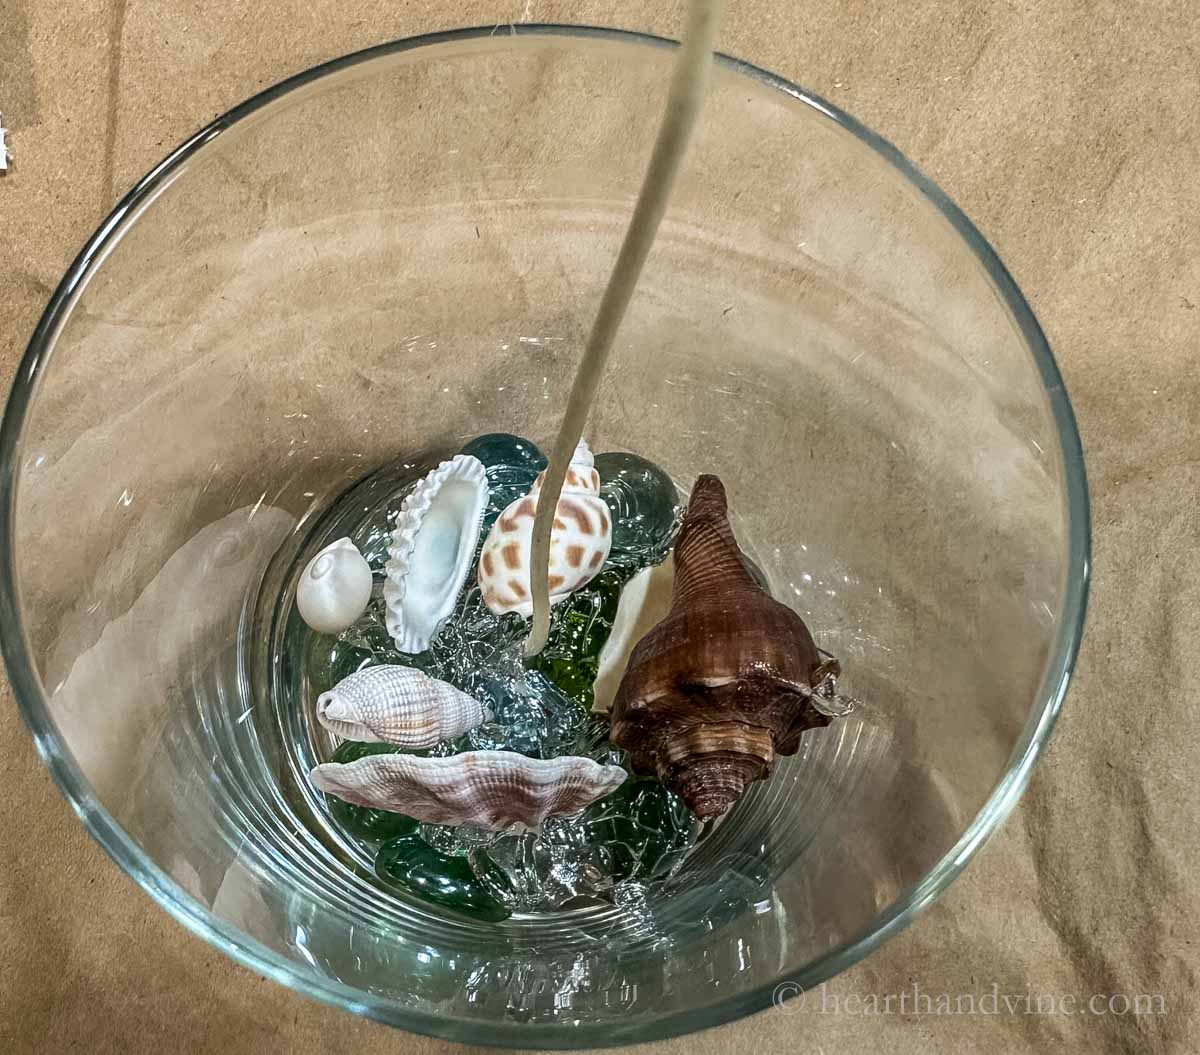
Step 4. Once the wax is melted, create the first layer by pouring a small amount into the glass, and return the pot to the stove on low heat. Then add your shells. The wax dries fast, and you will be able to stick the shells into it.

Step 5. Once you have your shells placed, pour the wax very slowly, filling the glass, leaving about .5-1 inch from the top.
You will notice bubbles. If you pour slowly, fewer bubbles will form. You can also pop the bubble with a pin or skewer. In the case of a "sea" theme, the bubbles actually look nice.

Step 6. Check the candles after a few minutes. Pop the large bubbles and straighten the wicks. Then let the candles harden for at least four hours before trimming the wicks.
They are really pretty, right? I like them just the way they are.
However, if you are set on burning them, and/or want to add fragrance, etc., make sure you do some extra research to stay on the safe side.


DIY Gel Candles
Equipment
- Old pot for crafting
- Plastic disposable knife or skewer
- Hot glue gun and glue sticks
Materials
- Clear glasses, jars, or vases
- Gel candle Wax 32 ounces
- Zinc candle wicks
- Seashells other non-flammable embeds
- Play sand or Glass pebbles
Instructions
- Wash and thoroughly dry the containers, shells, or embeds.
- Hot glue the wicks to the bottom center of each glass.
- Place some sand or colorful gem pebbles on the bottom.
- Melt the gel wax in an old pot directly on the stove.
- Once the wax is melted, pour a little bit into each prepared container.
- Set the pot back on the stove on low heat.
- Set your seashells in place in the container.
- Pour the wax slowly to fill the container, leaving about 1/2 inch from the top.
- Pop bubbles with a skewer or pin.
- After a few minutes, check again for large bubbles and straighten the wicks.
- After about 4 hours, trim the wicks.
Notes

Brenda Endicott
Do you think yuk can put a tea candle at the top of the gel, instead of the wick?
Patti Estep
Brenda, I haven't tried it, but I have seen a similar one where people put a votive candle in the middle and pour the gel around it. They sell them on Etsy, and if you search for something like "gel candle wax with votive center," you should find more info.