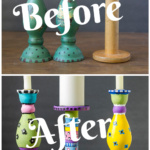

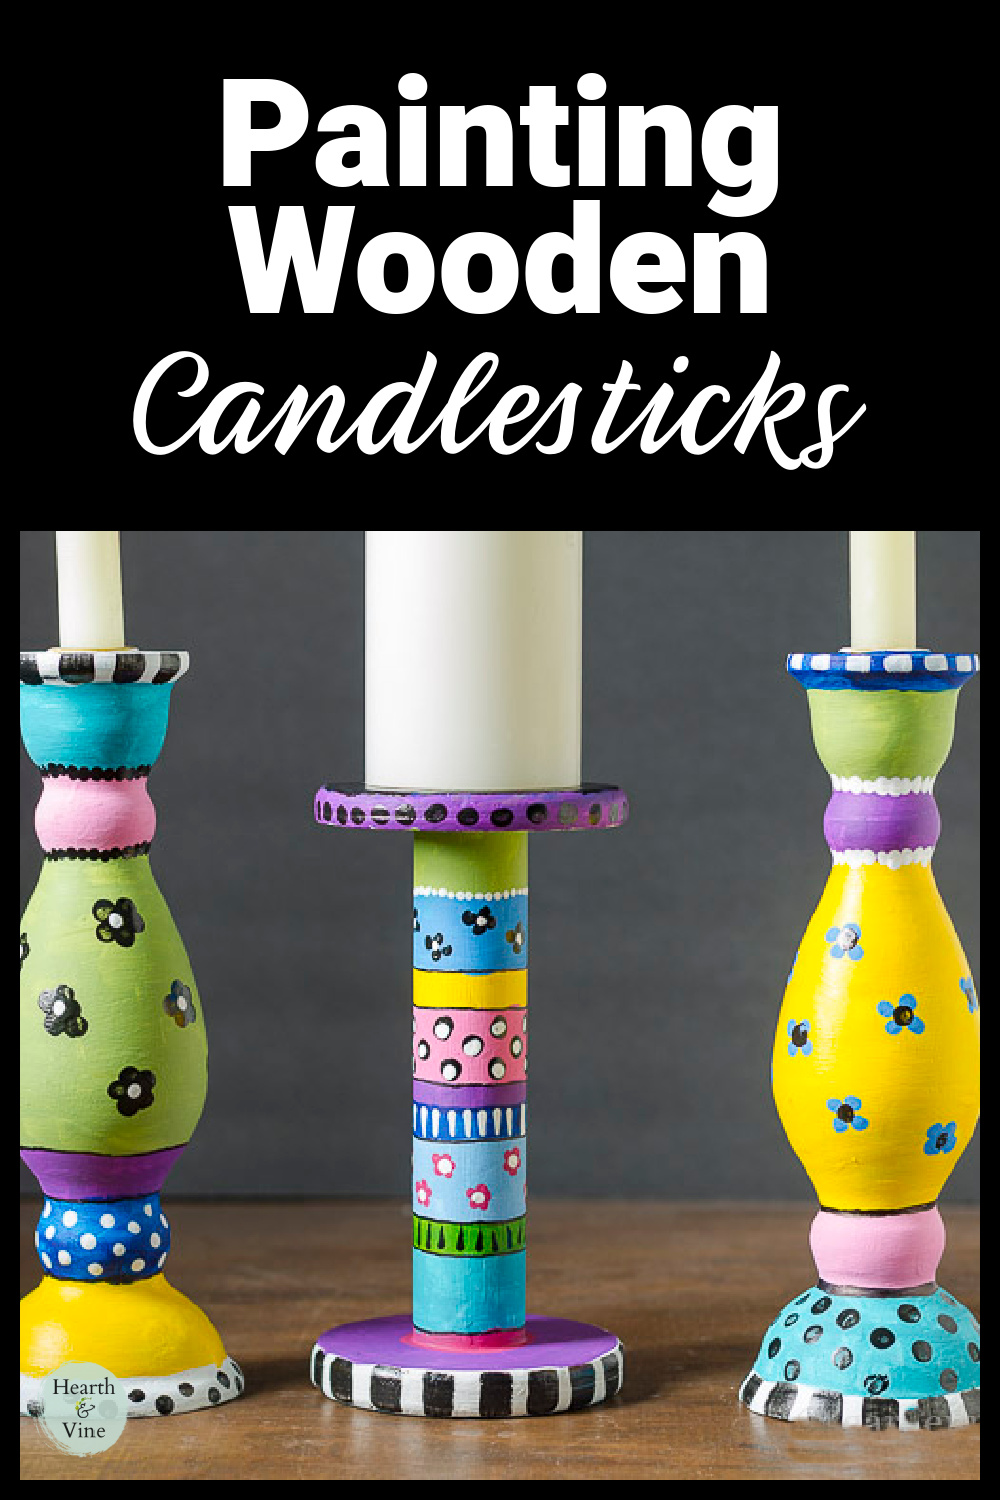
Learn a few tricks about painting wooden candlesticks that you can find at a thrift store and turn them into beautiful and whimsical home decor.
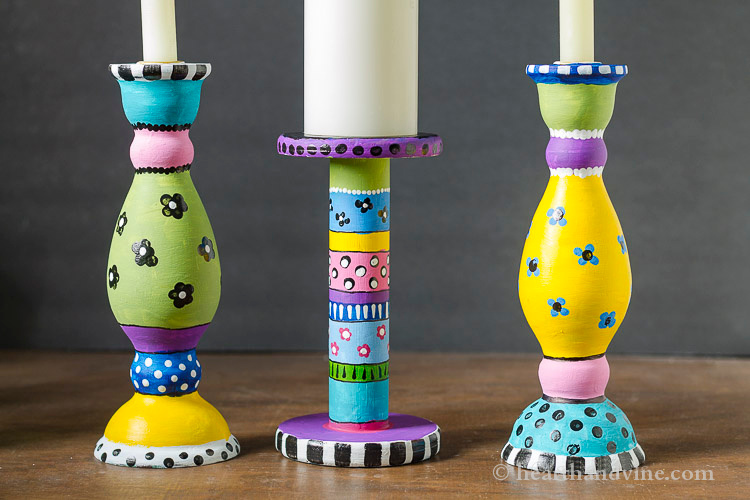
We always go thrift and antique shopping on our girls' weekend one of my purchases was an old wooden spool. I thought it would be perfect to set a pillar candle on. Soon after, I found a pair of wooden candle sticks. They were only $3.99 for the pair, and I thought they would go great with the spool. So I set out to create a whimsical trio by painting wood candlesticks in a variety of bright colors.
I was inspired by all the colorful Easter eggs I'm seeing all over the internet. The Easter eggs also made me think of Mary Engelbreit designs from the 90's.
This post contains some affiliate links (that means if you make a purchase after clicking a link, there’s no additional cost to you, but I will earn a very small commission. ) i.e. as an Amazon Associate, I earn from qualifying purchases. Click here to read my full disclosure policy.

Painting Wooden Candlestick Tips
Here are the original wooden candle holders and the spool that I purchased. They were pretty cute on their own, but not as bright as I wanted, and I also wanted them to coordinate well together.

Step 1. To start this project, simply give the wood a light sanding.
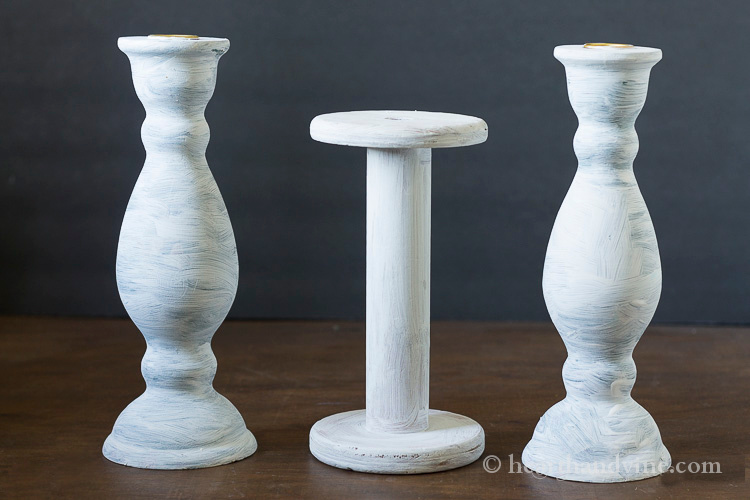
Step 2. Then give them a base coat of white paint. I used some chalk paint that I had on hand, but any kind would work. This is only one coat and I ended up painting them with a second coat for good coverage. The white paint will help with coverage, especially with lighter colors. And, you can leave some parts white as part of the design.

Decorating the Candlesticks with Paint
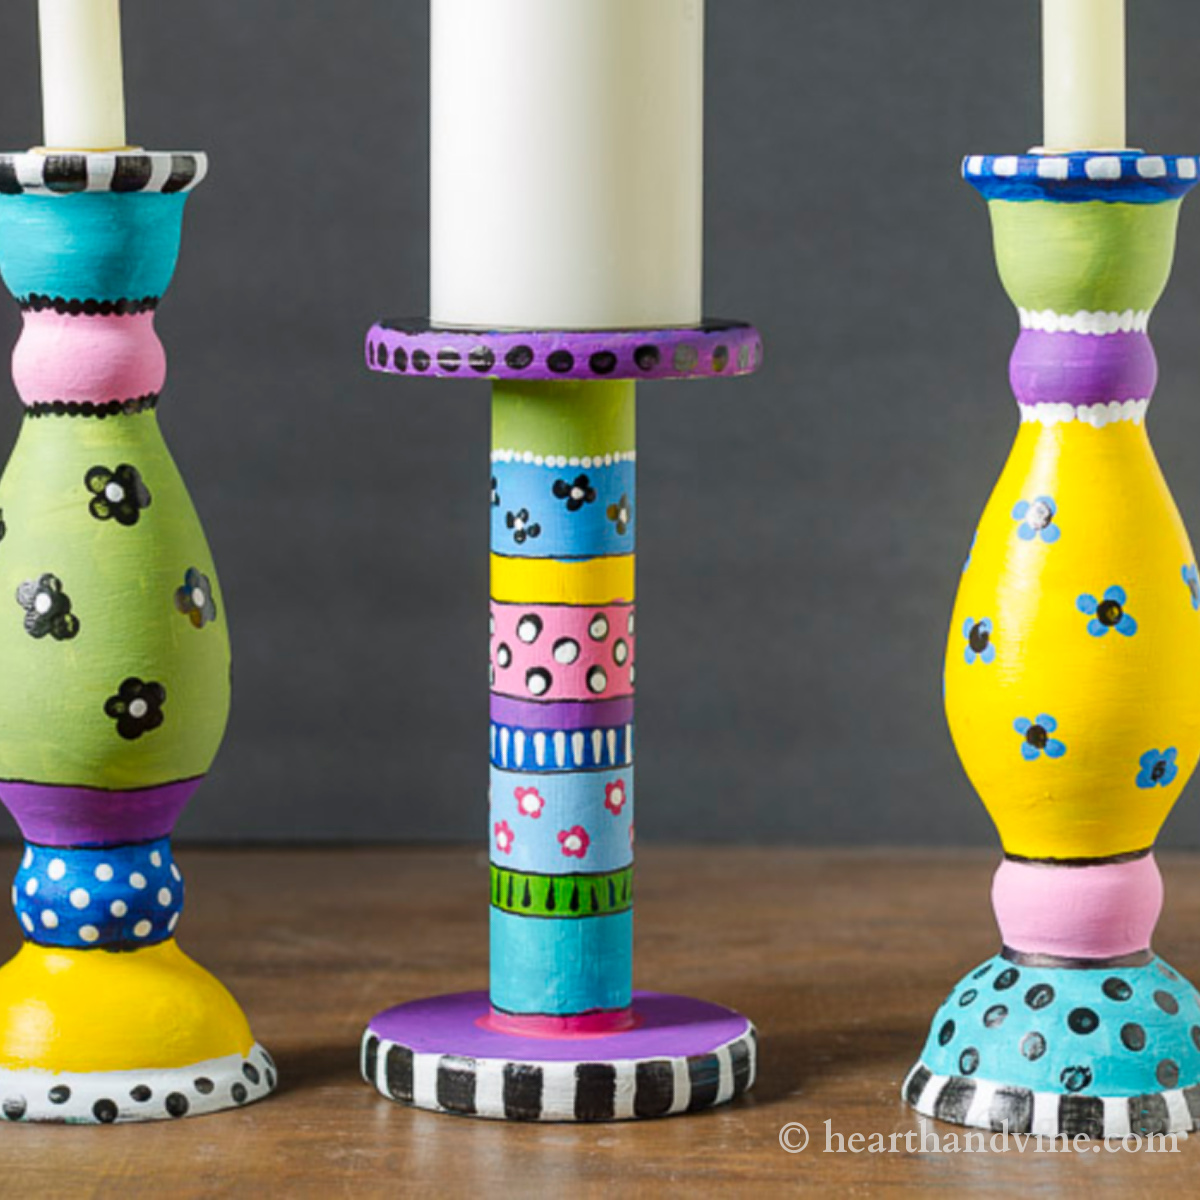
Tip 1. Since the spool was nice and straight I attempted to use some painter's tape to section off different areas.

However, as you can see some of it bled through the tape.
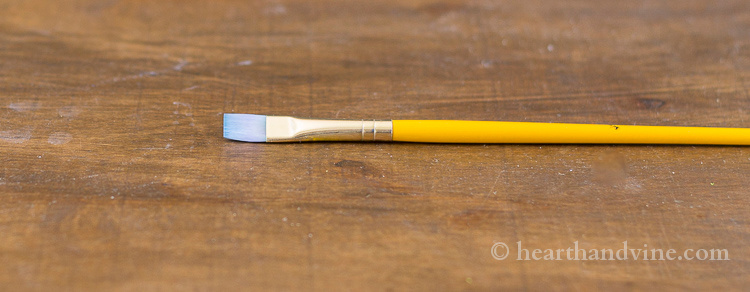
This flat paintbrush was a nice tool for painting bands of paint and dash marks.
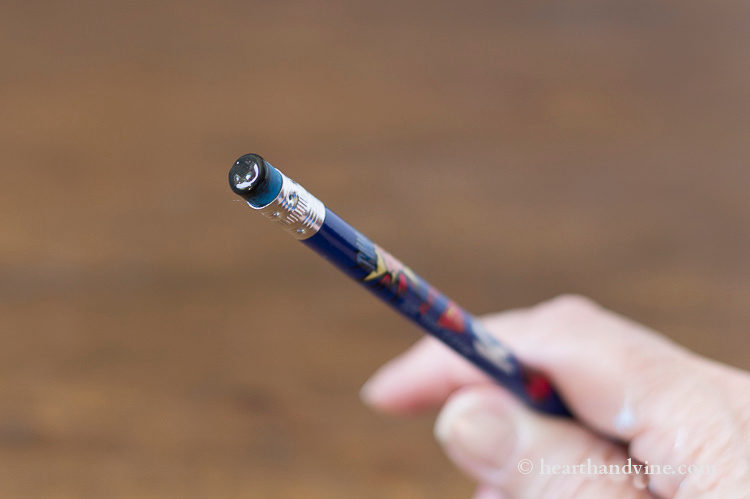
Tip 2. Use the top of a pencil eraser to make circles or dots. I found that it works best if you take the time to dip the eraser in the paint for each dot, instead of trying to get two or more dots per dip.

The same holds for these paint brush handles. You can use different sizes and dip them into paint to create dots on the candlesticks.
Tip 3. The last tip I have is using Sharpies for definition. I used a black Sharpie pen to add a little definition between colors.
Painting wooden candlesticks is a wonderful, creative activity. This would be a great project to make with a group of friends or kids.
If you don't have any lying around and don't thrift shop you can buy affordable unfinished candlesticks online like these candlesticks from Amazon or places like Hobby Lobby or Walmart.
You can also protect the candlesticks with spray polyurethane to protect the finish, however, I did not. I think if I was giving them as a gift I would finish them with a protective coating of poly or a wax finish.

kathryn
These are gorgeous! I wish they were for sale... but your tutorial is very clear, so I will attempt to find some candle holders and paint them myself. But... what kind of PAINT did you use?? Thanks for the tutorial!
Patti Estep
Kathryn, I'm so glad you like the painted candlesticks. They were so fun to make. I used ordinary acrylic craft paints that you can buy anywhere.
Sandi C
I have seen candlesticks similar to these in high-end catalogs and have always wanted to try painting some myself. Thanks for the tutorial. Now off to find some candlesticks!
P.S. I loved Mary Engelbreit too!
Patti Estep
Hi Sandi,
Another Mary Engelbreit lover! I think there are a lot of us out there. 🙂
You can totally do this project. If you mess up, just paint over it.
Thanks for stopping by and have a great weekend!
Patti
Karen
These are simply adorable, Patti, and yes, they bring back memories of Mary Engelbreit for me too. I remember a gorgeous package of her notecards I once bought. They were so much fun!
I love your candlesticks and it seems like such a fun project!
Patti Estep
Hi Karen,
I knew many people would remember those fun designs. Now that spring is finally here I just had to make something colorful.
Thanks for stopping by and have a great weekend!
Patti
Carole
What a fun project and can I just say how much I miss the Mary Engelbreit magazine? Well I do and these candlesticks do remind me of her. I love the spring colors and pinned this on one of Hometalk's boards this morning. The details and color complement in a grand way.
Patti Estep
Hi Carole,
You are sweet as always. I have one of my kids home for Easter but I don't know if we will have time to dye eggs so I thought these would be fun.
Thanks for stopping by,
Patti
Sandi
Just perfectly lovely!
Patti Estep
Thanks Sandi!