• Skip to primary navigation
  • Skip to main content
  • Skip to primary sidebar
  • Home
  • DIY Projects
    • Homemade Bath and Body
    • Sewing - Fabric Crafts
    • Flower Crafts/Decor
    • Thrift Store/Vintage
  • Gardening
    • Flower Gardens
    • Container Gardening
    • Houseplants
    • Indoor Gardening
    • Landscaping
    • DIY Garden Art
  • Decorate
    • Spring Decor
    • Summer Decor
    • Fall Decor
    • Winter Decor
    • Home Decor Projects
  • Recipes
    • Breakfast Recipes
    • Lunch Recipes
    • Dinner Recipes
    • Dessert
    • Salad Recipes
    • Soups and Stews
    • Side Dish Recipes
    • Appetizers and Snacks
    • Healthy Recipes
  • Holidays
    • Valentine's Day
    • Easter
    • Mother's Day
    • Halloween
    • Thanksgiving
    • Christmas
Hearth and Vine
menu icon
go to homepage
  • About
  • DIY
    • ...Flower/Gardening Crafts
    • ... Bath and Body
    • ...Sewing/Fabric Crafts
    • ...Thrift Store/Upcycle
  • Gardening
    • ...Flower Gardens
    • ...Container Gardening
    • ...Indoor Gardening
    • ...DIY Garden Art
  • Decorate
    • ...Home Decor Projects
    • ...Spring Decor
    • ...Summer Decor
    • ...Fall Decor
    • ...Winter Decor
    • ...Room Makeovers
  • Recipes
    • ...Appetizers and Snacks
    • ...Dinner Recipes
    • ...Side Dish Recipes
    • ...Salad Recipes
    • ...Dessert
    • ...Drinks
  • Holidays
    • ...Valentine's Day
    • ...Easter
    • ...Mother's Day
    • ...Halloween
    • ...Thanksgiving
    • ...Christmas
  • Subscribe
  • Instagram
    • Facebook
    • Instagram
    • Pinterest
    • Twitter
  • subscribe
    search icon
    Homepage link
    • About
    • DIY
      • ...Flower/Gardening Crafts
      • ... Bath and Body
      • ...Sewing/Fabric Crafts
      • ...Thrift Store/Upcycle
    • Gardening
      • ...Flower Gardens
      • ...Container Gardening
      • ...Indoor Gardening
      • ...DIY Garden Art
    • Decorate
      • ...Home Decor Projects
      • ...Spring Decor
      • ...Summer Decor
      • ...Fall Decor
      • ...Winter Decor
      • ...Room Makeovers
    • Recipes
      • ...Appetizers and Snacks
      • ...Dinner Recipes
      • ...Side Dish Recipes
      • ...Salad Recipes
      • ...Dessert
      • ...Drinks
    • Holidays
      • ...Valentine's Day
      • ...Easter
      • ...Mother's Day
      • ...Halloween
      • ...Thanksgiving
      • ...Christmas
    • Subscribe
    • Instagram
    • Facebook
    • Instagram
    • Pinterest
    • Twitter
  • ×
    Home » DIY Projects

    Smashed Can Basket Craft for May Day

    by Patti Estep · May 1, 2024

    Jump to How-to Card
    Tin can crushed hanging basket with purple lilacs inside.
    Two smashed can baskets with flowers hanging on door knobs over the supplies to make the craft.

    This easy smashed can basket craft is perfect for holding a few pretty flowers to hang on someone's door for May Day.

    A smashed can basket on a door with lilacs.

    Did you know that people used to hang baskets on the front door of loved ones and neighbors on May 1st? You can read more about this interesting tradition here.

    Today I'm combining the craft of crushed tin can baskets as a fun way to recycle and have a basket perfect for May Day. Of course, you can use it on any day or for any purpose you like.

    This post contains some affiliate links (that means if you make a purchase after clicking a link, there’s no additional cost to you, but I will earn a very small commission. ) i.e. as an Amazon Associate, I earn from qualifying purchases. Click here to read my full disclosure policy.
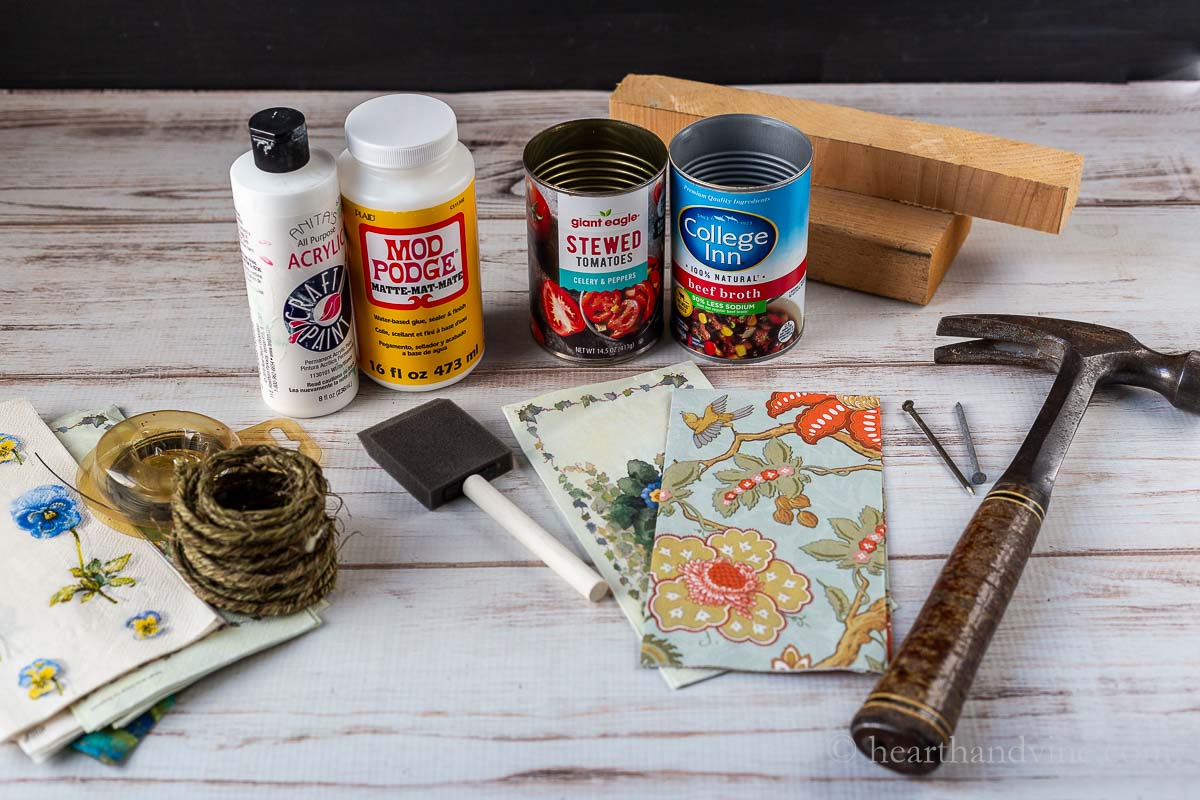
    Supplies for the tin can baskets including Mod Podge, white paint, a hammer, paper napkins, two tin cans, wire and a sponge brush.

    Supplies

    • Hammer
    • Scissors
    • Nail File
    • Paint brushes
    • Smooth Edge Can Opener
    • Large nail
    • Aluminum Can
    • Printed Napkin
    • Wire - or twine or ribbon to use as a hanger
    • White Craft Paint
    • Mod Podge
    • Wood Block
    Removing both ends of a can with a smooth edge can opener.

    How to Make a Smashed Can Basket

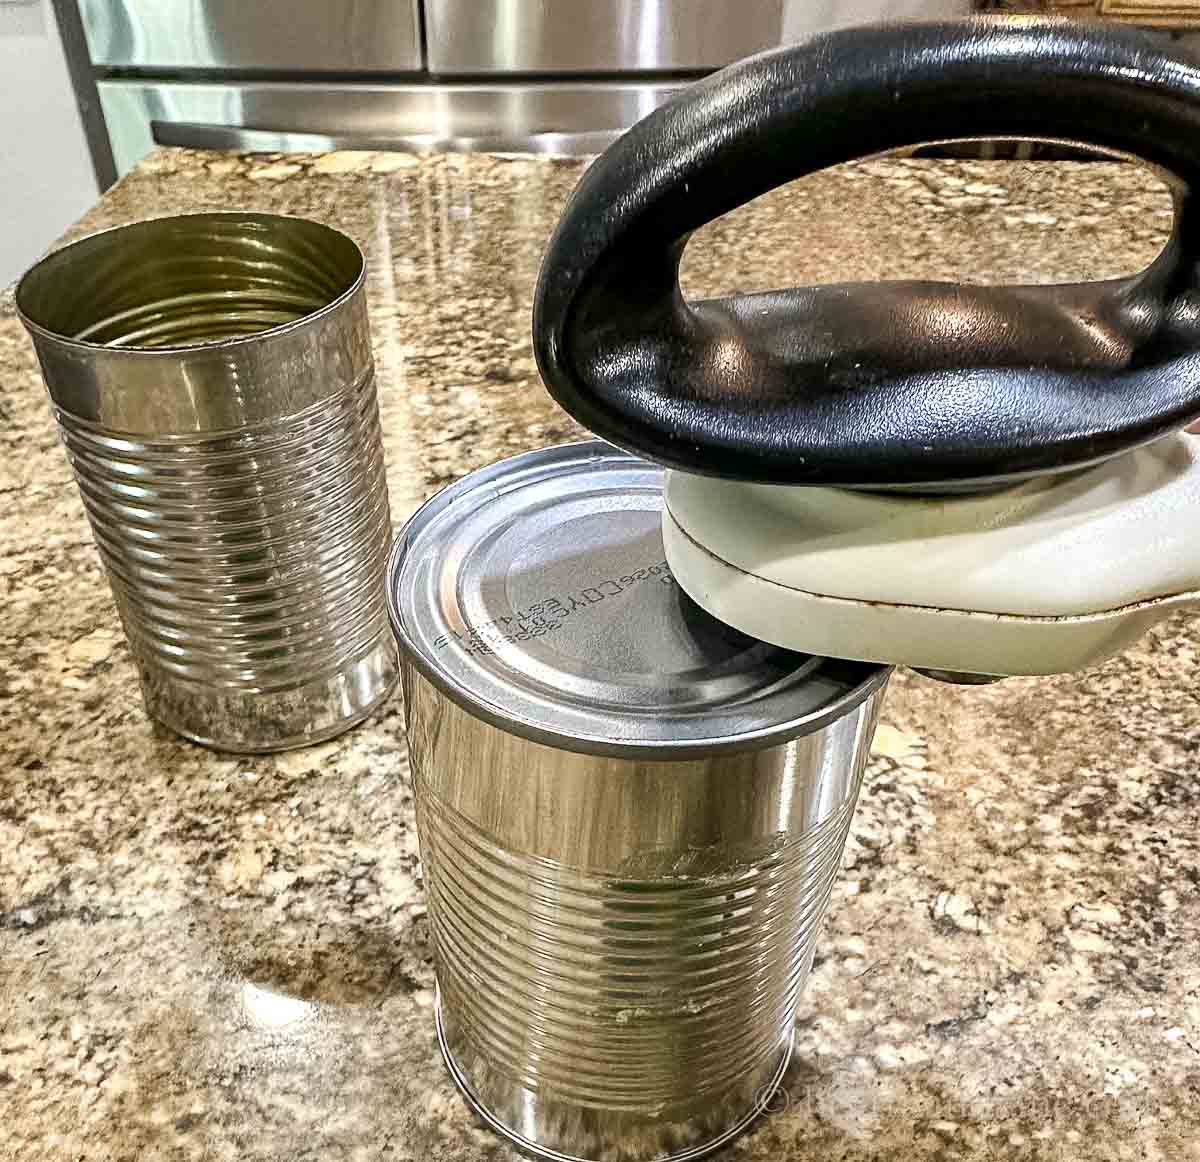
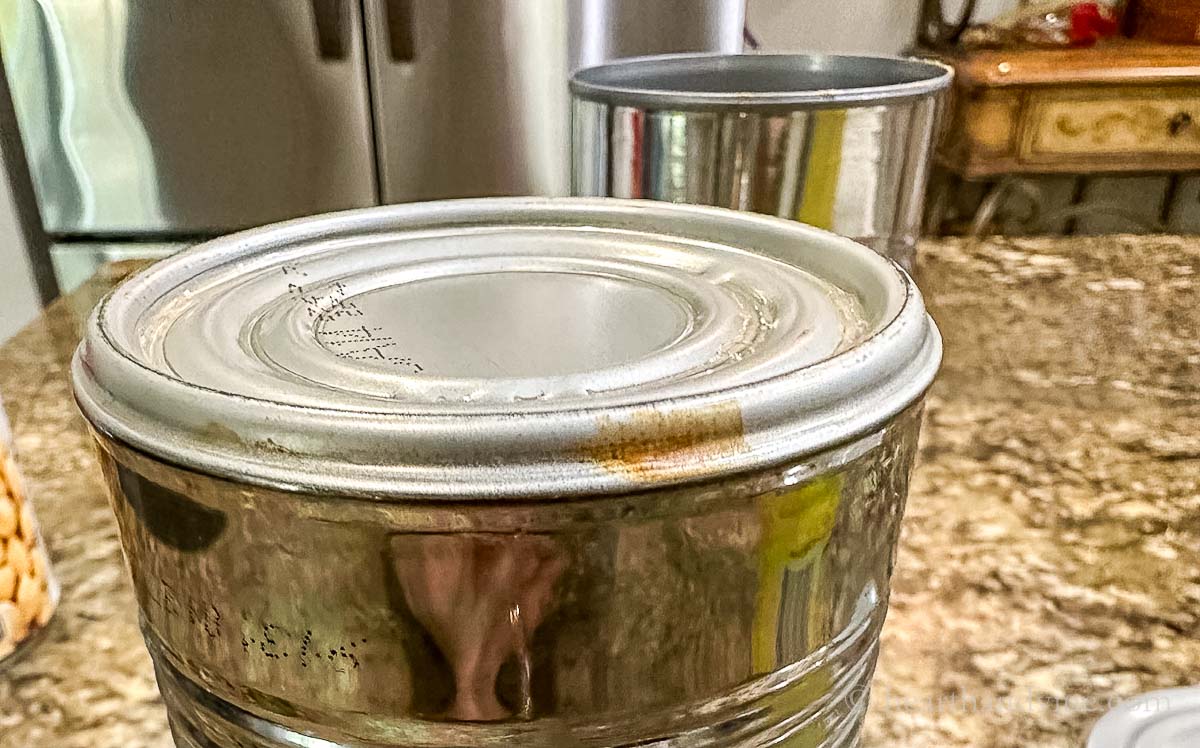
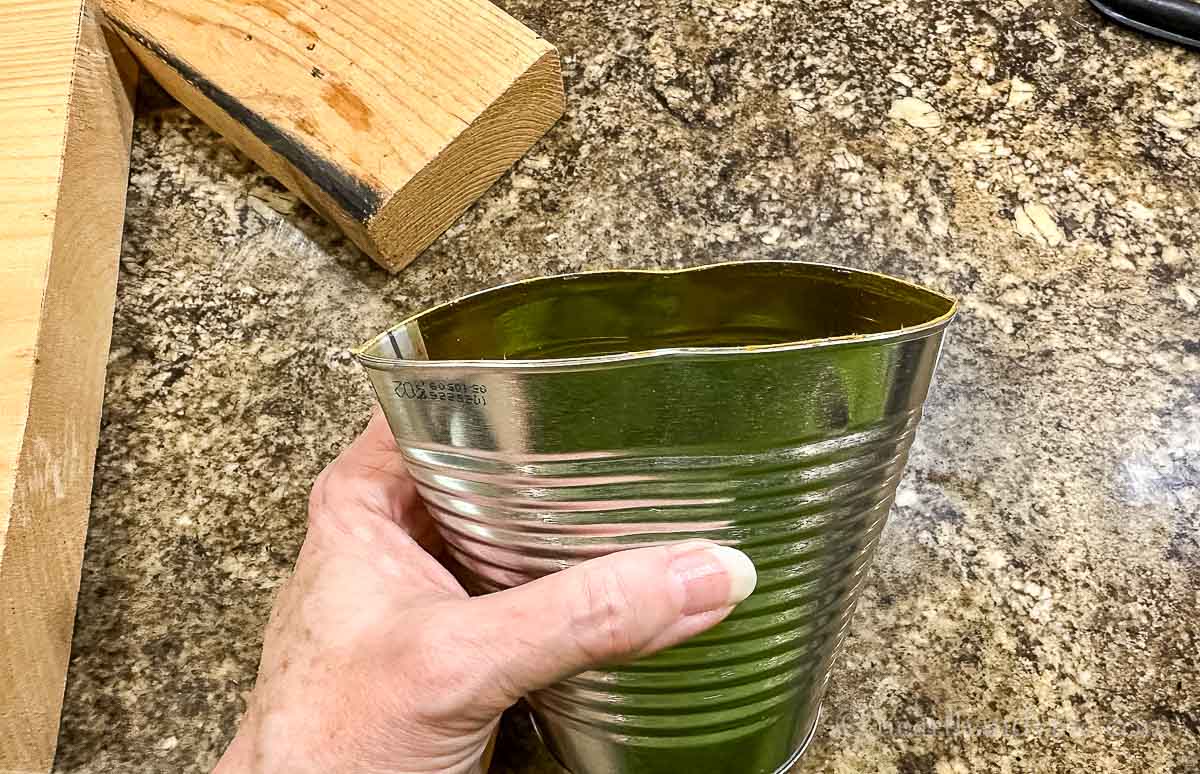
    Step 1: Remove the top and bottom of the can you will be using. Remove the label and any glue residue.

    Bottom of a tin can that cannot be removed with an opener.

    Note: You will need a smooth edge can opener for this craft. If you don't already have one you will love it. However, in the image above the can has a different bottom from the top and cannot be removed.

    A large nail being hammered into the side of a can to make a hole.

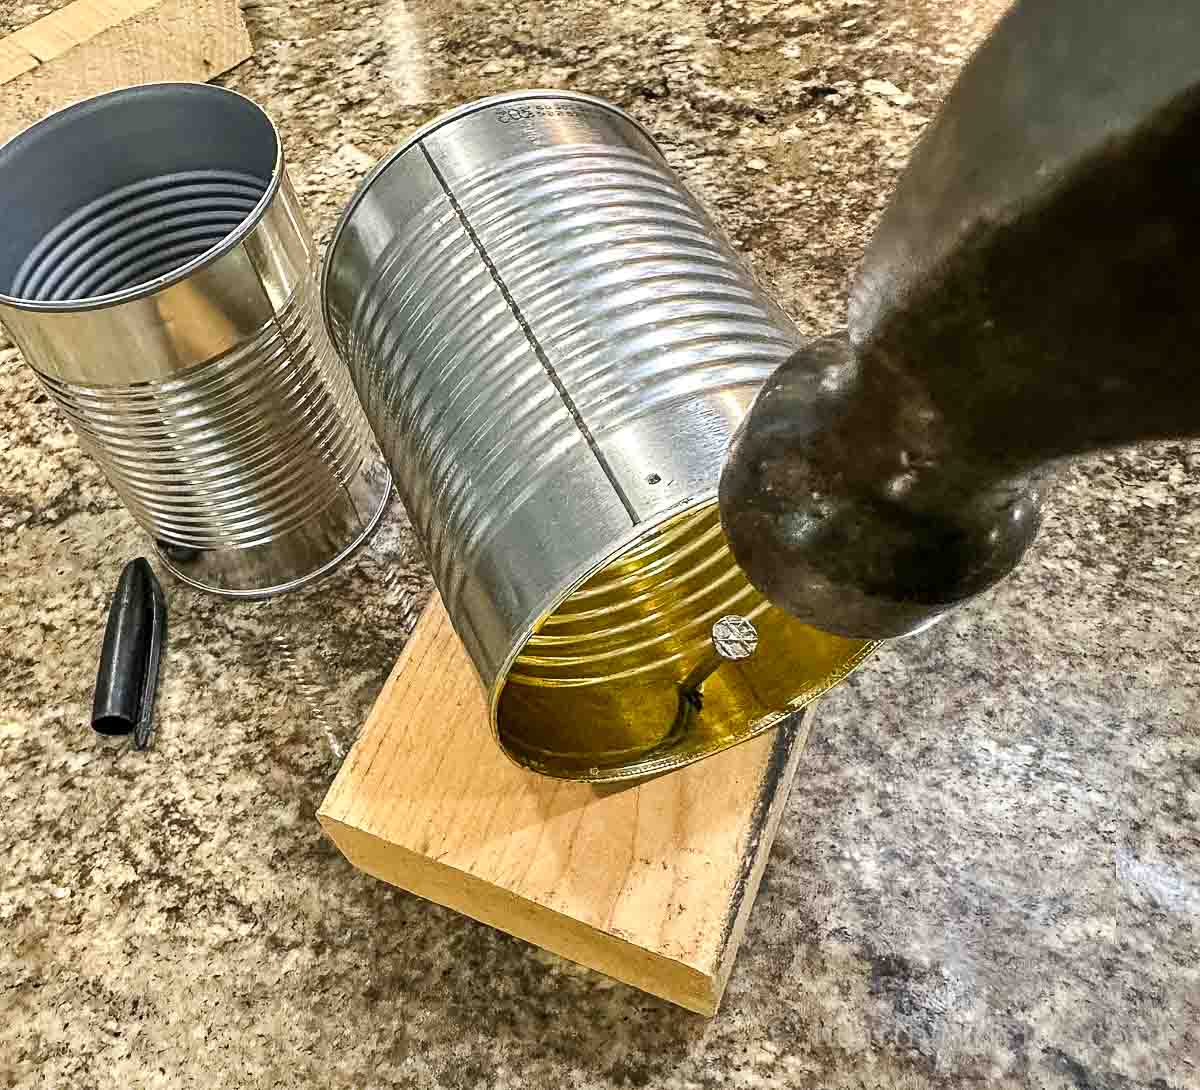
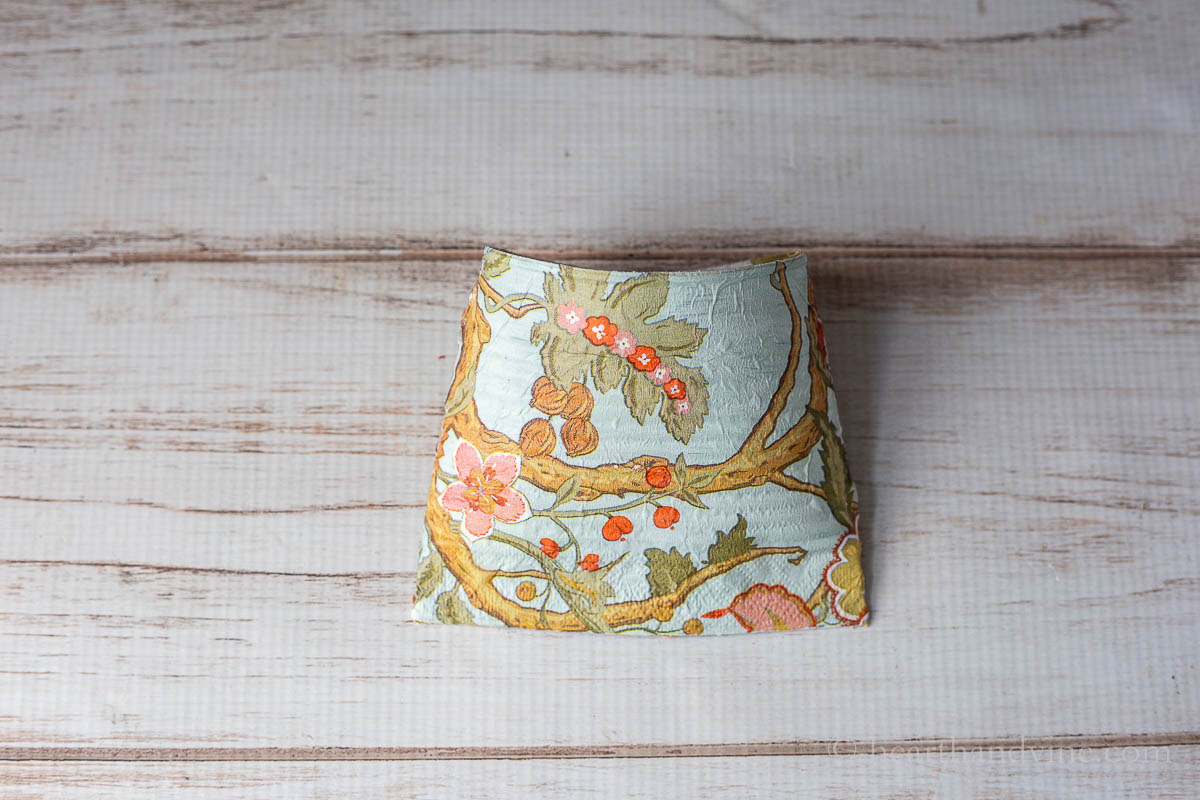
    Step 2: Next make some holes on each side of the can. I used a large nail and hammered it into the side about 1/2 inch from the top.

    Newsletter Signup
    Join Our Newsletter List!

    Be the first to receive new posts and get access to our Subscribers Only Page.

    A hand squeezing a tin can at the bottom.

    Step 3: Use your hands to begin to press the bottom opening together. (the side opposite of the holes you made)

    A hammer crushing the bottom of a tin can to crimp closed.

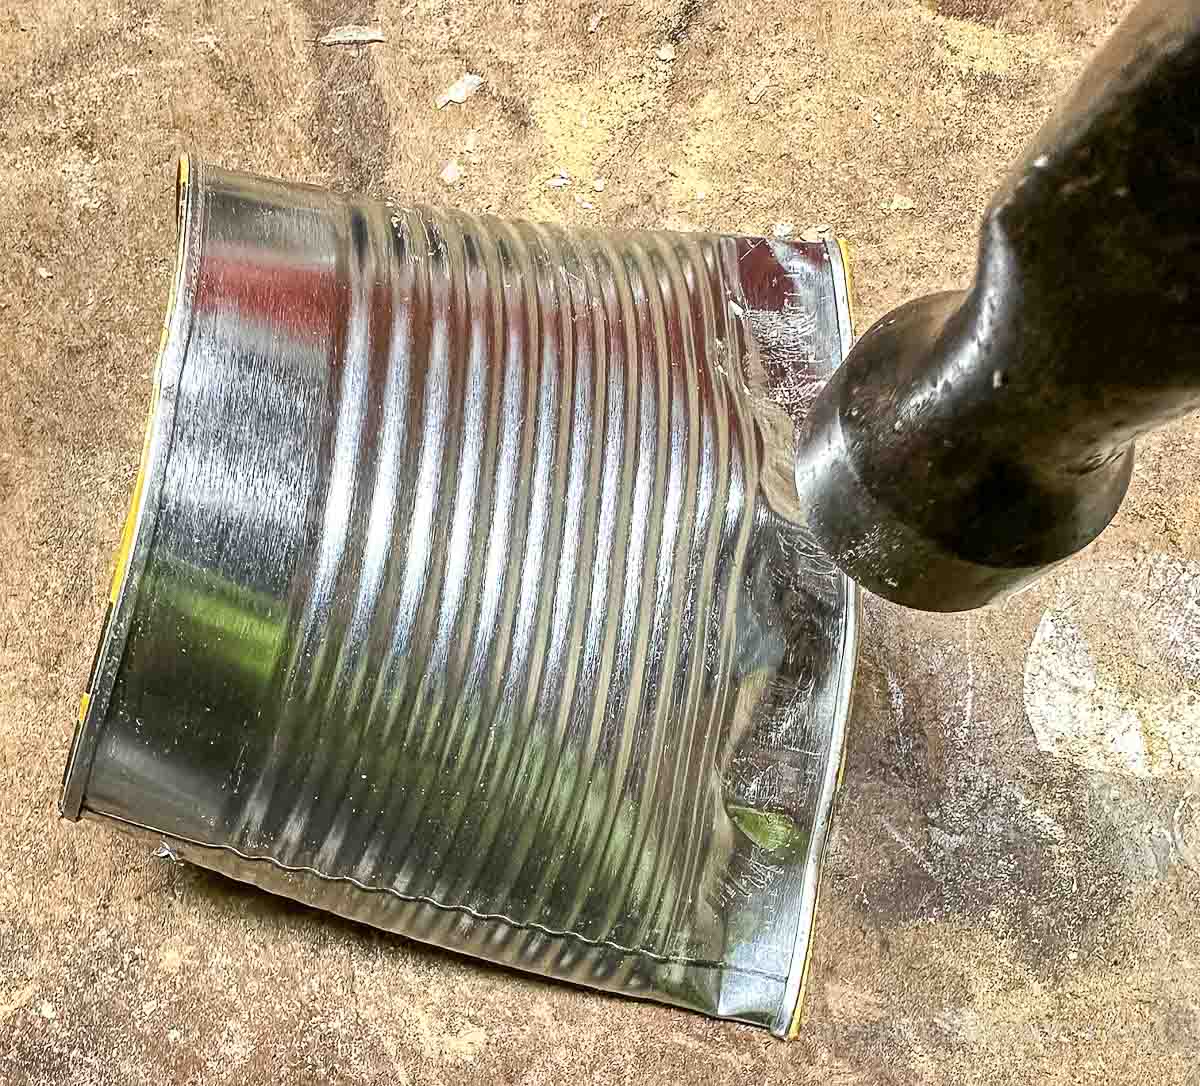
    Step 4: Use a hammer to finish smashing the edges together.

    Two smashed tin cans with one coat of white craft paint.

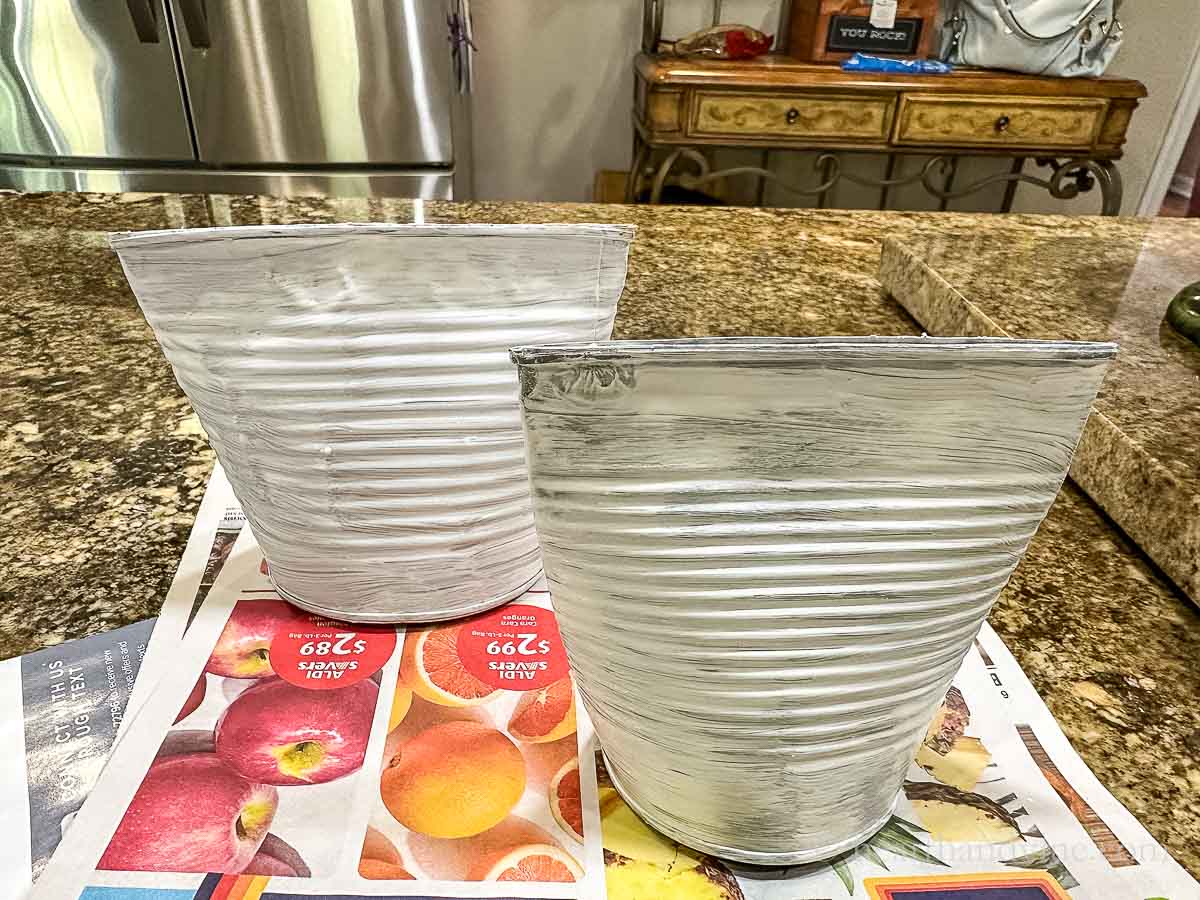
    Step 5: Coat the cans with white craft paint. You could also spray paint them or use chalk paint. This is only one coat and I ended up adding a second coat to cover the cans.

    Tearing apart napkin backing.

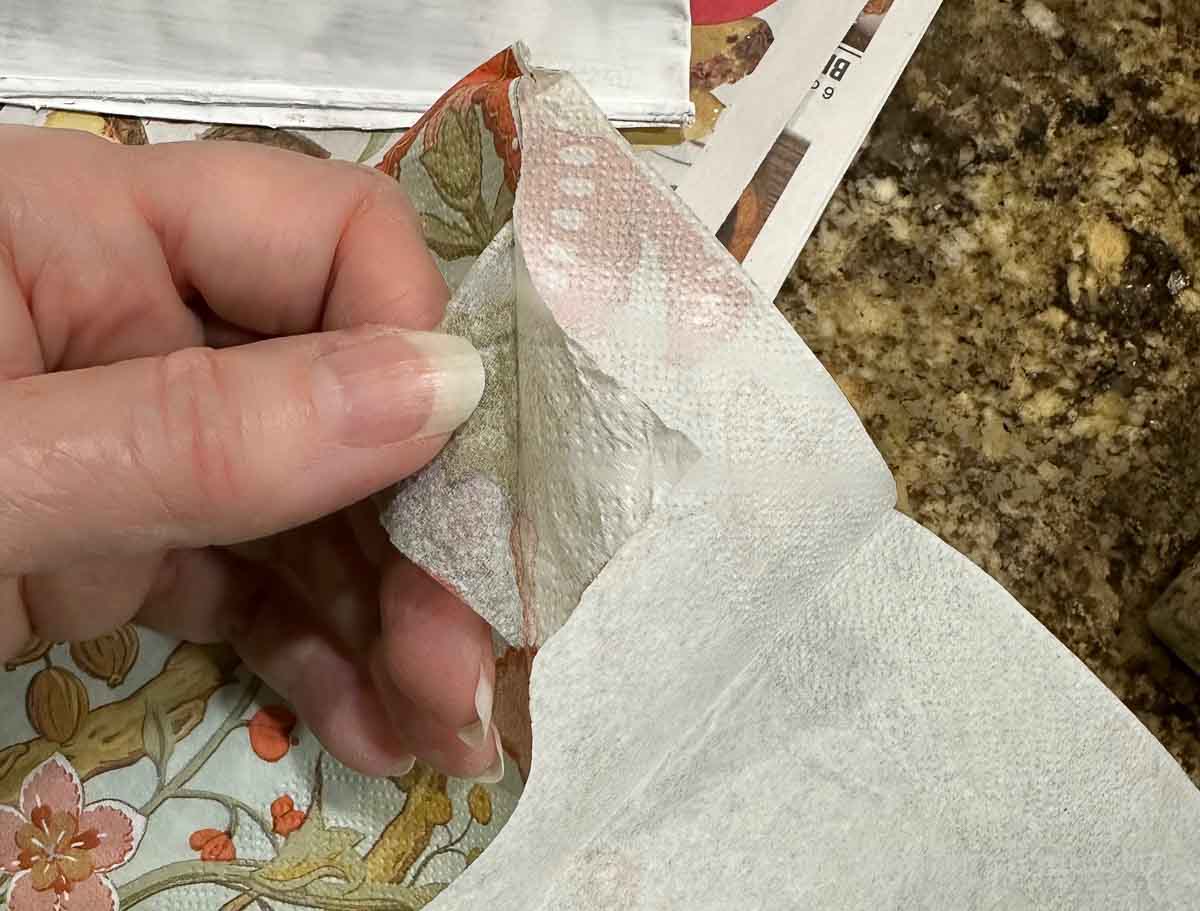
    Step 6: Separate the napkin layers, using only the top printed layer.

    A pretty peach and blue floral printed paper napkin set over one side of the can that has been coated with Mod Podge.

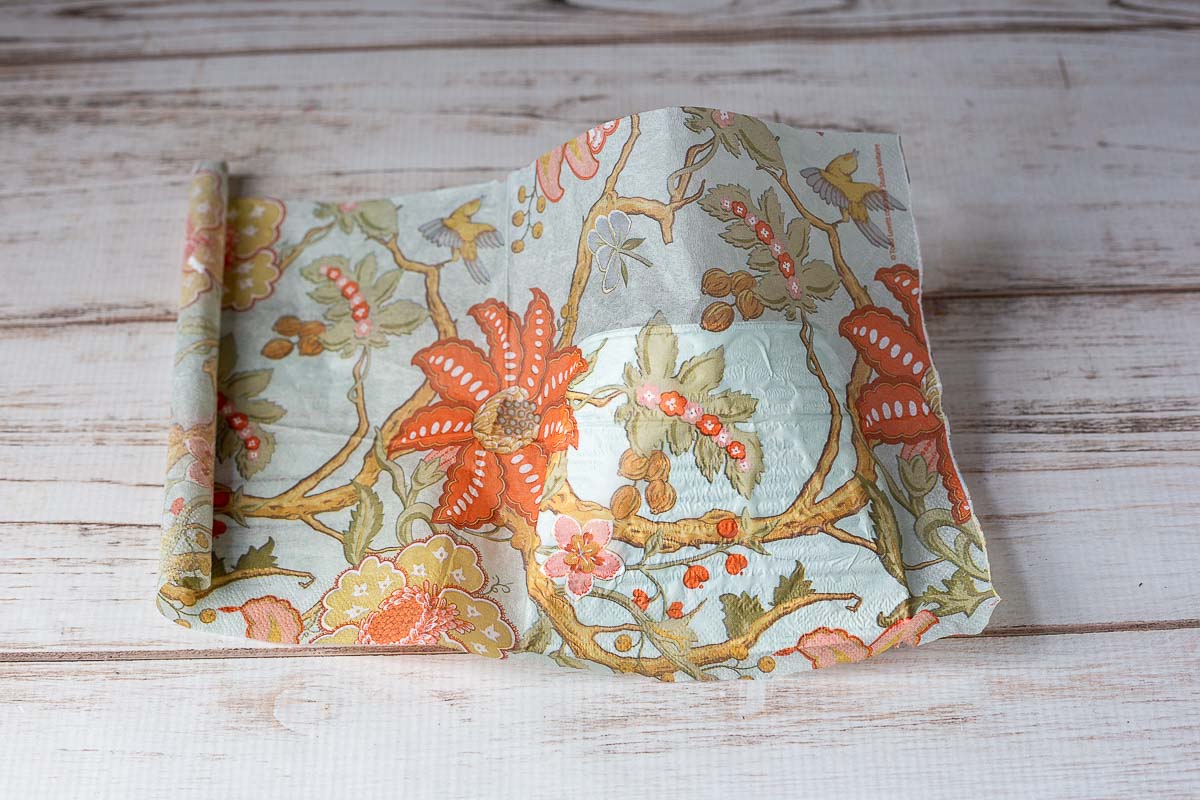
    Step 7: Brush a thin layer of Mod Podge on one side of the can and position the top layer of the napkin where you want.

    The decoupaged can with trimmed edges.

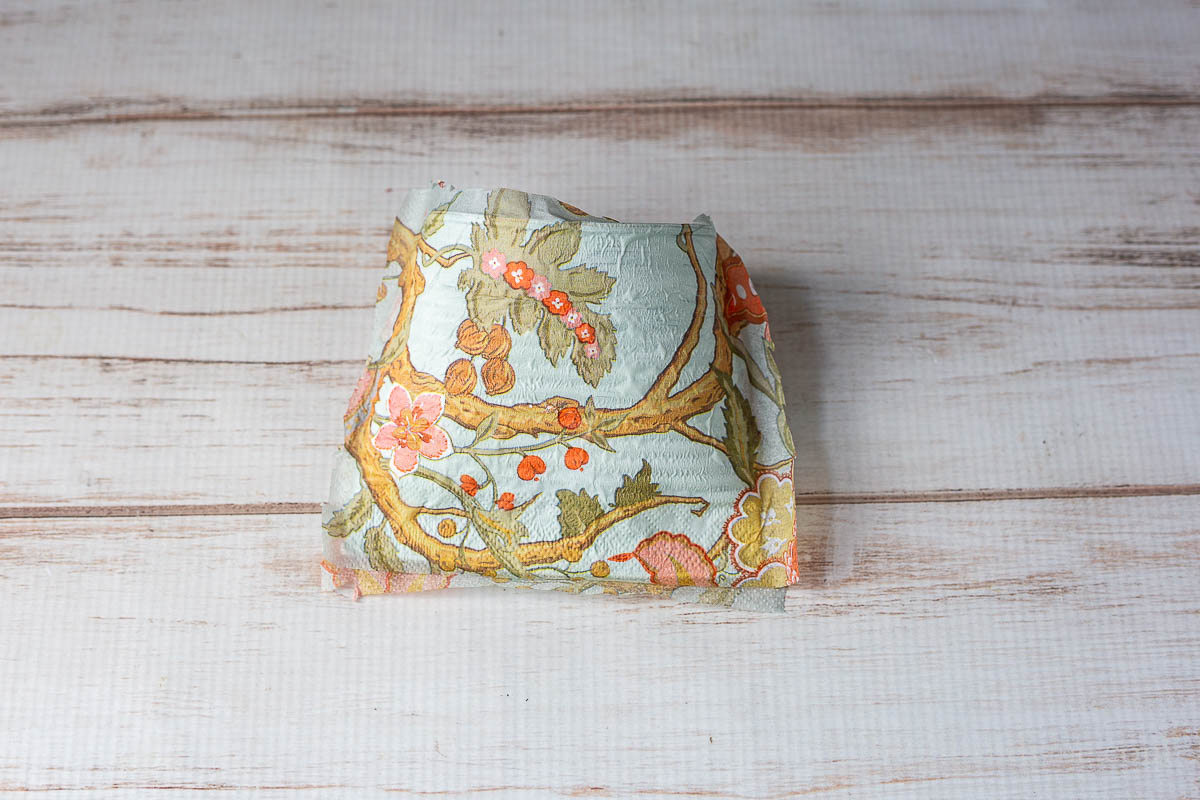
    Step 8: Trim the excess napkin with scissors.

    Using a nail file to remove excess paper napkin.

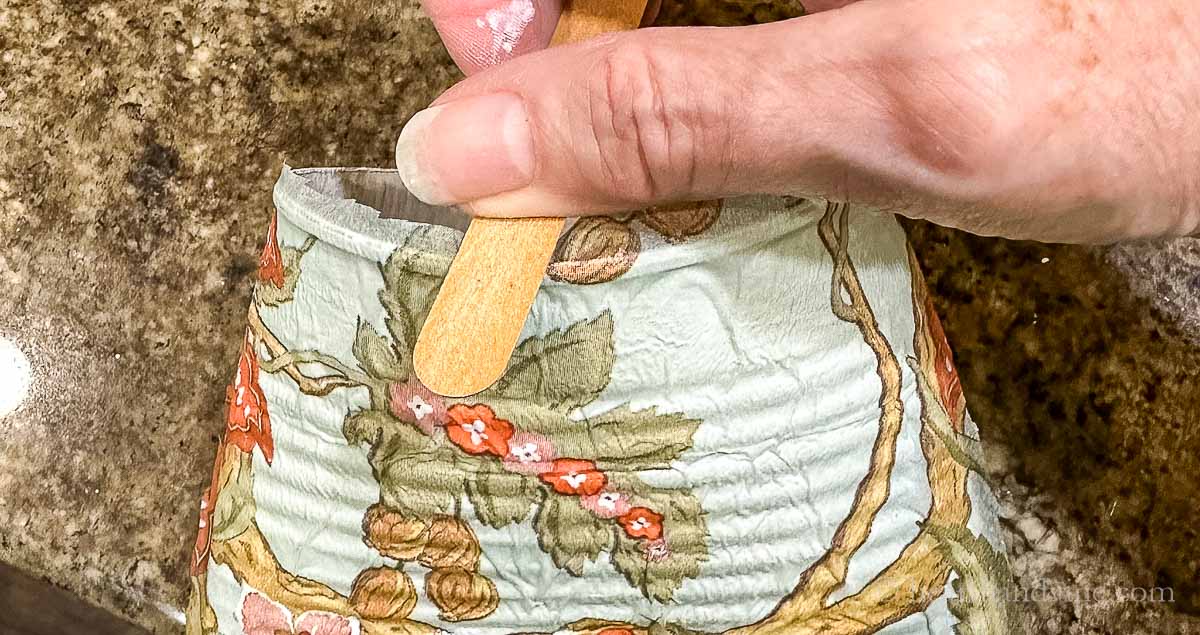
    Step 9: Use a nail file to file off any excess napkin material from the edges.

    The smashed can basket covered with a pretty printed paper napkin.

    Step 10: Allow the Modge Podge to dry and repeat on the other side.

    A thin black wire threaded through holes on the side to make a hanger.

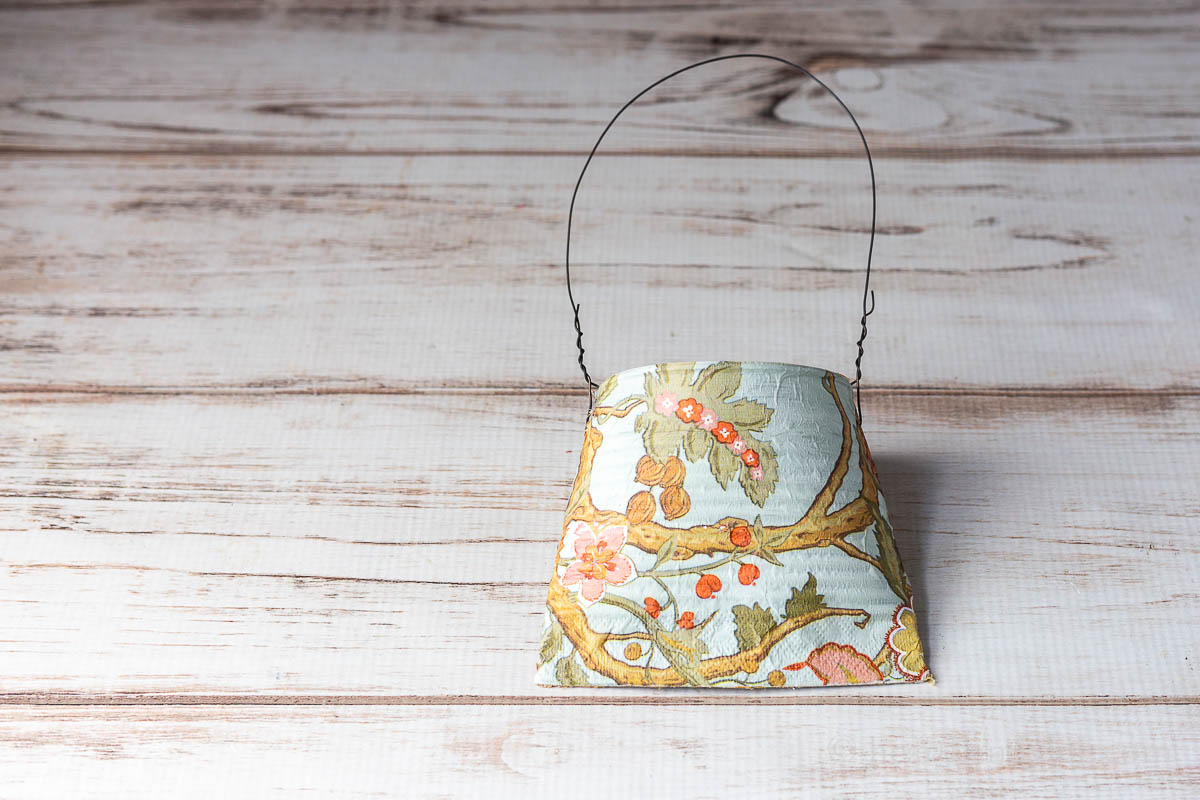
    Step 11: Thread a wire through the holes from the outside to create a hanger.

    Wrapping a wet paper towel and a rubber band on the bottom of some flowers to keep them from wilting.

    Note: The basket will not hold water. You can keep flowers fresh for a short time by wrapping a wet paper towel around the bottom of the stems keeping it in place with a rubber band.

    Two smashed cans hanging on door knobs. One with lilacs and the other with blue flowers.

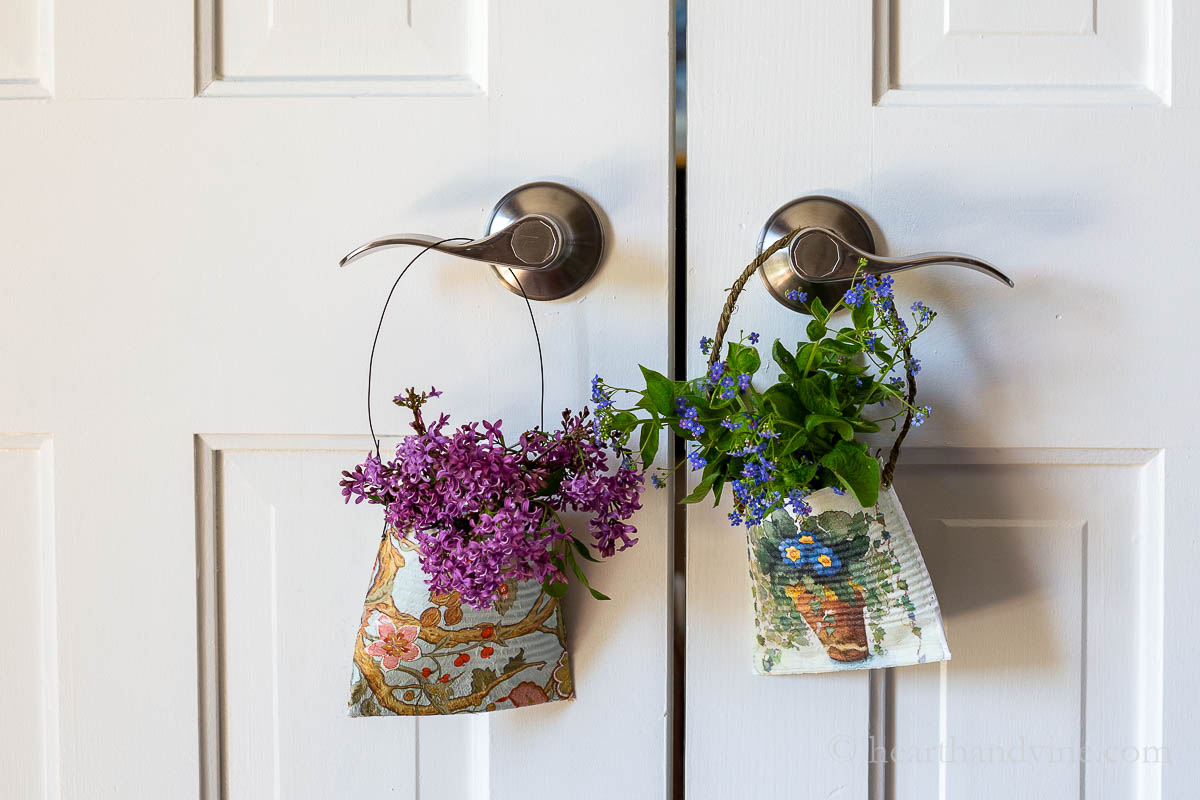
    Hang your lovely creations with your favorite flowers on the doorknob of someone special or simply enjoy the smashed can baskets for yourself.

    Patti signature

    More Tin Can Crafts

    • Tin Can Wind Chimes
    • Tin Can Light Pendant
    • Tin Can Organizer

    Two smashed can crafts into hanging baskets.
    Print

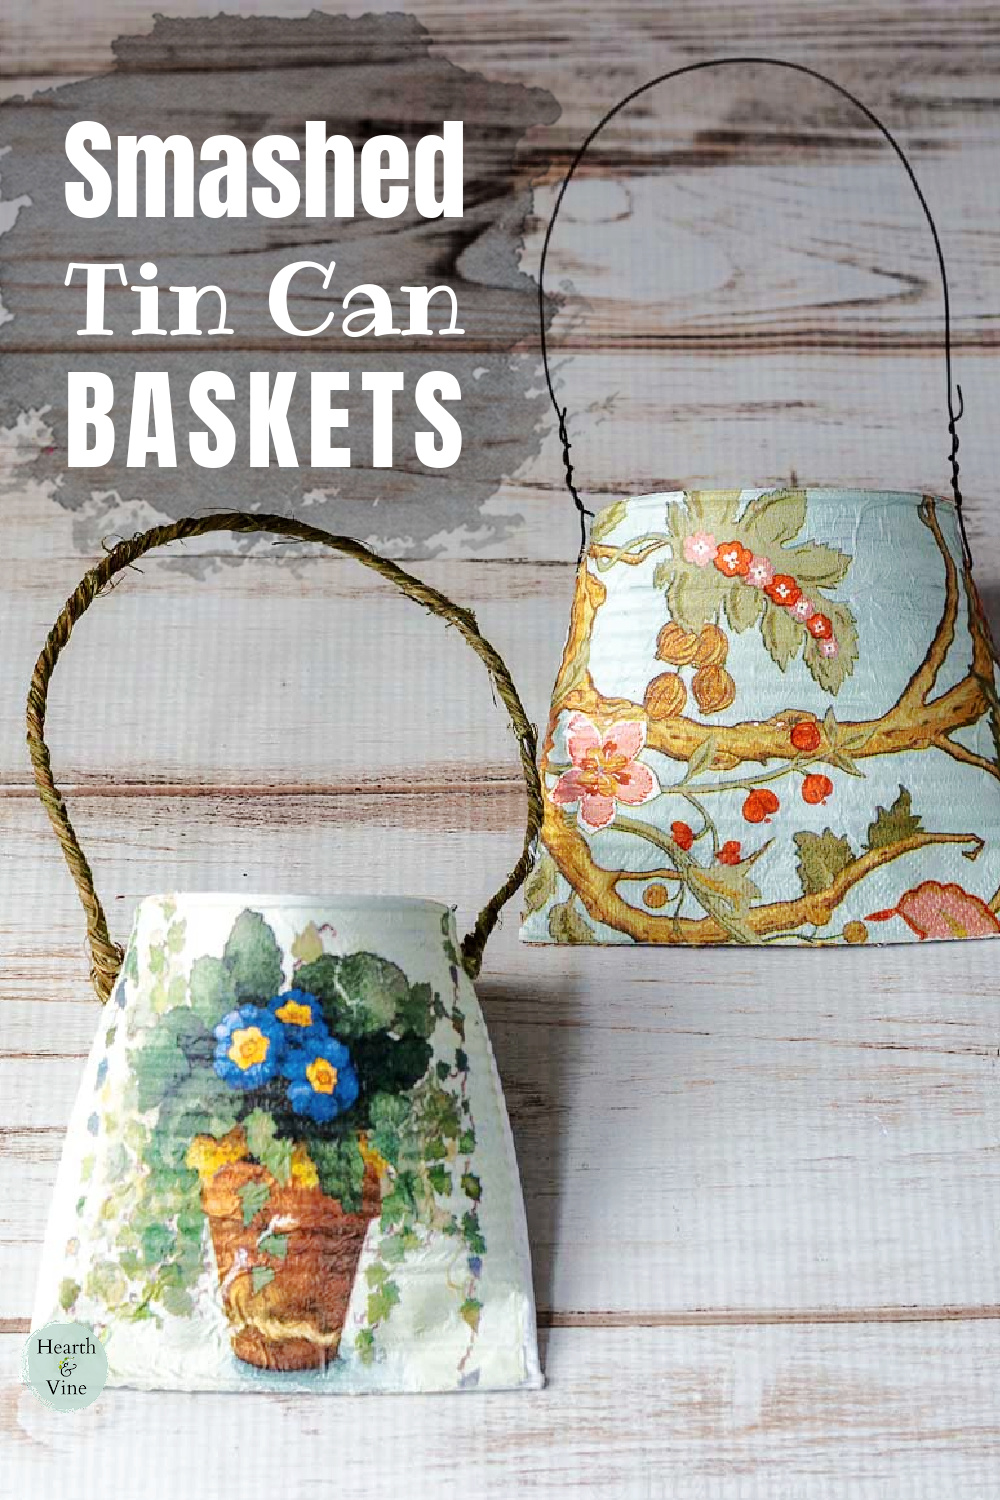
    Smashed Can Basket for May Day

    Enjoy making this easy little basket to carry flowers for May Day all from a plain ordinary recycled tin can.
    Prep Time5 minutes mins
    Active Time1 hour hr 30 minutes mins
    Drying Time1 hour hr
    Total Time2 hours hrs 35 minutes mins
    Yield: 1

    Equipment

    • Hammer
    • Scissors
    • Nail File
    • Paint brushes
    • Smooth Edge Can Opener
    • large nail

    Materials

    • 1 Aluminum Can
    • Printed Napkin
    • Wire
    • White Craft Paint
    • Mod Podge
    • Wood Block

    Instructions

    • Clean the can and remove both the top and bottom lids, the label, and any glue.
    • Use a nail to punch a hole at the top on the inside with a hammer.
    • Repeat on the other side.
    • Start squeezing the bottom of the can together with your hands.
    • Once you get close use a hammer on a safe surface or wood board to hammer the bottom edges together.
    • Paint the outside (inside too if you wish) with white craft paint.
    • Once the paint has dried brush on a layer of Mod Podge.
    • Separate the top printed layer of your printed paper napkin and arrange it on top of the Mod Podge.
    • Repeat on the other side.
    • Trim any excess and use a nail file to finish each edge.
    • Thread a wire on each side from the outside in.
    • Add some flowers with a wet paper towel fastened with a rubber band.
    • Hang your May basket on someone's front door to celebrate the holiday or save and use as you wish.

    Notes

    I ended up using one 15 oz can (beef broth) and a 28 oz can from a can of enchilada sauce. The stewed tomatoes had a different bottom that I could not remove.
    Tried this project?Tag @hearthnvine on Instagram
    Two smashed can baskets in two floral napkin designs.
    « Container Plants for Shade: My Favorites and More
    Brioche Baked French Toast »

    About Patti Estep

    Patti is the creator of Hearth and Vine, a home and garden blog filled with projects to inspire your creative side. She loves crafting, gardening, decorating and entertaining at her home in Pennsylvania. When she is not working on a project at home or searching for treasures at nurseries and thrift stores with her girlfriends, you’ll probably find her with family and friends, at a restaurant, or home party enjoying new and different food adventures.

    Reader Interactions

    Comments

    1. Kathy E.

      May 01, 2024 at 8:26 pm

      Patti, these baskets are so cute! What a great idea to smash the can ends and decoupage them with napkins! Larger cans like those that hold ground coffee would make a big impact too. I'm thinking I'd like one hanging on my porch and filled with artificial flowers. Thanks for the tutorial!

      Reply
      • Patti Estep

        May 02, 2024 at 7:15 am

        Kathy, that's sounds beautiful. Thanks for sharing your idea.

        Reply

    Leave a Reply Cancel reply

    Your email address will not be published. Required fields are marked *

    Recipe Rating


    Primary Sidebar

    Patti Estep Profile Picture

    Hi!

    I'm Patti

    Join me to create lots of fun DIY projects, including crafts, gardening, home decor, and tasty recipes

    More about me

    Popular Posts

    • Baked zucchini bite on a slated tray with a bowl of horseradish sauce.
      Make Tasty Zucchini Bites in Under an Hour
    • Three tin cans in descending sizes hanging from twine.
      DIY Wind Chimes with Tin Cans
    • Blue jean crossover bag
      DIY Crossbody Bag from Jeans
    • Ham barbecue sandwich on plate
      Chipped Ham Barbecue Sandwiches - A Pittsburgh Favorite
    • Echievera planter
      What to do With a Stretched Succulent
    • Make a Mason Jar Oil Candle Lamp with botanicals and essential oils. ~ gardenmatter.com
      DIY Oil Candle - Gifts for the Holidays

    Footer

    ^ back to top

    About
    Contact
    Privacy Policy
    Disclosure Policy

    Sign Up Here!
    for our
    newsletter &
    special offers

    Follow Me

    facebook
    Pinterest
    instagram

    As an Amazon Associate, I earn from qualifying purchases. i.e. as an Amazon Associate, I earn from qualifying purchases.

    Copyright © 2025 Hearth and Vine

    Rate This Recipe

    Your vote:


    A rating is required
    A name is required
    An email is required