• Skip to primary navigation
  • Skip to main content
  • Skip to primary sidebar
  • Home
  • DIY Projects
    • Homemade Bath and Body
    • Sewing - Fabric Crafts
    • Flower Crafts/Decor
    • Thrift Store/Vintage
  • Gardening
    • Flower Gardens
    • Container Gardening
    • Houseplants
    • Indoor Gardening
    • Landscaping
    • DIY Garden Art
  • Decorate
    • Spring Decor
    • Summer Decor
    • Fall Decor
    • Winter Decor
    • Home Decor Projects
  • Recipes
    • Breakfast Recipes
    • Lunch Recipes
    • Dinner Recipes
    • Dessert
    • Salad Recipes
    • Soups and Stews
    • Side Dish Recipes
    • Appetizers and Snacks
    • Healthy Recipes
  • Holidays
    • Valentine's Day
    • Easter
    • Mother's Day
    • Halloween
    • Thanksgiving
    • Christmas
Hearth and Vine
menu icon
go to homepage
  • About
  • DIY
    • ...Flower/Gardening Crafts
    • ... Bath and Body
    • ...Sewing/Fabric Crafts
    • ...Thrift Store/Upcycle
  • Gardening
    • ...Flower Gardens
    • ...Container Gardening
    • ...Indoor Gardening
    • ...DIY Garden Art
  • Decorate
    • ...Home Decor Projects
    • ...Spring Decor
    • ...Summer Decor
    • ...Fall Decor
    • ...Winter Decor
    • ...Room Makeovers
  • Recipes
    • ...Appetizers and Snacks
    • ...Dinner Recipes
    • ...Side Dish Recipes
    • ...Salad Recipes
    • ...Dessert
    • ...Drinks
  • Holidays
    • ...Valentine's Day
    • ...Easter
    • ...Mother's Day
    • ...Halloween
    • ...Thanksgiving
    • ...Christmas
  • Subscribe
  • Instagram
    • Facebook
    • Instagram
    • Pinterest
    • Twitter
  • subscribe
    search icon
    Homepage link
    • About
    • DIY
      • ...Flower/Gardening Crafts
      • ... Bath and Body
      • ...Sewing/Fabric Crafts
      • ...Thrift Store/Upcycle
    • Gardening
      • ...Flower Gardens
      • ...Container Gardening
      • ...Indoor Gardening
      • ...DIY Garden Art
    • Decorate
      • ...Home Decor Projects
      • ...Spring Decor
      • ...Summer Decor
      • ...Fall Decor
      • ...Winter Decor
      • ...Room Makeovers
    • Recipes
      • ...Appetizers and Snacks
      • ...Dinner Recipes
      • ...Side Dish Recipes
      • ...Salad Recipes
      • ...Dessert
      • ...Drinks
    • Holidays
      • ...Valentine's Day
      • ...Easter
      • ...Mother's Day
      • ...Halloween
      • ...Thanksgiving
      • ...Christmas
    • Subscribe
    • Instagram
    • Facebook
    • Instagram
    • Pinterest
    • Twitter
  • ×
    Home » Recipes

    Easy Fermented Pickles

    by Patti Estep · Oct 10, 2022

    Jump to Recipe

    This easy fermented pickles recipe is made with cucumbers, salt, water, a kitchen scale and a jar. A fun and easy process to try at home.

    Fermented pickles on a black slate next to a jar of pickles.
    Sliced fermented pickles

    My daughter started fermenting pickles recently. I really like making pickled vegetables for the refrigerator so I thought this would be a fun process to try. I followed her basic instructions. However, if you want to get really into it you might want to follow a complete guide to fermented pickles or try a fermentation book.

    This post contains some affiliate links (that means if you make a purchase after clicking a link, there’s no additional cost to you, but I will earn a very small commission. ) i.e. as an Amazon Associate, I earn from qualifying purchases. Click here to read my full disclosure policy.

    Small cucumbers next to a bag of Real Salt.

    Making Fermented Pickles

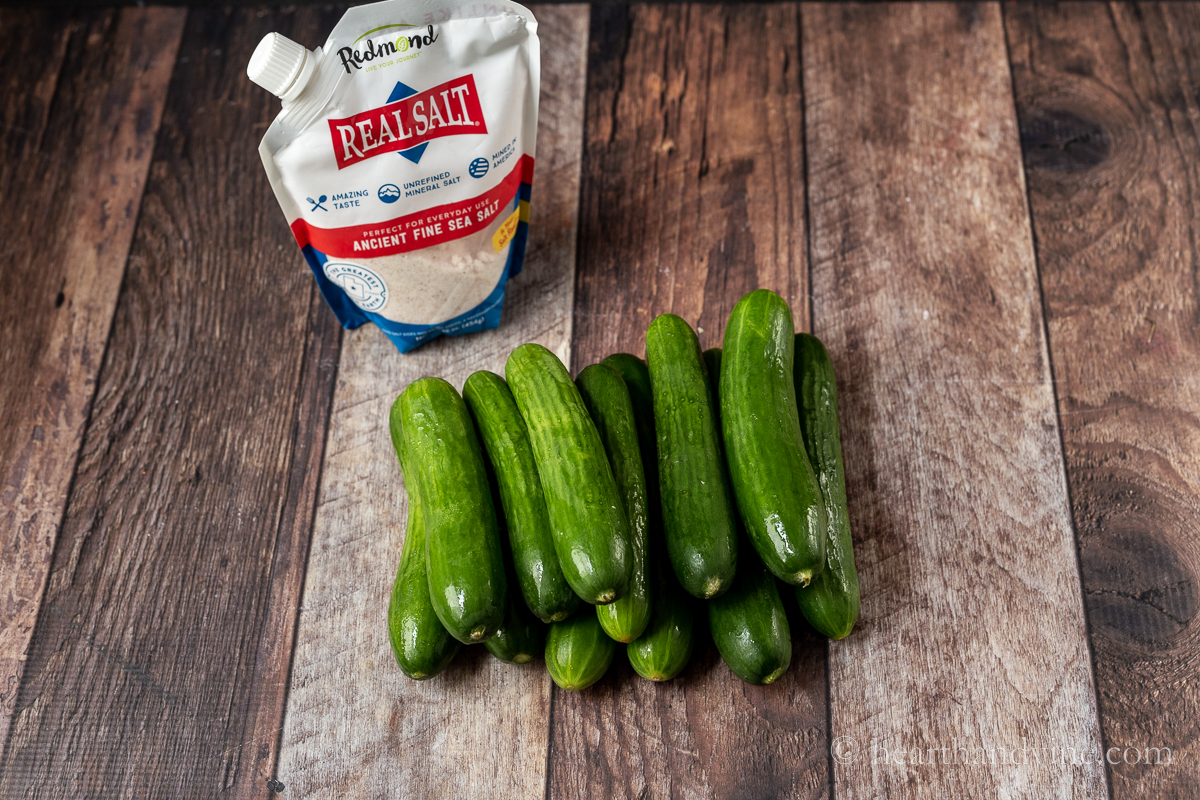
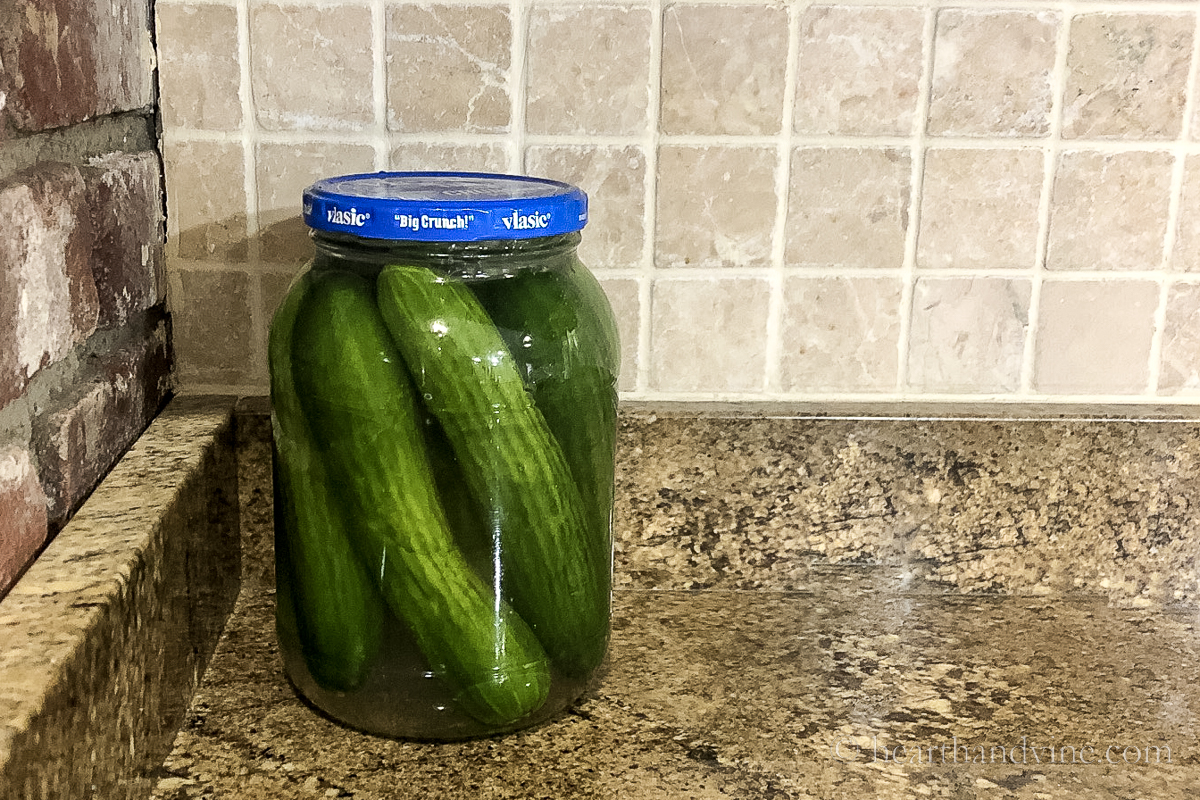
    I started with small cucumbers. This way the whole cucumber can fit in an average jar. You can also use this method to make other fermented foods such as onions, peppers, green beans, radishes, etc.

    Many say that you need to use sea salt for this process. Regular table salt supposedly prevents the growth of beneficial bacteria disrupting the fermentation process. However, some say this is not really true so I'll leave it up to you.

    You can also add spices like garlic cloves, fresh dill, dill seeds, black peppercorns, mustard seeds, allspice, and more. However, for my first attempt, I simply wanted to make cucumber pickles without any additional flavor.

    Cucumbers and water in a jar on a kitchen scale.

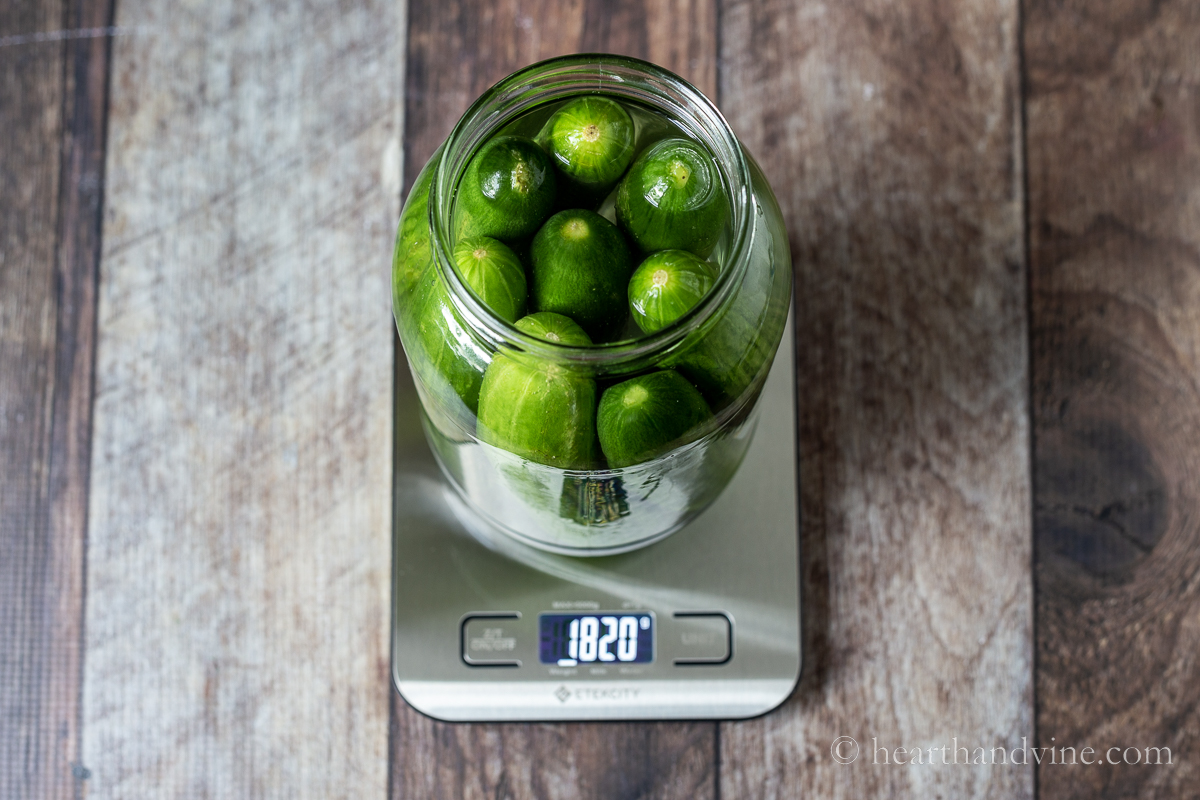
    The other thing you need is a kitchen scale. This is needed to determine just how much salt you will need to add to the water. By the way, you shouldn't use tap water because there might be chlorine in it. However, you can boil tap water or just use filtered water.

    Newsletter Signup
    Join Our Newsletter List!

    Be the first to receive new posts and get access to our Subscribers Only Page.

    Blue container with water on a scale.

    You want to add 2.5% of salt to the water to create the brine for your pickles. So after you weigh your cucumbers in their jar with water you'll want to then take that water and place it in a container and zero out the scale.

    Blue bowl with water and salt on a scale.

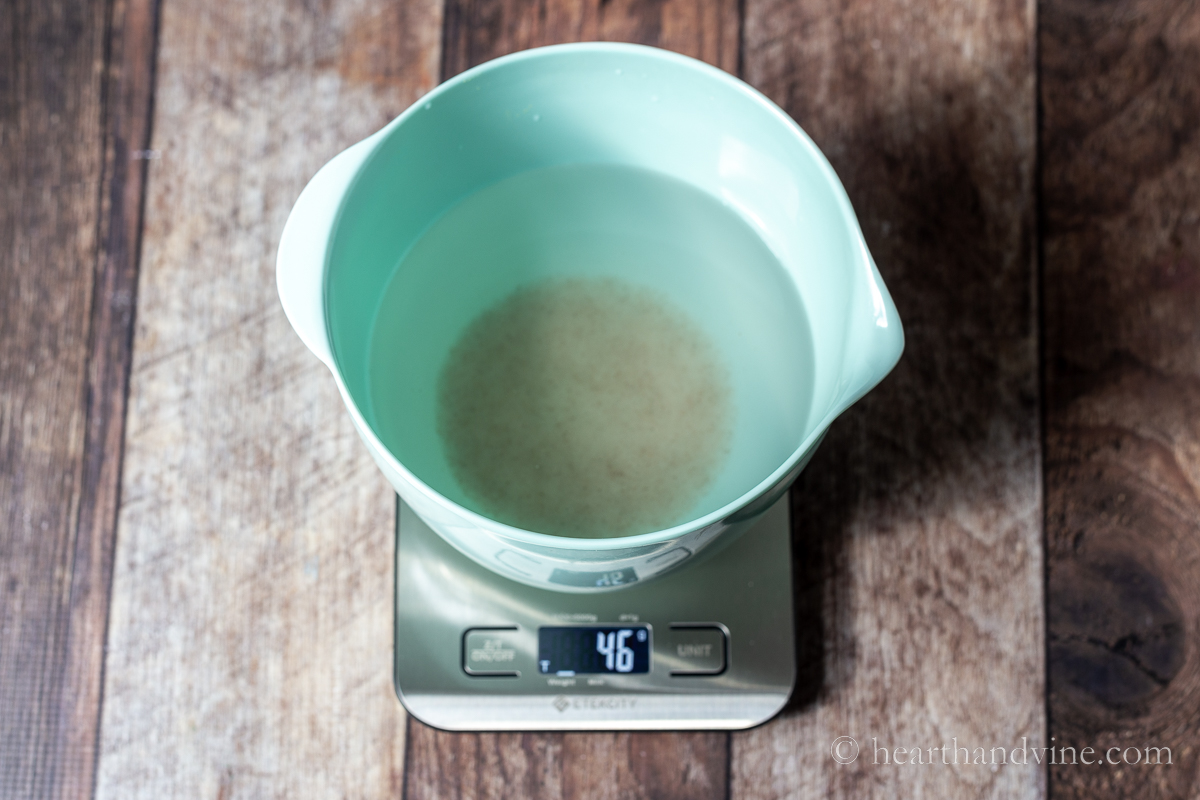
    Then you start adding salt, a little at a time until you reach the 2.5% mark. In my case, the jar weighed 1820 grams. So 1820 times .025 equals 45.5 or 46 grams. It ended up being about 2.5 tablespoons.

    Cucumbers in brine in a jar with a water baggie on top.

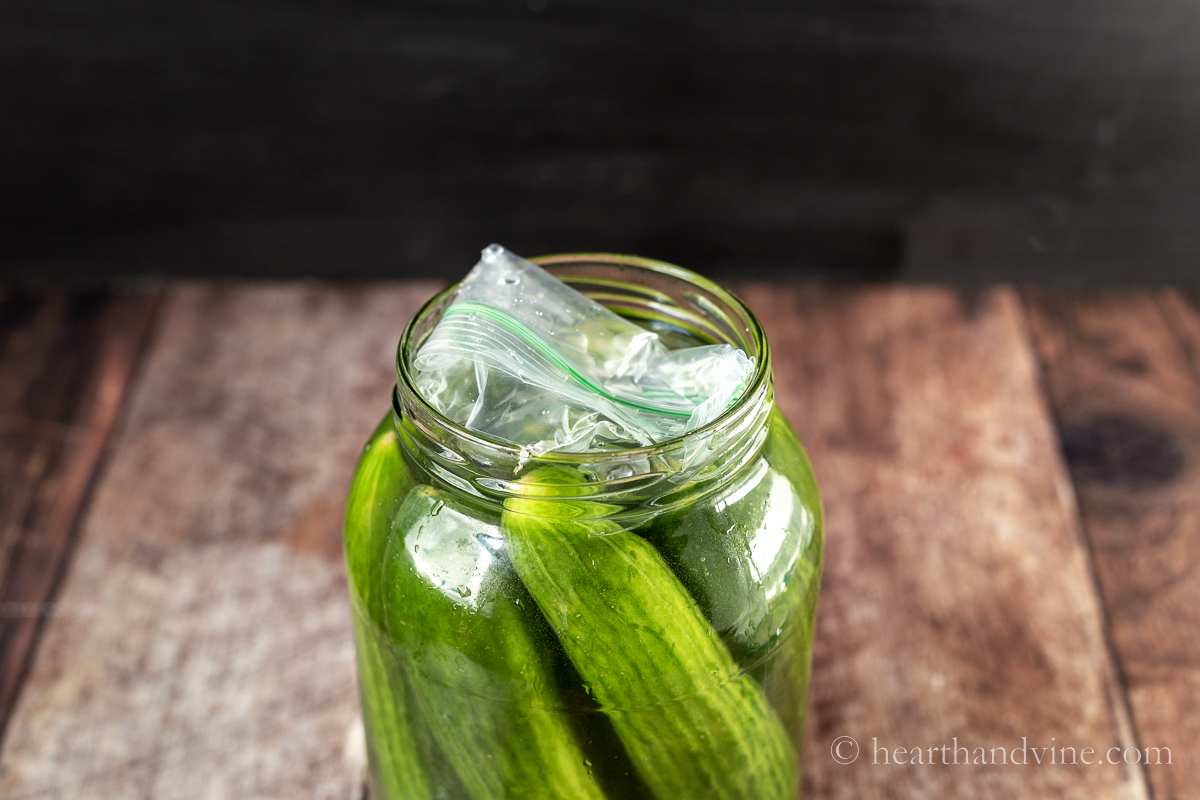
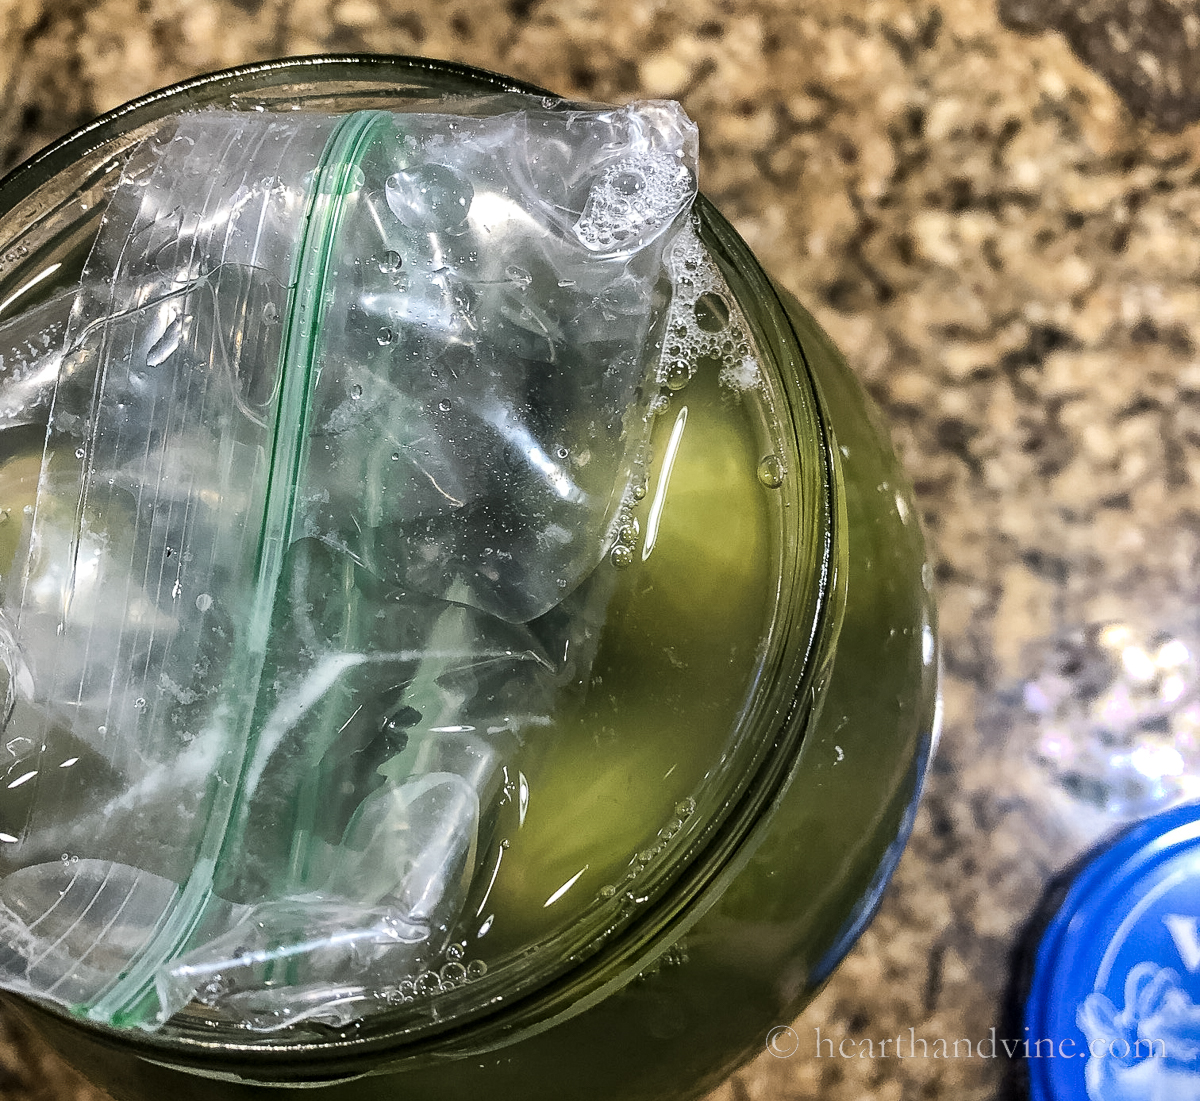
    Lastly, you need to make sure that the cucumbers stay submerged under the water. If not they may develop mold. I used a baggie filled with water to weigh it down. However, you can use a small plate or if you want to get fancy you can buy special fermentation weights for this part of the process.

    Cucumbers in a jar on the counter fermenting.

    Leave your jar to sit at room temperature somewhere on the counter out of the way.

    Top of pickle jar showing bubbles made with fermentation.
    Bubbles form as part of the fermentation process

    After a couple of days open the lid and let out any gasses that have built up. Keep checking it daily.

    Top view of fermented pickles.

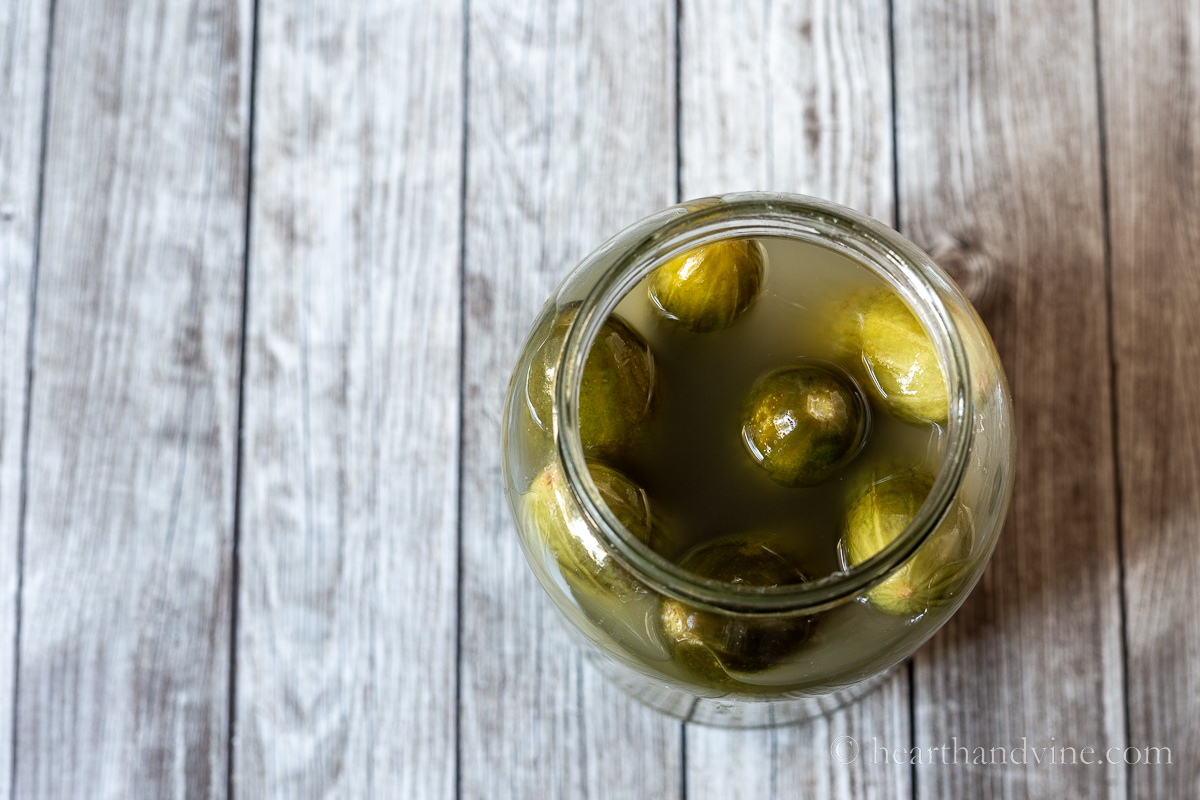
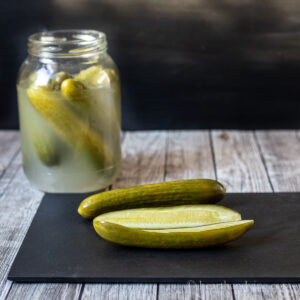
    After about a week you should have tasty fermented pickles just like the kind you see in big deli barrels similar to kosher dill pickles. At this point, you can keep them in the fridge and start consuming them without having to worry about the water level.

    They were really good. Not as crisp as the vinegar style refrigerator pickles. However, I've heard that you can add bay leaves or grape leaves to help maintain the crispiness. It has something to do with the tannin in the leaves that helps keep the skins from getting too soft. Definitely something to try next time.

    Patti signature

    More Pickling Ideas

    • Easy No Sugar Pickled Vegetables
    • Pickled Red Beet Eggs
    • Homemade Sauerkraut
    Sliced fermented pickles next to a jar of same pickles.
    Sliced pickles next to a jar of fermented pickles

    Fermented Pickle Recipe

    Learn how to make fermented pickles at home with a jar, salt and kitchen scale.
    Print Recipe Pin Recipe
    Prep Time 30 minutes mins
    Additional Time 7 days d
    Total Time 7 days d 30 minutes mins
    Course Appetizers and Snacks
    Cuisine American
    Servings 6
    Calories 5 kcal

    Equipment

    • Etekcity Food Kitchen Scale, Digital Grams and Ounces for Weight Loss, Baking, Cooking, Keto and Meal Prep, LCD Display, Medium, 304 Stainless Steel
    • Redmond Real Salt - Ancient Fine Sea Salt, Unrefined Mineral Salt, 16 Ounce Pouch (2 Pack)

    Ingredients
      

    • cucumbers
    • salt

    Instructions
     

    • Place a clean jar on a kitchen scale and write down the weight.
    • Zero out the scale.
    • Add cucumbers to the jar and cover with water.
    • Place on the scale and write down the weight.
    • Take the weight of the jar and multiply it by .025 to get a 2.5% amount for the salt needed.
    • Pour out the liquid into a separate vessel.
    • Set it on the scale, zero out and add enough salt to get to the 2.5%.
    • Mix the salt until it dissolves.
    • Add the salt water to the pickles in the jar.
    • Add a small plate or small baggie with water to weigh down the cucumbers so that they are submerged under water.
    • Cover with the lid and set it in a spot out of the way.
    • After 2 days open the lid and allow the gases out.
    • After a week taste a pickle to see if you like it.
    • Transfer the pickles to the refrigerator and enjoy.

    Notes

    The pickles may continue to ferment at a much slower process but you no longer need to keep them submerged under water once they are refrigerated.

    Nutrition

    Serving: 1gCalories: 5kcalCarbohydrates: 1gSodium: 98mgSugar: 1g

    Nutritional information is provided as a courtesy and is an estimate only. This information comes from online calculators. Although attempts have been made to provide accurate nutritional information, these figures are only estimates.

    Tried this recipe?Tag @hearthnvine on Instagram
    « Peanut Butter Chocolate Chip Cookies
    DIY Bath Salts with Herbs and Essential Oils »

    About Patti Estep

    Patti is the creator of Hearth and Vine, a home and garden blog filled with projects to inspire your creative side. She loves crafting, gardening, decorating and entertaining at her home in Pennsylvania. When she is not working on a project at home or searching for treasures at nurseries and thrift stores with her girlfriends, you’ll probably find her with family and friends, at a restaurant, or home party enjoying new and different food adventures.

    Reader Interactions

    Leave a Reply Cancel reply

    Your email address will not be published. Required fields are marked *

    Recipe Rating


    Primary Sidebar

    Patti Estep Profile Picture

    Hi!

    I'm Patti

    Join me to create lots of fun DIY projects, including crafts, gardening, home decor, and tasty recipes

    More about me

    Popular Posts

    • Baked zucchini bite on a slated tray with a bowl of horseradish sauce.
      Make Tasty Zucchini Bites in Under an Hour
    • Three tin cans in descending sizes hanging from twine.
      DIY Wind Chimes with Tin Cans
    • Blue jean crossover bag
      DIY Crossbody Bag from Jeans
    • Ham barbecue sandwich on plate
      Chipped Ham Barbecue Sandwiches - A Pittsburgh Favorite
    • Echievera planter
      What to do With a Stretched Succulent
    • Make a Mason Jar Oil Candle Lamp with botanicals and essential oils. ~ gardenmatter.com
      DIY Oil Candle - Gifts for the Holidays

    Footer

    ^ back to top

    About
    Contact
    Privacy Policy
    Disclosure Policy

    Sign Up Here!
    for our
    newsletter &
    special offers

    Follow Me

    facebook
    Pinterest
    instagram

    As an Amazon Associate, I earn from qualifying purchases. i.e. as an Amazon Associate, I earn from qualifying purchases.

    Copyright © 2025 Hearth and Vine

    Rate This Recipe

    Your vote:


    A rating is required
    A name is required
    An email is required