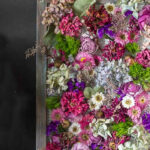
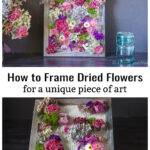
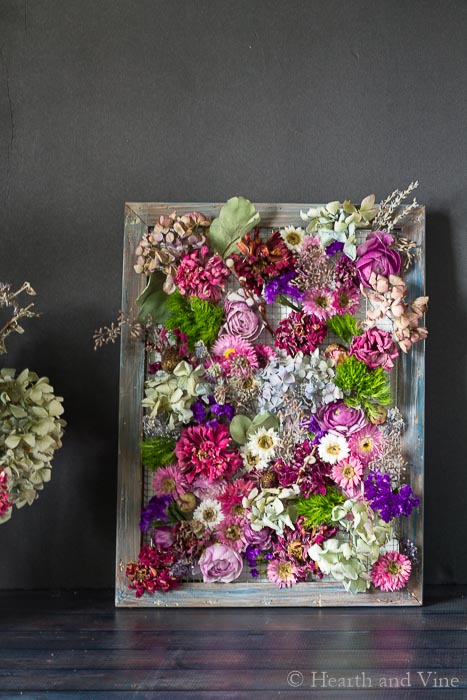
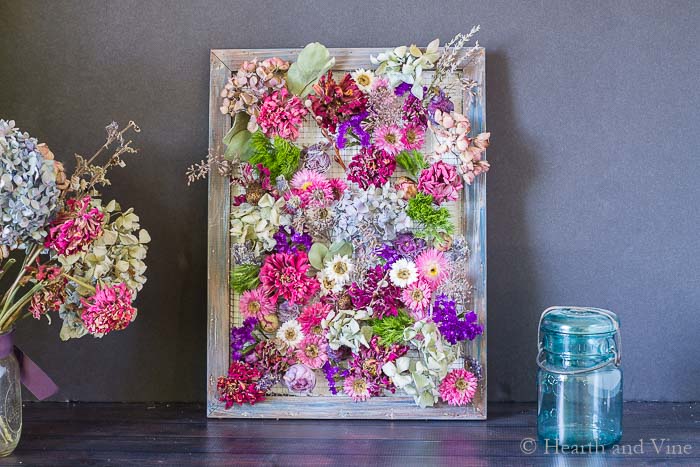
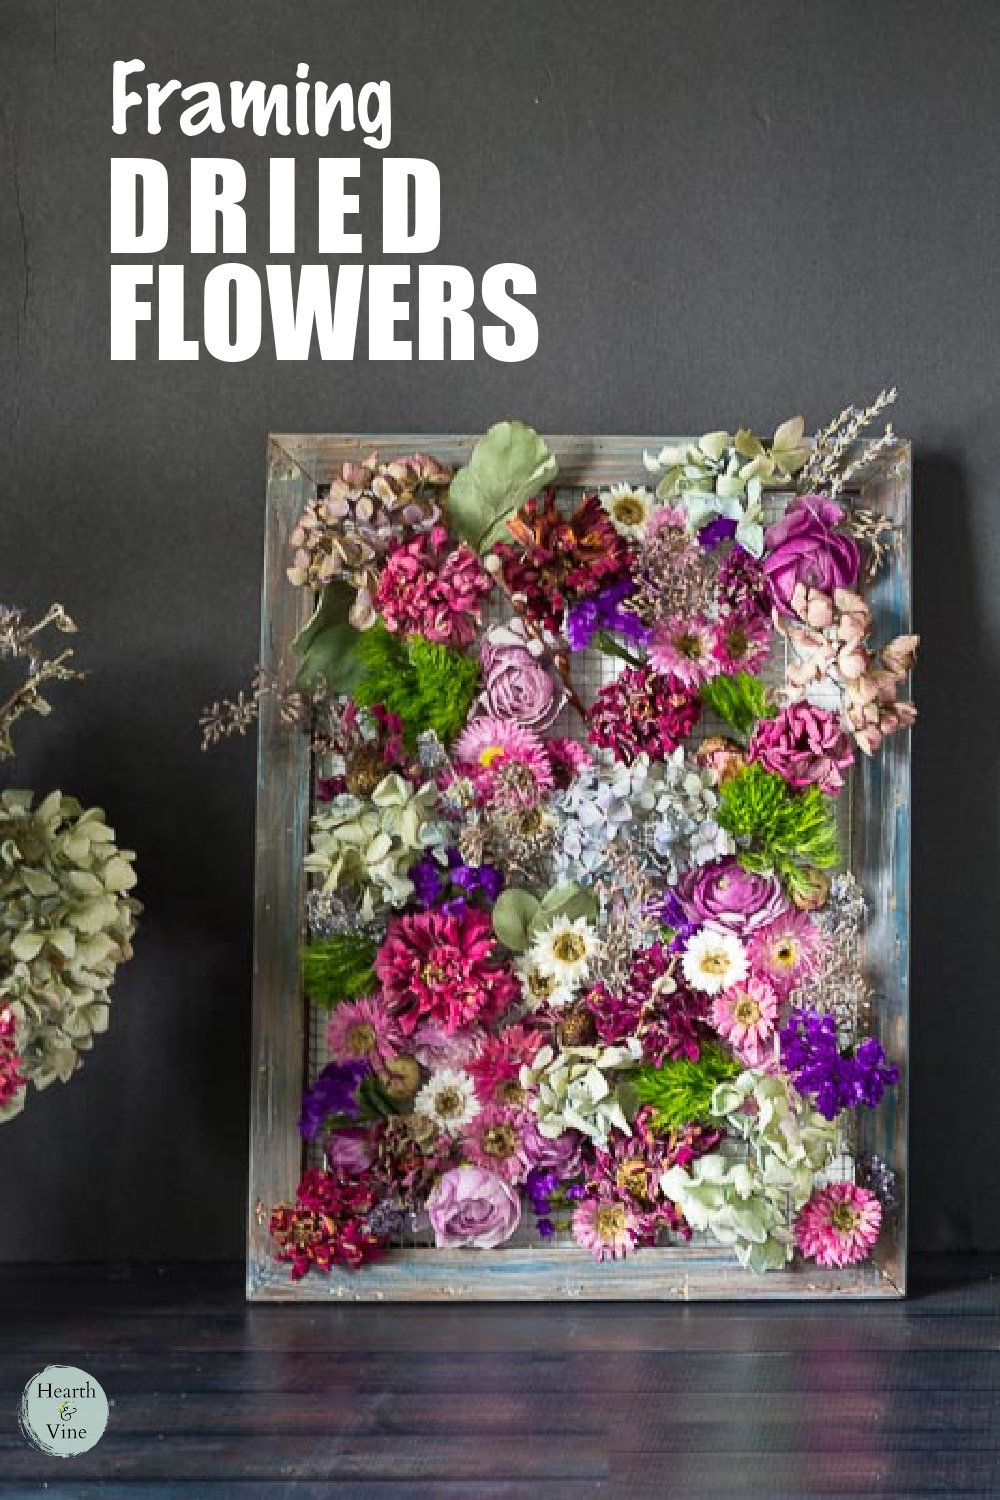
Framing dried flowers is a great way to make a beautiful wall hanging with just a few supplies. This easy flower craft tutorial will show you how to take your own dried plant material and turn it into a work of art.
Have you seen those beautiful vertical-framed succulent planters? They are truly gorgeous, however, I'm not sure that I want to spend the money on all those little plants.
Then I got a brilliant idea. Why not create framed dried flowers that have a similar look to the succulent planter? I already have lots of dried flowers and this no maintenance art will last a long time.
This post contains some affiliate links (that means if you make a purchase after clicking a link, there's no additional cost to you, but I will earn a very small commission.) i.e. as an Amazon Associate, I earn from qualifying purchases. Click here to read my full disclosure policy.
How to Frame Dried Flowers
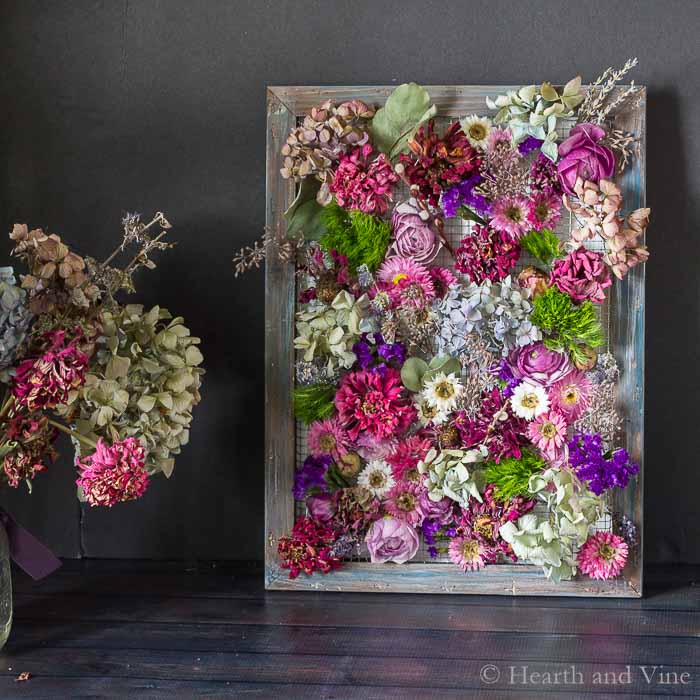
Instead of going out to buy a new frame, I decided to use an old artist's stretched canvas for this project.
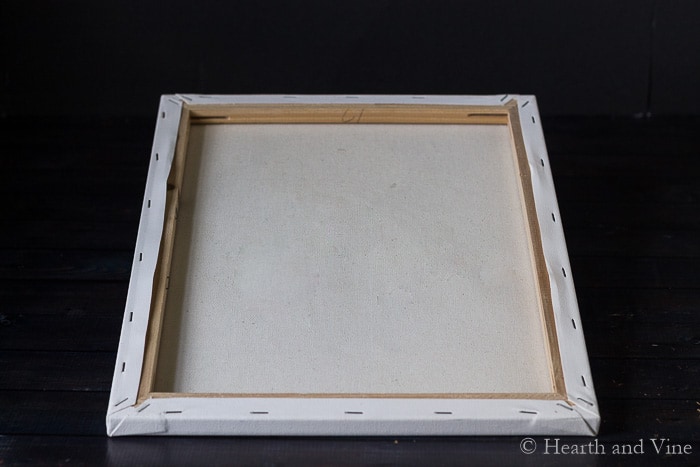
The idea is to use the back end of the canvas and place some wire inside for a rustic look, and to give the flowers a place to adhere to.
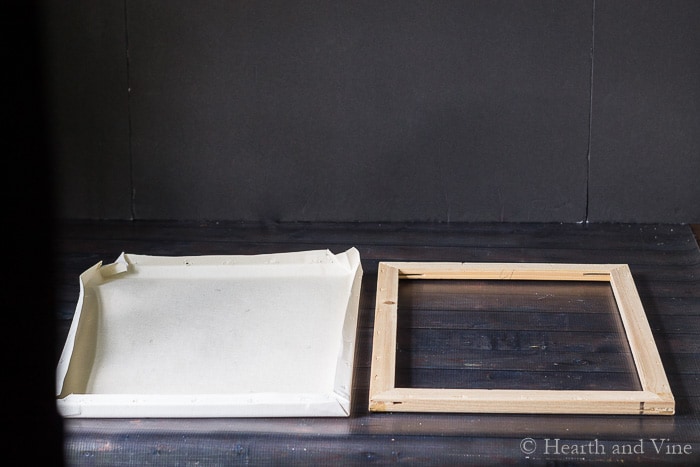
First, remove the paper from the wooden frame. Then cut it down in size to cover the front, and staple it back into place.
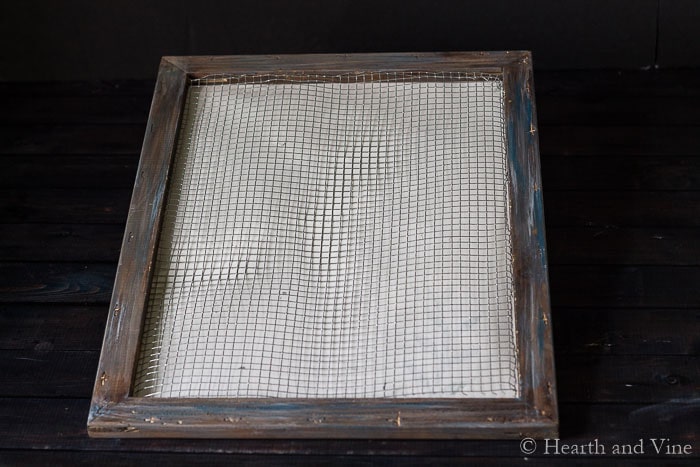
If you'd like you can paint or stain the frame before adding hardware fabric mesh inside the frame. Chicken wire would work well too.
Cut the wire a bit larger than the frame, and turn under the edges with some pliers. This will help it fit snugly inside the frame.
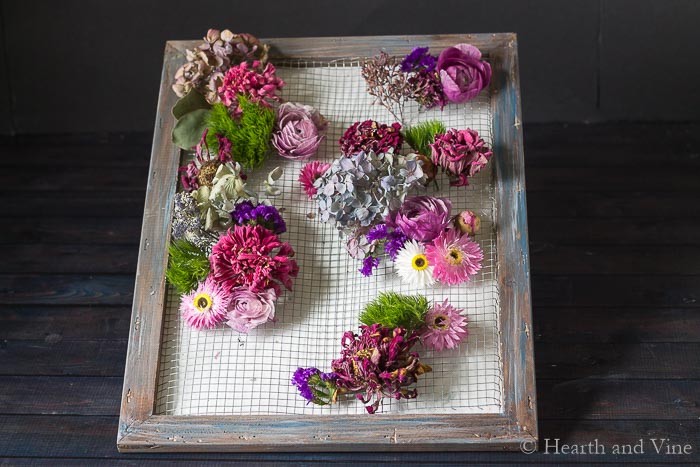
Then the real fun begins. Use a hot glue gun and place the flowers all over the frame.
Types of Flowers
Here there are a few fresh ranunculus, statice, and green balls that should dry well. If they don't you can pull them off, and replace them with something else.
I also purchased some strawflowers from Etsy. The rest are flowers from the garden that I've dried, including hydrangeas, peonies, and zinnias.
You can always pick up a bouquet from the store and use the blooms for this project. Many will dry right on the frame. However, they typically will shrink as they lose moisture so you might need to add a few petals, small flowers, or dried leaves with a pair of tweezers to fill in the space.
You could also try using silica gel. This is a sand-like material that you place the flower head in and it will absorb the moisture within a few days to a week.
How Long Will It Last?
This dried flower framed art should last a long time. You can spray it with a little hairspray to keep the dust off. Also, consider hanging it somewhere in a dry place away from direct sunlight to keep the color from fading. You could also set this artwork on a shelf or mantel.
You could try this with pressed flowers. However, they typically are more fragile to work with and don't offer the same 3-D textures that dried whole flowers provide. If pressed flower art is an interest, you can find a similar framed pressed flower project here.
This is my favorite kind of project. Working with pretty flowers and creating something special with their natural beauty. Wouldn't this be a nice project for a wedding bouquet?
The hardest part is knowing when to stop.

More Dried Flower Ideas
How to Frame Dried Flowers
Equipment
- Pliers
- Hot glue gun
- Staple Gun
- Scissors
Materials
- Artist's Stretched Canvas
- Hardware Fabric Mesh
- Dried Flowers
Instructions
- Remove the paper from the wooden frame.
- Cut it down in size to cover the front.
- Staple it back into place.
- Paint or stain the frame if desired.
- Cut the wire just a bit larger than the frame.
- Turn under the edges with some pliers.
- Use a hot glue gun and place the flowers all over the frame.
Dena
Could you please tell me how you store the unused flowers long-term, while you're waiting to use them for your next project?
Patti Estep
Dena. I have a wire shelving rack in my office that's open. Most of them are on the top of it. Find a place somewhere cool, dry, and away from the sunlight. You don't want any moisture causing mold, or strong light fading the colors.
Nikki Gwin
Patti, I love this and have been gathering materials to make myself one ever since I saw this. Is the fabric mesh that you used, window screen type stuff? How did you make it stay inside the frame? I have some wire and I also have the nylon window screen and I am trying to decide which to use.
Thanks for the idea and instructions!
🙂 gwingal
Patti Estep
Hi Nikki,
I used hardware cloth that I purchased a while ago for another project. (wrist comfort cuff). It was either at Lowes or Home Depot. This material is very stiff. I was able to cut it just a bit larger than the opening of the frame and turn the edges inward so that it sticks inside all on its own. You could do the same with chicken wire.
Screening is pretty soft and malleable so what I would do with that is use a heavy duty stapler and staple it to the frame.
Start in the middle of one of the sides and place a staple. Then pull tight and place a staple in the middle of the opposite side. Then go to the other two sides and place a staple in the middle pulling tight each time. Then go around filling in with enough staples to secure it to the frame.
This should make it strong enough to glue the flowers to.
Good luck. I'd love to see the finished product. Send me a pic when you're done.
Julie bosarge
Beautiful
Patti Estep
Thanks Julie. It was a fun one to create.
FLORENCE
That's gorgeous Patti! I absolutely love it, and it's so natural-looking!
Patti Estep
Thanks Florence!
Michelle Leslie
OMW Patti, what a beautiful creation. Those dried flowers in the frame look like a work of art. The colors are just stunning. Lovely idea
Meegan Fast
Beautiful idea, Patti. I am always inspired when I visit your blog. Your creativity is never ending. Thanks for sharing your ideas.
maria
Patty, I love dried flowers and this is such a unique idea, do you spray them afterwards with anything. I could not see on the post if you did. Sometimes hair spray.
Thanks
Patti Estep
Hi Maria,
I'm so glad you like this project. No, I did not spray it. I have heard of people using aerosol hairspray and/or poly sprays to protect the flowers before. Thanks for bringing it up in case anyone wants to try it.
Maureen
I just love this! So bright, and fresh! I would be tempted to use it as a wreath on the front door for spring!
Patti Estep
Thanks Maureen! It's a little too delicate for my front door because I don't have a storm door but it would look nice.
Mary
This came out stunning Patti. Very clever to use the fabric mesh inside. And that burst of colors is wow!!
Patti Estep
Hi Mary,
Thanks. Lucky for me that the flowers are so pretty, it's easy to make it look good.
Barbara Chapman ~ French Ethereal
Oh! I love this Patti!!! I was just at our storage units yesterday {in California} and was looking up at a basket of dried flowers from my former yard ~ I kept them as they are the last of my dried hydrangeas. There are roses in there as well as some faux fall vines and orange-headed daisies. This would be a great project to repurpose all them!!! Will be posting to my FB to share and for me to find again later.
Thank you for a lovely idea to take back to Texas with me,
Barb 🙂
Patti Estep
Hi Barbara,
You definitely should try it or some version of this project since you already have so many wonderful flowers to work with!
Carole
Brilliant.... I'm a huge fan of dried flowers, this dates back to my flower shop days. You had a really nice assortment of flowers to display in this piece and the colors pattern is one of my favorites. I really like this...
Patti Estep
Hi Carole,
Thank you. It was so fun to make. The flowers are so pretty. They make it easy.