Learn how to make a braided beach towel rug that you can use in the bathroom for a fun decorative piece that is also very useful.
this post contains affiliate links for your convenience. Click here to read my full disclosure policy
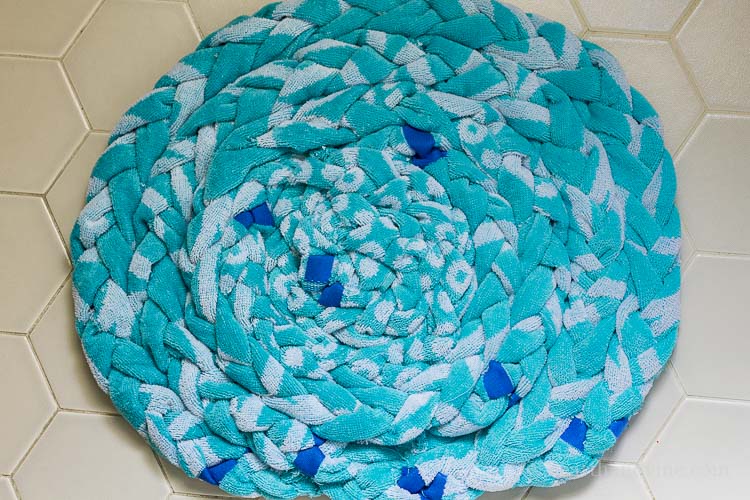
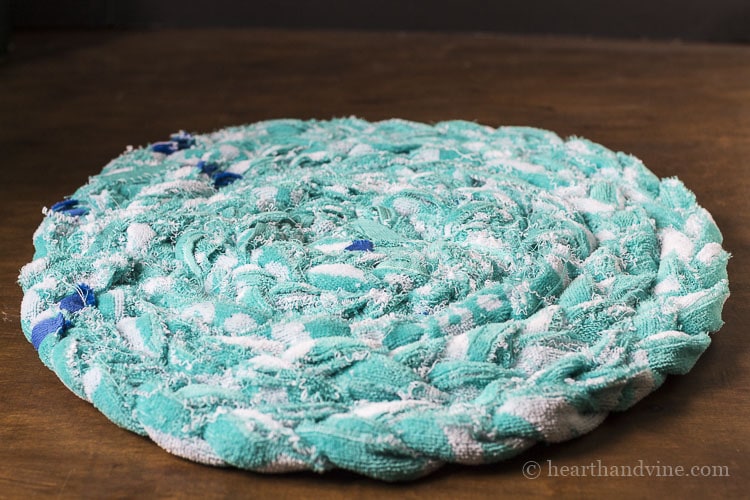
I found this pretty beach towel at a discount store, and thought about making a rug out of it. Remember using rags as a kid, and braiding them into a large coil rug? Why not make a braided beach towel rug that could be used in the bathroom? It actually turned out pretty nice. The beach towel I purchased measured 30 inches by 60 inches and the final rug was about 20 inches round.
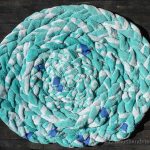
Braided Beach Towel Rug
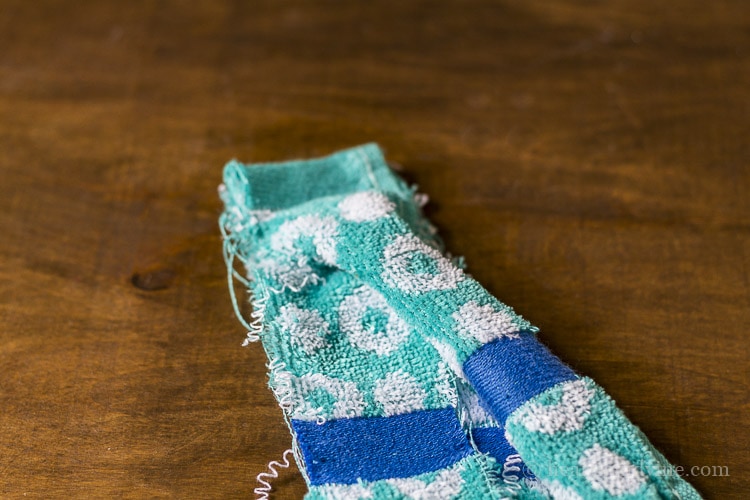
The first step is cutting your beach towel up into strips. I used two inch strips and ended up with four braids. Then sew sets of three strips together at one end. Begin braiding by turning the raw edges underneath as you go.
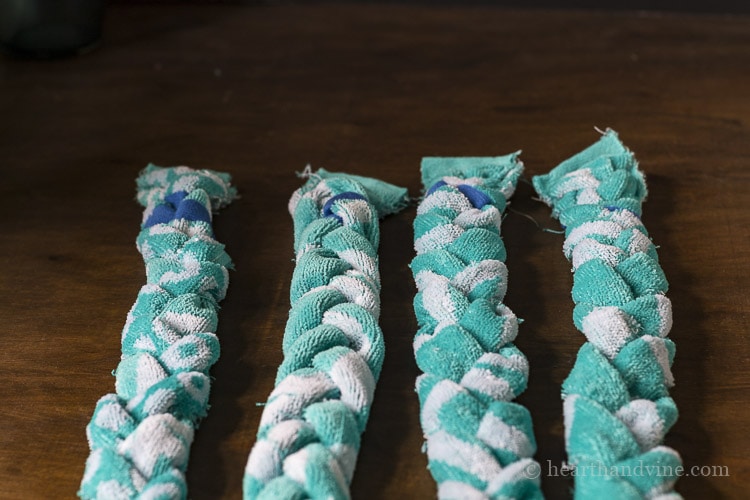
Sew the other end when you are finished braiding. If you find that there is extra material of one piece, simply cut it off, and sew where the three best meet together.
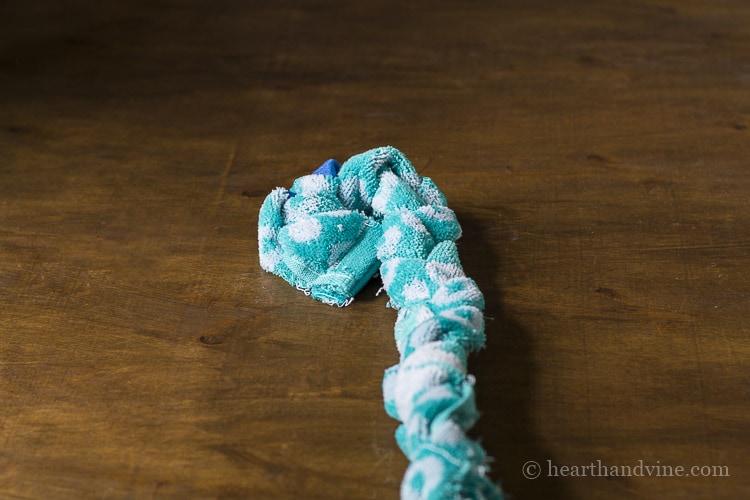
To make the rug begin coiling one of the braids, tucking the beginning edge underneath.

I used a double thread and hand sewed the coil together from underneath.
Here's a little tip my mother taught me: To make a quick knot for your thread, wrap the end around your index finger and using your thumb roll the thread up the index finger. Then use your middle finger to trap it against the thumb, and pull the end of the thread with the needle with your other hand to make a knot. If you want the knot to be larger, repeat the process.
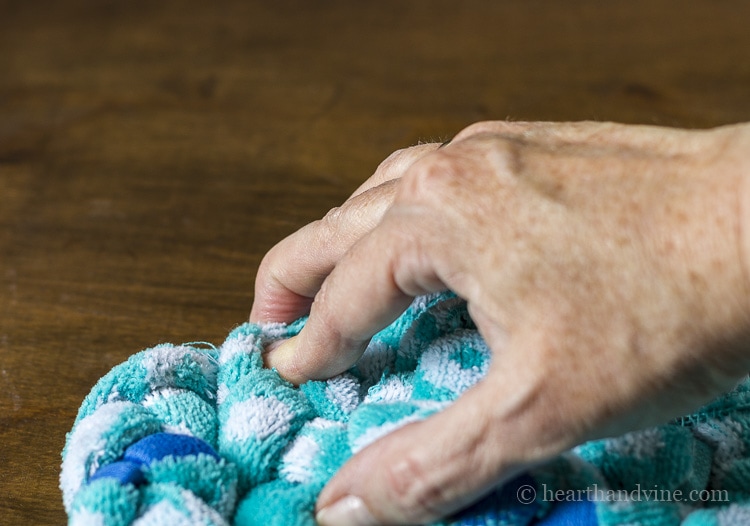
When you get to the end of a braid, tuck the sewn edge underneath and sew to the coil. Start the next braid underneath as well, and continue hand sewing from the back side.
Finally, here's what the back side looks like, with messy raw edges and threads everywhere.
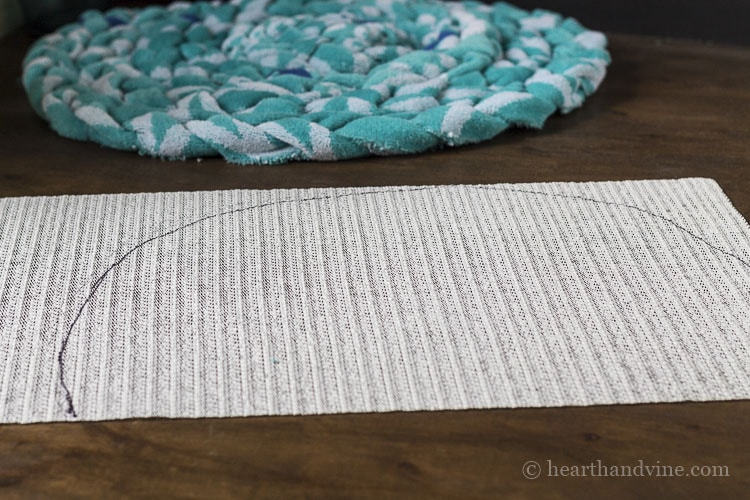
It seems like a good idea to give the backside a more finished look and prevent it from sliding, so I add some rubber shelf liner paper .
.
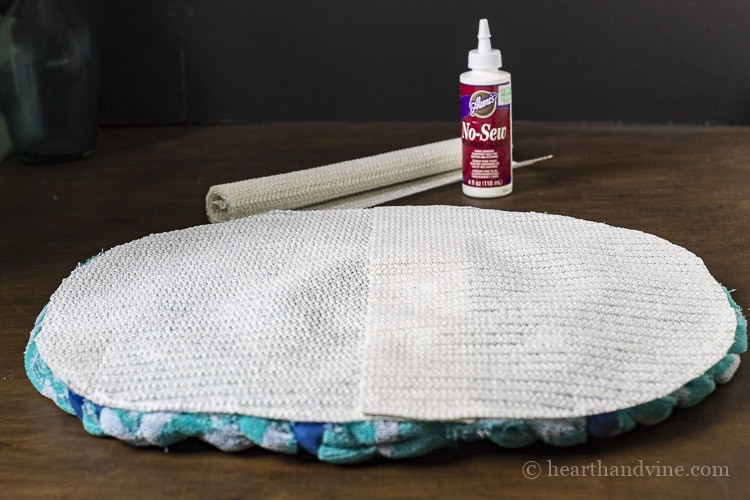
Use some fabric glue to adhere the liner to the rug.
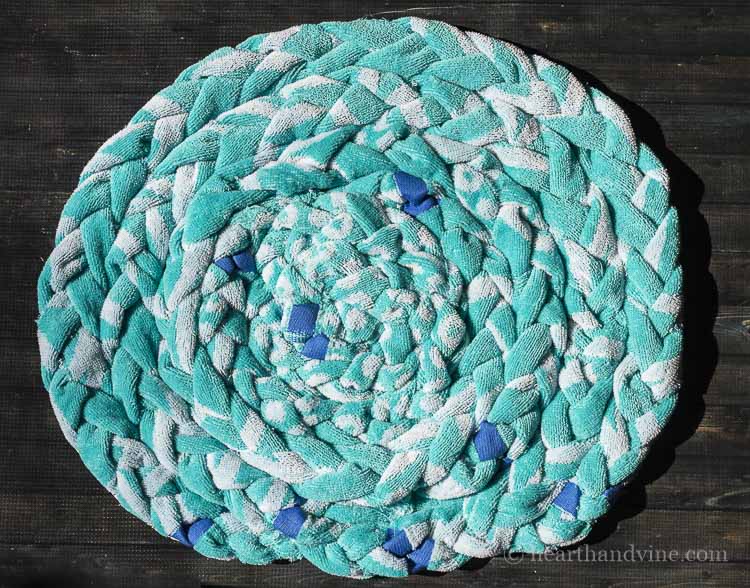
That's all there is to it. I think if you used two beach towels to make a larger rug it might be even better, yet it is pretty, and so cushy under your feet.
How to Make a Braided Beach Towel Rug
Equipment
- Sewing Machine
Materials
- Beach Towel
- Fabric Glue
- Rubber Shelf Liner Paper
- Thread
Instructions
- Cut your beach towel up into strips.
- I used two inch strips for four braids.
- Sew sets of three strips together at one end.
- Begin braiding by turning the raw edges underneath as you go.
- Sew the other end when you are finished braiding.
- Cut off any extra material.
- Sew where the three meet together.
- Begin coiling one of the braids, tucking the beginning edge underneath.
- Use a double thread and hand sew the coil together from underneath.
- When you get to the end of a braid, tuck the sewn edge underneath and sew to the coil.
- Start the next braid underneath and continue hand sewing from the back side.
- Add some rubber shelf liner paper to the underside of the rug with fabric glue.
Kelly Murray
I made one for my step-daughter, she absolutely loved it. And I think I got the kids thinking about the great benefits of recycling/up cycling. We are going to 1 project a month for their homeschooling curriculum!
Thanks for the tutorial!
Lilbigtoes (aka: Kelly Murray)
Patti Estep
That's a great idea Kelly!
Maude LaFountain
I love your little rug it is just so cute ...Now I need to find me an old beach towel to tear up and try making me one for my bathroom ....
Patti Estep
Hi Maude,
So glad you like the beach towel rug project. I wonder if you could find some nice towels at Goodwill? Soon it will be the end of the summer season and you will find them all on sale. I hope that you try it soon.
Have a great week and thanks for stopping by,
Patti
Emma
Your little rug is adorable. Started one with old sheets about 20 years ago. Was supposed to be a 5x7, then got married and had other projects and moving etc. Finally, one day cleaning out things I tossed the started piece and all the torn strips {Stupid? Yes }
Anyway, thinking of remembrances. I made a pillow and trimmed it in lace with a large C for my granddaughter..thinking she might want something to hold onto while in College. The C was cross stitched {never had cross stitched before and it turned out so professional looking. cross stitched the date and from grandmother in small letters }
After she graduated, I asked her where the pillow was and she said she didn't know, probably went to goodwill or salvation army? Never used it on her bed at home or away. My heart was broken, for 2 reasons, I never had a grandmother and no one ever made anything of sentiment for me as I did for her. . I know when I was in college, I would have loved to have had grandmothers pillow to hug. and my husband was so excited when I made it and only took about 7 hours. Anyway, that's my story and will probably start another rug soon.
Patti Estep
Hi Emma,
I'm sorry to hear that your grand-daughter did not cherish the lovely pillow you made. I don't think young people have the same nostalgia that our generation did. Maybe one day she will look back and wish she still had it. Maybe when she's older with her own kids will appreciate more and will want to learn from you. That certainly was a nice gift.
Thanks for stopping by the blog and telling your story,
Patti
Jan
Awesome. Who would of thought of using towels. I have made many rag rugs. I love the idea of the backing. Besides making it slip safe, the backing will help spills or dust etc from seeping through onto the floor
Patti Estep
Hi Jan,
If you are used to making rag rugs then this should be a cinch for you. A couple of people were concerned about washing it and I haven't washed mine. I used regular fabric glue for the backing but there is a washable fabric glue that you can buy which may work better.
Thanks for stopping by and have a great week!
Patti
Sandra D
This would also make a great mat for kids to sit on at the beach. Can you wash it with that backing on it?
Patti Estep
Hi Sandra,
I have not washed it yet. I would think that you could but would try a delicate cycle and make hang it dry to be safe.
Thanks for stopping by,
Patti
Carole
Excellent tutorial Patti and the beach towel is a great idea, I bet it feels comfy to the feet. Get this my grandma use to make these types of rugs for her home. She even made small ones for the kitchen chair seats. They were made from old clothes because being from the depression era she never got rid of anything. I still have one she never finished and was actually thinking of one day turning it into a funky wall piece. Love how your post took me down a bit of memory lane. It's a good thing!
Patti Estep
Hi Carole,
I do remember those rugs. We used to call them rag rugs and it was a fun thing to make in the summer as kids. I'm sure your grandmothers were much nicer and finely made. Definitely make a wall hanging from the unfinished one she gave you. It will look great and remind you of her every time you think if it.
Thanks for stopping by,
Patti