

Learn how to make scented hangers with simple wire hangers, fragrant lavender, and scraps of fabric. They are a great upgrade for your closet and make a great gift idea.
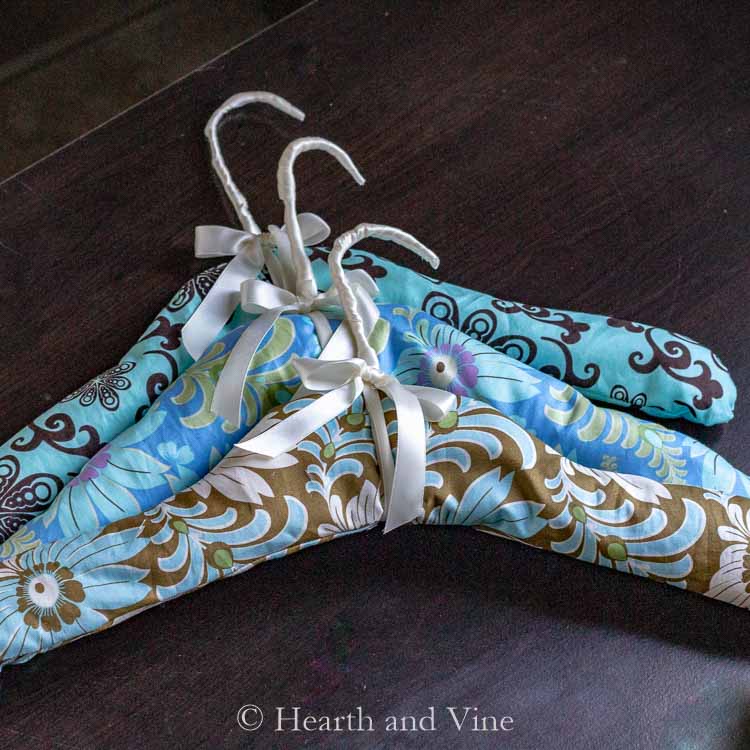
I've noticed some beautiful padded hangers for sale around the holidays and thought that they would make a great gift, or better yet great addition to my own closet. Since I have plenty of extra fabric lying around, and some leftover lavender flowers, I thought I would attempt to make scented padded hangers of my own, with the addition of lavender to add some wonderful fragrance to my closet.
This post may contain some affiliate links (that means if you make a purchase after clicking a link, there’s no additional cost to you, but I will earn a very small commission) i.e. as an Amazon Associate, I earn from qualifying purchases. Click here to read my full disclosure policy.
More Fabric Crafts
Supplies:
- wire hanger
- glue
- duct tape

- batting or other soft, thick fabric for padding, like terry cloth
- fillable teabag - make one from a coffee filter or thin muslin
- dried lavender flowers - or other fragrant herbs like mint leaves or dried lemon balm
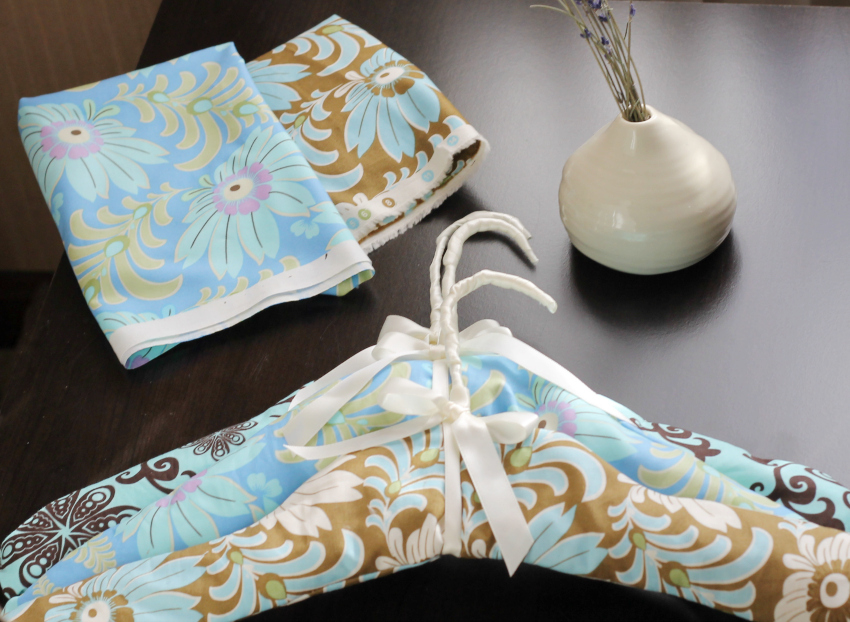
- scrap fabric - needs to be approx 12 in. x 18 in. for one hanger
- ribbon - I used about 1.25 yards of 5/8 in. satin ribbon.


 or other soft, thick fabric for padding, like terry cloth
 - make one from a coffee filter or thin muslin
 - or other fragrant herbs like mint leaves or dried lemon balm
 - I used about 1.25 yards of 5/8 in. satin ribbon.
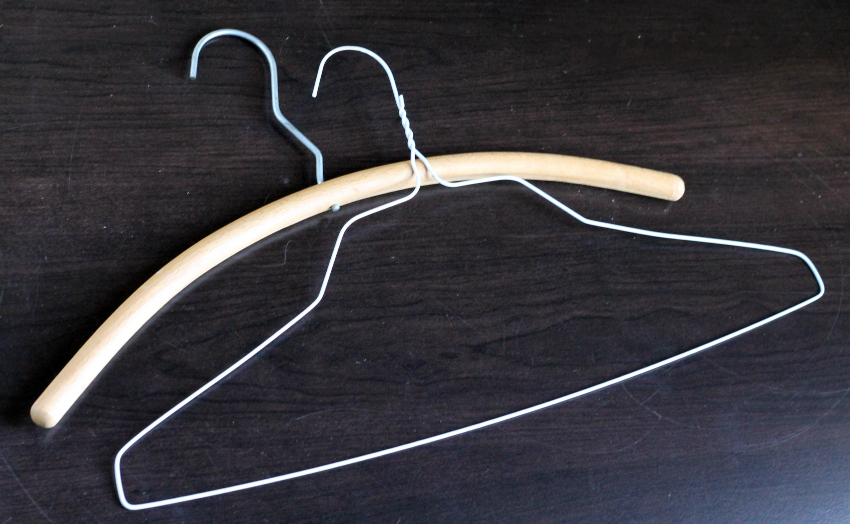
How to Make Scented Padded Hangers
The padded hangers usually start with single wooden hangers, but I only have one or two of these, and I did not want to spend the extra time or money to go out and get more.
So, I thought, why not try some of the many wire dry cleaner hangers we have and make a padded hanger from them?
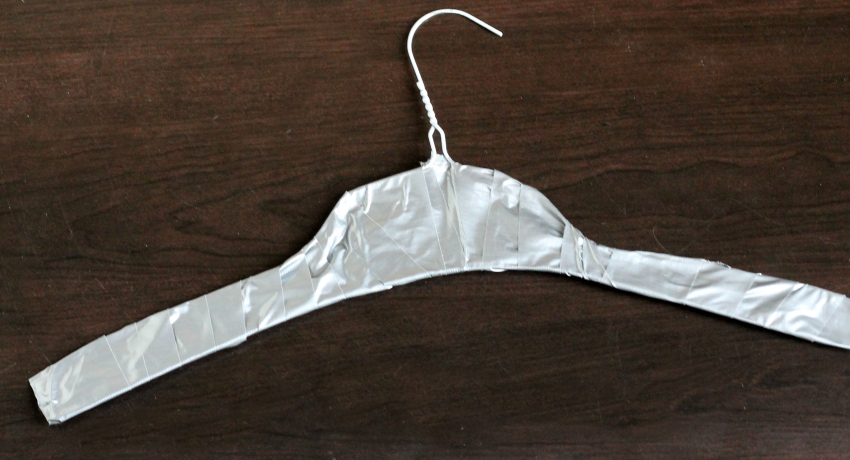
Step 1. Start by covering the hanger with duct tape to create the shape and to give it extra stability.
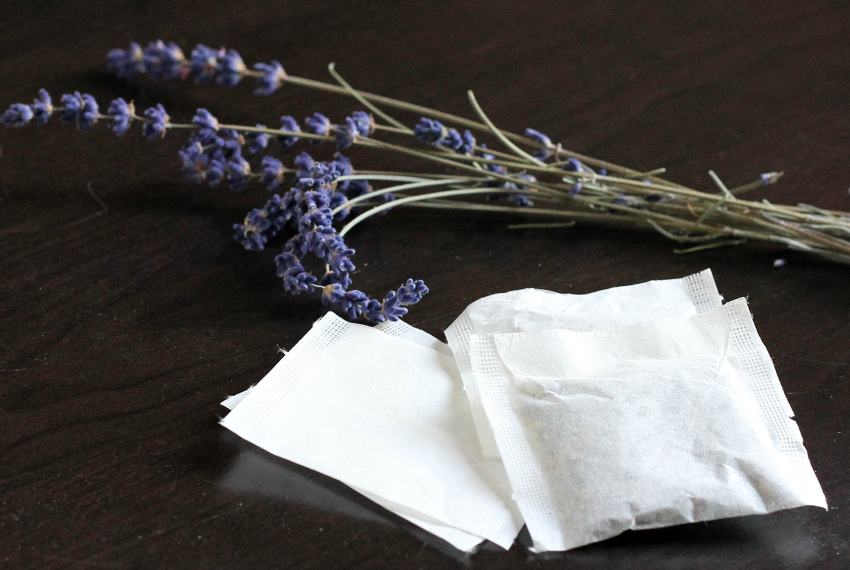
Step 2. Fill teabags with lavender flowers. You can use any herb you would like. If you don't have fillable tea bags you can make something similar by cutting up a coffee filter and filling it with herbs. Or simply add some essential oil to the cotton batting.
Be the first to receive new posts and get access to our Subscribers Only Page.
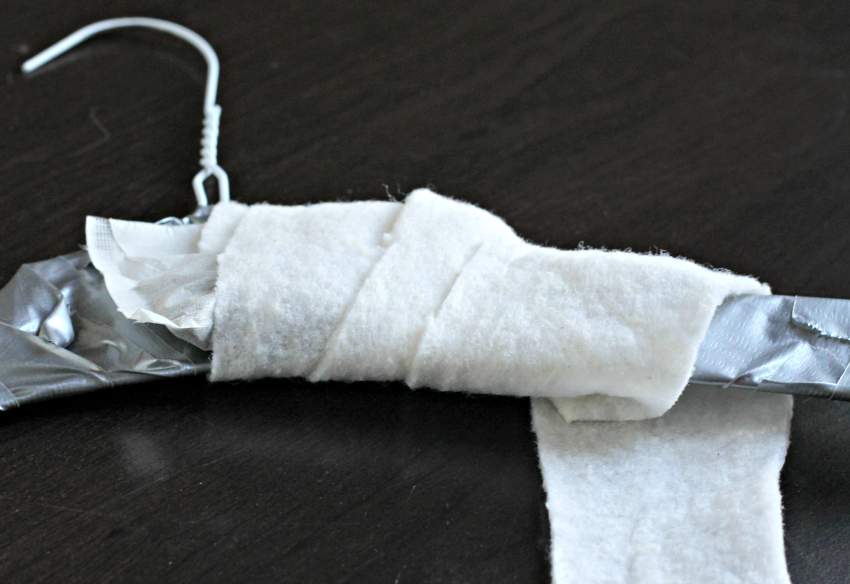
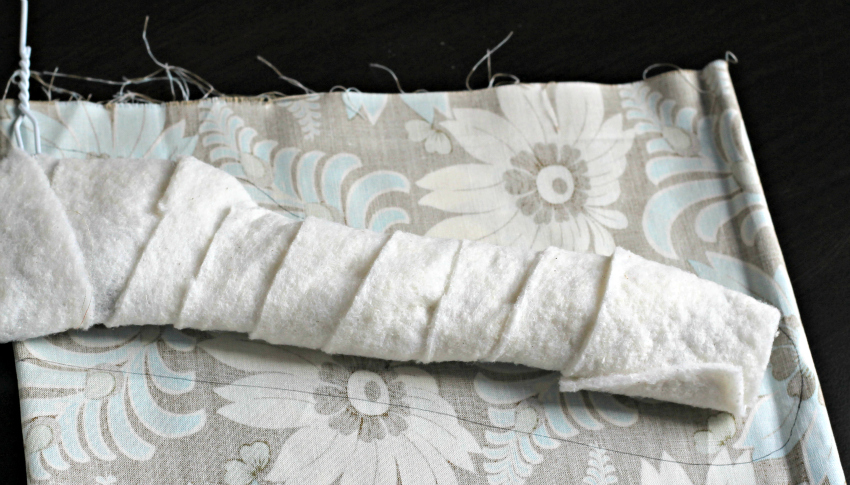
Step 3. Glue the teabag to the middle of the hanger. Then cut strips of quilter's batting and wrap it around the hanger, covering the tea bag. You could probably use other cotton material or old terry cloth towels if you don't have batting.
Step 4. Fold the fabric so that there are four layers, and lay half of the hanger on top. Use a thin marker, on the wrong side of the fabric, to outline one side of the hanger slightly past the middle.
Step 5. Cut out the traced pattern. You will now have four pieces.
Step 6. Put two together with right sides facing and sew along the edge, leaving the flat end open. Then turn it right side out.
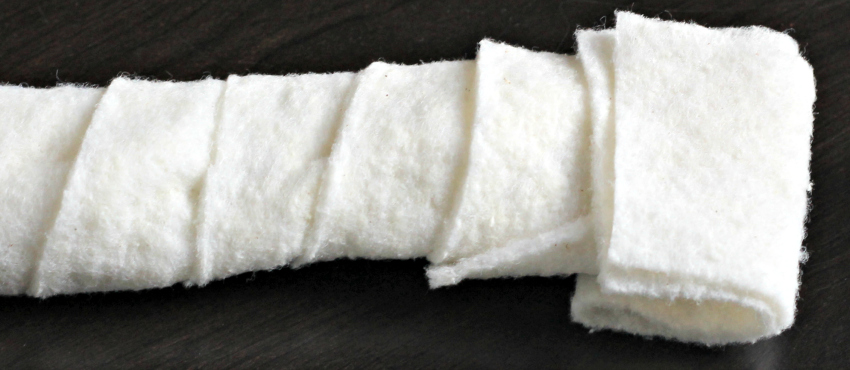
Step 7. Add more padding to the ends to make it nice and round. I just added some with a bit of glue before sliding the fabric tube on.
Step 8. Slide the fabric tubes onto each side of the hanger.
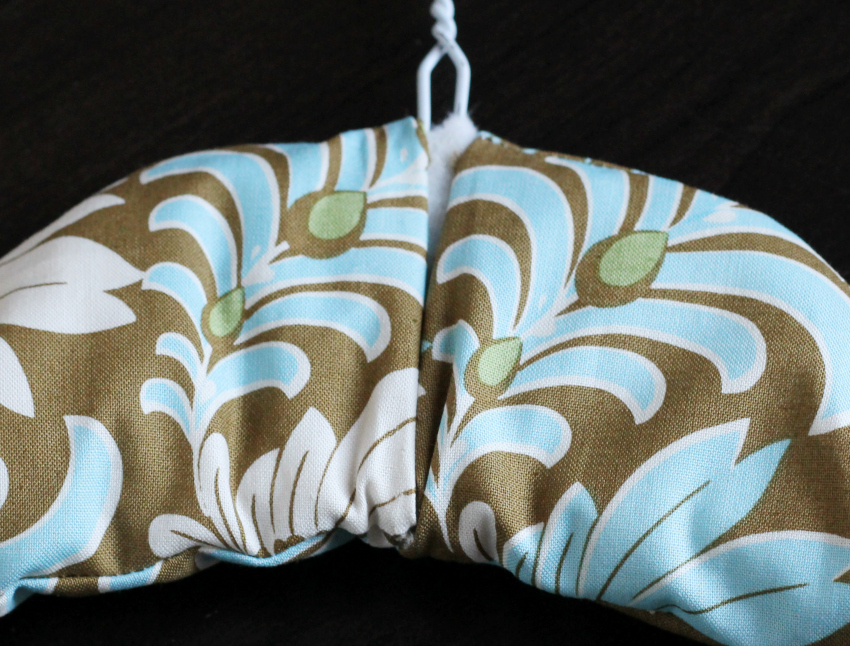
Step 7. Turn the raw edges under and slip stitch the two together at the center.
Finishing Touches - Adding Ribbon
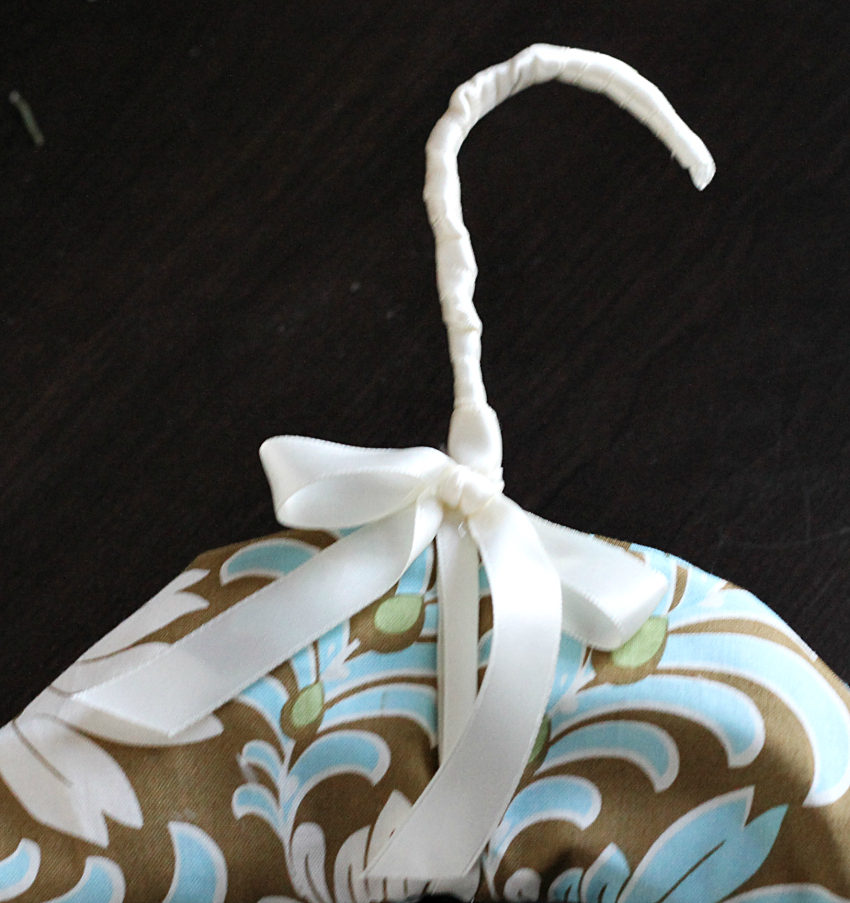
To add a finishing touch, take some pretty ribbon and wrap the top of the hanger.
Start at the tip with a little glue to attach the ribbon, and continue to wrap it all along the neck to cover all the exposed wire.
Then take another piece of the same ribbon and fold it in half lengthwise to make it narrow. Attach it to the bottom of the hanger to cover where the center seam is, using a little glue, and tie a bow at the neck.
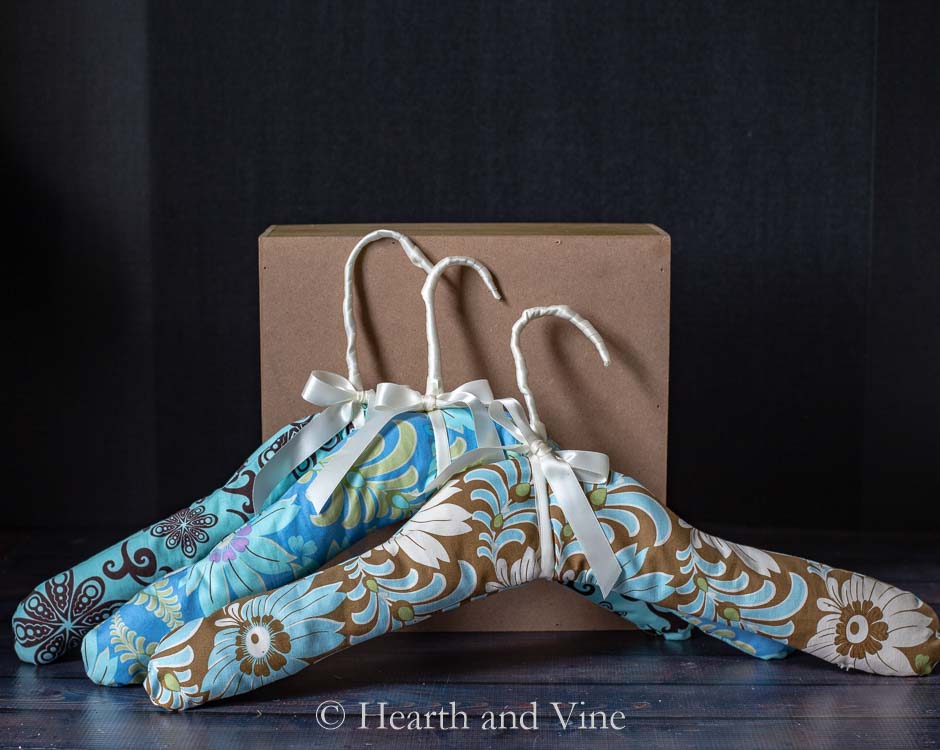
Wouldn't these make a great wedding shower/baby shower gift? If nothing else, you can use them to freshen up your own closet.


Scented Hangers from Basic Wire Hangers
Equipment
- Sewing Machine
- Scissors
- Pencil or marker
Materials
- wire hangers
- glue
- duct tape
- batting
- fillable teabags
- dried lavender flowers
- 1.25 yards ribbon (satin) 5/8"
Instructions
- Cover the hanger with duct tape to create the shape.
- Fill a teabag with lavender flowers
- Glue the teabag to the middle of the hanger.
- Cut strips of quilter's batting and wrap it around the hanger, covering the tea bag.
- Fold the fabric so that there are four layers, and lay half of the hanger on top. Use a thin marker, on the wrong side of the fabric, to outline the one side of the hanger slightly past the middle.
- Cut out the traced pattern. You will now have four pieces.
- Put two together with right sides facing and sew along the edge, leaving the flat end open. Then turn it right side out.
- Add more padding to the ends to make it nice and round.
- Slide the fabric tube on each side.
- Turn the raw edges under and slip stitch the two together at the center.
- Add ribbon by starting at the tip of the hook, adding a little glue to attach the ribbon, and continue to wrap it all along the neck to cover all the exposed wire.
- Then take another piece of the same ribbon and fold it in half lengthwise. Attach it to the bottom of the hanger to cover where the center seam is, using a little glue, and tie a bow at the neck.

Katherines Corner
Wonderful tutorial! I have several padded hangers and look forward to making my own now too.I invite you ti share at my Thursday hop Hugs!
Heather @ new house new home
I love these, Patti! I think they would make a great gift. And your tutorial is terrific!
Jane @ Cottage at the Crossroads
Hi Patti! I love this idea! What a great way to use up scrap material and to scent one's closet! Thanks for the tutorial!
Patti
Thanks Jane!
Earlene Ginter
When I worked,I wore pantyhose,when they got a run,it recycled by cutting 7p the center to elastic cut a hole in the elastic and then wrapped each leg around you will wrap top to bottom and then wrap a couple of times around the shoulder area and then back to the top and ect a hole 8n the toe and slip over the curved part, pull the hose as you wrap Round the hanger,and then cover with fabric. Have fun
Patti
Hi Erlene,
Hmmm I never thought of that and I bet they make a great filler as the stockings are very flexible. Great idea. Thanks for sharing.
Patti