
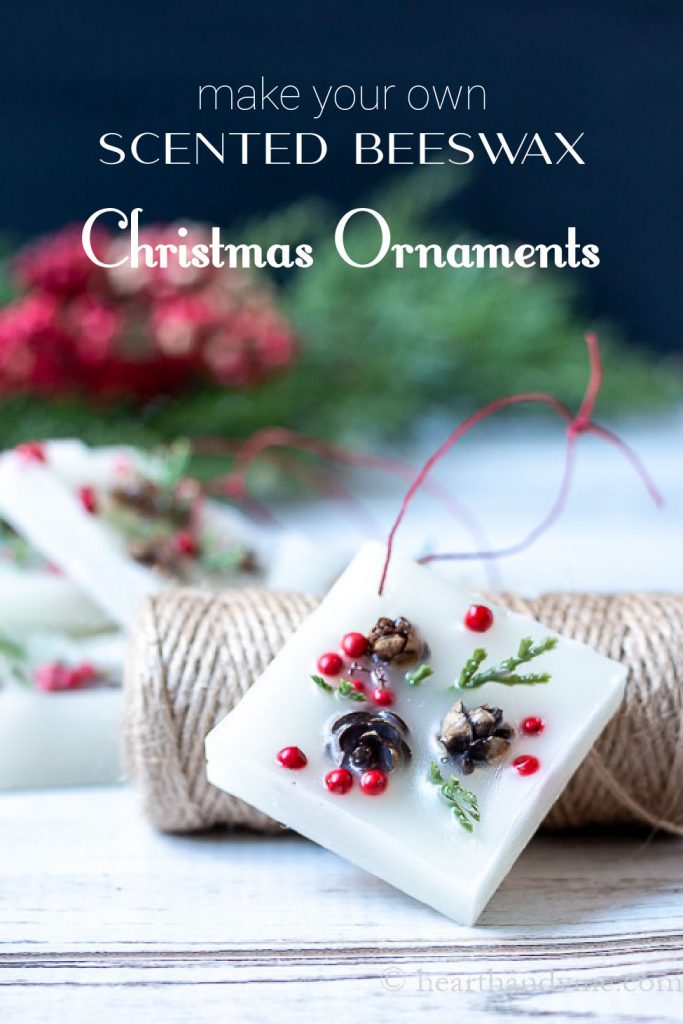
Use pretty faux botanicals and fragrance oils to make beautiful scented wax ornaments for your tree or to give away this Christmas season.

For years we purchased live trees for Christmas. The smell is wonderful. However, eventually, we bought a great pre-lit tree and stopped buying live. I still miss the smell.


Last year I made these DIY fire starters with real evergreens, dogwood berries, and cinnamon sticks. I loved the way they looked but as you can see a year later they don't look as pretty and they are not scented.
So today I'm marrying the idea of these woodland fire starters with fragrance oils to make pretty Christmas wax scented ornaments that will last.
This post contains some affiliate links (that means if you make a purchase after clicking a link, there’s no additional cost to you, but I will earn a very small commission. ) i.e. as an Amazon Associate, I earn from qualifying purchases. Click here to read my full disclosure policy.

How to Make Scented Wax Ornaments
Supplies
- silicone mold 6 cell
- beeswax pellets ~ .5 pound
- mini pine cones ~ 12
- artificial berries and cedar evergreens
- fragrance oils or essential oils ~ 5 ml or 2 ounces
- wooden toothpicks
- wax twine for hanging
Fragrance Options
I used a couple of fragrance oils but the one called Christmas wreath had that live tree smell I was looking for. You could combine different holiday scents like clove, orange, cranberry, and bayberry. You could also use similar essential oils such as fir needle essential oil if you want.
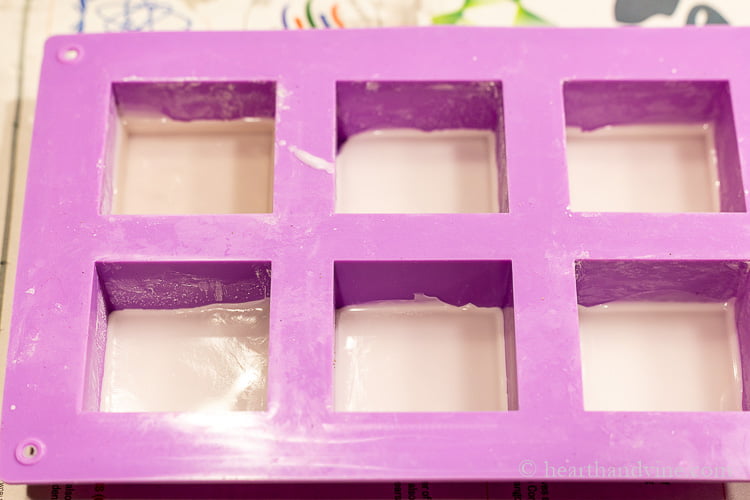
For the wax, I wanted to use beeswax because it has a nice smell but it dries opaque. So I only filled the mold cells about 1/3 of the way.
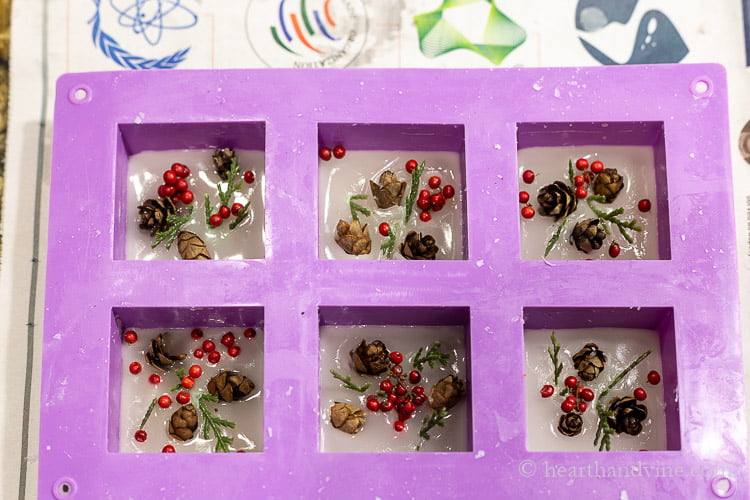
After a minute maybe less I was able to set the botanicals into the beeswax. Just enough to hold them in but still leaving some of the material out to show off it's color and beauty.
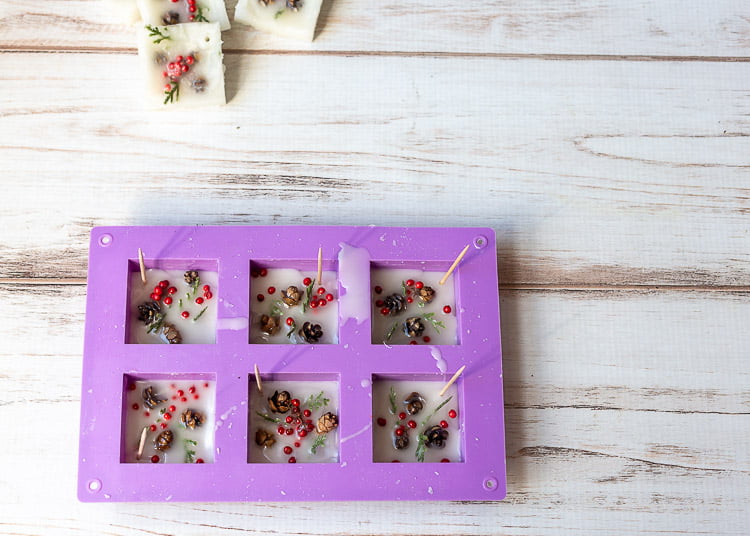
Then I add a bit more wax.
To make a hole for hanging stick wooden toothpicks in the corners.
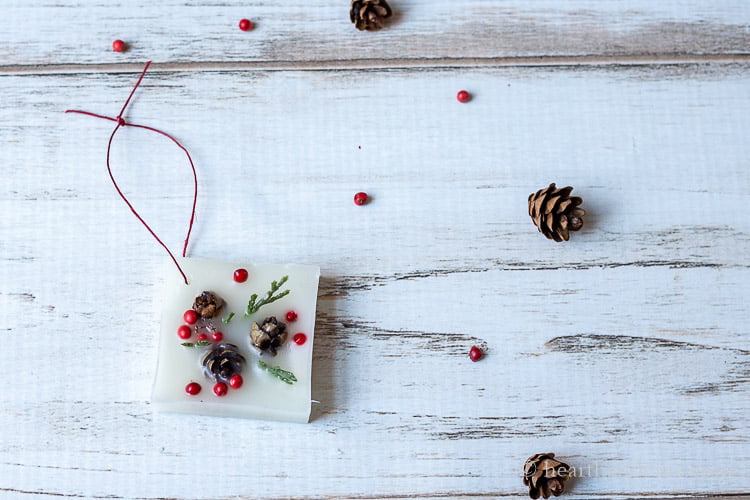
They hardened up pretty quickly. Once they are done you can pop them out of the mold and remove the toothpick. Replace the toothpick with a bit of pretty red waxed twine, neutral twine, or thin ribbon to use as a hanger.

Doesn't it look great on the tree?

Of course, I'm going to suggest that you give some of these away as gifts. A small cellophane bag lets their beauty shine through.

However, these cute Christmas treat bags are also a great look.


Christmas Wax Scented Ornaments
Equipment
- Old pot to hold water and heat melting pitcher
- Melting pitcher or clean large can for melting wax
- Wooden skewer for stirring
Materials
- silicone mold 6 cell
- beeswax pellets ~ .5 pound
- mini pine cones - 12
- artificial berries and evergreens
- fragrance oils or essential oils ~ 5 ml or 2 ounces
- wooden toothpicks
- wax twine for hanging
Instructions
- Melt the beeswax pellets in a pouring pitcher set in an old pan filled about 1/4 - 1/3 with water on the stove.
- Once the wax has completely melted remove from the stove and let sit for 30 seconds.
- Add fragrance oils and stir with a wooden skewer.
- Pour the wax into the molds about 1/3 of the way.
- Let sit for about 30 seconds before adding the pine cones, berries, and greenery.
- Push the botanicals slightly into the wax, leaving some parts out.
- Pour a little more wax on top of the botanicals.
- Place a wooden toothpick in the corner of each ornament.
- Allow the wax to harden before removing it. This should take about an hour.
- Push the toothpick through creating a hole to thread a piece of waxed twine or ribbon through to act as a hanger.
- Package in cellophane bags or fabric bags for gift giving.
Kathy Menold
So pretty and a wonderful way to scent a faux tree.
Patti Estep
Thanks Kathy. I love the scent of a fresh tree. This is not exactly the same but it's close.