• Skip to primary navigation
  • Skip to main content
  • Skip to primary sidebar
  • Home
  • DIY Projects
    • Homemade Bath and Body
    • Sewing - Fabric Crafts
    • Flower Crafts/Decor
    • Thrift Store/Vintage
  • Gardening
    • Flower Gardens
    • Container Gardening
    • Houseplants
    • Indoor Gardening
    • Landscaping
    • DIY Garden Art
  • Decorate
    • Spring Decor
    • Summer Decor
    • Fall Decor
    • Winter Decor
    • Home Decor Projects
  • Recipes
    • Breakfast Recipes
    • Lunch Recipes
    • Dinner Recipes
    • Dessert
    • Salad Recipes
    • Soups and Stews
    • Side Dish Recipes
    • Appetizers and Snacks
    • Healthy Recipes
  • Holidays
    • Valentine's Day
    • Easter
    • Mother's Day
    • Halloween
    • Thanksgiving
    • Christmas
Hearth and Vine
menu icon
go to homepage
  • About
  • DIY
    • ...Flower/Gardening Crafts
    • ... Bath and Body
    • ...Sewing/Fabric Crafts
    • ...Thrift Store/Upcycle
  • Gardening
    • ...Flower Gardens
    • ...Container Gardening
    • ...Indoor Gardening
    • ...DIY Garden Art
  • Decorate
    • ...Home Decor Projects
    • ...Spring Decor
    • ...Summer Decor
    • ...Fall Decor
    • ...Winter Decor
    • ...Room Makeovers
  • Recipes
    • ...Appetizers and Snacks
    • ...Dinner Recipes
    • ...Side Dish Recipes
    • ...Salad Recipes
    • ...Dessert
    • ...Drinks
  • Holidays
    • ...Valentine's Day
    • ...Easter
    • ...Mother's Day
    • ...Halloween
    • ...Thanksgiving
    • ...Christmas
  • Subscribe
  • Instagram
    • Facebook
    • Instagram
    • Pinterest
    • Twitter
  • subscribe
    search icon
    Homepage link
    • About
    • DIY
      • ...Flower/Gardening Crafts
      • ... Bath and Body
      • ...Sewing/Fabric Crafts
      • ...Thrift Store/Upcycle
    • Gardening
      • ...Flower Gardens
      • ...Container Gardening
      • ...Indoor Gardening
      • ...DIY Garden Art
    • Decorate
      • ...Home Decor Projects
      • ...Spring Decor
      • ...Summer Decor
      • ...Fall Decor
      • ...Winter Decor
      • ...Room Makeovers
    • Recipes
      • ...Appetizers and Snacks
      • ...Dinner Recipes
      • ...Side Dish Recipes
      • ...Salad Recipes
      • ...Dessert
      • ...Drinks
    • Holidays
      • ...Valentine's Day
      • ...Easter
      • ...Mother's Day
      • ...Halloween
      • ...Thanksgiving
      • ...Christmas
    • Subscribe
    • Instagram
    • Facebook
    • Instagram
    • Pinterest
    • Twitter
  • ×
    Home » Gardening

    Planting in a Burlap Sack

    by Patti Estep · May 13, 2025

    Jump to How-to Card
    Full lush herb garden in a burlap sack.
    Herbal planter in a burlap sack over the view of a decorative label on the bag.

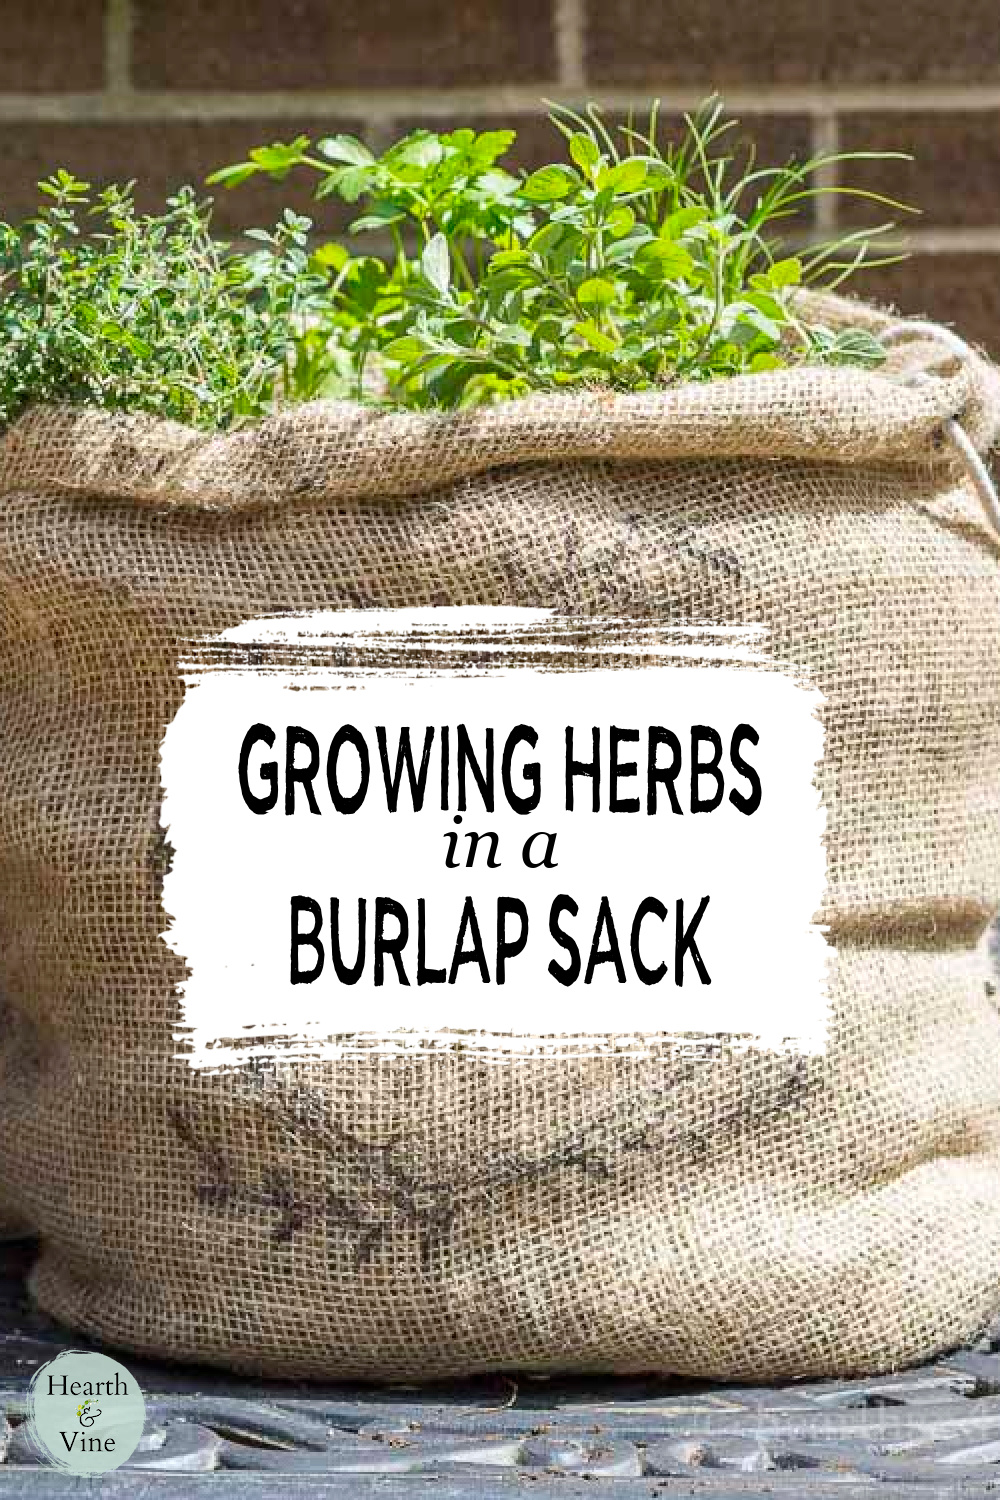
    Want to have a kitchen herb garden at the ready? Planting in a burlap sack allows water to drain quickly while giving you a beautiful rustic planter you can enjoy all season long.

    Herbs grown in a burlap sack.

    Often you'll find people growing potatoes, peppers, or tomatoes in burlap sacks. However, I'm sticking with herbs. This also makes a great gift for those who like gardening and cooking. It can be set near a door for easy access, so you can snip what you need quickly, even if it's raining outside.  

    The burlap fabric allows the excess water to seep right through. Perfect for herbs that typically enjoy well-drained soil and arid climates. The height will keep the rabbits away, and if you have it close to the house, it may deter the deer, too.

    Make one for yourself or give one away for Mother's Day or as a housewarming gift to your gardening friend. Maybe a group teacher appreciation gift. Who wouldn't love this rustic compact garden?

    Sections at a Glance

    • Supplies
    • Create the Burlap Planter
    • Add a Graphic Label
    • Fill the Planter with Herbs
    • Herbs to Choose
    • More Herb Gardening Ideas
    • Burlap Planter Printable How-to Card

    This post contains some affiliate links (that means if you make a purchase after clicking a link, there’s no additional cost to you, but I will earn a very small commission. ) i.e. as an Amazon Associate, I earn from qualifying purchases. Click here to read my full disclosure policy.

    Materials for burlap herb garden tutorial.

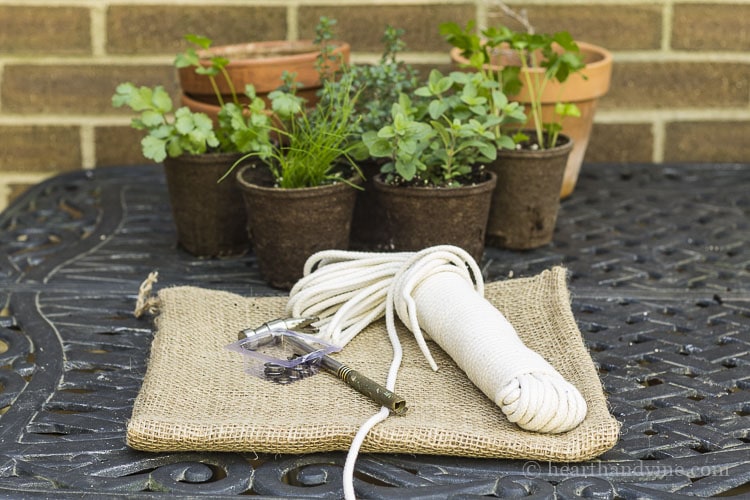
    Burlap Planter Supplies

    • Burlap Bags
    • Grommets
    • Cotton Rope
    • Potting Soil
    • Herbs
    Bottom of burlap sack.

    Making an Herb Garden in a Burlap Sack

    Create the Burlap Planter

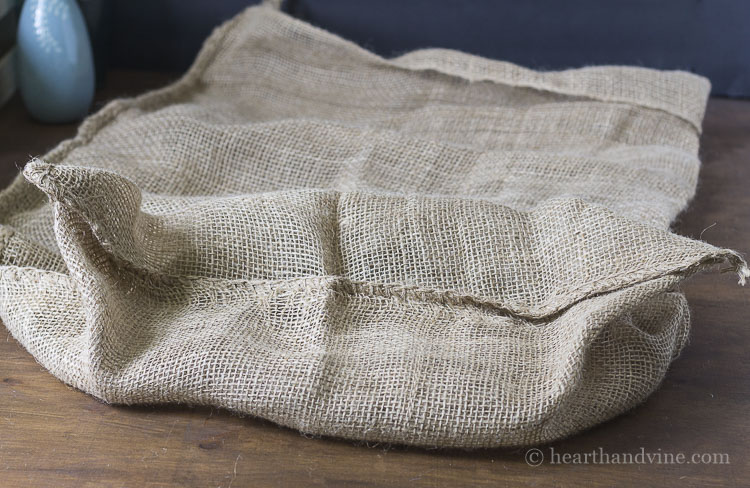
    Step 1. Start by creating a bottom to the sack. Simply gather the corners of the bottom of your burlap bag.

    Corners of burlap sack sewn together to create bottom.

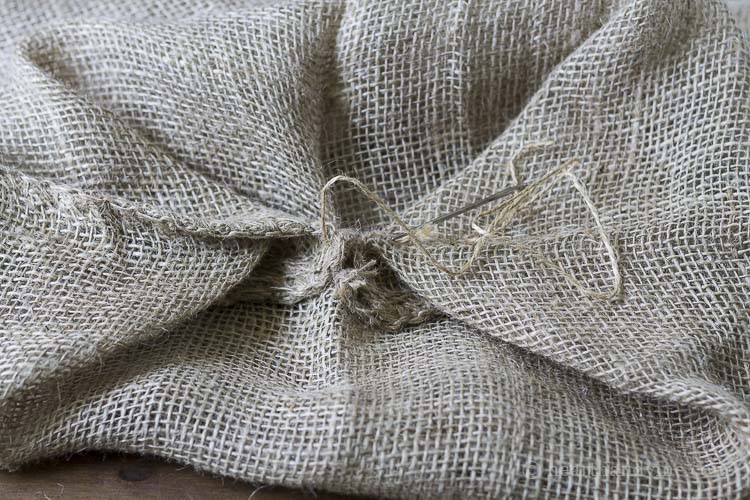
    Using a large needle and heavy thread (I used a thin twine), sew the tips of the corners and through the bottom of the sack.

    Top of sack folded down in half

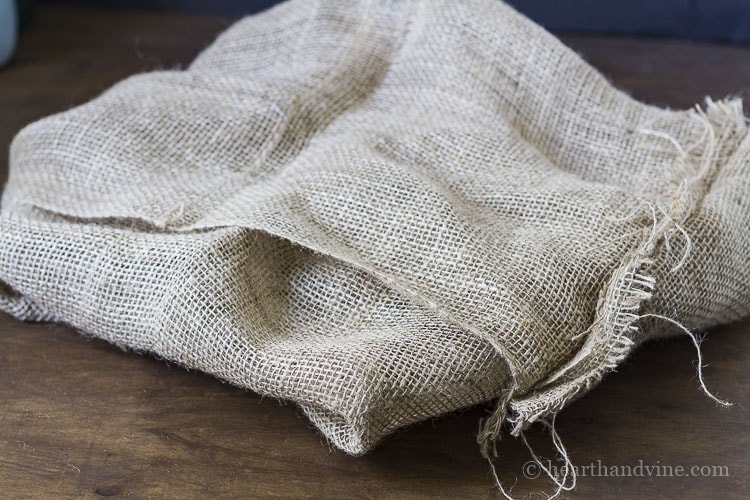
    Step 2. Next, because this particular bag was so long, I folded it in half and then flipped it inside out.

    Add grommets for handle.

    Step 3. Add some rope handles. Use grommets to give the bag a nice look and to hold the cotton rope.

    Cotton rope handles through grommets.

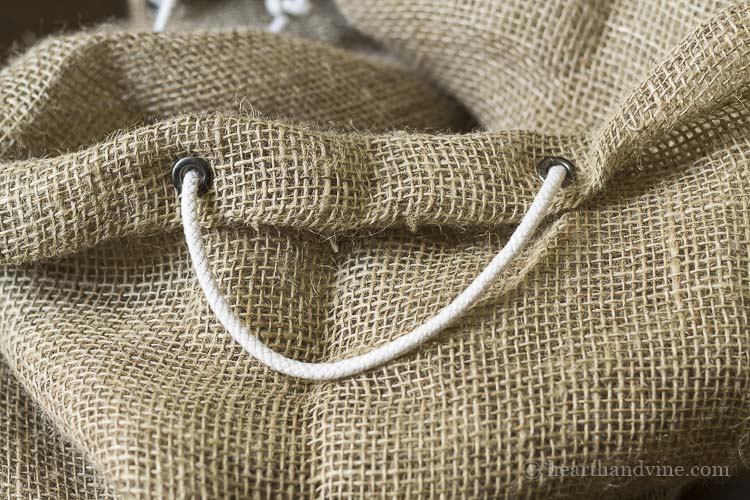
    Step 4. Tie a double knot on the inside of the bag to secure the rope.
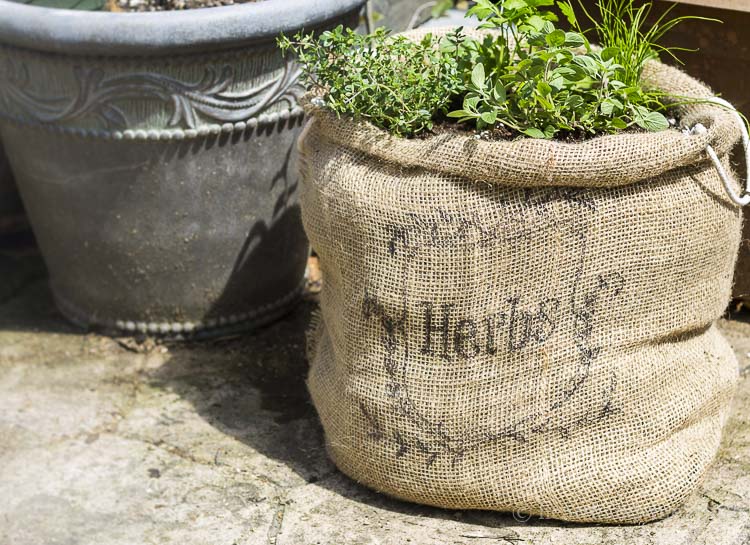
    Herbal graphic on inkjet.

    Add a Graphic Label

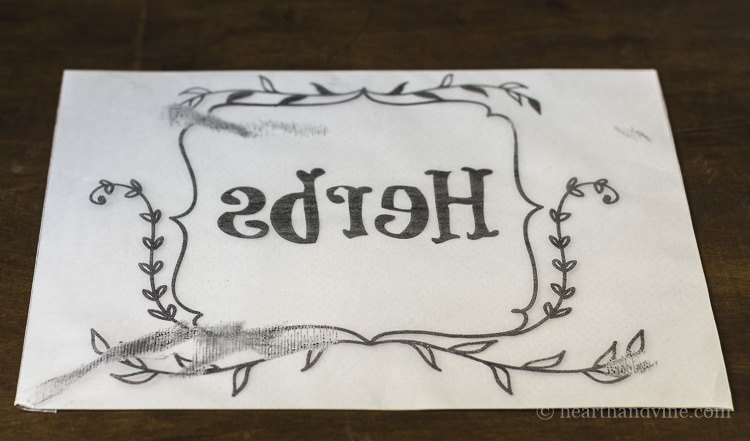
    For an added decorative look, you can print out the word Herbs on an inkjet printer and apply it to the bag.

    Herbal graphic on burlap bag.

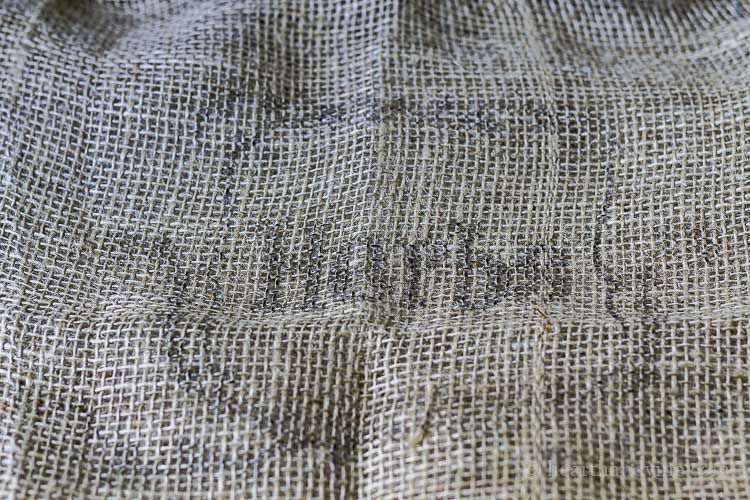
    It came out pretty light when placed on the burlap.

    Label herbs in wreath filled in with sharpie pen.

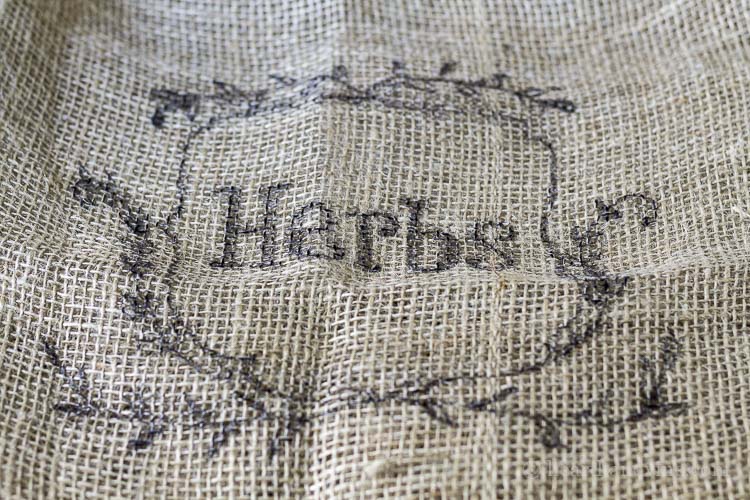
    You can use a black Sharpie pen to fill in the graphic.

    Herb Graphic for burlap herb garden.

    Note: You are welcome to use this one. Simply right click to save, copy or print. If you create your own, don't forget (like I often do) to reverse the letters in a mirror image. I use wax paper taped to a piece of card stock that I run through an inkjet. The ink sits on top of the wax paper. Then you can flip it over and press it onto the burlap.

    Plastic nursery cell packs for filler in bottom of planter.

    Fill the Planter with Herbs

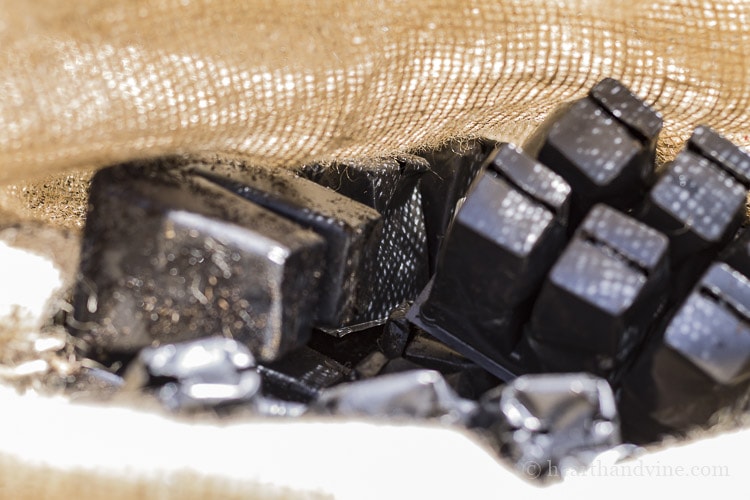
    Even with the bag folded over, this was still a large container, so I added a bunch of old plastic nursery cells (see above) to fill in the bottom of the bag.

    Chives in biodegradable pot.

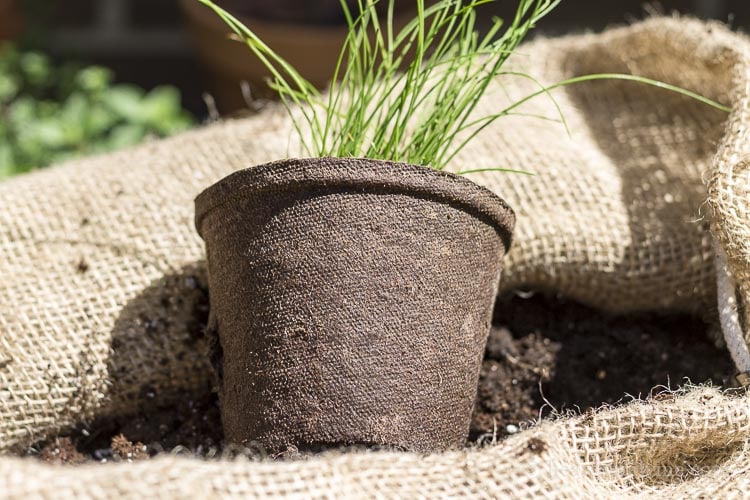
    The herbs I purchased came in these pretty biodegradable pots. You could try to grow some herbs from seed, but I find that those grown in small containers are inexpensive and easier to work with from the get-go.

    Chive plant removed from its pot.

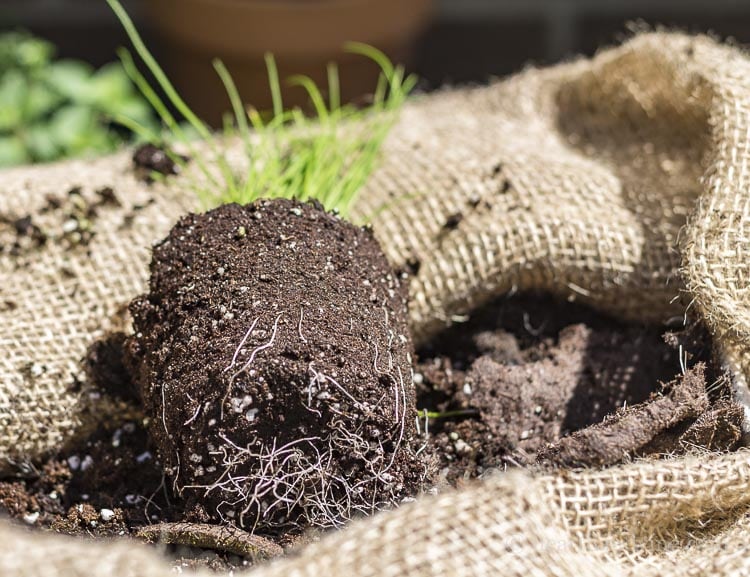
    They will break down, but I personally like to remove them before planting.
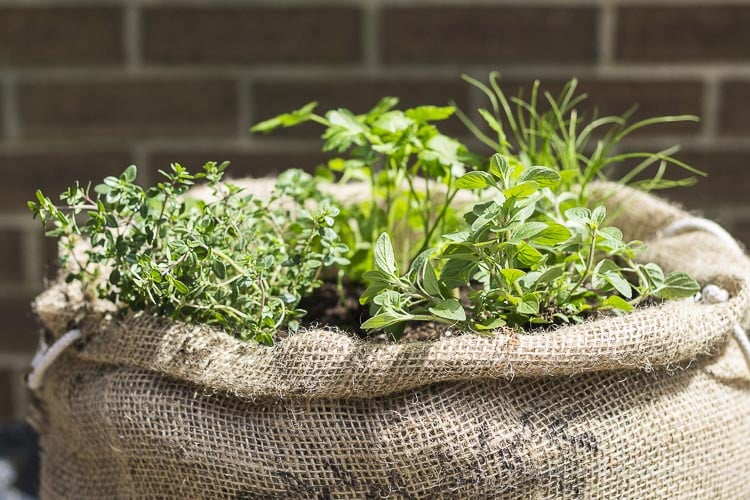
    Close top view of herbs planted in burlap sack.

    Herbs to Choose

    I chose thyme, chives, oregano, flat-leaf parsley, and cilantro because they are popular for cooking. Don't worry about crowding them. Planting several herbs together in the bag is fine for the season and will help keep out the weeds.

    Herb garden in burlap sack on patio.

    Basil would be another great cooking herb, but it is a little too early here to plant basil, which hates the cold weather. I may consider switching out the cilantro, which hates the hot weather, with basil down the road.

    Patti signature

    More Herb Gardening Ideas

    • Growing Herbs in a Strawberry Pot
    • Hanging Herb Gardens
    • Growing Herbs Indoors
    Herb garden in burlap sack on patio.
    Print
    4 from 2 votes

    Make an Inexpensive Herb Garden in a Burlap Sack

    Make this inexpensive DIY herb garden in a burlap sack. It's the perfect portable gift for those who like gardening and cooking. 
    Prep Time15 minutes mins
    Active Time45 minutes mins
    Total Time1 hour hr
    Course: DIY Garden Art
    Yield: 1 Herb Garden
    Cost: $15

    Materials

    • Burlap Bags
    • Grommets
    • Cotton Rope
    • Potting Soil
    • Herbs

    Instructions

    • Create a bottom for your burlap bag by gathering the corners of the bottom.
    • Use a large needle and sturdy thread to sew the tips of the corners and through the bottom of the sack.
    • Fold it in half and flip it inside out.
    • Add some rope handles using grommets.
    • Tie a double knot on the inside of the bag to secure the rope.
    • Print out the word Herbs on an inkjet printer by taping a piece of wax paper to computer paper. (make sure to reverse the image)
    • Apply the graphic by pressing the printed image onto the burlap. Then use a black Sharpie to fill in the graphic.
    • Start filling the sack by placing some old plastic nursery cells in the bottom of the bag.
    • Add your potting soil and herbs.
    • Place your burlap sack somewhere where it will receive at least 6 hours of sun each day.
    Tried this project?Tag @hearthnvine on Instagram
    Herbs planted in a large burlap sack.
    « DIY Lemon Wreath
    Red Beet Pickled Eggs »

    About Patti Estep

    Patti is the creator of Hearth and Vine, a home and garden blog filled with projects to inspire your creative side. She loves crafting, gardening, decorating and entertaining at her home in Pennsylvania. When she is not working on a project at home or searching for treasures at nurseries and thrift stores with her girlfriends, you’ll probably find her with family and friends, at a restaurant, or home party enjoying new and different food adventures.

    Reader Interactions

    Comments

    1. Michelle Marine

      April 28, 2017 at 10:43 am

      What a beautiful project, Patti. I might have to try this soon! <3

      Reply
    2. Shelly

      April 25, 2017 at 12:52 pm

      Such a great project Patti. I love how it looks and I love your tip about adding the empty nursery containers to the bag. I do the same thing with my big pots to keep them from being too heavy to move. Fresh herbs are so nice to have on hand. With this project, you can have fresh herbs for cooking for a lot less expensive than the small store bought containers of fresh herbs.

      Reply
    3. Jami

      April 25, 2017 at 12:23 pm

      This is completely adorable! What a fun gift idea. 🙂

      Reply
    4. Angie Rose

      April 25, 2017 at 11:23 am

      I adore this fun gardening gift and project. It looks so rustic, I love the look of burlap and twine. My mom would love something like this. She loves having herbs close by for cooking! Such a great idea Patti!

      Reply
    5. Diane Williams

      April 25, 2017 at 10:53 am

      What a CUTE idea! Burlap is such a cozy rustic material. Perfect for a mobile planter and porch decor too. How handy to find your herbs right next to the kitchen door.

      Reply
    6. Carole @ Garden Up Green

      April 25, 2017 at 8:14 am

      This is an awesome project Patti and I love that you choose herbs, this is perfect for Mother's day.. Placing it on a terra cotta saucer would also look neat.. Always enjoy your creativity simply awesome!

      Reply
      • Patti Estep

        April 25, 2017 at 8:40 am

        Hi Carole,

        I'm so glad you like the herb garden and I love your idea to place it on a terra cotta saucer. Perfect!
        Thanks for stopping by,
        Patti

        Reply
    4 from 2 votes (2 ratings without comment)

    Leave a Reply Cancel reply

    Your email address will not be published. Required fields are marked *

    Recipe Rating


    Primary Sidebar

    Patti Estep Profile Picture

    Hi!

    I'm Patti

    Join me to create lots of fun DIY projects, including crafts, gardening, home decor, and tasty recipes

    More about me

    Popular Posts

    • Pressed flower are in two dark frames.
      DIY Pressed Flower Art
    • Pilea peperomioides
      Pilea Plant - The Pass It On Friendship Plant
    • Serving of cream of crab soup in a red bowl.
      Easy Cream of Crab Soup
    • Small indoor water fountain
      DIY Indoor Water Fountain
    • Chicken oscar on a plate
      Easy Chicken Oscar Recipe Made with Hollandaise Sauce
    • Fabric bowl covers in 3 prints
      How to Make Fabric Bowl Covers

    Footer

    ^ back to top

    About
    Contact
    Privacy Policy
    Disclosure Policy
    Terms of Service

    Sign Up Here!
    for our
    newsletter &
    special offers

    Follow Me

    facebook
    Pinterest
    instagram

    As an Amazon Associate, I earn from qualifying purchases. i.e. as an Amazon Associate, I earn from qualifying purchases.

    Copyright © 2025 Hearth and Vine

    Rate This Recipe

    Your vote:


    A rating is required
    A name is required
    An email is required

    Recipe Ratings without Comment

    Something went wrong. Please try again.