• Skip to primary navigation
  • Skip to main content
  • Skip to primary sidebar
  • Home
  • DIY Projects
    • Homemade Bath and Body
    • Sewing - Fabric Crafts
    • Flower Crafts/Decor
    • Thrift Store/Vintage
  • Gardening
    • Flower Gardens
    • Container Gardening
    • Houseplants
    • Indoor Gardening
    • Landscaping
    • DIY Garden Art
  • Decorate
    • Spring Decor
    • Summer Decor
    • Fall Decor
    • Winter Decor
    • Home Decor Projects
  • Recipes
    • Breakfast Recipes
    • Lunch Recipes
    • Dinner Recipes
    • Dessert
    • Salad Recipes
    • Soups and Stews
    • Side Dish Recipes
    • Appetizers and Snacks
    • Healthy Recipes
  • Holidays
    • Valentine's Day
    • Easter
    • Mother's Day
    • Halloween
    • Thanksgiving
    • Christmas
Hearth and Vine
menu icon
go to homepage
  • About
  • DIY
    • ...Flower/Gardening Crafts
    • ... Bath and Body
    • ...Sewing/Fabric Crafts
    • ...Thrift Store/Upcycle
  • Gardening
    • ...Flower Gardens
    • ...Container Gardening
    • ...Indoor Gardening
    • ...DIY Garden Art
  • Decorate
    • ...Home Decor Projects
    • ...Spring Decor
    • ...Summer Decor
    • ...Fall Decor
    • ...Winter Decor
    • ...Room Makeovers
  • Recipes
    • ...Appetizers and Snacks
    • ...Dinner Recipes
    • ...Side Dish Recipes
    • ...Salad Recipes
    • ...Dessert
    • ...Drinks
  • Holidays
    • ...Valentine's Day
    • ...Easter
    • ...Mother's Day
    • ...Halloween
    • ...Thanksgiving
    • ...Christmas
  • Subscribe
  • Instagram
    • Facebook
    • Instagram
    • Pinterest
    • Twitter
  • subscribe
    search icon
    Homepage link
    • About
    • DIY
      • ...Flower/Gardening Crafts
      • ... Bath and Body
      • ...Sewing/Fabric Crafts
      • ...Thrift Store/Upcycle
    • Gardening
      • ...Flower Gardens
      • ...Container Gardening
      • ...Indoor Gardening
      • ...DIY Garden Art
    • Decorate
      • ...Home Decor Projects
      • ...Spring Decor
      • ...Summer Decor
      • ...Fall Decor
      • ...Winter Decor
      • ...Room Makeovers
    • Recipes
      • ...Appetizers and Snacks
      • ...Dinner Recipes
      • ...Side Dish Recipes
      • ...Salad Recipes
      • ...Dessert
      • ...Drinks
    • Holidays
      • ...Valentine's Day
      • ...Easter
      • ...Mother's Day
      • ...Halloween
      • ...Thanksgiving
      • ...Christmas
    • Subscribe
    • Instagram
    • Facebook
    • Instagram
    • Pinterest
    • Twitter
  • ×
    Home » DIY Projects

    How to Make Acorn Cap Candles

    by Patti Estep · Oct 31, 2022

    Jump to How-to Card
    Acorn cap candles on a plate of charcoal pellets

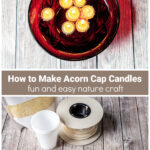
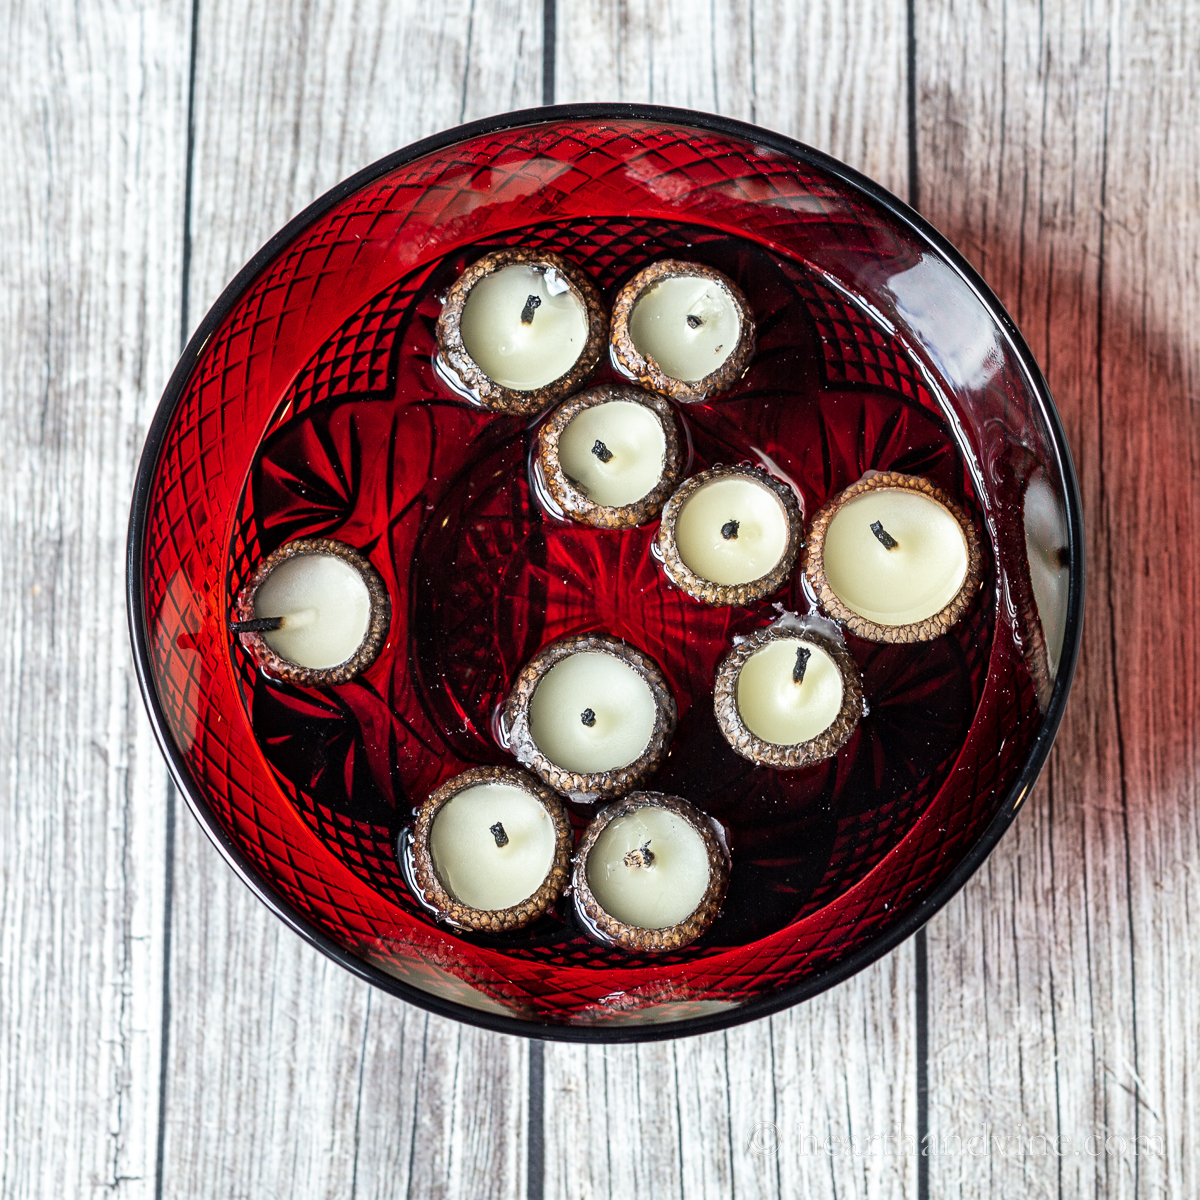
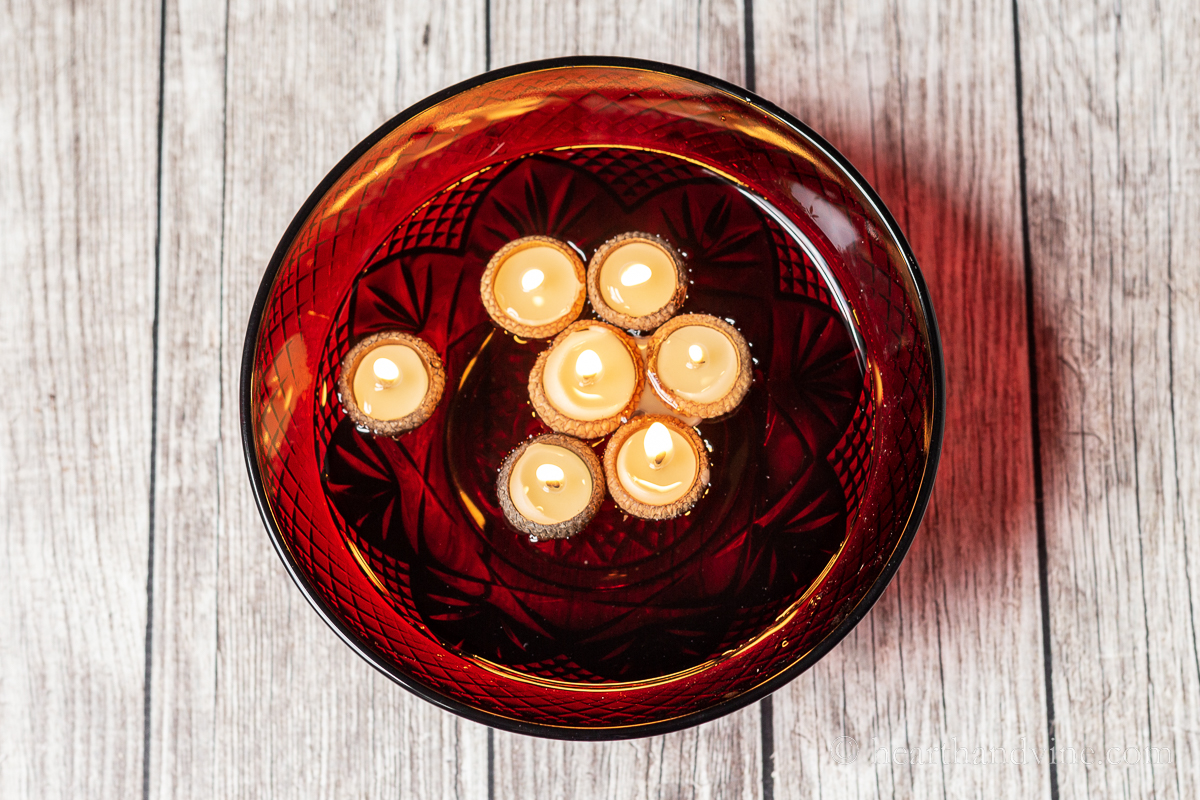
    Gather up all the acorns the squirrels haven't gotten to and create some fun beeswax acorn cap candles for fall. They look really adorable floating in a bowl of water.

    An ornate red bowl filled with water and several beeswax acorn cap candles floating on top.

    I saw these and thought "how fun." You know I love to create with nature and these mini little candles made in acorn caps are the cutest. You can buy them on Etsy but they are really easy to make at home.

    This post contains some affiliate links (that means if you make a purchase after clicking a link, there’s no additional cost to you, but I will earn a very small commission. ) i.e. as an Amazon Associate, I earn from qualifying purchases. Click here to read my full disclosure policy.

    Acorn caps, beeswax pellets, a roll of wicking and a few plastic cups.

    Making Acorn Cap Candles

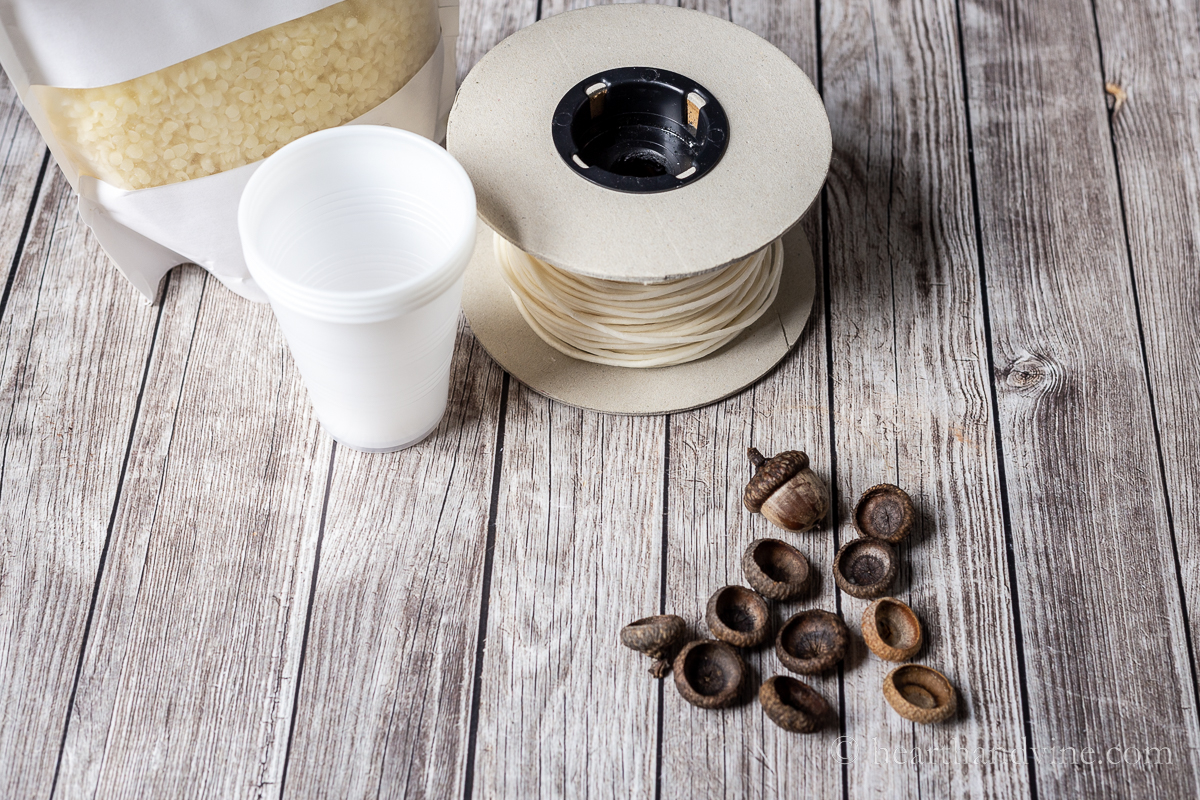
    I used beeswax and some wicking that I had from the time I made rolled beeswax candles. Also, our yard is loaded with acorns. Too much for the squirrels to handle.

    However, you can use an old candle and melt it down because you don't need much to make these acorn candles. The same goes for the wick. Break up an old taper candle and use the wick for this project with something you already have at hand.

    Acorn caps on a baking sheet covered with foil.

    Preparing the Acorns

    One thing I always do is bake the acorns at a low temperature (around 200 degrees) to make sure I kill any larvae, eggs, or other unwanted pests. It only takes about 1 hour.

    Tops of acorns are set in a pie plate filled with charcoal pellets.

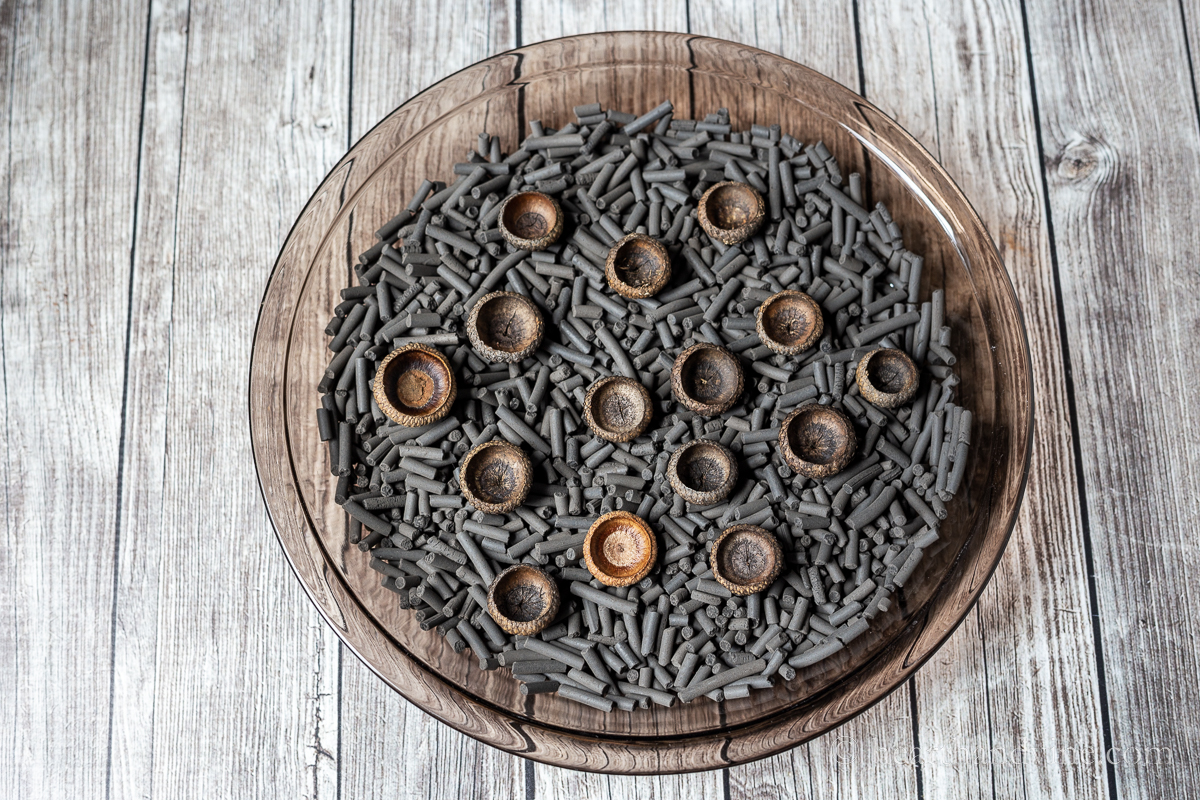
    Next, you need to balance the caps to be able to hold the wax. Use any material you have. Sand would be ideal but I didn't have any so I used some charcoal pellets from the last terrarium I made. Anything that you can nestle the caps in and keep them flat would work.

    Newsletter Signup
    Join Our Newsletter List!

    Be the first to receive new posts and get access to our Subscribers Only Page.

    A plastic disposable cup with melted beeswax is pinched pouring a small amount into acorn caps.

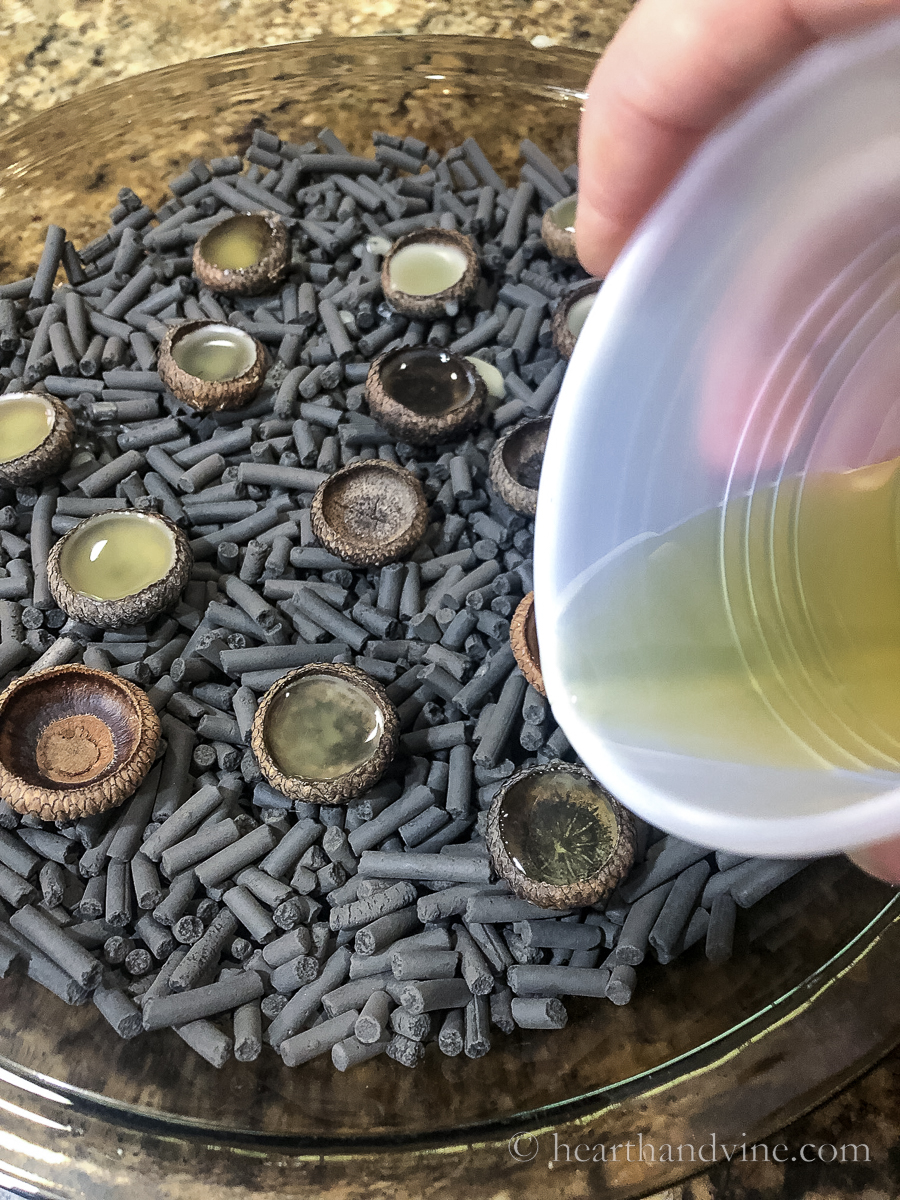
    Next, I melted some beeswax and used a plastic cup that I could squeeze and pour the melted wax into the tiny caps.

    Just poured beeswax in acorn tops set in charcoal pellets for balance and a small plate of cut wicks.

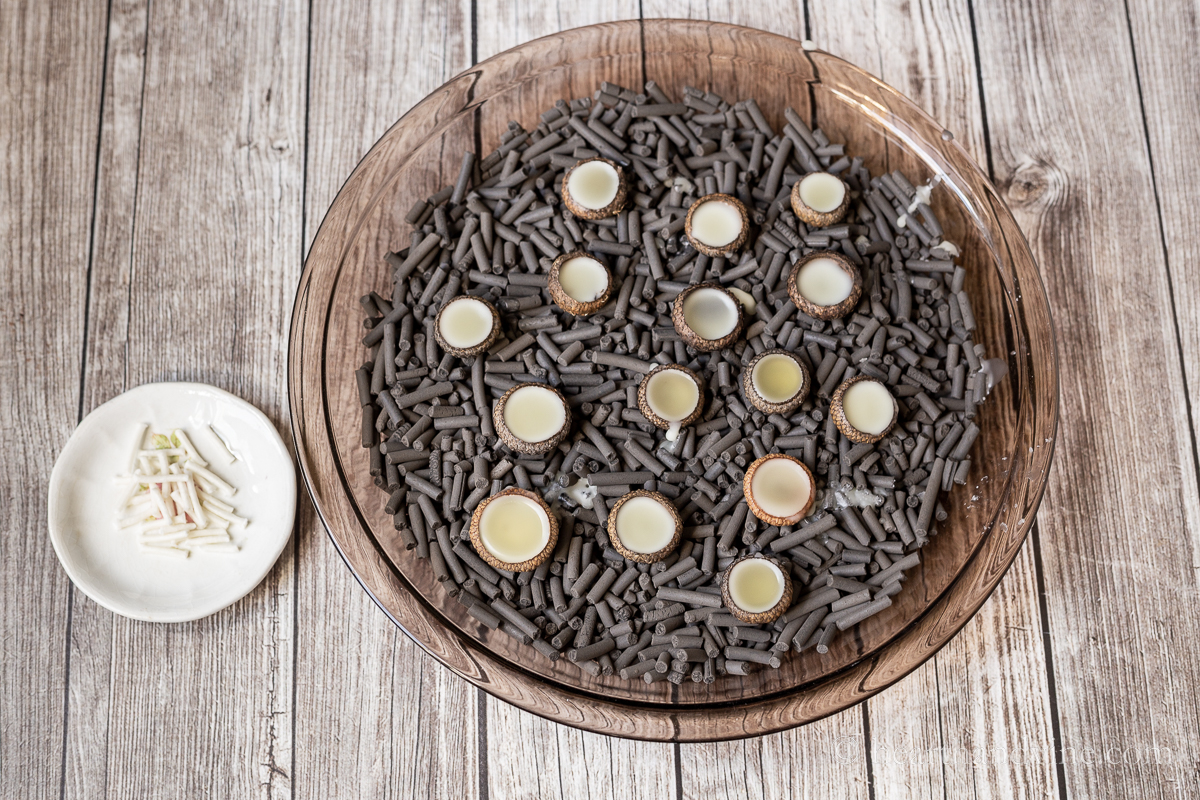
    Let the wax harden some but not completely before inserting the wicks.

    Three acorn cap candles floating in water in a small clay pot.

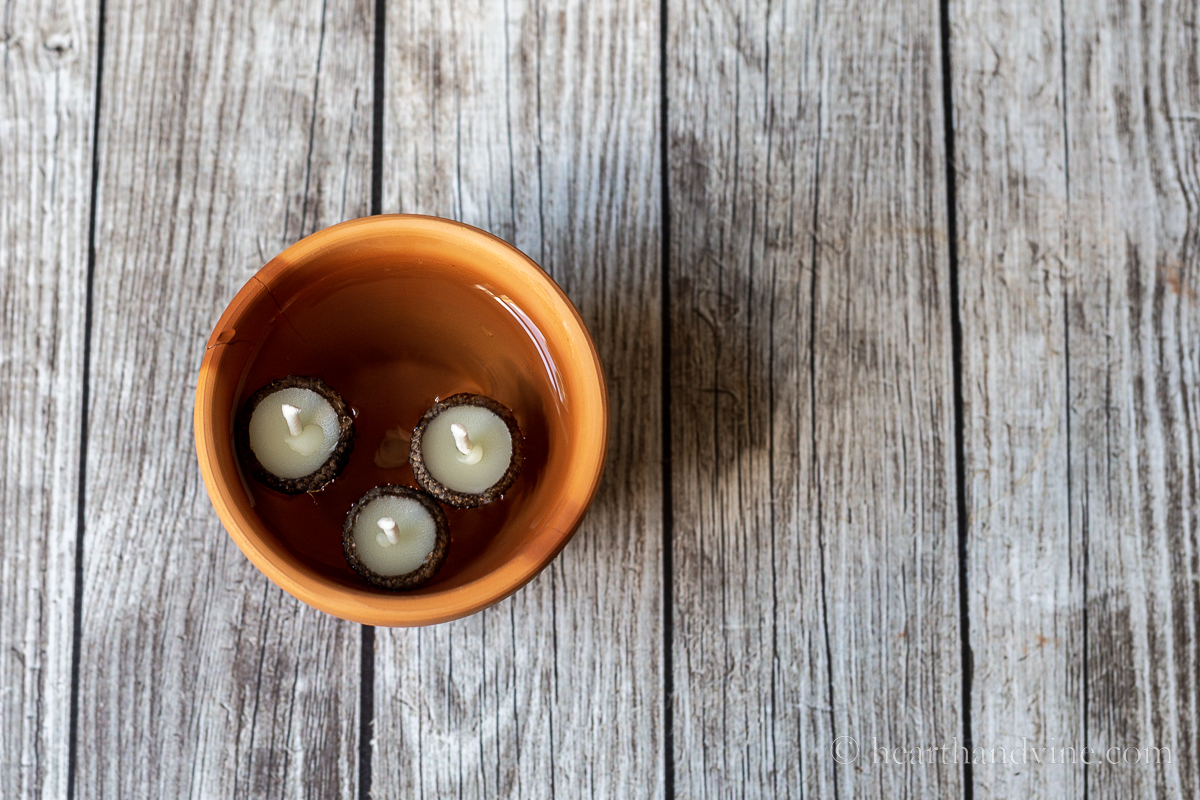
    How cute do they look in this small clay pot?

    How Long Do They Burn?

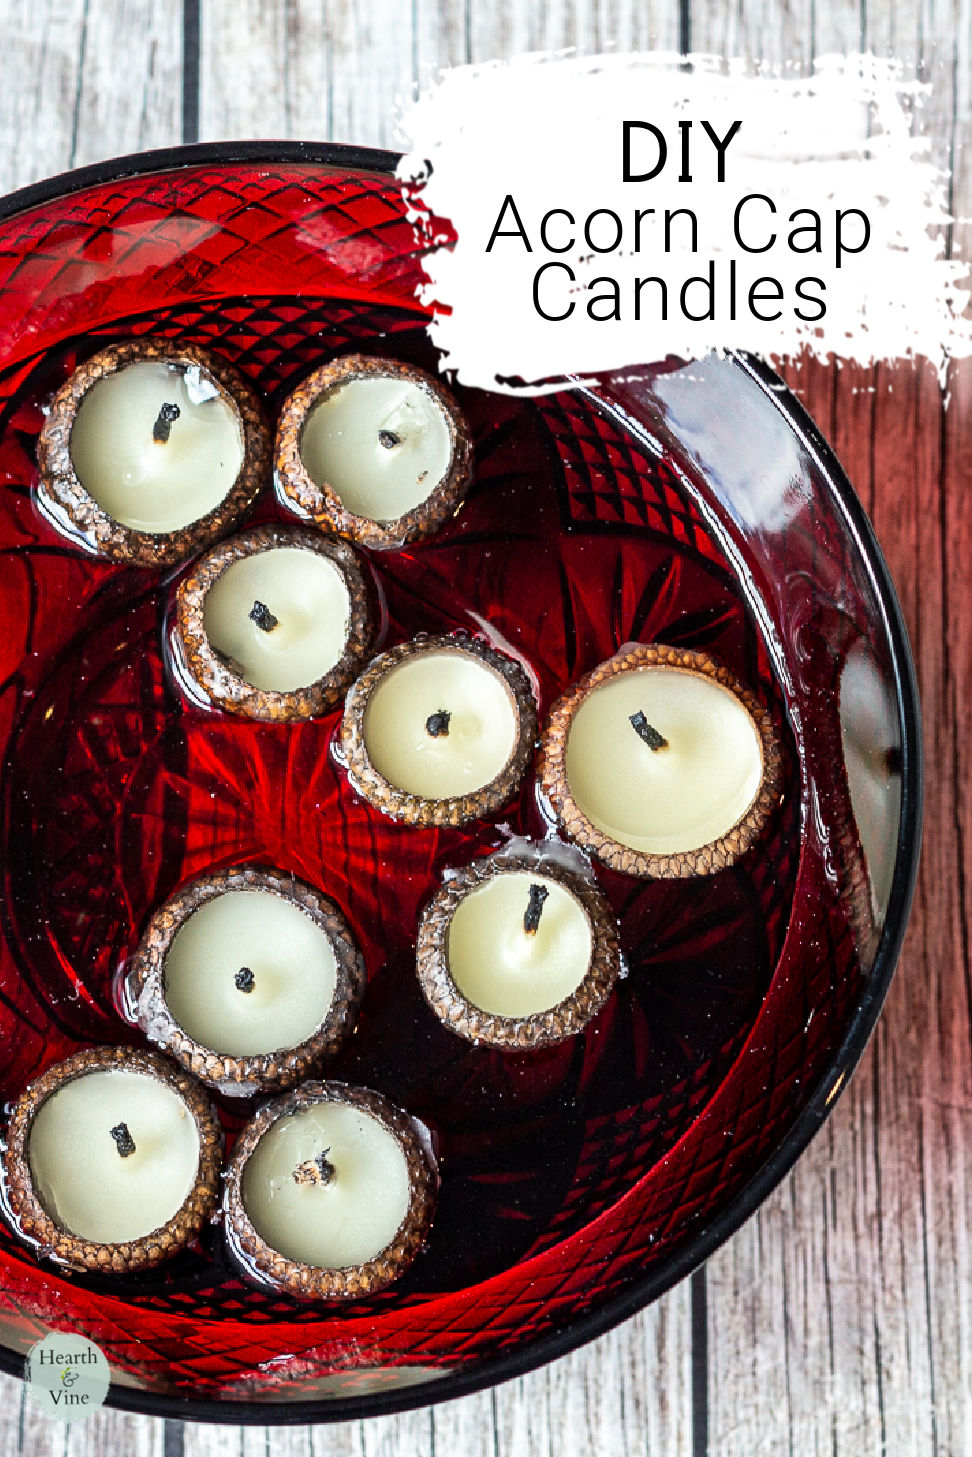
    Not long. Maybe 10-20 minutes depending on the size of the acorn cap. However, you could reuse the caps and make more or just use them for decoration without burning them.

    Acorn cap candles floating in water with large flames.

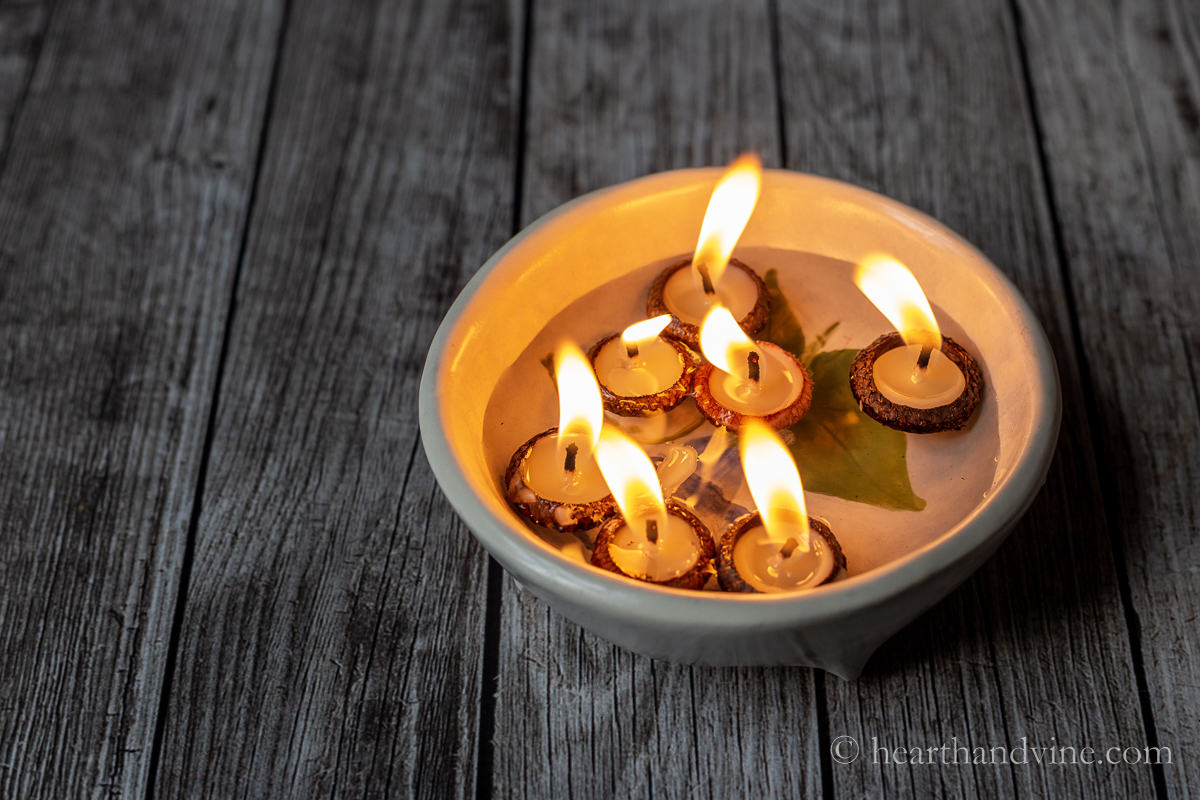
    One thing to remember and this is true for most candles. Keep the wicks trimmed to about 1/4 inch high. Otherwise, the flame will get very high as shown in the image above.

    Beeswax acorn cap candles lit and floating in a bowl of water.

    I think they turned out really cute!

    Patti signature

    More Acorn Crafts

    • Acorn Napkin Ties
    • Acorn Centerpiece
    • Acorn Ornaments
    Acorn cap candles floating in a red bowl of water.
    Red bowl with acorn cap candles floating in water
    Print

    How to Make Beeswax Acorn Cap Candles

    Enjoy making these whimsical acorn cap candles that you've gathered and float them in a bowl of water for an enchanted setting.
    Prep Time1 hour hr 30 minutes mins
    Active Time30 minutes mins
    Additional Time1 hour hr
    Total Time3 hours hrs
    Course: DIY Projects
    Yield: 2 dozen
    Author: Patti Estep

    Equipment

    • Old pot and can
    • Shallow bowl
    • Sand or other material to set the caps on
    • Disposible plastic cup
    • Scissors

    Materials

    • Acorn caps
    • Beeswax
    • Wicking

    Instructions

    • After you gather the acorn caps place them on a baking sheet covered with foil in the oven on the lowest setting for one hour.
    • Place some sand or similar material in a shallow bowl or dish such as a pie plate and set the acorn cap on top to level them.
    • Melt some beeswax and pour it into a small plastic cup.
    • Squeeze the cup to pour and fill each cap.
    • Allow the wax to harden a little and then set a piece of wicking in the middle.
    • Once the wax has hardened trim the wicks.
    • Float the acorn cap candles in water in any container and light as you wish.

    Notes

    These candles will burn for maybe 10 -20 minutes. However, you can also reuse them with more wax and add a new wick.
    Keeping the wicks trimmed to 1/4 inch helps keep the flames from getting too high.
    Tried this project?Tag @hearthnvine on Instagram
    « Homemade Chili Seasoning
    Handwritten Family Recipe Tea Towel Gift Easy Tutorial »

    About Patti Estep

    Patti is the creator of Hearth and Vine, a home and garden blog filled with projects to inspire your creative side. She loves crafting, gardening, decorating and entertaining at her home in Pennsylvania. When she is not working on a project at home or searching for treasures at nurseries and thrift stores with her girlfriends, you’ll probably find her with family and friends, at a restaurant, or home party enjoying new and different food adventures.

    Reader Interactions

    Leave a Reply Cancel reply

    Your email address will not be published. Required fields are marked *

    Recipe Rating


    Primary Sidebar

    Acorn cap candles on a plate of charcoal pellets
    Patti Estep Profile Picture

    Hi!

    I'm Patti

    Join me to create lots of fun DIY projects, including crafts, gardening, home decor, and tasty recipes

    More about me

    Popular Posts

    • Baked zucchini bite on a slated tray with a bowl of horseradish sauce.
      Make Tasty Zucchini Bites in Under an Hour
    • Three tin cans in descending sizes hanging from twine.
      DIY Wind Chimes with Tin Cans
    • Blue jean crossover bag
      DIY Crossbody Bag from Jeans
    • Ham barbecue sandwich on plate
      Chipped Ham Barbecue Sandwiches - A Pittsburgh Favorite
    • Echievera planter
      What to do With a Stretched Succulent
    • Make a Mason Jar Oil Candle Lamp with botanicals and essential oils. ~ gardenmatter.com
      DIY Oil Candle - Gifts for the Holidays

    Footer

    Acorn cap candles on a plate of charcoal pellets

    ^ back to top

    About
    Contact
    Privacy Policy
    Disclosure Policy

    Sign Up Here!
    for our
    newsletter &
    special offers

    Follow Me

    facebook
    Pinterest
    instagram

    As an Amazon Associate, I earn from qualifying purchases. i.e. as an Amazon Associate, I earn from qualifying purchases.

    Copyright © 2025 Hearth and Vine

    Rate This Recipe

    Your vote:


    A rating is required
    A name is required
    An email is required