• Skip to primary navigation
  • Skip to main content
  • Skip to primary sidebar
  • Home
  • DIY Projects
    • Homemade Bath and Body
    • Sewing - Fabric Crafts
    • Flower Crafts/Decor
    • Thrift Store/Vintage
  • Gardening
    • Flower Gardens
    • Container Gardening
    • Houseplants
    • Indoor Gardening
    • Landscaping
    • DIY Garden Art
  • Decorate
    • Spring Decor
    • Summer Decor
    • Fall Decor
    • Winter Decor
    • Home Decor Projects
  • Recipes
    • Breakfast Recipes
    • Lunch Recipes
    • Dinner Recipes
    • Dessert
    • Salad Recipes
    • Soups and Stews
    • Side Dish Recipes
    • Appetizers and Snacks
    • Healthy Recipes
  • Holidays
    • Valentine's Day
    • Easter
    • Mother's Day
    • Halloween
    • Thanksgiving
    • Christmas
Hearth and Vine
menu icon
go to homepage
  • About
  • DIY
    • ...Flower/Gardening Crafts
    • ... Bath and Body
    • ...Sewing/Fabric Crafts
    • ...Thrift Store/Upcycle
  • Gardening
    • ...Flower Gardens
    • ...Container Gardening
    • ...Indoor Gardening
    • ...DIY Garden Art
  • Decorate
    • ...Home Decor Projects
    • ...Spring Decor
    • ...Summer Decor
    • ...Fall Decor
    • ...Winter Decor
    • ...Room Makeovers
  • Recipes
    • ...Appetizers and Snacks
    • ...Dinner Recipes
    • ...Side Dish Recipes
    • ...Salad Recipes
    • ...Dessert
    • ...Drinks
  • Holidays
    • ...Valentine's Day
    • ...Easter
    • ...Mother's Day
    • ...Halloween
    • ...Thanksgiving
    • ...Christmas
  • Subscribe
  • Instagram
    • Facebook
    • Instagram
    • Pinterest
    • Twitter
  • subscribe
    search icon
    Homepage link
    • About
    • DIY
      • ...Flower/Gardening Crafts
      • ... Bath and Body
      • ...Sewing/Fabric Crafts
      • ...Thrift Store/Upcycle
    • Gardening
      • ...Flower Gardens
      • ...Container Gardening
      • ...Indoor Gardening
      • ...DIY Garden Art
    • Decorate
      • ...Home Decor Projects
      • ...Spring Decor
      • ...Summer Decor
      • ...Fall Decor
      • ...Winter Decor
      • ...Room Makeovers
    • Recipes
      • ...Appetizers and Snacks
      • ...Dinner Recipes
      • ...Side Dish Recipes
      • ...Salad Recipes
      • ...Dessert
      • ...Drinks
    • Holidays
      • ...Valentine's Day
      • ...Easter
      • ...Mother's Day
      • ...Halloween
      • ...Thanksgiving
      • ...Christmas
    • Subscribe
    • Instagram
    • Facebook
    • Instagram
    • Pinterest
    • Twitter
  • ×
    Home » DIY Projects

    DIY Wooden Bead Wreath for Spring

    by Patti Estep · Mar 4, 2024

    Jump to How-to Card
    Off white wooden bead wreath with spring flowers hanging on a front door.

    This DIY wooden bead wreath is ideal for spring but could also be kept up all summer long. This easy tutorial will help you make one in an afternoon.

    Wooden bead wreath with flowers on a dark front door.

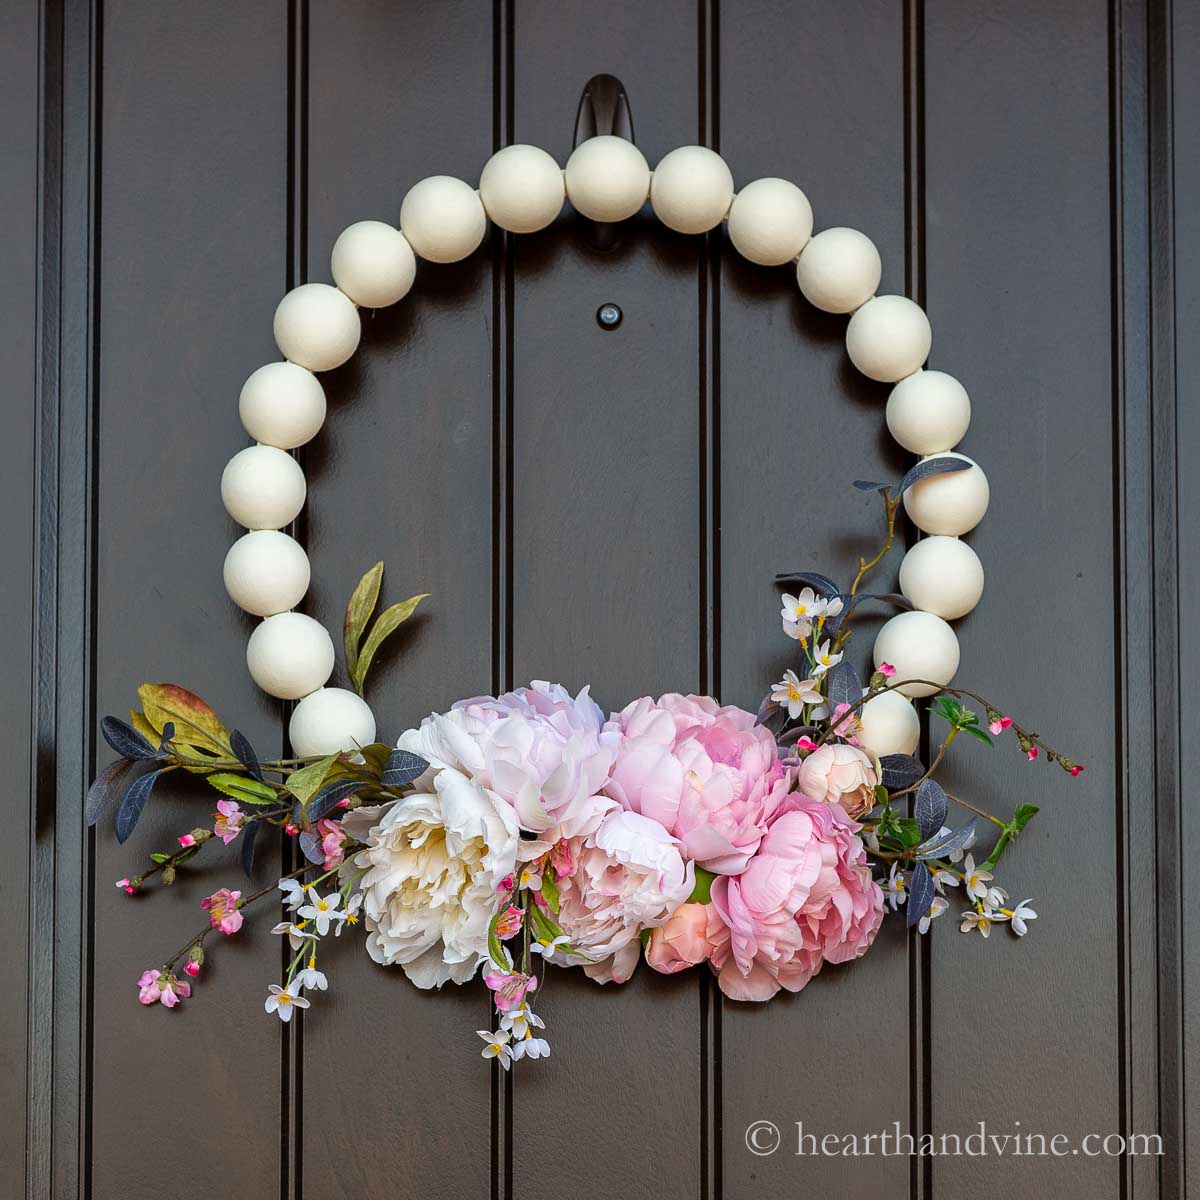
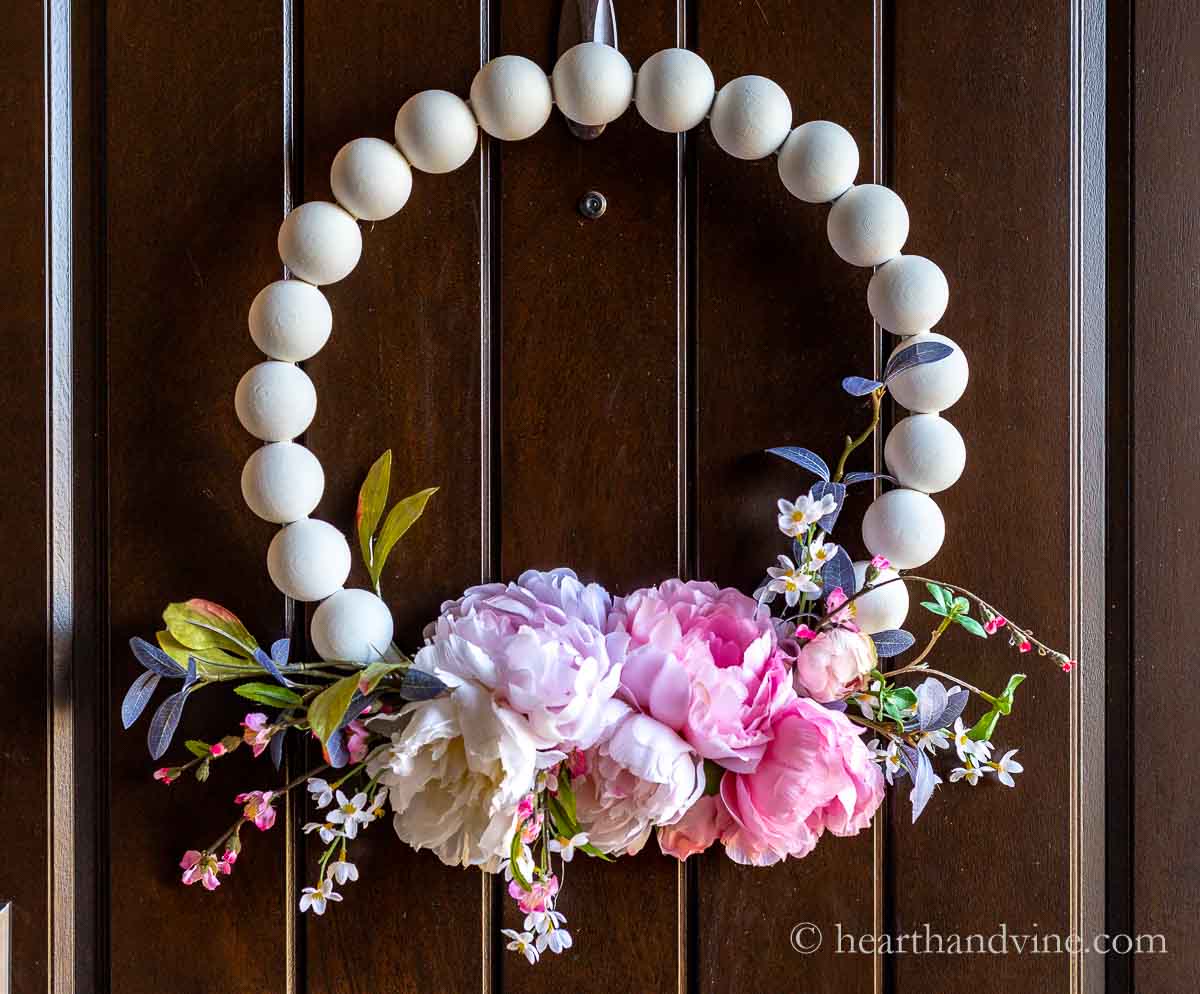
    Spring is around the corner so it's time for a new spring wreath for our front door home decor. Today I'm sharing this modern farmhouse style wooden bead wreath with some faux peonies, (my favorites), a few other spring blossoms, and greenery mixed in.

    This post contains some affiliate links (that means if you make a purchase after clicking a link, there’s no additional cost to you, but I will earn a very small commission. ) i.e. as an Amazon Associate, I earn from qualifying purchases. Click here to read my full disclosure policy.

    Supplies for DIY wooden bead wreath including paint, split wood beads, florals and a wooden wreath form.

    How to Make a Wooden Bead Wreath
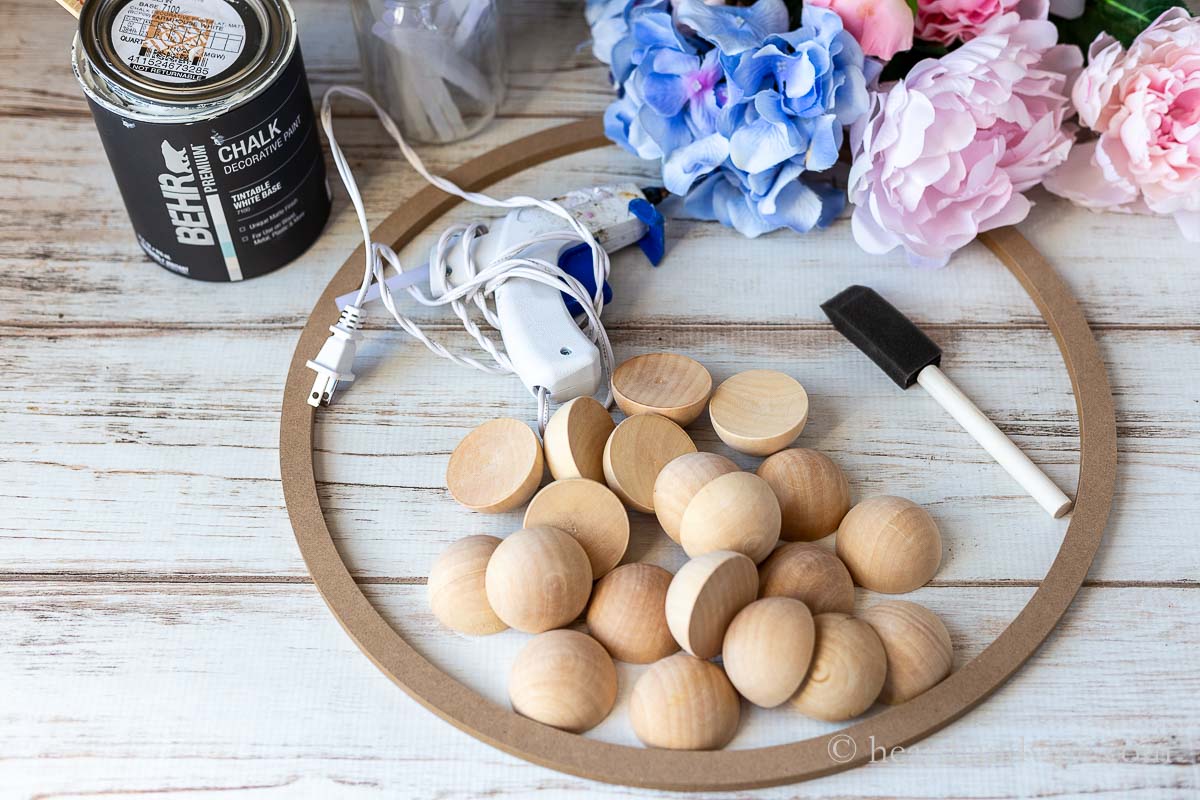
    Supplies

    • Split Wood Beads (2")
    • Flat Wooden Wreath Frame (16")
    • Various Artificial Florals
    • White Chalk Paint
    • Pipe Cleaner/Chenille Stem
    • Hot glue gun and sticks
    • Scissors
    • Paintbrush
    Wooden wreath form and split beads painted white.

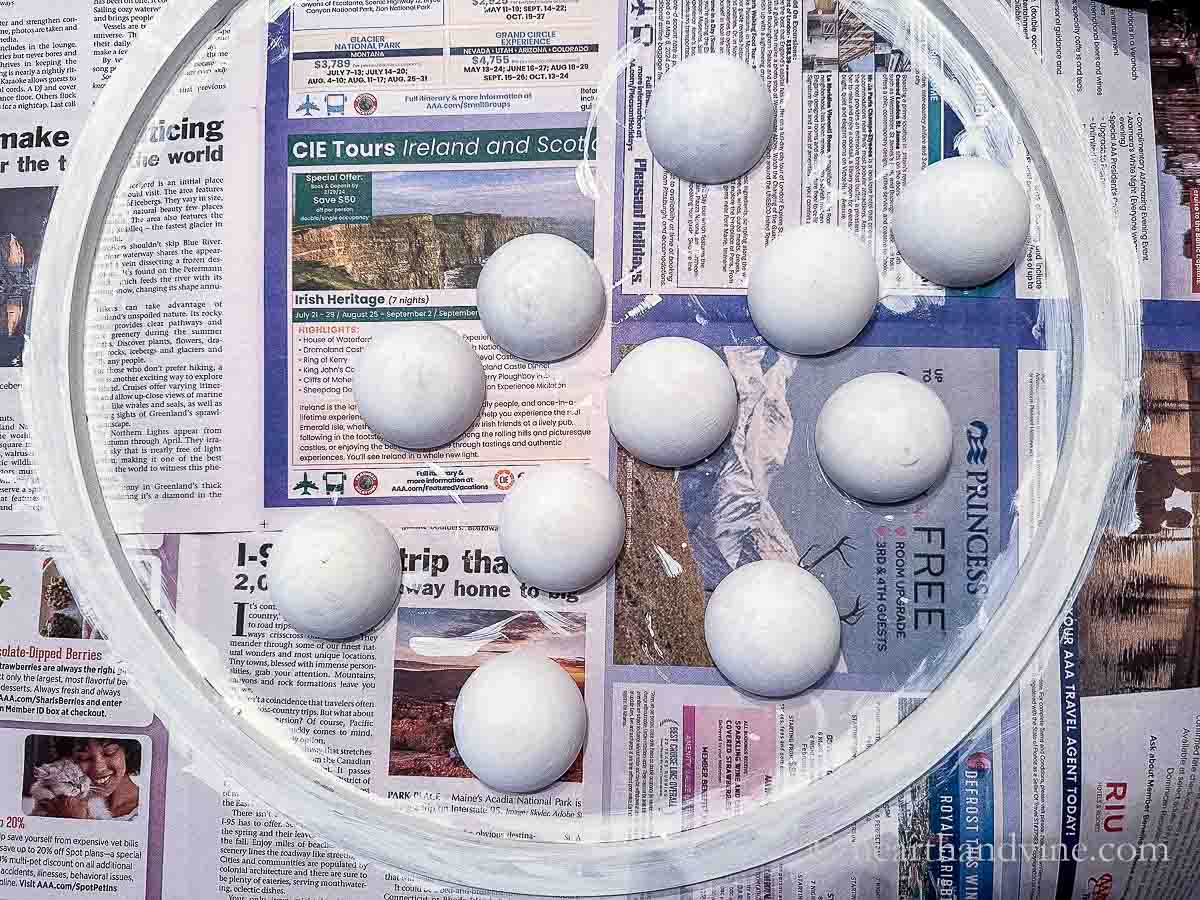
    Step 1: Paint the wood bead halves and the wreath frame with white chalk paint. This required a second coat for good coverage. You could use any white paint or a different color if you want.

    A piece of chenille stem glued to the back of the frame to use as a hanger.

    Step 2: Once the paint is dry add a hanger on the back of the frame. I used a small piece of a pipe cleaner and hot glued it to the back leaving a little hump in the middle for a hanger. Update: Hot glue wasn't strong enough. After a couple of weeks, it broke. Instead, try stapling the pipe cleaner to the wood.

    Split wood beads glue onto 3/4 of a wooden round wreath frame.

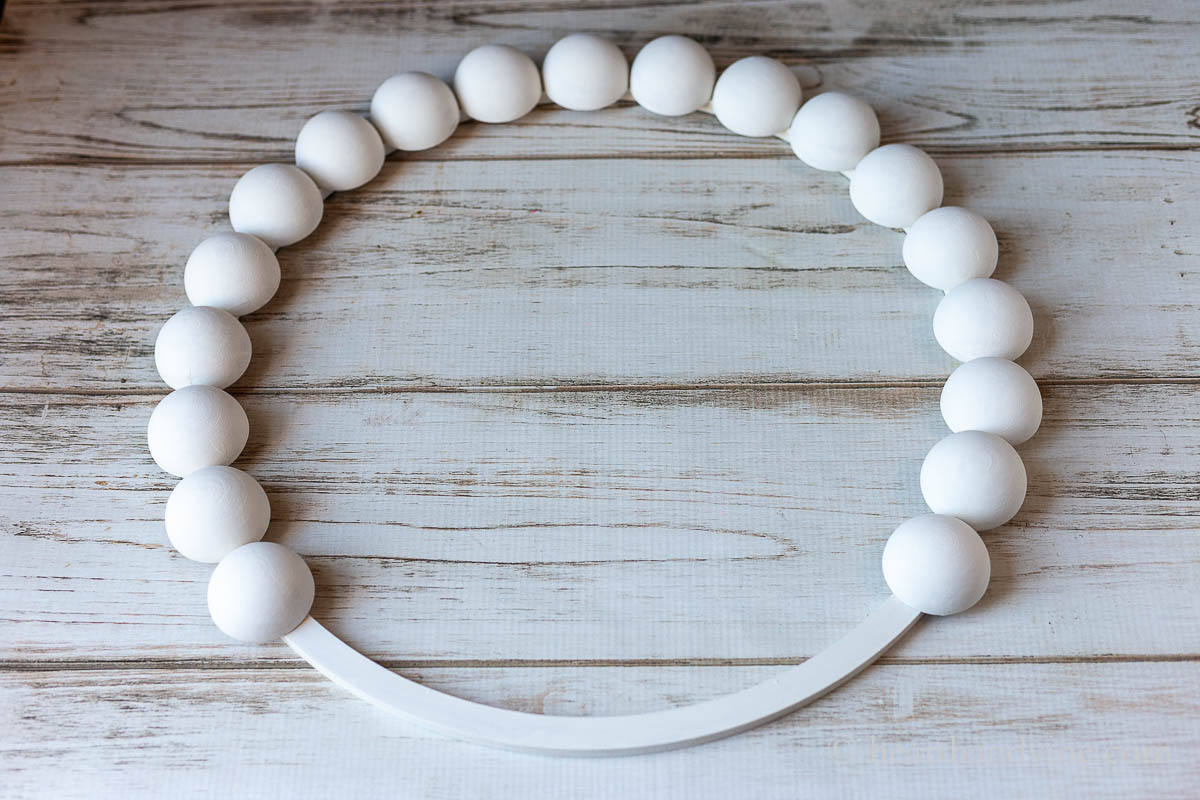
    Step 3: Hot glue the beads onto the front of the wreath form. Start with one in front of the spot where you placed your hanger. Then continue adding a bead to each side leaving some space at the bottom for flowers. I ended up using 19 of the 20 split wooden balls for a 16 inch frame.

    Completed spring wooden bead wreath on a table.

    Step 4: Hot glue faux flowers with larger ones in the center of the open space working outward towards the balls.

    Newsletter Signup
    Join Our Newsletter List!

    Be the first to receive new posts and get access to our Subscribers Only Page.

    I used some large beautiful peony flowers from my simple spring peony wreath a while back. Then I add some smaller flowers, leaves, and other vining pieces on the sides.

    White wooden bead wreath with faux peonies and spring blooms.

    This was a quick and easy one to create and I love the way it turned out.

    Happy Spring!

    Patti signature

    More Spring Decor Projects

    • Galvanized Hanging Planter
    • Burlap Wreath for Spring
    • Easy Monogrammed Spring Wreaths
    • Flowering Living Wreath
    • Decorating with Moss for Spring
    Partial view of a white wooden bead wreath with artificial peonies, blossoms and leaves.
    Wooden bead wreath with flowers on a dark front door.
    Print

    DIY Wood Bead Wreath

    This DIY wooden bead wreath is made with split wood balls a flat wreath frame and artificial spring flowers.
    Active Time1 hour hr 30 minutes mins
    Total Time1 hour hr 30 minutes mins
    Yield: 1

    Equipment

    • Hot glue gun and sticks
    • Scissors or floral wire cutters
    • Paintbrush
    • Heavy Duty Stapler

    Materials

    • 19 Split wood beads (2 in)
    • 1 18 inch Flat wooden wreath frame
    • Various artificial florals
    • White chalk paint
    • 1 3 inch Pipe cleaner (chenille stem)

    Instructions

    • Paint the split balls and frame white.
    • Staple a piece of pipe cleaner to the back of the frame to use as a hanger.
    • Hot glue the balls to the wooden frame starting at the top on the other side of the hanger.
    • Continue to glue the wooden balls next to the top one on each side.
    • Fill the bottom empty space with various faux artificial flowers and leaves.

    Notes

    If you can't find a flat wreath base you could use a large embroidery hoop.
    You could also add a ribbon or bow to the wreath. However, I think it looks great with just the flowers.
    Note: Originally I hot glued the pipe cleaner to the back for a hanger but after a while, it broke. So I used a heavy-duty stapler to attach it and now it's fine. 
    Tried this project?Tag @hearthnvine on Instagram
    « Sweet Potato Shepherd's Pie: St Patrick's Day Casserole
    DIY Window Frame Craft »

    About Patti Estep

    Patti is the creator of Hearth and Vine, a home and garden blog filled with projects to inspire your creative side. She loves crafting, gardening, decorating and entertaining at her home in Pennsylvania. When she is not working on a project at home or searching for treasures at nurseries and thrift stores with her girlfriends, you’ll probably find her with family and friends, at a restaurant, or home party enjoying new and different food adventures.

    Reader Interactions

    Comments

    1. Pamela Hull

      March 04, 2024 at 8:25 am

      where do you buy thode initials

      Reply
      • Patti Estep

        March 04, 2024 at 8:44 am

        Pamela, are you talking about the spring monogram wreath post? If so, those letters were originally bought at Hobby Lobby. I don't think they sell the exact same ones anymore. However, I do have a link to some similar ones on Amazon in the "How To" card for that project.

        Reply

    Leave a Reply Cancel reply

    Your email address will not be published. Required fields are marked *

    Recipe Rating


    Primary Sidebar

    Patti Estep Profile Picture

    Hi!

    I'm Patti

    Join me to create lots of fun DIY projects, including crafts, gardening, home decor, and tasty recipes

    More about me

    Popular Posts

    • Baked zucchini bite on a slated tray with a bowl of horseradish sauce.
      Make Tasty Zucchini Bites in Under an Hour
    • Three tin cans in descending sizes hanging from twine.
      DIY Wind Chimes with Tin Cans
    • Blue jean crossover bag
      DIY Crossbody Bag from Jeans
    • Ham barbecue sandwich on plate
      Chipped Ham Barbecue Sandwiches - A Pittsburgh Favorite
    • Echievera planter
      What to do With a Stretched Succulent
    • Make a Mason Jar Oil Candle Lamp with botanicals and essential oils. ~ gardenmatter.com
      DIY Oil Candle - Gifts for the Holidays

    Footer

    ^ back to top

    About
    Contact
    Privacy Policy
    Disclosure Policy
    Terms of Service

    Sign Up Here!
    for our
    newsletter &
    special offers

    Follow Me

    facebook
    Pinterest
    instagram

    As an Amazon Associate, I earn from qualifying purchases. i.e. as an Amazon Associate, I earn from qualifying purchases.

    Copyright © 2025 Hearth and Vine

    Rate This Recipe

    Your vote:


    A rating is required
    A name is required
    An email is required