


Learn how to make this beautiful spring peony wreath with easy step by step instructions and readily available supplies.

Peonies are definitely my most favorite flowers of all time. I have several shrubs growing in the garden and enjoy them all spring and early summer. However, their blooming season is pretty short and even though I've been able to dry them to make a lovely Dried Peony Wreath, I don't think it will do well on my front door, and I really wanted to make something new for spring.
This post contains some affiliate links (that means if you make a purchase after clicking a link, there's no additional cost to you, but I will earn a very small commission. ) i.e. as an Amazon Associate, I earn from qualifying purchases. Click here to read my full disclosure policy.
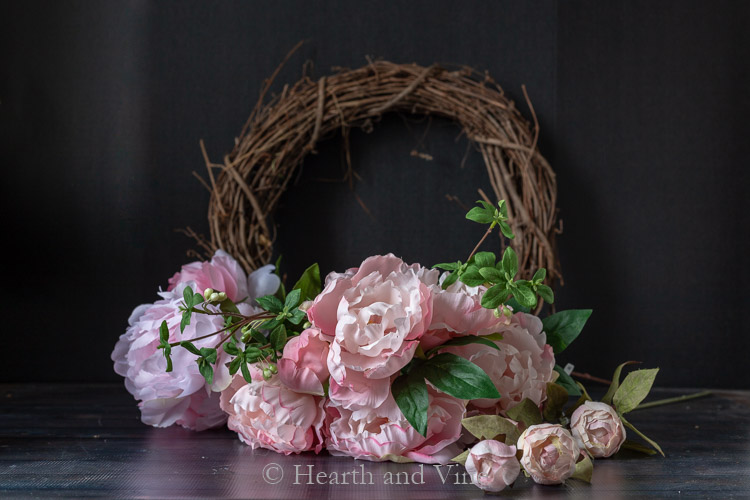
Fresh flowers are certainly the most beautiful, but I am amazed at the quality of artificial flowers on the market. I don't know if it's because I love peonies so much or if these artificial flowers are just that nice, but I decided to make a spring peony wreath from these artificial blooms for our front door.
Spring Peony Wreath Supplies
- 18-inch Grapevine Wreath

- 2 - Pink Peony Bushes
- 1 - Mini Peony Stem
- 1 - Gypsophilia Leaf Stem
- Wire Cutters or Heavy Duty Scissors

 or Heavy Duty Scissors
For this project, I re-used an old grapevine wreath and purchased the flowers at Michaels. They were having a 40% off sale on all florals which made this wreath very affordable. Don't forget that Michaels and Hobby Lobby both have 40% off coupons all the time so you could make this work any time of year.
You could also save money by making a smaller wreath that would require fewer flowers and/or re-using a wreath base or supplement florals that you may already have in your craft stash.
How to Make a Spring Peony Wreath
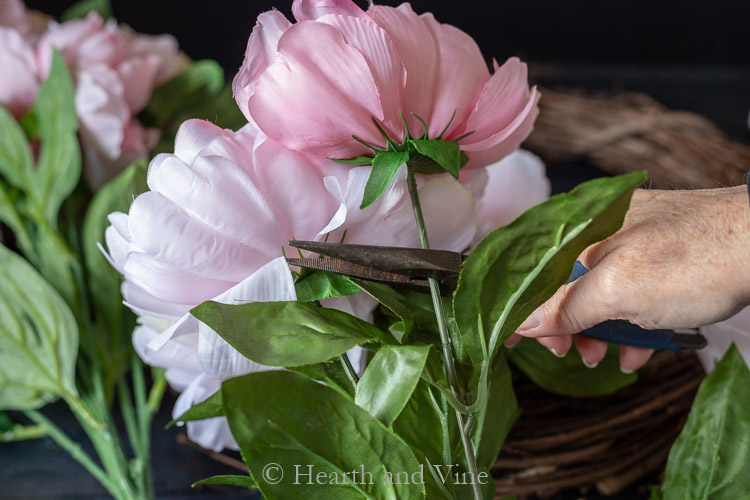
- Cut the blooms leaving about 3 inches of the stem with wire cutters or heavy duty scissors.
I used two bushes for this 18-inch wreath. Bushes are what the craft store refers to as a group of stems with several flowers attached. Each came with 8 flowers though one had a bud in place of a flower.
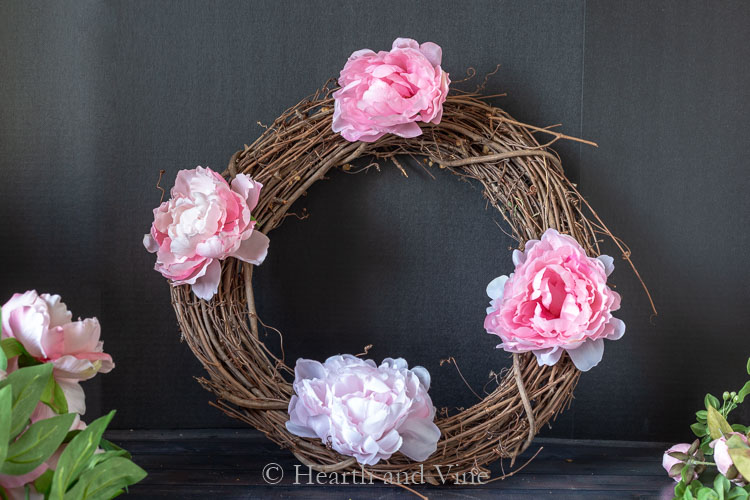
2. Start by placing four of the peony flowers evenly around the wreath, using the wire stem to fit in between the grapevines.
Note: Use a tight grapevine wreath, then you will have no need for glue, and you can reuse the flowers and the wreath in the future

3. Next, place four more peony blossoms in between the first four flowers. Vary up the positions by placing them at different angles, with some facing inward and a few facing out.

4. Then place the remaining blooms in between to fill in the wreath. Since I was short one flower I placed the bud at the bottom. Then I added the buds from the dried artificial peony stem in with the bud to create a cluster. You could do this at the top instead but I like to add a little extra at the bottom.
You could stop there, but I wanted to add a little green into the mix to give the wreath an airy cottagey feeling.
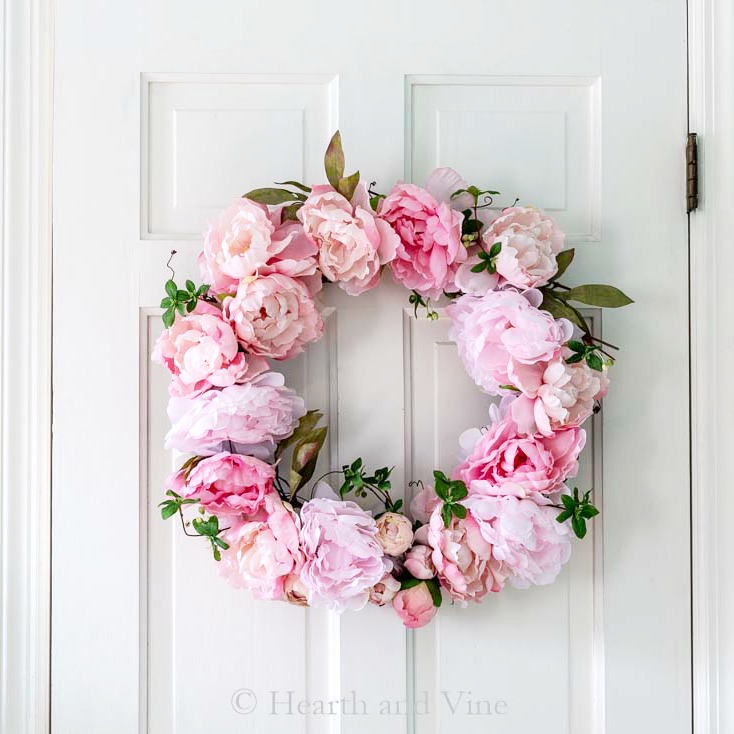
5. Hang the wreath on a door to make it easier to see the final look. Cut up the greenery and place it evenly around the wreath. Use the Gypsophila stem and some of the leaves from the other peonies as you wish.

The great thing about using a grapevine wreath and artificial flowers is you can easily tweak and move them around without worrying about damage.
This wreath should withstand the elements, though we do have a little coverage on our front porch.
I love the way it brings a little spring to our doorstep, even if it is still winter.

P.S. If you grow peonies in your garden, or have access to them, try drying them to create a beautiful Dried Peony Wreath. You can also dry just a few and make a beautiful Peony Shadow Box. Find these and more fun ideas on my DIY/Projects Page.
Click Here to Save to Pinterest!

Make a Beautiful Spring Peony Wreath in Under an Hour
Equipment
- Wire Cutters or Heavy Duty Scissors
Materials
- 18- inch Grapevine Wreath
- 2 - Pink Peony Bushes
- 1 - Mini Peony Stem
- 1 - Gypsophilia Leaf Stem
Instructions
- Cut the blooms leaving about 3 inches of the stem with wire cutters or heavy duty scissors.
- Start by placing four of the peony flowers evenly around the wreath, using the wire stem to fit in between the grapevines.
- Place four more peony blossoms in between the first four flowers.
- Vary up the positions by placing them at different angles.
- Place the remaining blooms in between to fill in the wreath.
- Cut up the greenery and place it evenly around the wreath.
Markette Bayliss
So beautiful and peonies are one of my favorites.
Patti Estep
Me too Markette! Thanks for the lovely comment.
Tammy
Hi Paula from your neighboring state of Maryland. I love all of these wreath options the basket on the door is my favorite followed by the peony wreath. So many beautiful options to choose from in your post.
Patti Estep
So glad you like them!
Karen Howard
Hello. It's my 1st time visiting & I am subscribing. I just couldn't resist this Gorgeous Peony Wreath I found on Pinterest. I love Peonies, esp. Pink ones. I just happened to buy some yesterday to go with the others I have. Lol. They are all over the house, along w/plenty of other flowers in Bouquets & on Wreaths I make. Looking forward to hearing from you soon. Have a lovely day.
Patti Estep
Another peony lover! Welcome Karen. I'm so glad you like the peony wreath. It was so easy to make and of course, anything peony is going to look good because they are so beautiful, right?
Kathleen
Hi from Ontario Canada! After the longest and coldest winter in years,your beautiful wreath is like a ray of sunshine! Can't wait to make one for my Mom and for my front door too! Nice to see the different backgrounds in your photos. I think the white door is my favorite. So glad I found your blog!
Patti Estep
Thanks Kathleen. The white door is a bedroom door but it does look great for a photo backdrop. The wreath is really easy and I think it's a great gift for Mom.
Bernie
Love this wreath Patti! Definitely will be making this for my front door. You always come up with such great ideas. Love your blog.
Patti Estep
Thanks Bernie. It's an easy one. The artificial flowers are so pretty now. Not cheap but many places have them on sale this time of year. So glad you love the blog. ♥
Jody
Thank you new front door needs a new flower wreath. Have a porch old fashioned door too now. I just adore it. All the gardening and flower tutorials are being read and seeds, plants are listed to buy. I have a lot but this backyard is going to be flower envy.
Patti Estep
That's exciting, Jody. You'll have to send me a picture when your garden is in bloom.
Marie
Patti, I just had to come to visit from the Style Showcase Party to take a closer look at your pretty wreath. Peonies are one of my favorite flowers so I'm swooning over this! Pinned 🙂
Patti Estep
Thanks Marie. I really appreciate the kind comment and pins!
Christine
So pretty, Patti! I just brought some more artificial flowers this past weekend and I too am amazed at how realistic they look now! I love the added greenery in your wreath and the fact that you don't have to use glue! Thanks for the tips!
Patti Estep
Thanks CD! It's a nice bright spot on our front door during such a dreary winter.
Barbara Warner
Patti,
Did you glue the stems in place or wire them around the grapevine? We amateurs need every step explained!!! The wreath is gorgeous! Thanks for sharing. I agree that many artificial flowers look real and are well worth the money I spend on them!
Patti Estep
Barbara, I did not glue or wire them around the grapevine. The stems are wire based so you could if you wanted to, but if you buy a tight grapevine wreath it will hold them in place. Then you can reuse the flowers and the wreath in the future. If you want to glue them in place I would suggest hot glue. However, let me tell you can I have a small roof over my front door and this wreath has been hanging outside for a couple of weeks with no issue.
Carole West
This is just so pretty and inviting. Love the bright pink makes me want spring to arrive even more.
Patti Estep
Thanks Carole. You and me both!
Denise
That's so beautiful! Something that really catches your eye at this time of year. I can't wait for spring!
Patti Estep
Thanks! I can't wait either!