

This simple tutorial for a dried peony wreath is a great way to preserve all your beautiful peony blooms in the spring.

We went on vacation in May, and the peonies were already starting to bloom. When we got home they were just about done blooming. I love peonies but they have such a short blooming season.
Normally I will cut stems, and use them in bouquets in vases around the home or bring them to a friend, but this year I decided to cut as many as I could, to create a lovely dried peony wreath.
It will be a great summer wreath for our home and will probably last a long time.
This post contains some affiliate links (that means if you make a purchase after clicking a link, there's no additional cost to you, but I will earn a very small commission. ) i.e. as an Amazon Associate, I earn from qualifying purchases. Click here to read my full disclosure policy.
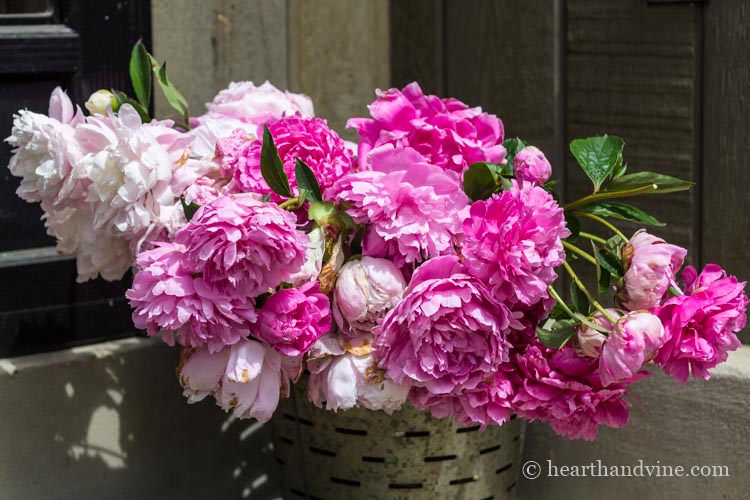
As you can see above I have tons of peony flowers. I cut them all white peonies, dark pink peonies, and shades in between. Some of the blooms were getting old. Ideally, you would want to cut them in bud, or when they are still tight. They seem to dry better that way. Like the peonies, I dried for the Shadow Box Peony project. Still, I thought, what did I have to lose?
How to Dry Peonies
Step 1: Cut as many fresh peony blooms as you can leaving plenty of stems for hanging.
Step 2: Strip off all the leaves from the stem.
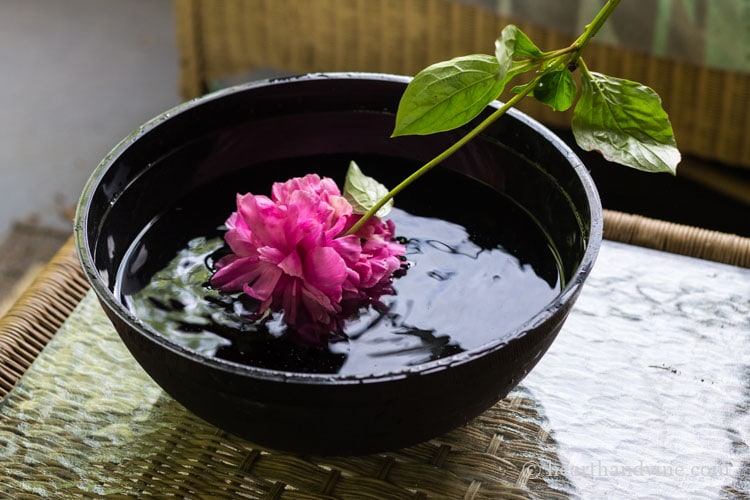
Step 3: Next remove pests such as ants by swishing the flower heads in a large bowl of cold water.

Step 4: I let them dry out a little.
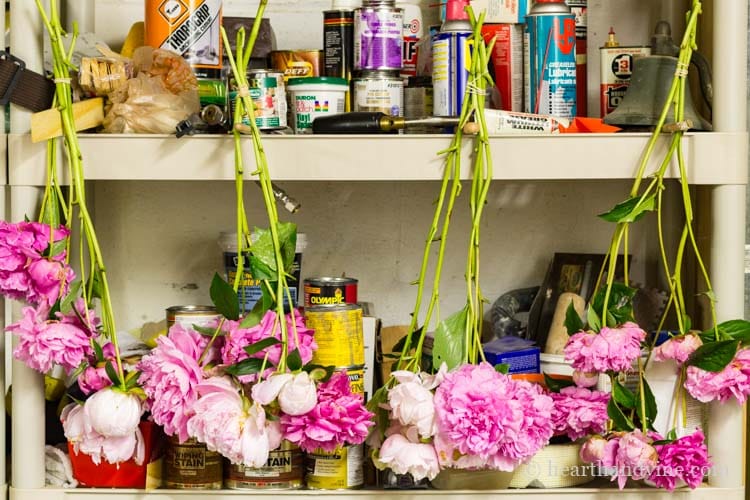
Step 5: Group the peonies together, using rubber bands to secure the bunches.
Step 6: Hang them in anyplace that is cool, dry, and away from direct sunlight. I hung mine in the basement.
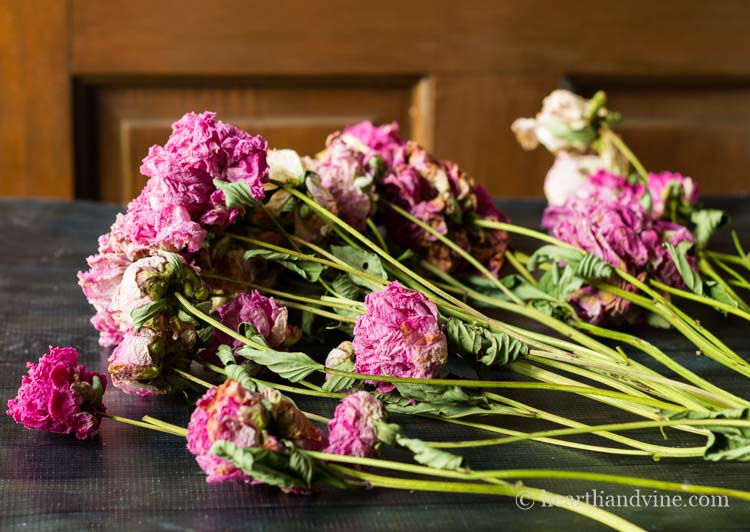
After about two weeks the peonies should be nice and dry.
This time-frame may vary depending on the humidity in the house. Some of the peonies were too close to each other and did not look as good as the others.
If you can, keep them a little more separate when drying. Here is where my impatience gets in the way.
How to Make a Dried Peony Wreath
Step 1: Use a grapevine base from the store or make a grapevine wreath from vines in your yard.
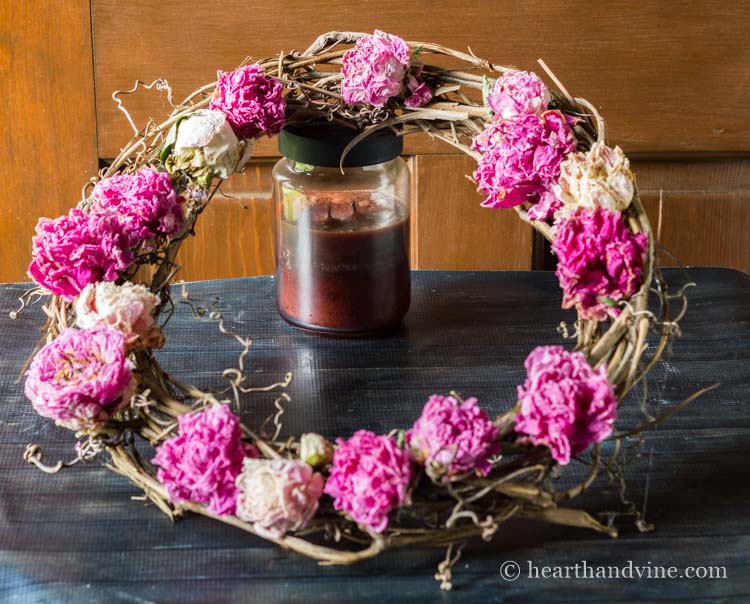
Step 2: Start with the larger flowers first. Using a glue gun, attach them to the wreath.
Tip: It helps to use something to lift and support the wreath as you work, like the candle here.
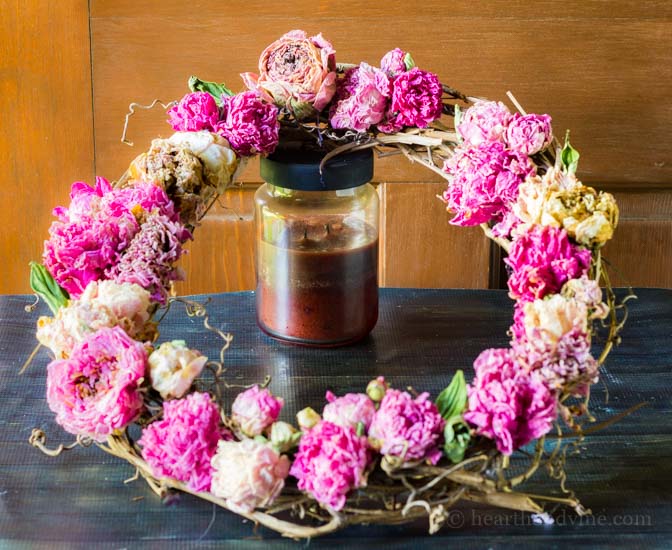
Step 3: Continue adding smaller flowers, and fill in with some of the leaves.
If you don't have enough peonies, you could also add in some other dried flowers such as hydrangea or roses. A smaller wreath base would help too.

Step 4: To help protect the wreath, give it a spray of polyurethane, matte, or semi-gloss. Some people even use hairspray. It will still be very fragile, so you may want to find a spot indoors to hang this dried peony wreath.
I think it has a very shabby chic romantic look, and I am happy to extend the life of all those pretty peonies. Plus this project didn't cost me a dime and it was fun to make such a beautiful wreath.
You could also make a wreath like this with flowers from a special occasion, such as a wedding, or a pretty bouquet you received from someone special.
Not all flowers will dry as well as others, but if your only other option is to throw them out, why not give it a try?

More Dried Flower Crafts

Dried Peony Wreath Tutorial
Equipment
- Hot glue gun and glue sticks
- Scissors or garden shears
Materials
- Grapevine wreath
- Dried Peonies
Instructions
- Cut peony flowers with a long stem.
- Swish the heads in a bowl of water to remove ants and other insects.
- Group a few together in bunches using a rubber band near the bottom.
- Hang the bunches somewhere cold, dark, and dry.
- Once dry, cut off the blooms and use a glue gun to glue the flower heads to a grapevine wreath.
- Start by gluing the larger flowers spaced out around the wreath.
- Then fill in with medium size flowers.
- Finish with the smallest flowers, dried leaves, and dried flower buds.
Notes
Click Here to Save to Pinterest!

April Knight
Every year my heart is broken when I realize I will not get any more peony blooms from my plants. It's like I literally hear taps in my head... This craft has made me so happy! I can't wait to try this next Spring. With a few of my Itoh peony blooms as a centerpiece of the wreath I just know it will be beautiful. Wonderful idea! Thank you.
Patti Estep
April, I couldn't agree more. It's a shame how short their blooming period is. My dried wreath is still looking pretty good. It was a fun project to create. I know you will love yours too.
Marie
I've never dried my peonies but after seeing your post, I'm definitely going to do that with next year's crop. Thank you for the inspiration!
Patti Estep
Hi Marie,
You should definitely try it. It's so easy and you really can't go wrong with the natural beauty of peonies.
Thanks for stopping by,
Patti
Nikki Gwin
I absolutely love this! I keep all my dried flowers that my husband gives me.
🙂 gwingal
Patti Estep
Hi Nikki,
This is the perfect project for you! A nice way to show off all that love.
Thanks for stopping by,
Patti
Barbara Chapman ~ French Ethereal
Hello Patti,
I LOVE how your peony wreath turned out!!! I bought a tiny bunch of peonies in late winter and two dried by themselves! The others rotted ~ too humid in our "home." But, I'm so happy just to have these two! I'll have to try again now that it is warmer. I pinned your photos like crazy, thank you!
Thank you for a lovely tutorial,
Barb 🙂
Patti Estep
Hi Barbara,
I'm so glad you like it so much and that you have experienced first hand how the peonies can dry on their own. When you try again place them somewhere dry with a lot of airflow. They will be perfect in just a few weeks.
Thanks for stopping by,
Patti
Lidy@FrenchGardenHouse
This is so beautiful. I love peonies, I've never considered they would dry. Inspiring!
Patti Estep
Hi Lidy,
They sure do. I picked this group a little late because we were away but I do think they work a little better if you pick them when they are in mid-bloom.
Thanks for stopping by and have a great week!
Patti
FLORENCE @ VintageSouthernPicks
Such a pretty wreath Patti! I didn't know peonies were good candidates for drying. I'll have to try that next Spring.
Patti Estep
Hi Florence,
I think it's fun to see how well different flowers dry, just by hanging them in the basement or making a wreath with them. Since they are going to die back anyway, what do you have to lose.
Thanks for the lovely comment and stopping by today,
Patti
Sharon Rexroad
I won a dried peony wreath at a charity auction years ago and babied it for several seasons. Now I know how to recreate it! Thank you SO much for this tutorial.
Patti Estep
Hi Sharon,
This is great news. I love that you have something that you love and can now make one for yourself.
Thanks for stopping by and have a great day!
Patti
Janet
Wow.. That is such a gorgeous wreath Patti. I never thought of drying peonies but this is such a great idea for extending the life of my beloved peonies. So simple yet spectacular.
Thank you for sharing.
Janet rosemary-thyme.blogspot.com
Patti Estep
Hi Janet,
Thank you. They are a favorite of mine too.
Thanks for stopping by,
Patti
Lisa
What a lovely way to preserve all the lovely peony blooms!
Patti Estep
Hi Lisa,
Thank you. I love them and I'm always so sad to see them go, so this year I decided to save some. Might just be a yearly event.
Thanks for stopping by,
Patti
Maria Brittis
I love working with dried flowers and you create a masterpiece. I am pinning.
Maria
Patti Estep
Hi Maria,
I know you love the beauty of nature as much as I do.
Thanks for the kind comment and have a great week!
Patti
Debrashoppeno5
This is so beautiful. I wish I could grow peonies but it is to hot where I live.
Patti Estep
Hi Debra,
I'm so glad you like my wreath, and that's shame that you cannot grow them where you live. You'll just need someone to buy you a bouquet so that you can dry them for your own wreath. Roses and many other flowers work well too.
Thanks for stopping by,
Patti
Patti
Love yore wreath! So beautiful.
Patti Estep
Hi Patti,
Thank you for your kind comment. It's easy to make something pretty with the materials are so lovely themselves.
Thanks for stopping by and have a great week!
Patti
Carole
Of course you know I love this kind of thing and this turned out so nice, all those shades blended together makes a beautiful presentation. We dried peonies back in my floral shop days because buying them already dried was expensive. We even tested the silica gel process for drying, worked better with roses. Have you done that? Love the wreath and I think next week I'm going to attempt one of your wreath projects.. Think Herbs!!
Patti Estep
Hi Carole,
I'm so glad you like the wreath. I just couldn't let all the pretty blooms go to waste.
Looking forward to seeing what you create. I'm sure it will be amazing.
Have a great week!
Patti