
Learn two different techniques on how to marble paper at home with alcohol inks to create beautiful cards, gift tags, and other creative media.
I've never tried to make marbled paper before, but I wanted to see what else I could create with my alcohol ink set.
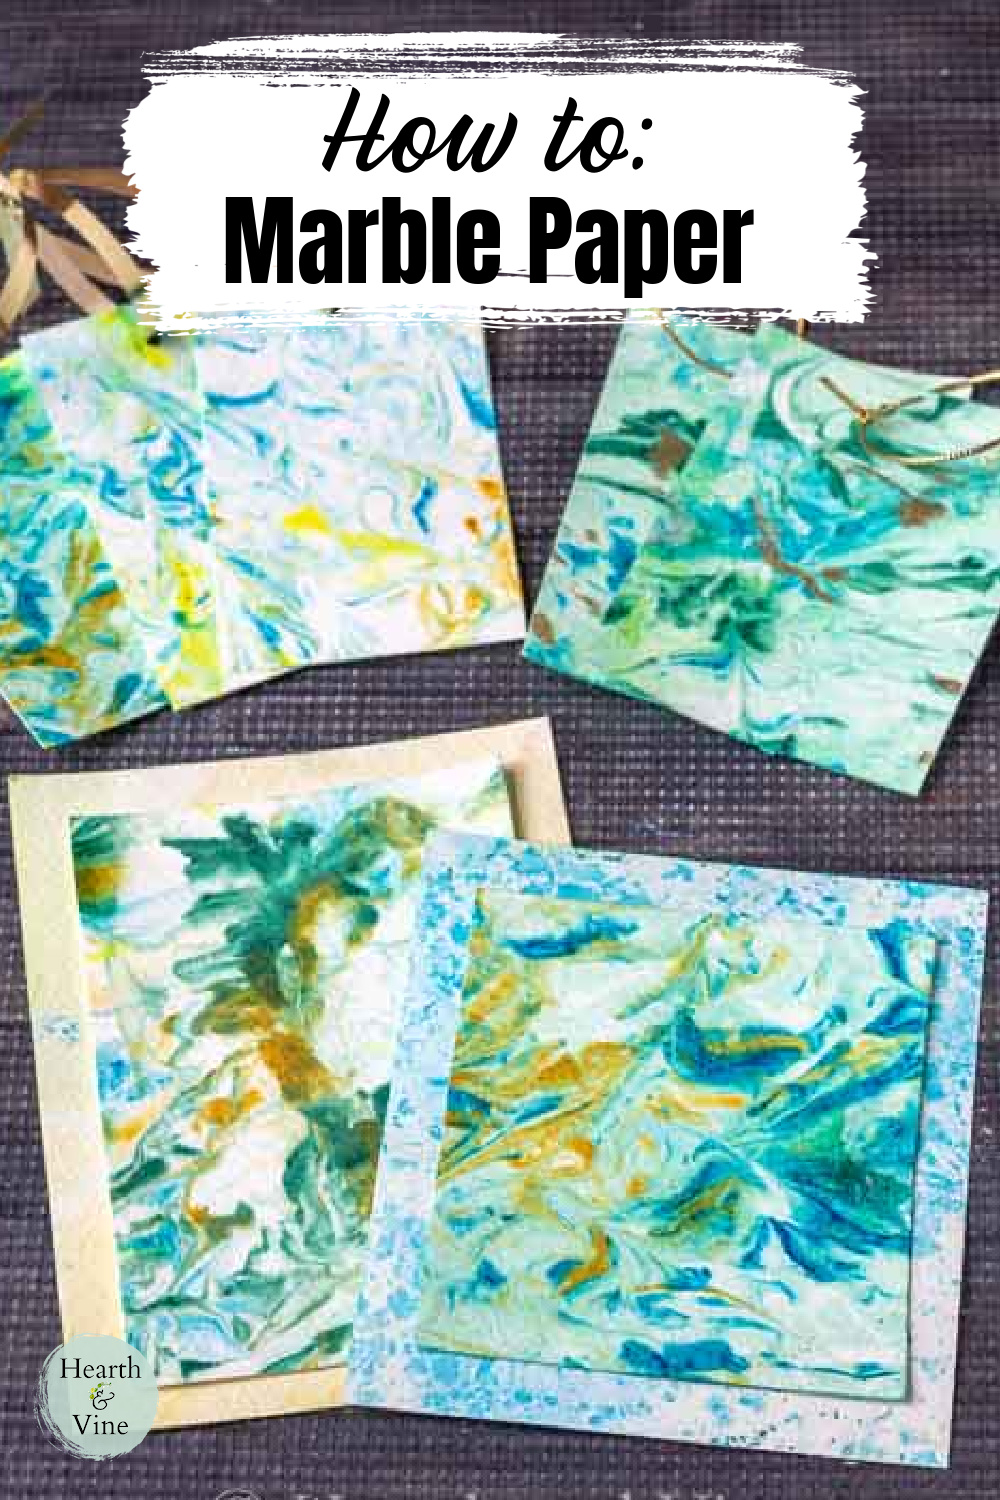
Today, I will show you two ways to get a beautiful pattern on your paper that you can use for cards or tags using alcohol inks.
This post contains some affiliate links (that means if you make a purchase after clicking a link, there’s no additional cost to you, but I will earn a very small commission. ) i.e. as an Amazon Associate, I earn from qualifying purchases. Click here to read my full disclosure policy.

How to Marble Paper with Alcohol Inks
Method 1 - Water Marbling
All you need for this technique are some alcohol inks , paper, a tray, and water.
I used a heavy watercolor stock for my paper, but I think you could get away with a nice cardstock.
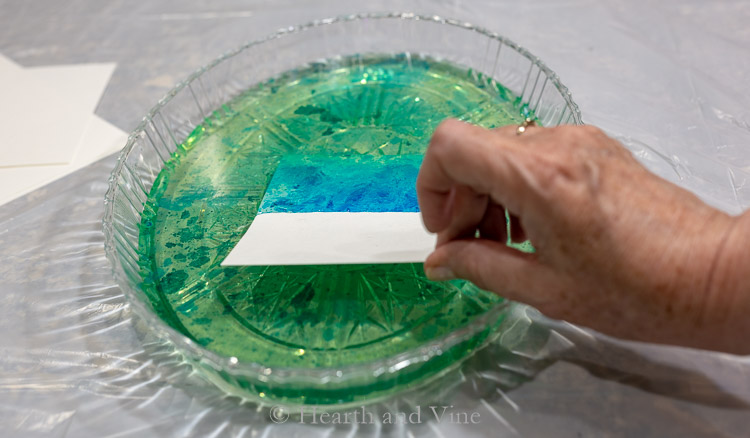
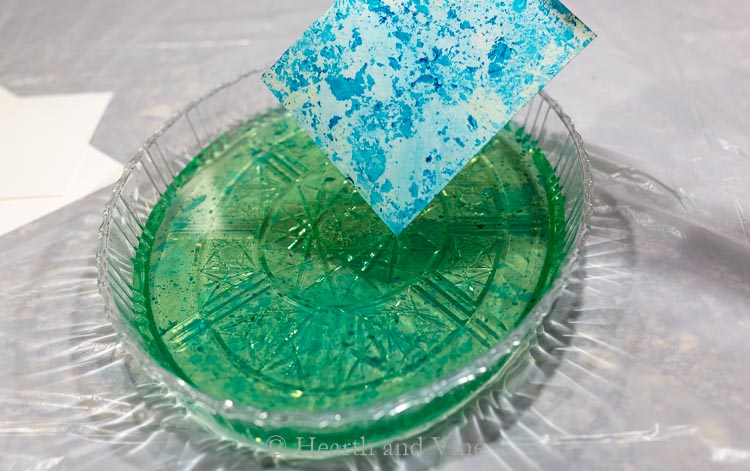
- Fill your tray with about 1/2 - 1 inch of water.
- Drop different colors of alcohol ink around on the water.
- Dip one end of your paper into the water the whole way and then pick it up.
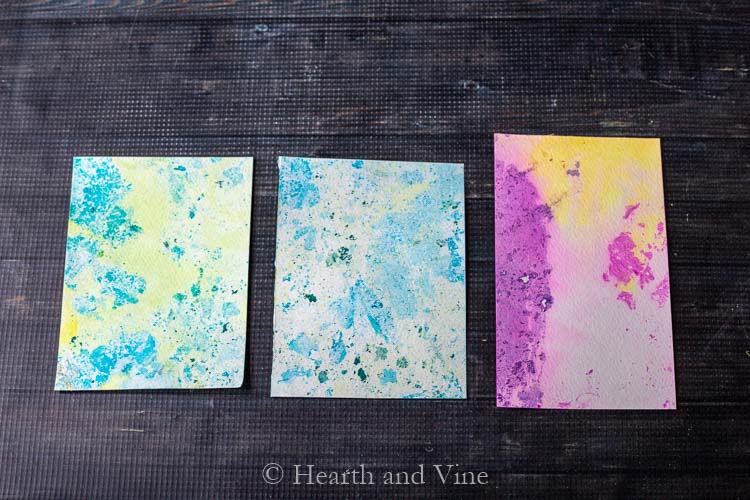
Super easy and quick. You can add more ink and create more cards at this point, but I suggest staying in the same color family.
Or you can dump the water and start over.
You may want to wear gloves because your fingers will get stained with the ink. Isopropyl alcohol works well for removing the ink from your fingers.
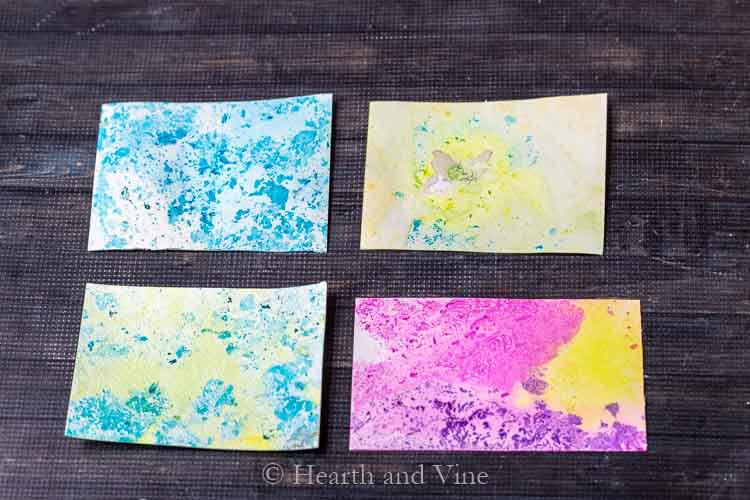
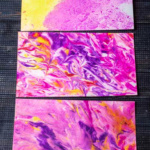
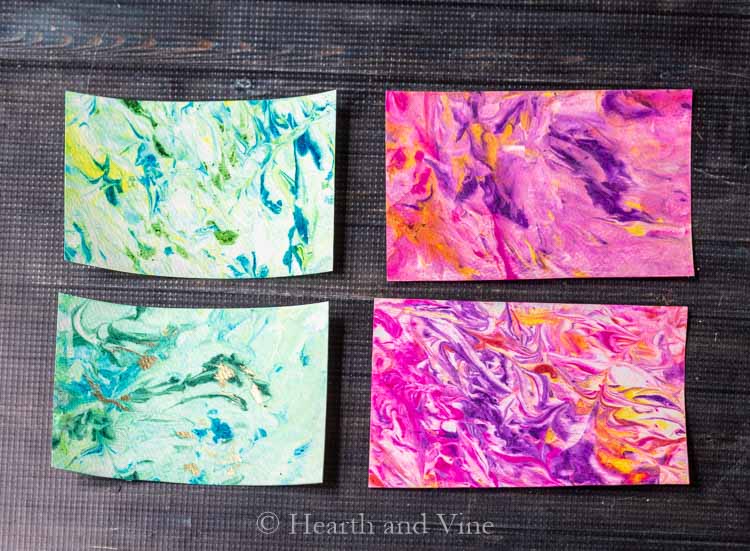
So pretty with lots of interesting patterns and texture.
With this technique, even the backside is pretty. In fact, you may like the back more.
Method 2 - Marbling Paper with Shaving Cream
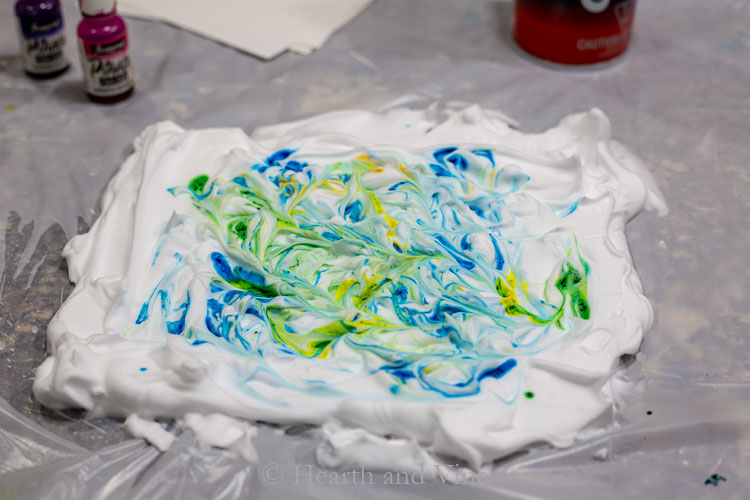
Here, you use a bed of shaving cream (foam, not gel) as a base. This technique is more marbled and intense looking.
- Working on a covered surface (I used a plastic garbage bag), add some shaving cream and spread it out large enough for your paper.
- Drop spots of your favorite alcohol inks all over.
- Then, use a toothpick to run through the ink, making swirls and marbled shapes.
- Set your paper on top and gently press down, making sure the entire surface comes in contact with the shaving cream.
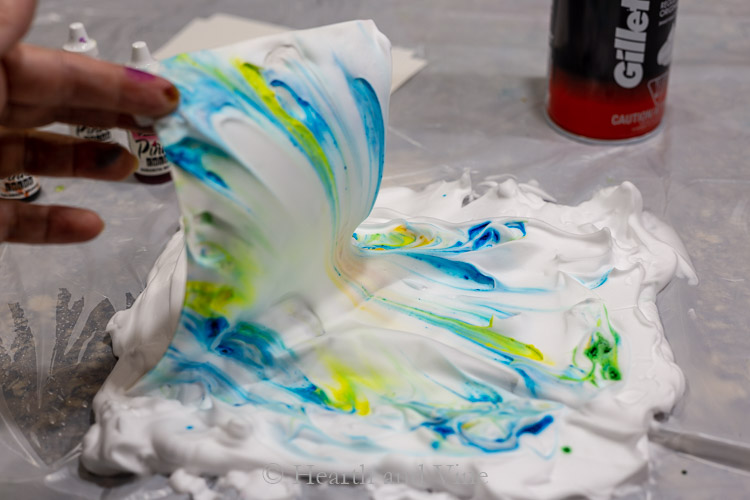
Gently lift up from the corner.
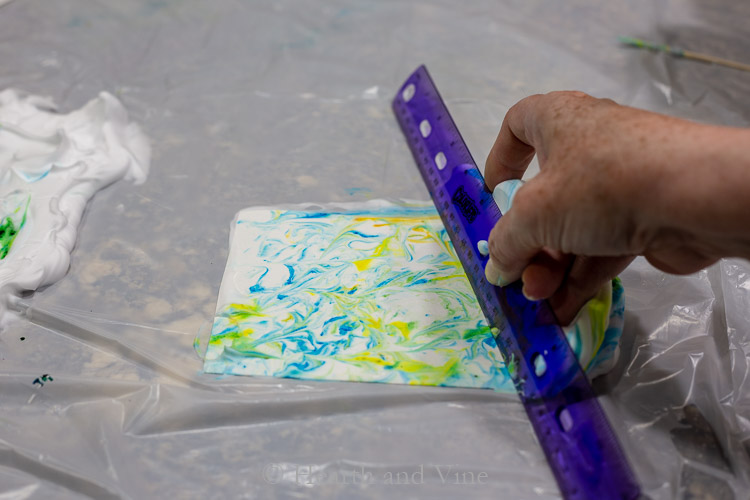
Set the paper down and using a flat tool like this ruler, scrap all the shaving cream off to the side.
It's a little magical how the patterns emerge when you scrape off the shaving cream, right?
Set aside and allow to dry.
The papers will probably warp a little, but you can easily press them flat under some books.
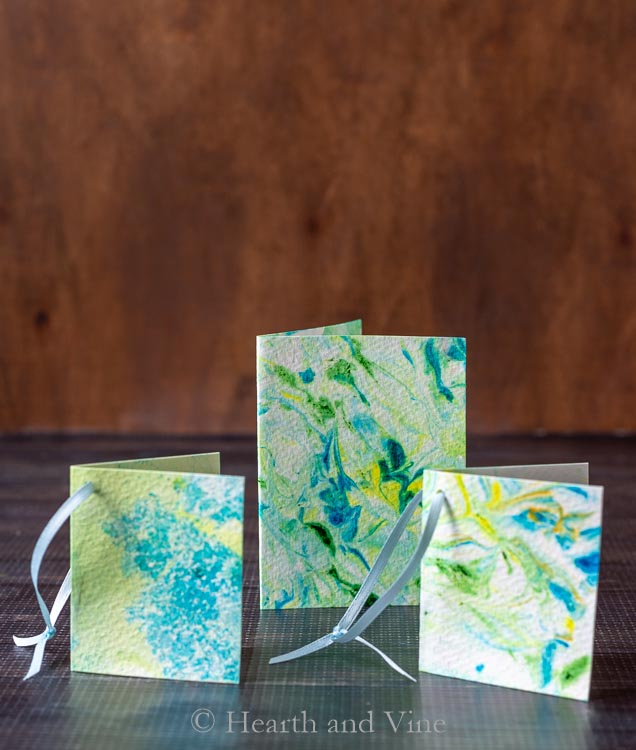
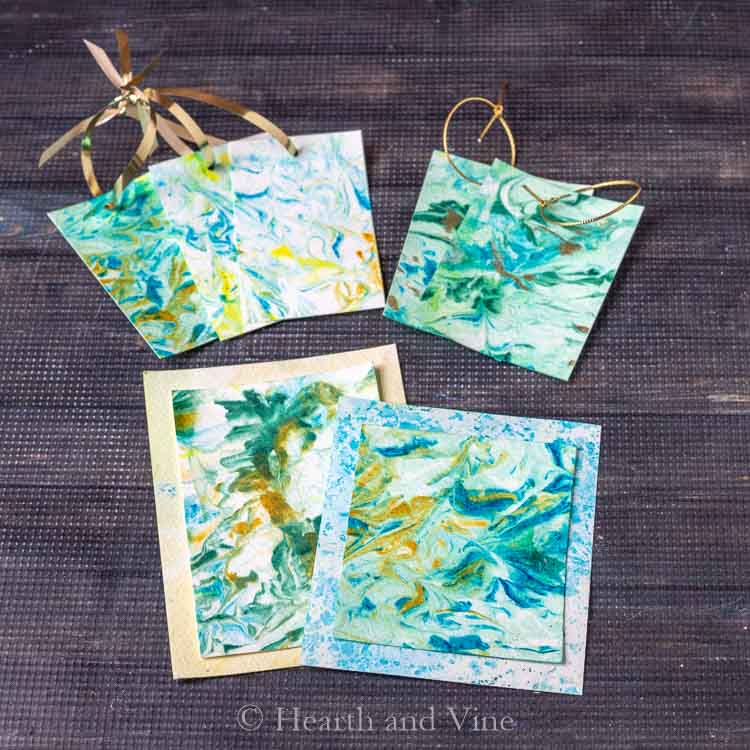
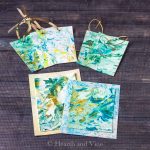
I'm using some of my creations as cute gift tags and homemade cards.
One idea that I would like to try in the future is marbling with alcohol inks on white craft paper to make interesting printed wrapping paper. I don't know if it would work or not, but these are so quick and simple that I think it would be worth a try.

More Alcohol Ink Crafts
How To Marble Paper with Alcohol Inks - 2 Ways
Materials
- Heavy Watercolor Paper
- Alcohol Inks
- Bowl or tray
- Water
- Ruler or other straight edge like a piece of cardboard
Instructions
- Fill your tray with about 1/2 - 1 inch of water.
- Drop different colors of alcohol ink on the water.
- Dip one end of your paper into the water all the way and then pick up.
- Marbling With Shaving Cream
- Add some shaving cream over a plastic garbage bag.
- Spread it out large enough for your paper.
- Drop spots of your favorite alcohol inks all over.
- Use a toothpick to run through the ink making swirls and marbled shapes.
- Set your paper on top and gently press down.
- Make sure the entire surface comes in contact with the shaving cream.
- Gently lift up from the corner.
- Set the paper down and use a flat tool, like a ruler, to scrape all the shaving cream off to the side.
- Set aside and allow to dry.
Donna Sharp
I just watched your video and did my first ever shaving cream marbling on watercolor cardstock. How much fun was this and how beautiful the cardstock came out! Sure glad I did this on nonstick oven liner cause otherwise the cleanup could haven been a challenge as I'm kinda messy! Thank you so much!!!!
Patti Estep
So glad you liked it Donna. And yes, they are very messy!
PJH
COULD THIS BE USED WITH CANVAS INSTEAD OF PAPER?
Patti Estep
I have never tried using canvas this way. My first thought is that often canvas has a sizing treatment that might prevent the ink from adhering to the surface. I don't know if there are more absorbent canvas products out there but you can always give it a try on a small canvas and see how it turns out.
Carole West
What fun ideas - I tried using my inks but failed and had a hard time with the scent. Got a headache. But I love the colors and the concept so I'm trying to figure out what to try next. I was using glass but really like this idea with paper. Neat idea and perfect for gift cards, bookmarks would be another neat idea.
Patti Estep
Oh no Carole. I didn't notice that the inks give off fumes. Sorry to hear that. For the paper, you could use food coloring. I know this because I just tried it with my 5-year-old nephew on Monday and they worked great too. I don't know if they will fade or how well they would withstand time but they looked really pretty and it was a fun craft to make with a kid.