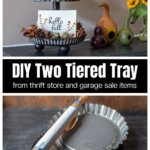
This easy DIY tiered tray is created with simple items that you might find in a thrift store, dollar tree, garage sales, or perhaps even items you have at home.

I've wanted a 2 tiered tray to decorate for every season. I could have just bought one at Hobby Lobby or somewhere online but where's the fun in that? Instead, I recycled or upcycled one from simple items I bought at a thrift shop.
This post contains some affiliate links (that means if you make a purchase after clicking a link, there’s no additional cost to you, but I will earn a very small commission. ) i.e. as an Amazon Associate, I earn from qualifying purchases. Click here to read my full disclosure policy.
More Thrift Store Upcycles
How to Make a Tiered Tray
This tiered tray project is made from a few thrift store finds. It's a fun upcycle that anyone can do with all kinds of materials.
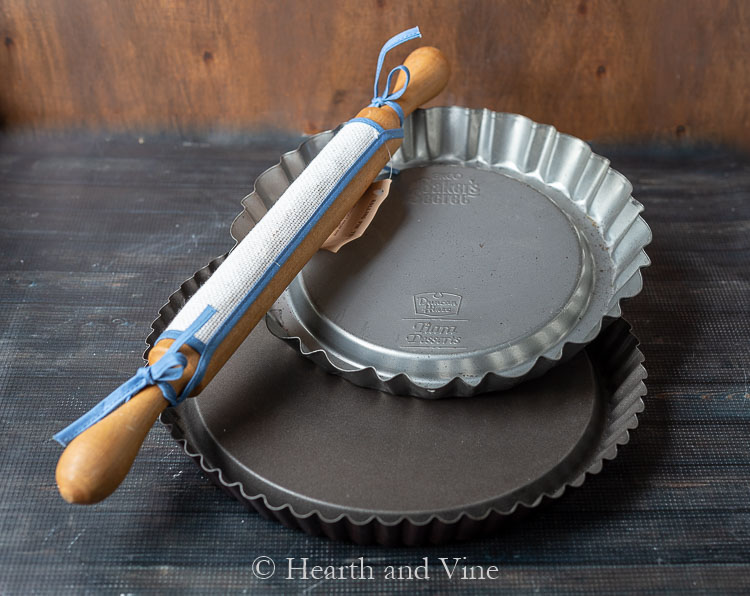
I chose two old baking pans and a thin vintage rolling pin for this project. You could use a candlestick and straight edge pans. Scout around when shopping to see what might work.
I've seen lots of projects where people use dinner plates and salad plates screwed together with special tiered tray hardware to make two or three-tiered trays.

At first, I thought about drilling holes in the metal and threading the rolling pin through the middle. But then I thought it would be easier just to glue parts of the pin between and on top of the pans.
So I cut one of the ends of the rolling pin off. I'm saving it for a future project. I could see this being used for a handle for something. The other end will be the topper.
Then I needed to decide how much of the other end I wanted to be on the top tier, leaving the remaining portion for the middle.
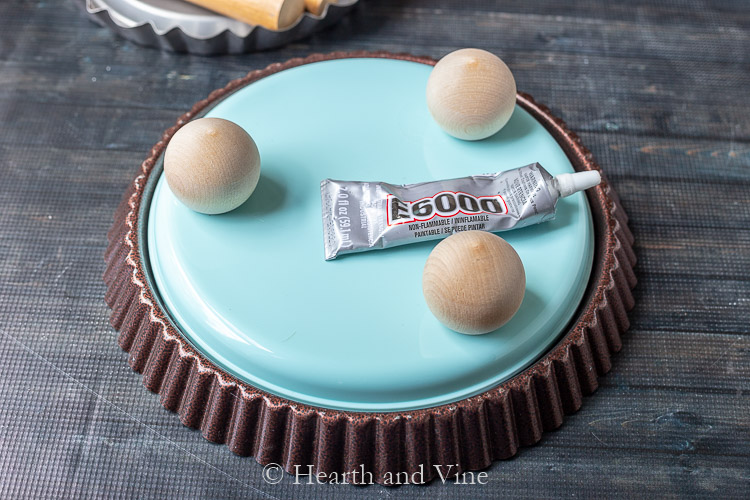
Since the bottom of this pan is concave, I needed something to fill in to attach some feet. I found a plastic plate at Target for $.79 that fit perfectly.
Then I used some wooden feet from Hobby Lobby and glued the plate with E6000 , followed by the feet. You could try hot glue, but I'm not sure if it will hold up as well.
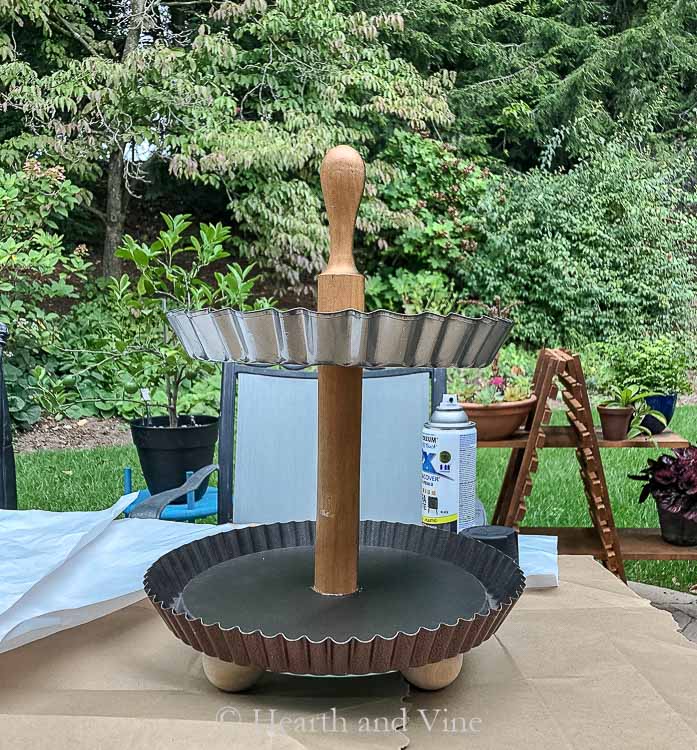
Then all you need to do is glue the rolling pin pieces between and on top of the pans, and you have a nice tiered tray to decorate.
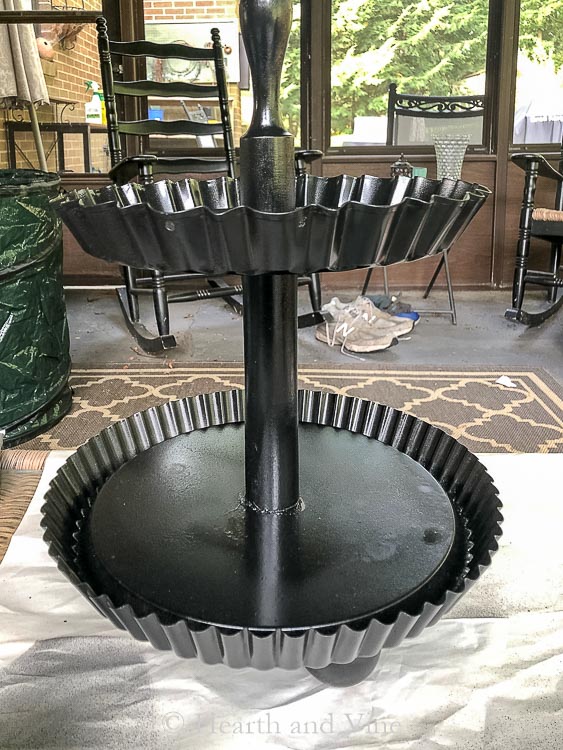
I decided to spray the entire piece with black matte spray paint to make it look more cohesive.
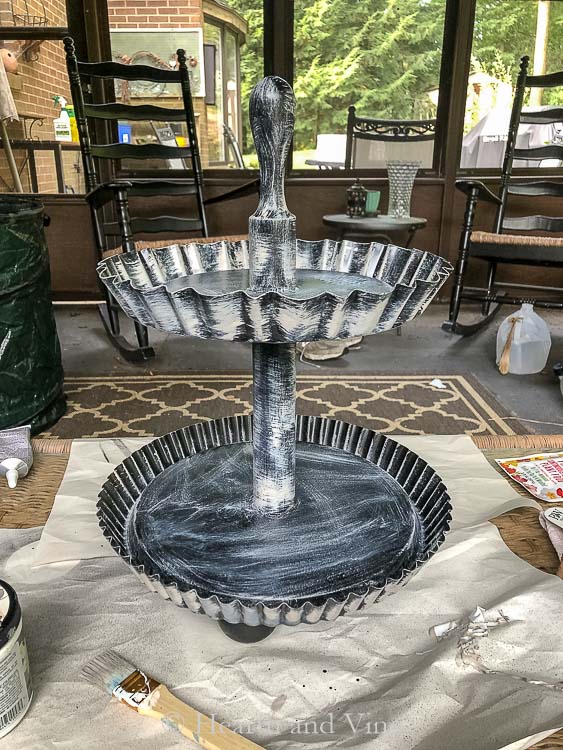
The black paint pulled the pieces together, but it needed something more, so I used a dry brush technique with some leftover light gray paint to give it some dimension. Then I added a little more black paint.
You can really go to town here, and it's all a matter of choice. I like playing around with different paints to give a piece a worn look. Sometimes you can take it too far, but then again, you could start over with more black spray paint.
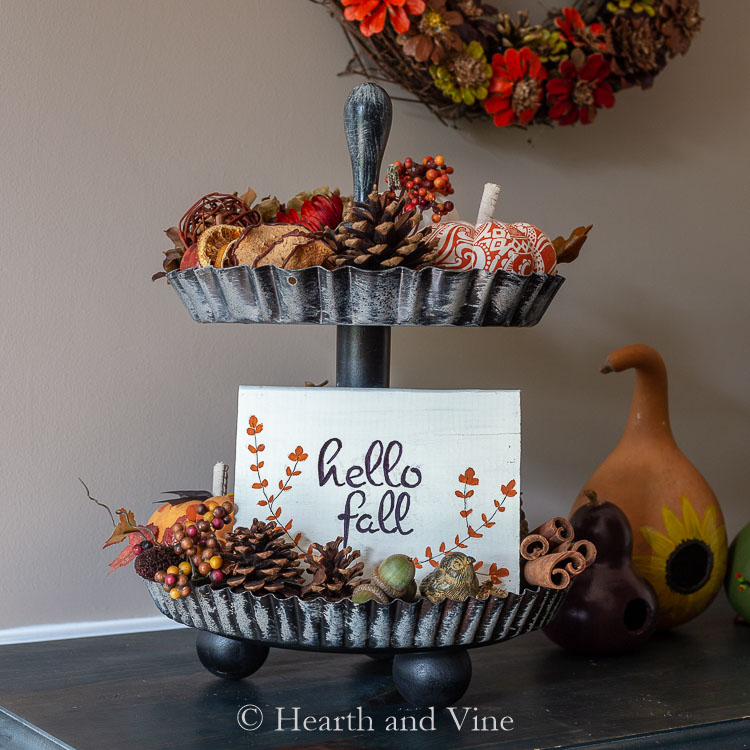
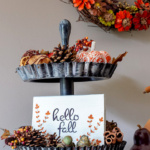
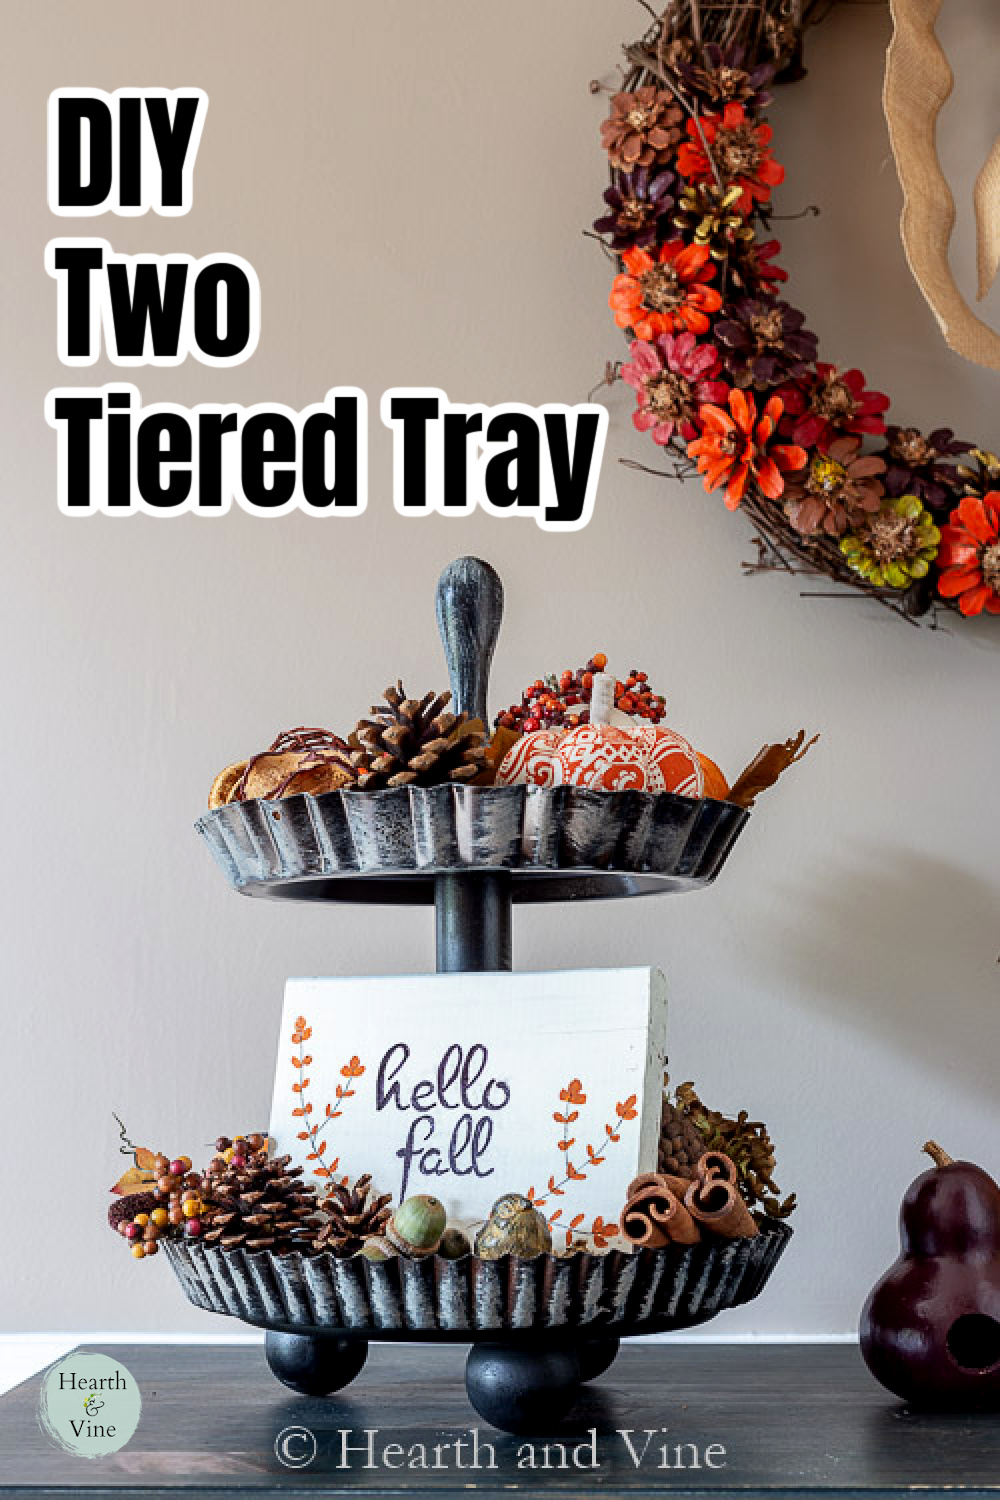
Here it is all decorated. I've got lots of fun fall pieces displayed, and I made a cute sign with a piece of scrap wood. You can also find small decorative signs at the dollar store. Pair it with fun mugs, candles, and other seasonal items.
Free Printable

You are welcome to click on the image above and use this clip art for yourself.
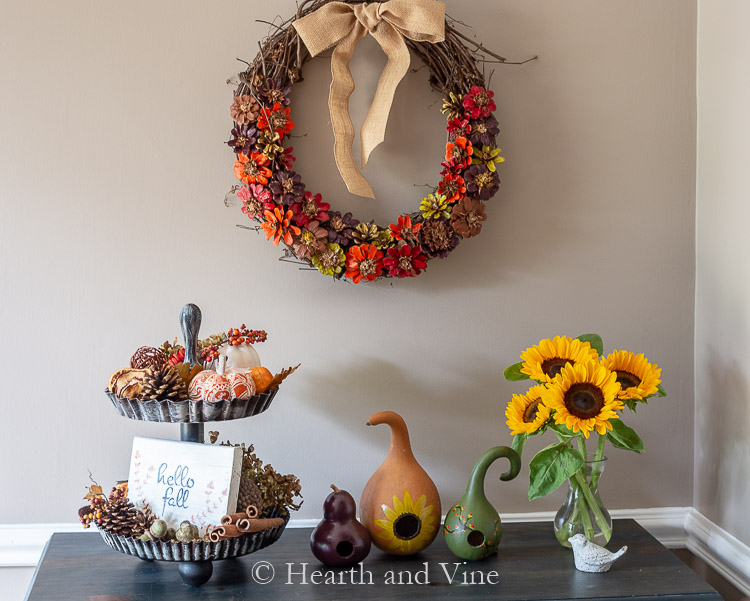
This DIY two tiered tray turned out great, and I love the way it looks with this Pine Cone Flower Wreath and Painted Gourds, making our foyer all warm and cozy for fall.


Tiered Tray DIY - Made Easy with Thrift Store Finds
Equipment
- Wood saw
Materials
- Two old baking pans
- Thin vintage rolling pin
- Wooden feet
- E6000
- Plastic plate
- Black matte spray paint
Instructions
- Cut one of the ends of the rolling pin off.
- Glue the plate, followed by the feet, into place with E600 glue.
- Glue the rolling pin pieces between and on top of the pans.
- Let glue dry.
- Spray the entire piece with black matte spray paint.
- Dry brush some light gray paint to give it dimension.
- Add a little more black paint if desired.
- Let dry and decorate as you wish.
Rhonda Smith
Love this....and I know I just saw some of those at the thrift store the other day! Heading back ASAP to make one of these.....I have one at home that was a gift, but I really want one for the counter in my office as well. This would make it very affordable to have!!! Thank you for sharing!
Patti Estep
Thanks Rhonda. So glad to hear that you like it. Enjoy creating your own tiered tray.
Becky
What are the measurements for cutting the rolling pin?
Patti Estep
Becky, it's up to you but for reference, I used 7 inches for the middle section and the top was 2 inches before the handle.
Angie
One of your pans looks like it is Teflon. Is it? Reason I am asking is that I tried to make a tiered tray, & I made it look farmhouse enamel. I used a Teflon pan with the fluted edge like one of yours and I loved it! However, when I tried to glue the pans together, no glue worked, the glue would not bond the Teflon! ! Please advise.
Patti Estep
Angie, I used E6000 glue. My pans were found at an antique store and were pretty worn so maybe that's why they had less of a problem. You might want to try sanding the area first. I do remember that it didn't immediately stick together but I think that is the nature of that glue as compared to something like hot glue that adheres within minutes. See if you can let each section sit with the glue for a few hours before adding the next.
Angie
Yes, I’ll try to sand the area and then glue it, and wait between steps. Thank you for the tip. I forgot to tell you on my comment that I loved your tiered tray! Great job!
Patti Estep
I hope it works out for you. I'm thinking about how I'll decorate mine for fall and Christmas now.
Loretta Plemmons
Patti,
I love your ideas, your so creative...good job.
Patti Estep
Thanks Loretta. That is so sweet of you to say!
Deb Nelson
Sorry, I clicked on the link but only saw square solutions and Three birch trees. I didn’t find heartandvine or, a place to enter the code.
However, I wanted to tell you how much I ❤️ your website. It’s very special. Much different than any other. It has a sweet softness to it. No loud bold blaring fonts with annoying head-splitting colors.
Instead, it provides a comforting, welcoming feel. I’ll be back often!
xo,
Deb
Patti Estep
Deb, first let me thank you for your very kind comment. That is so nice to hear. Second, I'm don't understand what you mean about clicking on a link and seeing square solutions. Perhaps you clicked on an ad? Let me know what you are looking for so that I can help further.
MrsSW
Hi Patti - great job. I've wanted something similar for awhile now but not farmhouse style. Your project has me looking from a different angle.
Thanks,
Sheila
Patti Estep
Thank you Sheila. That makes me soooo happy!
Susan M.
I love how you painted your tiered tray! It really pulled everything together and gave it a great aged/distressed look. You are just so creative!!
Patti Estep
Thanks Susan. I really debated on the painting. Sometimes it's hard to know when to stop. 😉
Carole West
Very clever and I love how you used that rolling pin to bring it all together. The dry brush was a perfect addition as well. I was just in Hobby Lobby yesterday walking through their Christmas aisles for ideas and my first thought was the same. What's the fun in buying it.... Going to actually decorated indoors this year and I'm even thinking about updating the RV Interior.
Great project and was neat to see your plant stands in the background.
Patti Estep
Thanks Carole. I've always wanted one of these but never got around to buying one. Having content for the blog has pushed me to create lots of things I've never got around to. I think this one will actually get a lot of use.