Learn how to make a customized fabric photo transfer notebook to give to someone special using their own personal images.
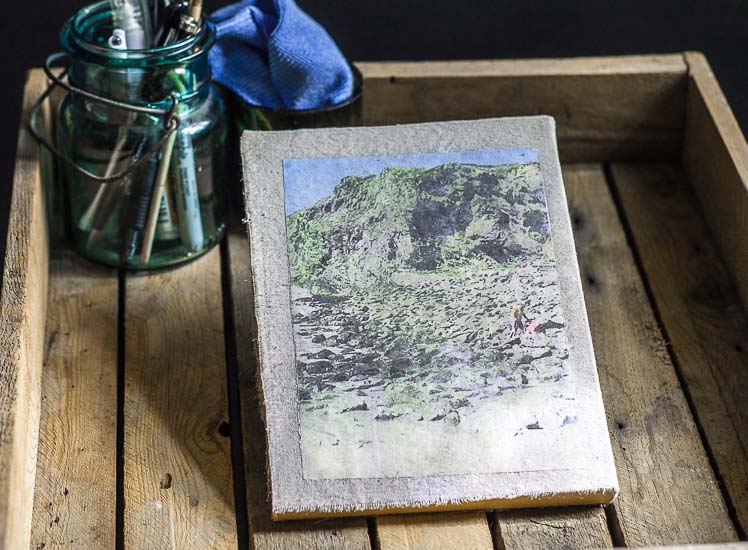
It's my brother-in-law's birthday. He's a fellow blogger, the creator of Daytripping with Rick, so I thought I would make him a personalized blogger gift. I know I am forever taking notes and jotting down ideas, so I created a fabric photo transfer notebook, using a couple of pics from our trip to Sonoma.
This post contains some affiliate links (that means if you make a purchase after clicking a link, there’s no additional cost to you, but I will earn a very small commission. ) i.e. as an Amazon Associate, I earn from qualifying purchases. Click here to read my full disclosure policy.
Materials
- Notebook
- Fabric (I used drop cloth canvas fabric, but any nice cotton will work)
- Mod Podge Photo Transfer Medium
- Color photocopies or prints of your photo(s) or a computer and inkjet printer
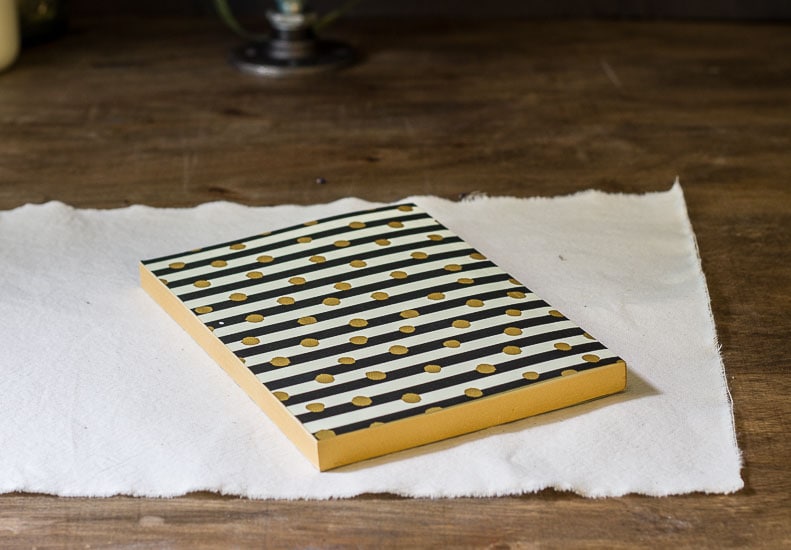
I picked up this nice notebook for around $5. The drop cloth canvas was leftover from my Botanical Pillows article.
You can experiment with different types of fabric. However, I liked the rustic feel of the canvas, and I wanted something heavy enough to cover the stripes and dots of the notebook.
How to Make an Image Transfer onto Fabric
Step 1
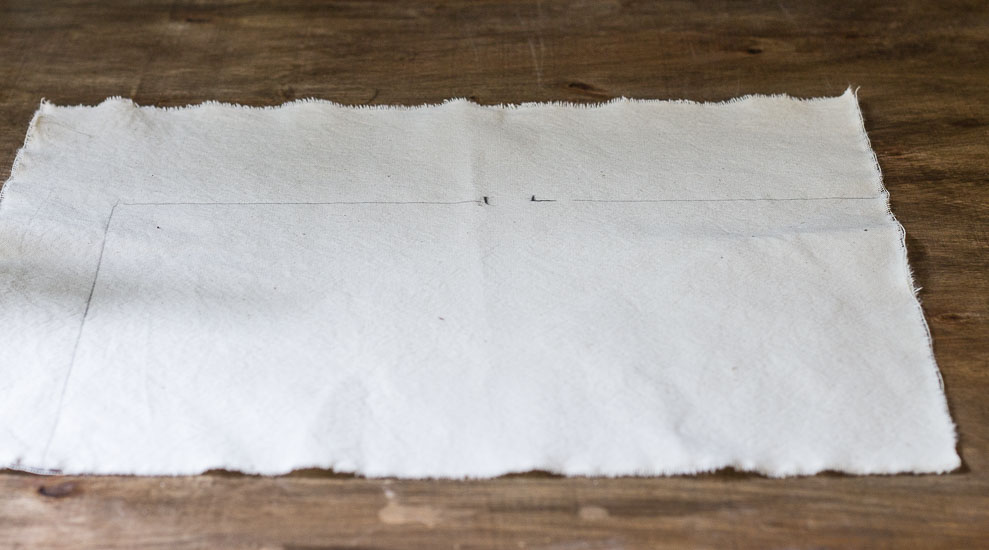
Draw an outline of the notebook on the fabric on the wrong side (this drop cloth had no wrong side), in pencil. Be sure to indicate the area of the spine to help with alignment.

Step 2
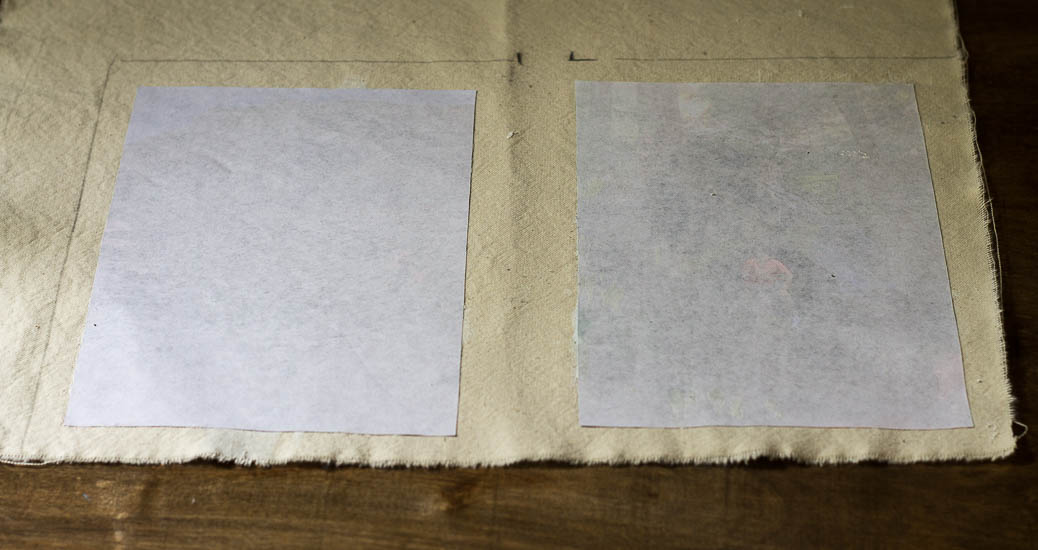
Print, and cut out your photo(s). If you don't have access to a color printer, you can have them photocopied in color at a local copy shop. Roughly position the photos on the cloth. I chose to make mine slightly smaller than the fabric.
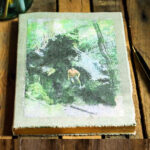
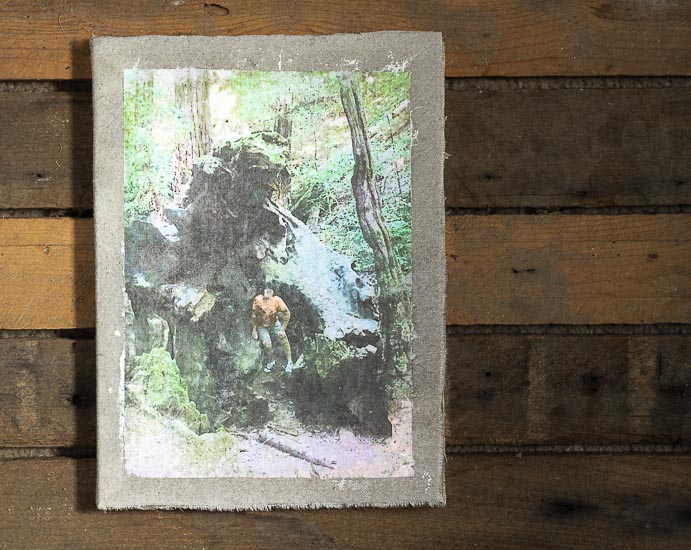
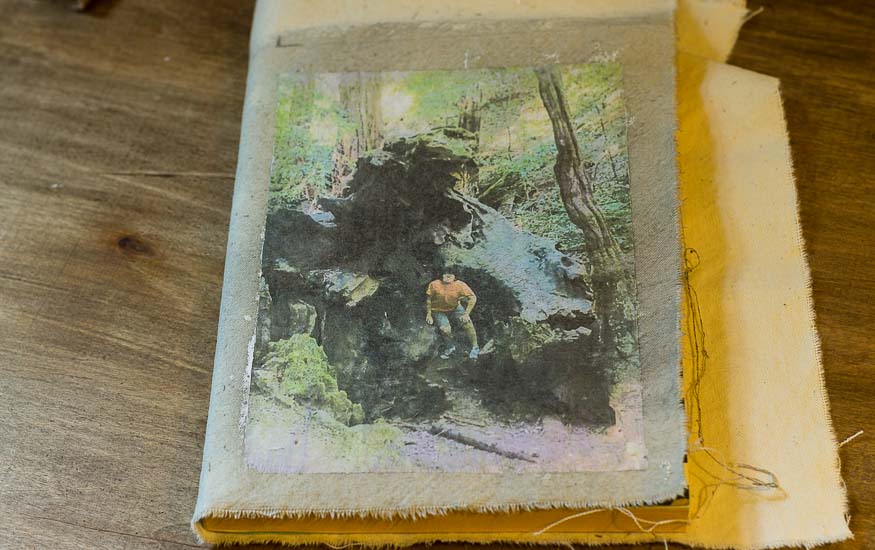
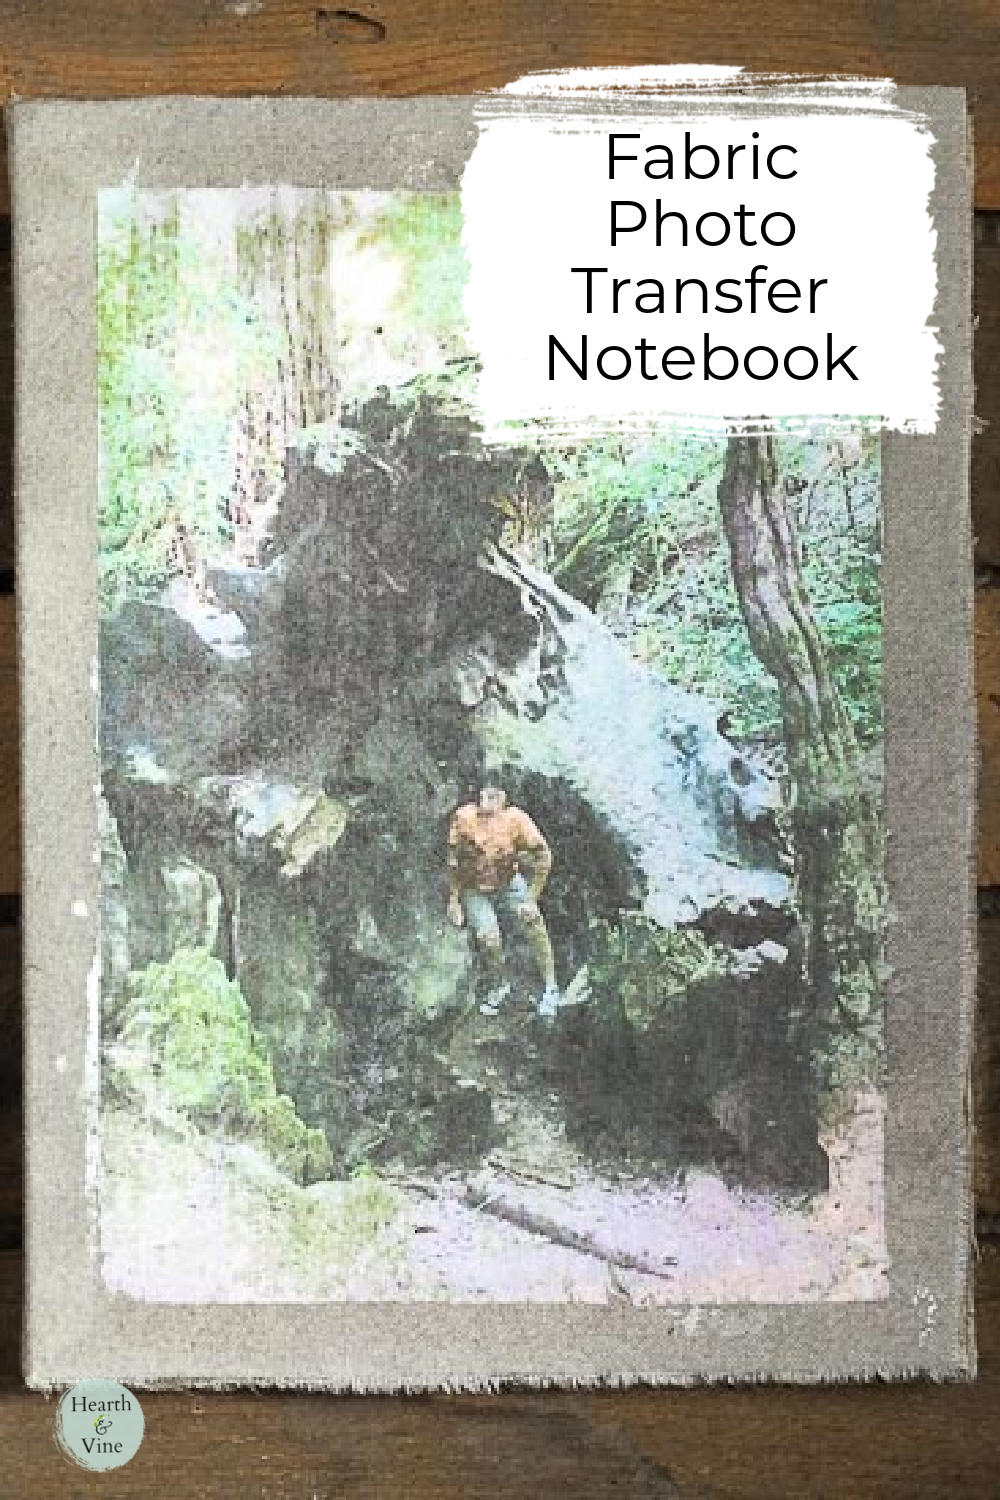
Although, I do think full photo coverage could look really nice. The front cover will display the picture on the right, of Rick's son, Max, also my Godson, amidst the redwoods of Armstrong Redwoods State Natural Reserve. The back cover, on the left, is a picture of Rick and Max combing at Goat Rock Beach.
Note: Be sure to reverse, or make a mirror image of your photo, if you are using any letters or images that show direction.

Step 3
Brush on a thick coat of the transfer medium on top of the paper with your photo.
Step 4
Place the photos carefully face down on the right side of your fabric. Try to avoid touching the gel medium. Smooth out any air bubbles or wrinkles with your fingers, or with a straight edge, such as a ruler, or credit card. Wipe away any medium that sneaks out from the edge. Let sit for 24 hours
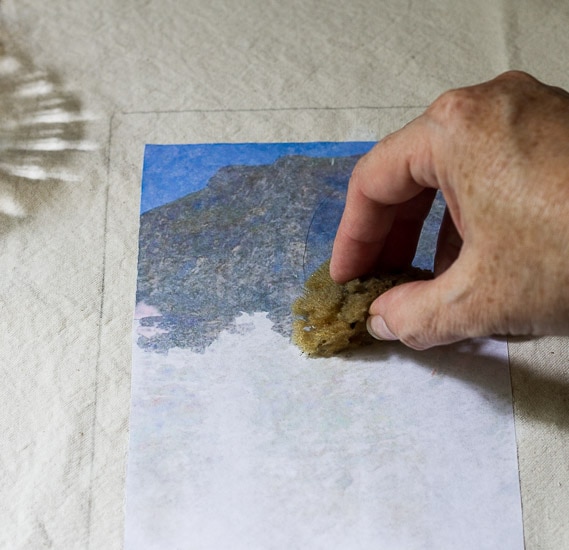
Step 5
After 24 hours wet the image face all over with a sponge, spray bottle, or wet rag.
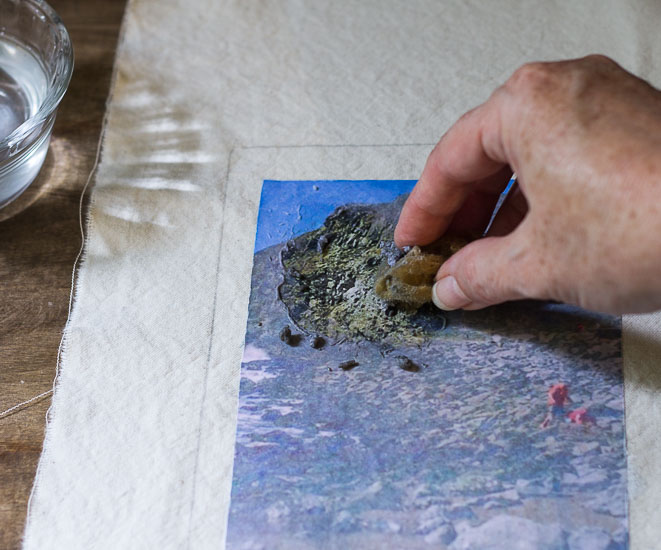
Step 6
After 2 minutes start removing the excess paper by making circles with a damp sponge. The paper will pill up, revealing the image underneath, like magic.
I noticed that I was getting some ink on the canvas outside the photo. This worked out for me because it gave the project a nice rustic look. However, you could tape off the edges and/or be more diligent with cleaning your sponge.
Step 7
After allowing the fabric to dry, re-fit it to the notebook, marking off where you want to cut the final piece. Cut and glue the fabric to the notebook, using Mod Podge, white glue or spray adhesive.
I'm happy to say that Rick loved this fabric photo transfer notebook, and I loved making it.
This project turned out to be a really nice personalized gift that anyone would enjoy, and I will definitely do it again.

Fabric Photo Transfer Notebook
Equipment
- Computer
- Color printer
- Scissors
Materials
- Notebook
- Drop Cloth Fabric
- Photo Transfer Medium
- Photos
Instructions
- Draw an outline of the notebook on the fabric on the wrong side (this drop cloth had no wrong side), in pencil. Be sure to indicate the area of the spine to help with alignment.
- Print, and cut out your photo(s). If you don't have access to a color printer, you can have them photocopied in color at a local copy shop. Roughly position the photos on the cloth.
- Apply a thick coat of the transfer medium on top of the photo.
- Place the photos face down very carefully on the right side of the fabric.. Try to avoid touching the transfer medium. Smooth out any air bubbles with your fingers, or with a straight edge, such as a ruler. Wipe away any medium that sneaks out from the edge.
- Let sit for 24 hours
- After 24 hours wet the image all over with a sponge.
- After 2 minutes start removing the paper by making circles with a damp sponge. The paper will pill up, revealing the image underneath.
- After allowing the fabric to dry, re-fit it to the notebook, marking off where you want to cut the final piece.
- Cut and glue the fabric to the notebook, using Mod Podge, white glue or spray adhesive.
Donna Fox
Patti, just so I understand, you put the picture face down on the wrong side of the fabric, and it shows through on the right side? I have never worked with Modge Podge photo transfer medium. Thanks, Donna
Patti Estep
Donna, that's a good question. You want to place the image face down on the Right Side of the fabric. Make sure that the image is reversed when you print it. The canvas I used really doesn't have a right side but now I see that I should have added this point. Thanks for bringing this to my attention. I will update the post.
Victoria Conery
Very lovely I think I would love to do this my son passed would love to do his picture and frame it thank you,P.S was this your first time doing this vicky
Patti Estep
Vicky that would be lovely too. I'm so sorry for your loss. And yes it was the first time for me but it turned out pretty good.