• Skip to primary navigation
  • Skip to main content
  • Skip to primary sidebar
  • Home
  • DIY Projects
    • Homemade Bath and Body
    • Sewing
    • Flower Crafts/Decor
    • Thrift Store/Vintage
  • Gardening
    • Flower Gardens
    • Container Gardening
    • Houseplants
    • Indoor Gardening
    • Landscaping
    • DIY Garden Art
  • Decorate
    • Room Makeovers
    • Spring Decor
    • Summer Decor
    • Fall Decor
    • Winter Decor
    • Home Decor Projects
  • Recipes
    • Breakfast Recipes
    • Lunch Recipes
    • Dinner Recipes
    • Dessert
    • Salad Recipes
    • Soups and Stews
    • Side Dish Recipes
    • Appetizers and Snacks
    • Healthy Recipes
  • Holidays
    • Valentine's Day
    • Easter
    • Mother's Day
    • Halloween
    • Thanksgiving
    • Christmas
Hearth and Vine
menu icon
go to homepage
subscribe
search icon
Homepage link
  • Home
  • About Hearth and Vine
  • DIY Projects
    • ...Flower/Gardening Crafts
    • ... Bath and Body
    • ...Sewing/Fabric Crafts
    • ...Thrift Store/Upcycle
  • Gardening
    • ...Flower Gardens
    • ...Container Gardening
    • ...Indoor Gardening
    • ...DIY Garden Art
  • Decorate
    • ...Home Decor Projects
    • ...Spring Decor
    • ...Summer Decor
    • ...Fall Decor
    • ...Winter Decor
    • ...Room Makeovers
  • Recipes
    • ...Appetizers and Snacks
    • ...Dinner Recipes
    • ...Side Dish Recipes
    • ...Salad Recipes
    • ...Dessert
    • ...Drinks
  • Holidays
    • ...Valentine's Day
    • ...Easter
    • ...Mother's Day
    • ...Halloween
    • ...Thanksgiving
    • ...Christmas
  • Subscribe
  • Instagram
    • Email
    • Facebook
    • Instagram
    • Pinterest
    • Twitter
  • ×
    Home » DIY Projects

    Pumpkin Tea Towel - Easy Applique Project for Your Fall Decor

    October 12, 2020 by Patti Estep 2 Comments

    Jump to How-to Card
    Pumpkin tea towel applique, an embroidery hoop and thread

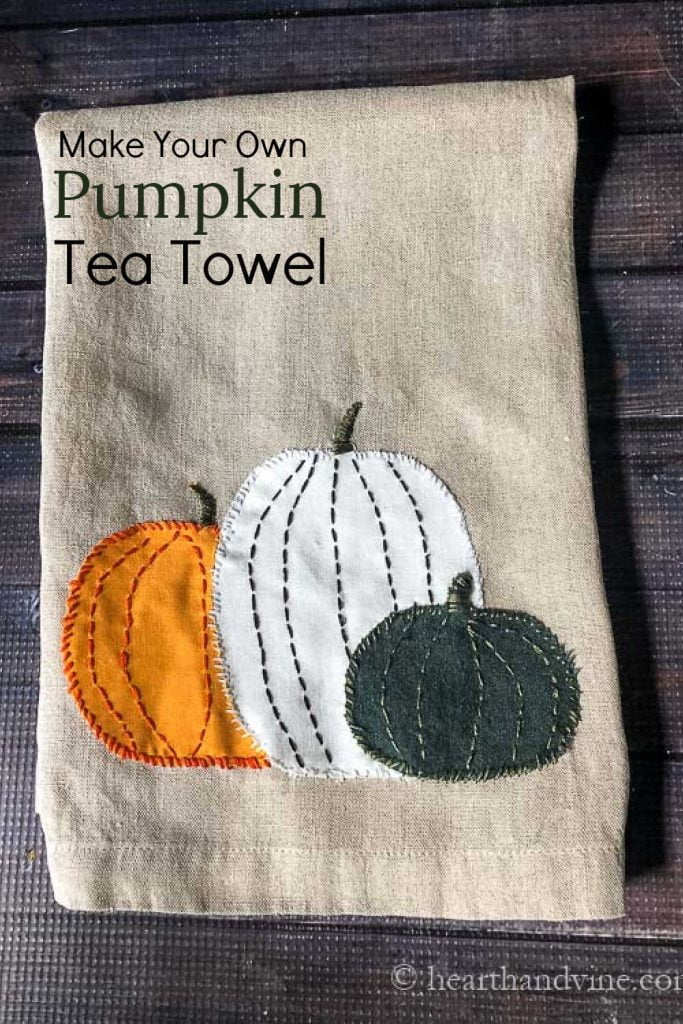
    Learn how to make this cute pumpkin tea towel to gift or use as part of your fall home decor. This tutorial uses basic hand sewing applique techniques that anyone can do.

    Three pumpkins appliqued onto a linen tea towel. One is orange, one white and the third is dark green. Each is hand embroidered with thread in coordinating and contrasting colors.

    I love a good tea towel and they are fun to craft with too. Last year I created a roundup of fun tea towel crafts and today I have a new one to share with you.

    A linen tea towel in an embroidery hoop with pieces of fabric in orange, white and dark green on top and coordinating embroidery threads.

    How to Make a Pumpkin Tea Towel with Fabric
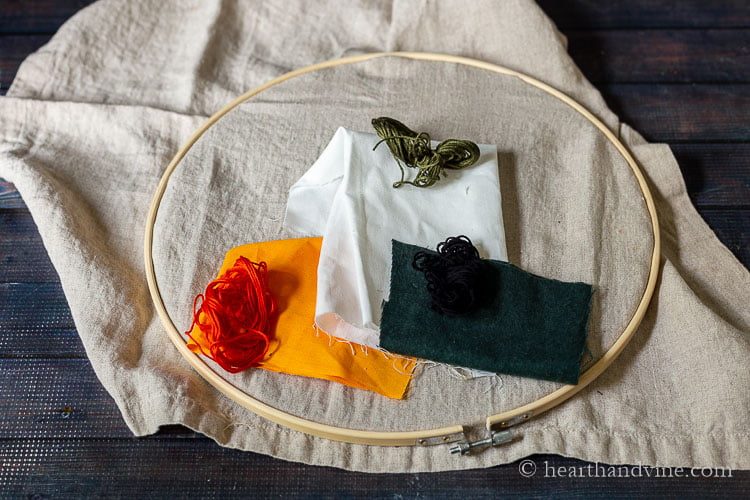
    Supplies

    • tea towel or large napkin
    • embroidery hoop
    • embroidery floss
    • embroidery needle
    • scrap fabric

    This is a basic applique project. It does not require a sewing machine. All the stitches are super easy. Anyone can make this pretty pumpkin patch tea towel.

    Newsletter Signup
    Join Our Newsletter List!

    Be the first to receive new posts and get access to our Subscribers Only Page.

    I used one of my extra long homemade linen napkins for this project. I liked the color of the linen with the pumpkins. However, any tea towel will work.

    A graphic of three nestled pumpkins one in orange, one black and one green.

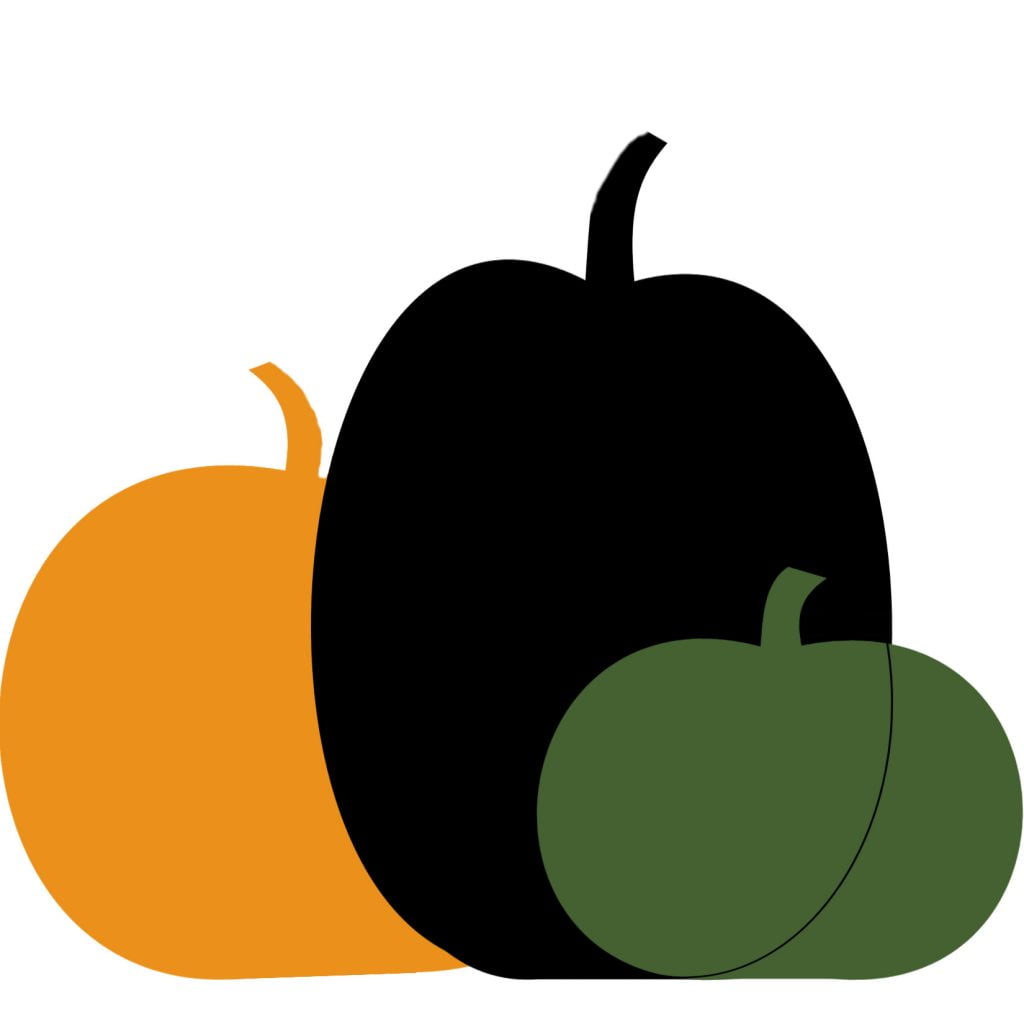
    Above is the graphic template that I used. You can also use it by right-clicking on the image and selecting "save image as," to save it on your computer to print out. BTW you don't need to print it in color.

    A trio of paper pumpkins set on a fold tea towel.

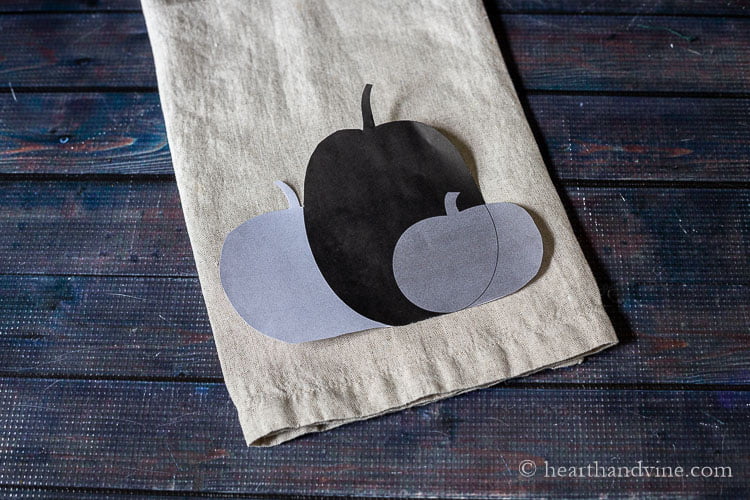
    Here's the graphic printed in grayscale. As you can see it fits well within the width of the folded towel.

    Orange fabric with a partial paper pumpkin cut out on top next to a swatch of white fabric with a large paper pumpkin cut out on top.

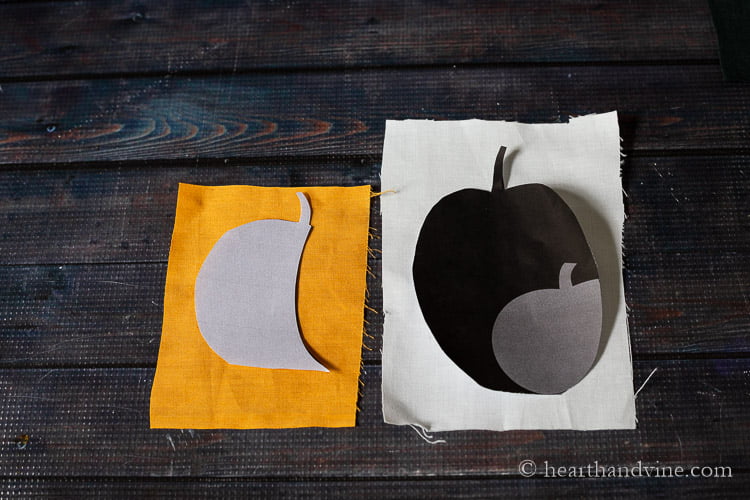
    Because I wanted the tall pumpkin to be white, I only cut the portion of the medium sized pumpkin on the left in an orange color.

    Next, cut out the large pumpkin and trace it on the white scrap fabric.

    Paper cut outs of pumpkins and fabric in orange, white and dark green traced from the pumpkin pattern.

    For the little pumpkin on the right you can match up the portion of the template that was cut off for the large pumpkin, and cut out the other piece of the large pumpkin now that you have already traced it onto the fabric.

    Orange, white and green fabric swatches with whole and partial traced pumpkin graphics.

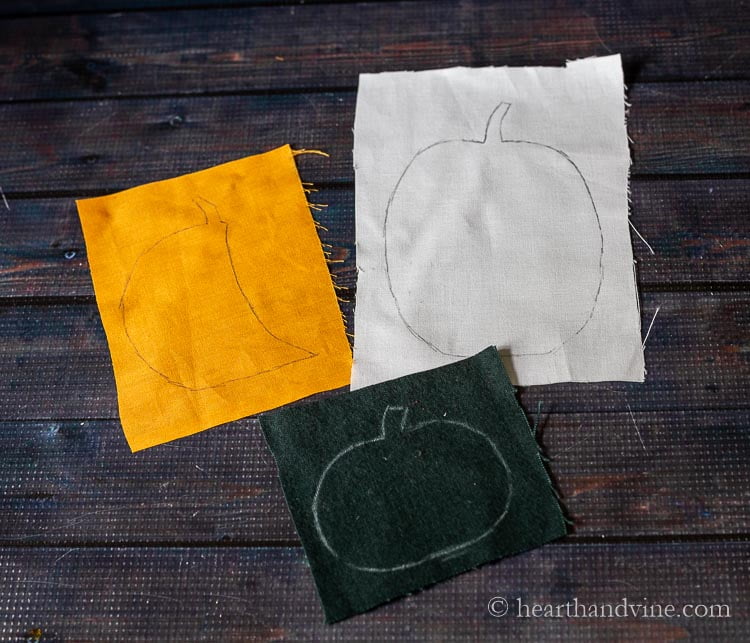
    Since the small green pumpkin is sitting on top of the white pumpkin you will want to cut out the entire piece. If you cut out the entire medium pumpkin in orange and place it behind the white it will show through. However, depending on the colors you choose and the thickness of the fabric it may not matter.

    Fabric Considerations

    I choose cotton and flannel fabric to sew on to the linen. I also think felt or corduroy would look super cute. Prints may also be a great choice. Keep in mind that you may want to wash the tea towel in the future and some fabrics like felt may not wash well. You may consider washing your scraps first, to remove any sizing. Often my tea towels are just for decoration so I don't worry about being able to wash them.

    Cut out appliques of pumpkins on a linen tea towel. A roll of stitch witchery on top and a pair of small scissor on the side.

    Next, glue the fabric shapes onto the tea towel with fabric glue or stitch witchery, a fusible bonding tape that acts like glue when you apply heat on top with an iron. This will help keep them in place while you embroider.

    An orange, white and green pumpkin fabric cut out glued to a linen towel and placed in an embroidery hoop with colored thread piles on top.

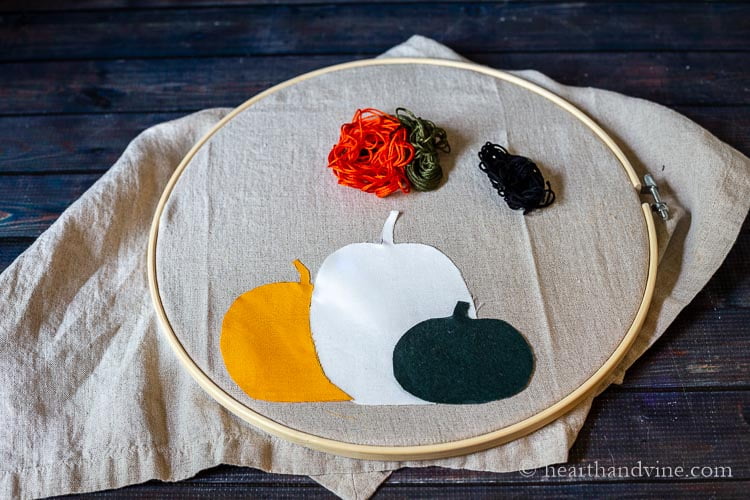
    Once you have your fabric pumpkins in place, add the embroidery hoop around the area to keep the background fabric nice and taut. Choose embroidery floss for each pumpkin in either a coordinating or contrasting color.

    Appliqued pumpkin towel with embroidery hoop underneath.

    How to Embroider the Pumpkins

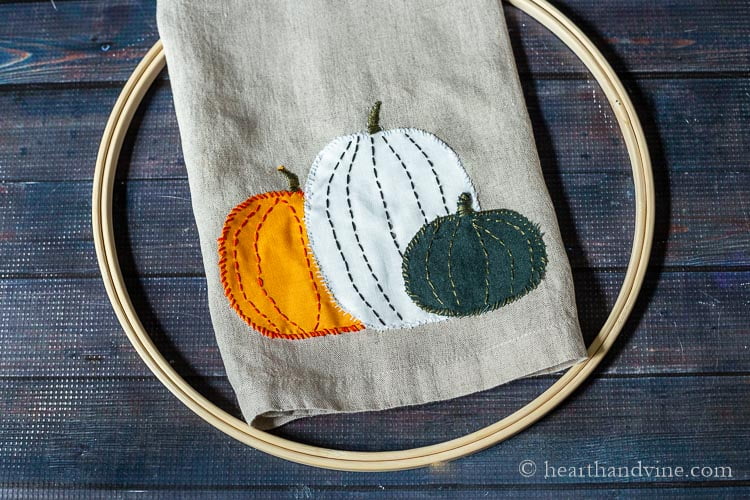
    I used 3 strands about 2-3 feet long of embroidery floss for each color. Create an outline by starting at a corner of one of the pumpkins.

    • Tie a knot in one end then thread the other through the eye of the needle.
    • Come up through the back of the linen and pull the thread all the way through until the knot catches.
    • Then put the needle back down through the fabric just above the first spot.
    • Then move to the left or right of your fabric and bring the needle back up through keeping the stitches close together until you completely outline the pumpkin.

    You can do the same thing for each stem. I used a dark green for the stems but you can decide what color you want to use.

    For the vertical lines use a pencil to lightly draw them. Then stitch from the bottom just like before only this time you want to leave a little space between each stitch.

    As you can see my stitches are not perfect, but that just adds to the handcrafted appeal.

    Pumpkin tea towel hanging on the oven door.

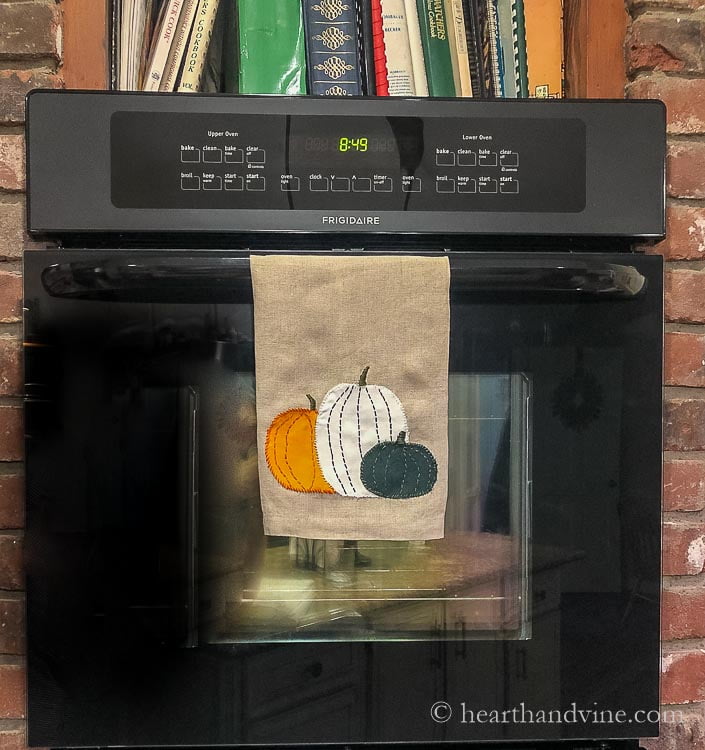
    Overall, this handmade pumpkin tea towel applique project was super easy and I think it makes a great addition to my kitchen for the fall. Maybe I'll try this idea again with Christmas trees.

    Linen towel with pumpkins appliqued at the bottom.
    Linen towel with pumpkin applique
    Print

    Pumpkin Tea Towel - Easy Applique Project for Your Fall Decor

    Make an adorable pumpkin tea towel with this simple tutorial. It uses basic hand sewing applique techniques that even a beginner sewer can do!
    Prep Time20 minutes mins
    Active Time40 minutes mins
    Total Time1 hour hr
    Course: Sewing
    Yield: 1 Tea Towel
    Author: Patti Estep
    Cost: $5

    Equipment

    • Embroidery needle

    Materials

    • Tea towel or large napkin
    • Embroidery hoop
    • Embroidery floss
    • Scrap fabric

    Instructions

    • Print out the pumpkin template.
    • Cut out the pumpkin pieces and trace them onto your scrap fabric.
    • Place it on the bottom of your tea towel.
    • Glue the fabric shapes onto the tea towel with fabric glue or stitch witchery.
    • Add the embroidery hoop around the area to keep the background fabric nice and taut.
    • Choose embroidery floss for each pumpkin in either a coordinating or contrasting color.
    • Tie a knot in one end then thread the other through the eye of the needle.
    • Come up through the back of the linen and pull the thread through until the knot catches.
    • Put the needle back down through the fabric above the first spot.
    • Move to the left or right of your fabric.
    • Bring the needle back up through, keeping the stitches close together to outline the pumpkin.
    • Repeat for each stem.
    • Use a pencil to lightly draw the vertical lines.
    • Stitch from the bottom just like before. 
    « Deviled Eggs - A Classic Party Finger Food Recipe
    How to Make A Gratitude Jar for Thanksgiving Dinner »

    About Patti Estep

    Patti is the creator of Hearth and Vine, a home and garden blog filled with projects to inspire your creative side. She loves crafting, gardening, decorating and entertaining at her home in Pennsylvania. When she is not working on a project at home or searching for treasures at nurseries and thrift stores with her girlfriends, you’ll probably find her with family and friends, at a restaurant, or home party enjoying new and different food adventures.

    Reader Interactions

    Comments

    1. Carole West

      October 12, 2020 at 10:32 am

      Another fun project, at first glance I thought you sewed this. My grandmother taught me how to embroidery... Love this activity - just fun and simple, also a great thing to incorporate while watching a movie at home.

      Reply
      • Patti Estep

        October 12, 2020 at 10:42 am

        Thanks Carole. Yes, I'm always looking for something to do in the evening while watching TV or a movie. So glad you lik

        Reply

    Leave a Reply Cancel reply

    Your email address will not be published. Required fields are marked *

    Recipe Rating


    Primary Sidebar

    Follow Me

    • Email
    • Facebook
    • Instagram
    • Pinterest
    • Twitter

    Patti profile pic

    Hi! I'm Patti

    Join me to create lots of fun DIY projects including crafts, gardening, home decor and tasty recipes.

    more about me

    Popular Posts

    Blue jean crossover bag

    DIY Crossbody Bag from Jeans

    tabletop water gardens

    How to Make an Indoor Water Garden

    Echievera planter

    What to do With a Stretched Succulent

    Fabric bowl covers in 3 prints

    How to Make Fabric Bowl Covers

    Long blooming perennials including yarrow, geraniums, black-eyed susan, daisy, coneflower, coreopsis, and russian sage.

    10+ Long Blooming Perennials

    Chicken black bean tortilla casserole

    Chicken Black Bean Casserole Recipe

    Footer

    ^ back to top

    About
    Privacy Policy
    Disclosure Policy

    Sign Up Here!
    for our
    newsletter &
    special offers

    • Shop
    • Web Stories

    As an Amazon Associate, I earn from qualifying purchases. i.e. as an Amazon Associate, I earn from qualifying purchases.

    Copyright © 2023 Hearth and Vine