• Skip to primary navigation
  • Skip to main content
  • Skip to primary sidebar
  • Home
  • DIY Projects
    • Homemade Bath and Body
    • Sewing - Fabric Crafts
    • Flower Crafts/Decor
    • Thrift Store/Vintage
  • Gardening
    • Flower Gardens
    • Container Gardening
    • Houseplants
    • Indoor Gardening
    • Landscaping
    • DIY Garden Art
  • Decorate
    • Spring Decor
    • Summer Decor
    • Fall Decor
    • Winter Decor
    • Home Decor Projects
  • Recipes
    • Breakfast Recipes
    • Lunch Recipes
    • Dinner Recipes
    • Dessert
    • Salad Recipes
    • Soups and Stews
    • Side Dish Recipes
    • Appetizers and Snacks
    • Healthy Recipes
  • Holidays
    • Valentine's Day
    • Easter
    • Mother's Day
    • Halloween
    • Thanksgiving
    • Christmas
Hearth and Vine
menu icon
go to homepage
  • About
  • DIY
    • ...Flower/Gardening Crafts
    • ... Bath and Body
    • ...Sewing/Fabric Crafts
    • ...Thrift Store/Upcycle
  • Gardening
    • ...Flower Gardens
    • ...Container Gardening
    • ...Indoor Gardening
    • ...DIY Garden Art
  • Decorate
    • ...Home Decor Projects
    • ...Spring Decor
    • ...Summer Decor
    • ...Fall Decor
    • ...Winter Decor
    • ...Room Makeovers
  • Recipes
    • ...Appetizers and Snacks
    • ...Dinner Recipes
    • ...Side Dish Recipes
    • ...Salad Recipes
    • ...Dessert
    • ...Drinks
  • Holidays
    • ...Valentine's Day
    • ...Easter
    • ...Mother's Day
    • ...Halloween
    • ...Thanksgiving
    • ...Christmas
  • Subscribe
  • Instagram
    • Facebook
    • Instagram
    • Pinterest
    • Twitter
  • subscribe
    search icon
    Homepage link
    • About
    • DIY
      • ...Flower/Gardening Crafts
      • ... Bath and Body
      • ...Sewing/Fabric Crafts
      • ...Thrift Store/Upcycle
    • Gardening
      • ...Flower Gardens
      • ...Container Gardening
      • ...Indoor Gardening
      • ...DIY Garden Art
    • Decorate
      • ...Home Decor Projects
      • ...Spring Decor
      • ...Summer Decor
      • ...Fall Decor
      • ...Winter Decor
      • ...Room Makeovers
    • Recipes
      • ...Appetizers and Snacks
      • ...Dinner Recipes
      • ...Side Dish Recipes
      • ...Salad Recipes
      • ...Dessert
      • ...Drinks
    • Holidays
      • ...Valentine's Day
      • ...Easter
      • ...Mother's Day
      • ...Halloween
      • ...Thanksgiving
      • ...Christmas
    • Subscribe
    • Instagram
    • Facebook
    • Instagram
    • Pinterest
    • Twitter
  • ×
    Home » DIY Projects

    Stacked Painted Pumpkins

    by Patti Estep · Sep 23, 2020

    Jump to How-to Card
    Three painted stacked pumpkins and stages of the process on the right.
    Apple head witches, stacked painted pumpkins and flying paper bats.

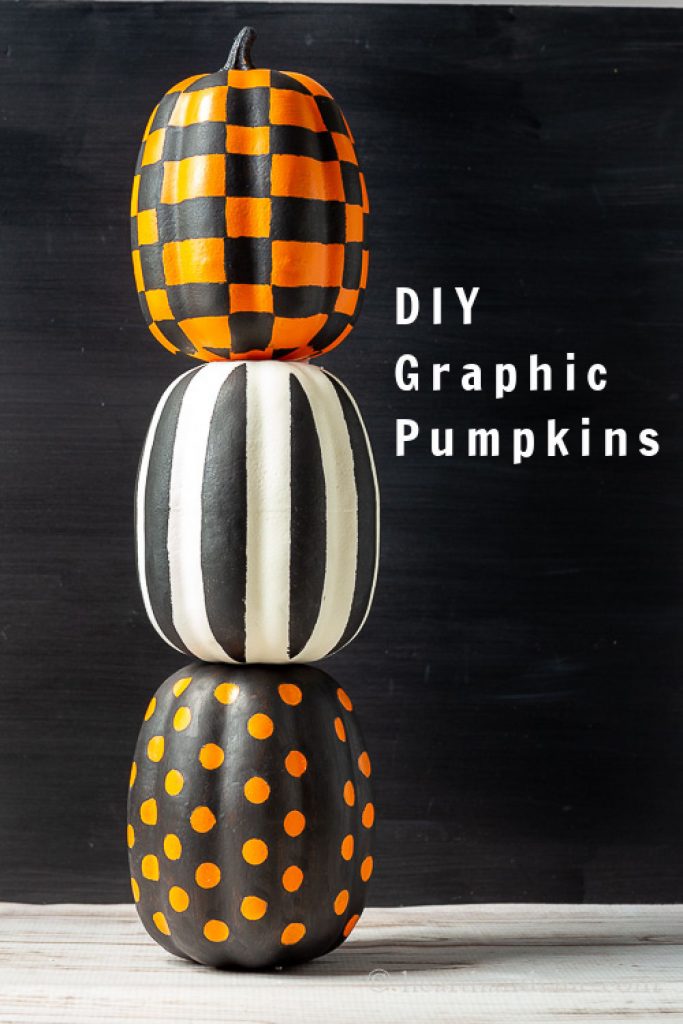
    Learn how to make these easy and inexpensive stacked painted pumpkins for a modern graphic Halloween display. This inexpensive craft is easy to create from dollar store pumpkins, craft paints, and other basic supplies.

    Three different graphically painted pumpkins in shades of orange, black and white, stacked on top of each other.

    I have a thing for pumpkin topiary. In the past, I made a Cinderella Pumpkin Topiary out of fabric, and a super large Paper Mache Pumpkin Topiary for my front porch. However, today I'm showing you how to make this easy graphic painted stacked pumpkin set for a Halloween vignette.

    Three pumpkins from the dollar store. Two orange and one white with Halloween sayings in black on the fronts.

    How to Make Painted Stack Pumpkins

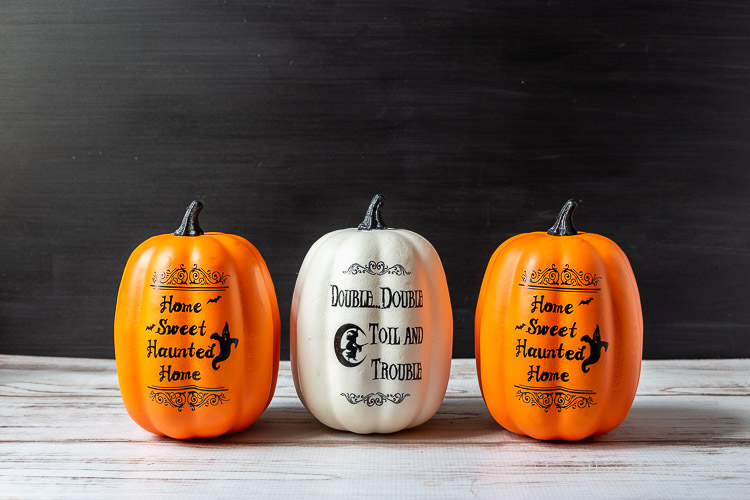
    It starts with these three craft pumpkins I found at Dollar General for $3.50 each. Ideally, they would not have any text on them but this is what I found in my area. And for $10 I thought they would be just fine for this project.

    White foam craft pumpkin with the stem removed.

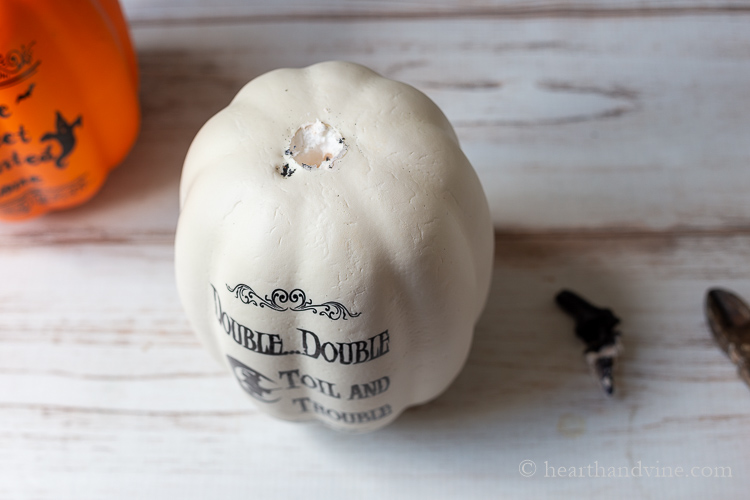
    First, you need to remove the stems from two of the pumpkins. You can see that they are made of Styrofoam making them very lightweight.

    Three craft pumpkins. Two have the stems removed and the middle one has a large wooden dowel rod in the top.

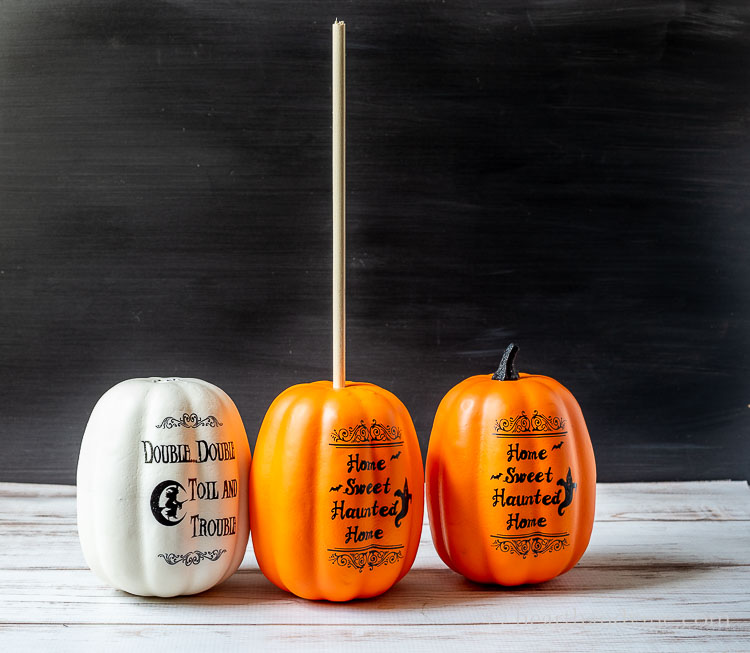
    Then use a dowel rod to hold them together. You can use an Exacto knife or a sharp paring knife to cut holes in the center for the dowel rod on the bottom of the pumpkins. If you don't have a dowel rod a nice straight stick from outdoors will do the trick.

    Orange craft pumpkin with cheap round stickers all over.

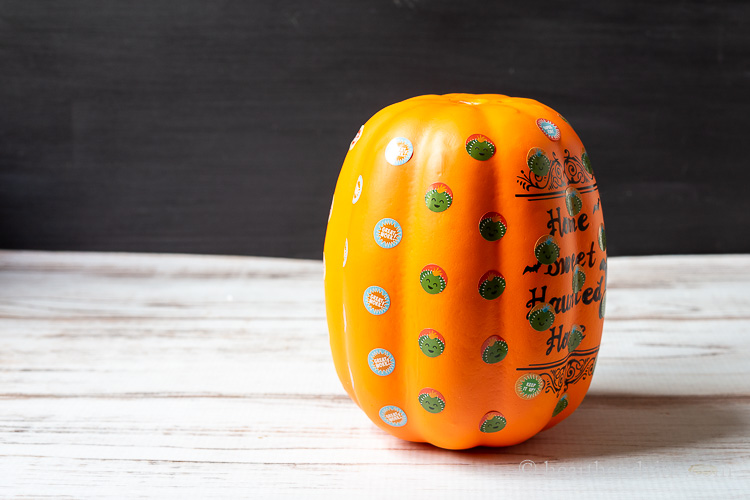
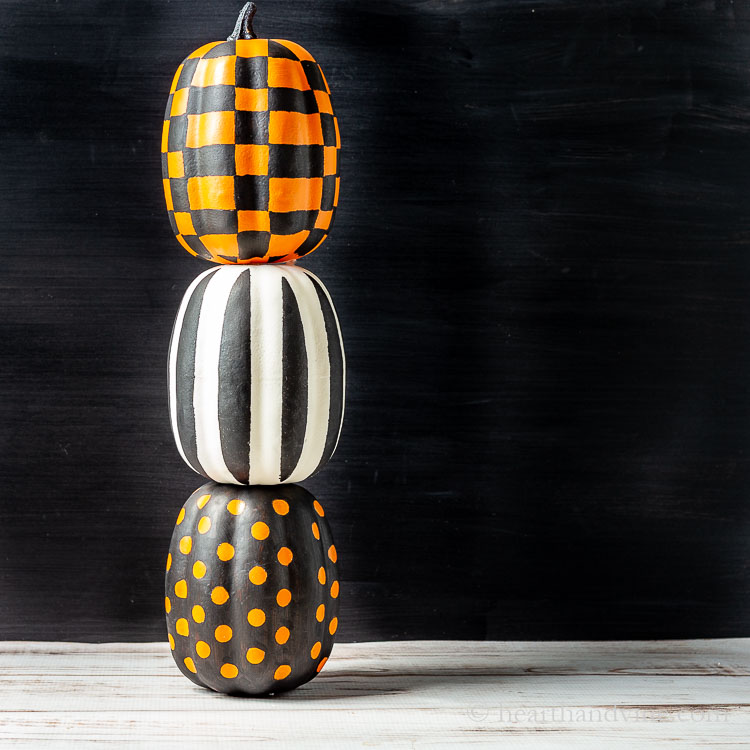
    Next, use round stickers to make the polka dot pattern. I found these at the dollar store. However, you can use whatever size you like.

    White craft pumpkin with vertical stripes of masking tape to the left and an orange pumpkin with masking tape in a plaid pattern.

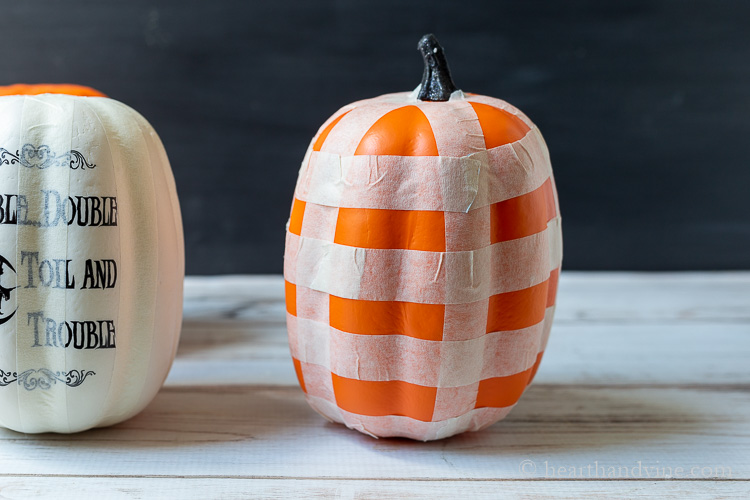
    Then use masking tape vertically on the white pumpkin for stripes. Then add both vertical and horizontal tape to the other orange pumpkin for a plaid look.

    Newsletter Signup
    Join Our Newsletter List!

    Be the first to receive new posts and get access to our Subscribers Only Page.

    Three craft pumpkins with stickers, or masking tape that have been painted with black paint over top.

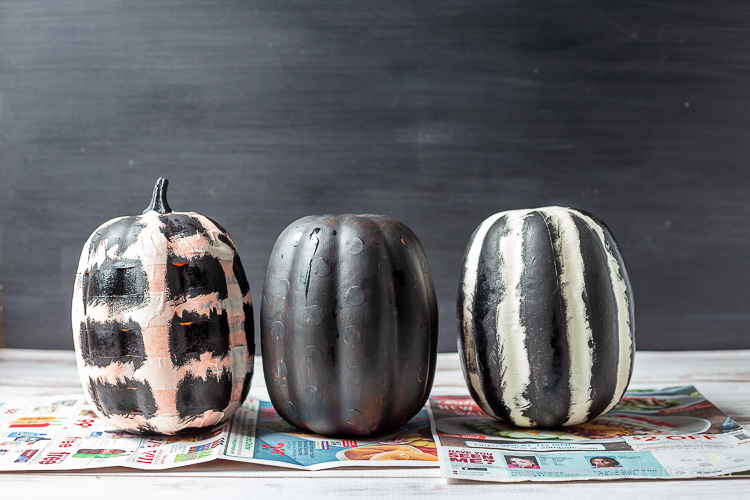
    Once everything is taped up, cover them with black craft paint.

    Once the paint is dry, carefully pull away the stickers and masking tape.

    Tips for painting:

    • Burnish the edges of the stickers and tape before painting to make sure they stay in place.
    • Use a stippling action as you would for a stencil around the tape to help keep the paint from seeping through.
    • Use white and orange craft paint to cover the text left behind from the original print.
    • A black sharpie or a small brush with black paint works great for touch-ups.
    Paper bats taped to the wall to look like they are flying.

    How to Make Flying Bats

    Another quick and fun project that goes well with the pumpkins are these flying bats.

    Black bat silhouette.

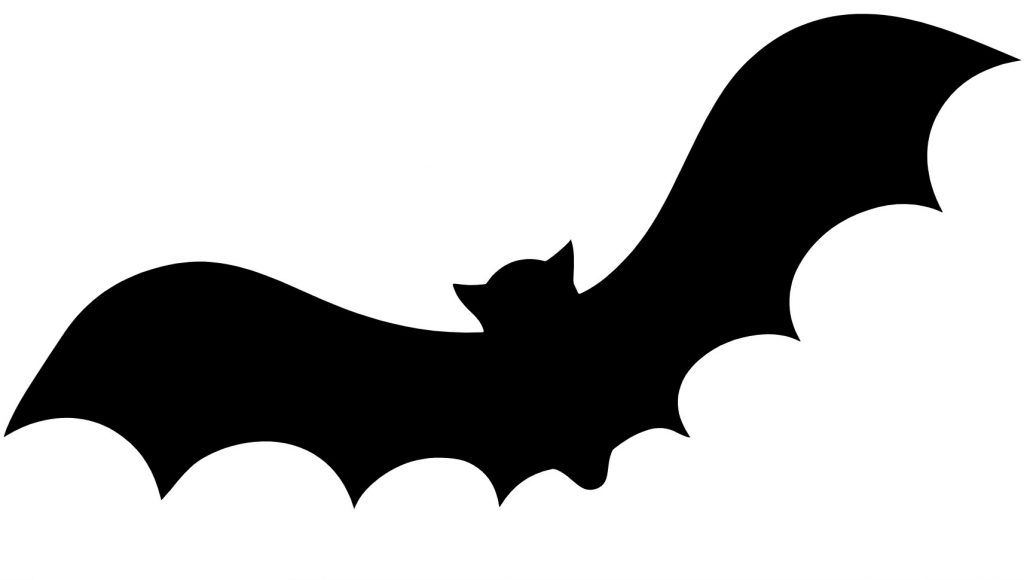
    Click on the image above to print out as many bats as you want. You can print them on card stock or ordinary copy paper. Or, you can print out one and make a template to trace onto black paper and save yourself some ink.

    Little pieces of black card stock folded in an accordion style.

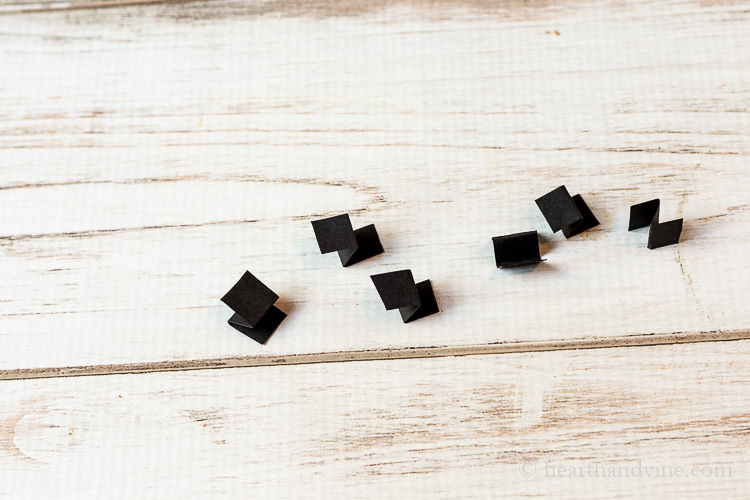
    How to make the bats fly.

    • Take strips of card stock or cardboard and fold them as shown above.
    • Then use double stick tape on each end. Use three for each bat.
    • Place one in the center and one on each side.
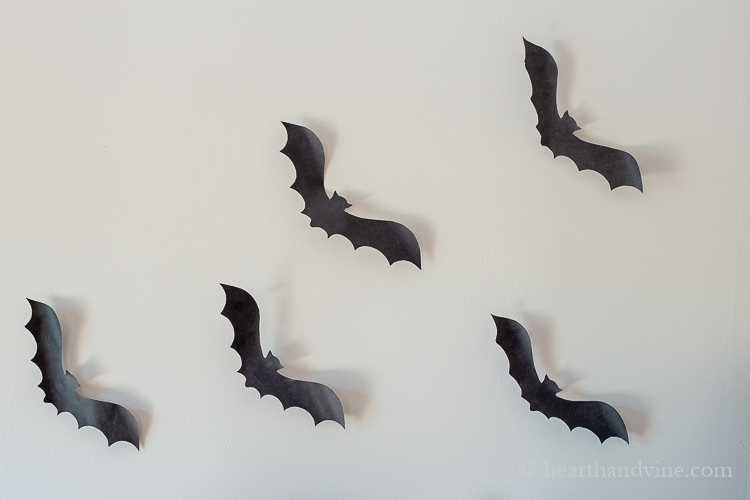
    • Then, stick them to the wall to give them a 3-D effect.

    Halloween display with bats on the wall, apple head witches and graphic  stacked painted pumpkins on the dresser.

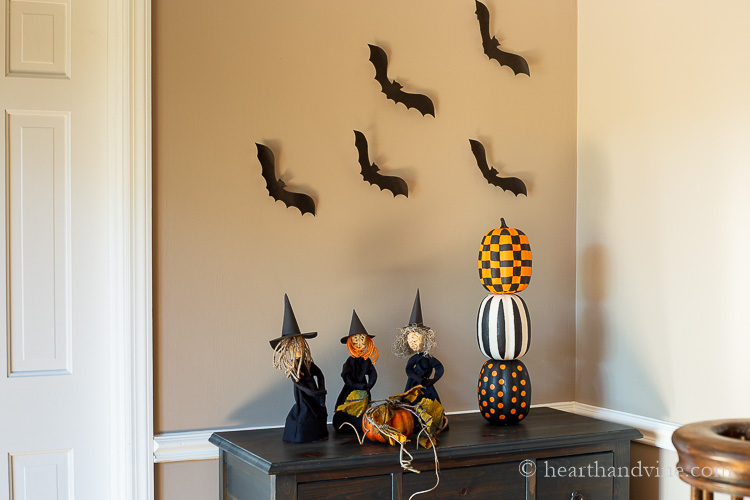
    We now have a fun and modern looking Halloween vignette in our foyer. Three apple head witches, flying bats, and the graphic stacked painted pumpkins.

    Happy Halloween!

    Painted stacked pumpkins in a modern graphic print. One is polka dots, one is striped and the last is plaid.
    Trio of painted pumpkins stacked together.
    Print

    Stacked Painted Pumpkins and More Halloween Decorating Ideas

    Learn how to make this easy graphic painted stacked pumpkin set for a Halloween vignette. It will look great in a foyer, or entryway.
    Prep Time30 minutes mins
    Active Time30 minutes mins
    Total Time1 hour hr
    Course: Holidays
    Yield: 1 Stacked Pumpkin Topiary
    Author: Patti Estep
    Cost: $30

    Equipment

    • X-acto Knife

    Materials

    • Craft Pumpkins
    • Dowel Rods
    • Round Stickers
    • Masking Tape
    • Craft Paint
    • Paint Brush
    • Black Sharpie

    Instructions

    • Remove the stems from two of the pumpkins.
    • Use a dowel rod to hold them together.
    • You can use an x-acto knife to cut holes in the center of the two pumpkins.
    • Use round stickers to make the polka dot pattern.
    • Add masking tape vertically on the white pumpkin for stripes.
    • Then add both vertical and horizontal tape to the other orange pumpkin for a plaid look.
    • Cover them with black craft paint. Let dry.
    • Carefully pull away the stickers and masking tape.
    • A black sharpie can be used for touch-ups.
    Tried this project?Tag @hearthnvine on Instagram
    « Apple Head Doll Witches
    How to Make Tasty Oven Roasted Red Beets »

    About Patti Estep

    Patti is the creator of Hearth and Vine, a home and garden blog filled with projects to inspire your creative side. She loves crafting, gardening, decorating and entertaining at her home in Pennsylvania. When she is not working on a project at home or searching for treasures at nurseries and thrift stores with her girlfriends, you’ll probably find her with family and friends, at a restaurant, or home party enjoying new and different food adventures.

    Reader Interactions

    Leave a Reply Cancel reply

    Your email address will not be published. Required fields are marked *

    Recipe Rating


    Primary Sidebar

    Three painted stacked pumpkins and stages of the process on the right.
    Apple head witches, stacked painted pumpkins and flying paper bats.
    Patti Estep Profile Picture

    Hi!

    I'm Patti

    Join me to create lots of fun DIY projects, including crafts, gardening, home decor, and tasty recipes

    More about me

    Popular Posts

    • Baked zucchini bite on a slated tray with a bowl of horseradish sauce.
      Make Tasty Zucchini Bites in Under an Hour
    • Three tin cans in descending sizes hanging from twine.
      DIY Wind Chimes with Tin Cans
    • Blue jean crossover bag
      DIY Crossbody Bag from Jeans
    • Ham barbecue sandwich on plate
      Chipped Ham Barbecue Sandwiches - A Pittsburgh Favorite
    • Echievera planter
      What to do With a Stretched Succulent
    • Make a Mason Jar Oil Candle Lamp with botanicals and essential oils. ~ gardenmatter.com
      DIY Oil Candle - Gifts for the Holidays

    Footer

    Three painted stacked pumpkins and stages of the process on the right.
    Apple head witches, stacked painted pumpkins and flying paper bats.

    ^ back to top

    About
    Contact
    Privacy Policy
    Disclosure Policy

    Sign Up Here!
    for our
    newsletter &
    special offers

    Follow Me

    facebook
    Pinterest
    instagram

    As an Amazon Associate, I earn from qualifying purchases. i.e. as an Amazon Associate, I earn from qualifying purchases.

    Copyright © 2025 Hearth and Vine

    Rate This Recipe

    Your vote:


    A rating is required
    A name is required
    An email is required