Learn how to make a large heirloom pumpkin topiary with simple inexpensive materials, to create a festive fall look.

I love the look of heirloom pumpkins or Cinderella pumpkins with their squatty shapes and muted colors. I thought a stack on both sides of my front door would look really great, but they are so pricey and much too heavy to achieve the look I wanted.
So I decided to create some using old-fashioned paper mache.
How to Make a Pumpkin Topiary
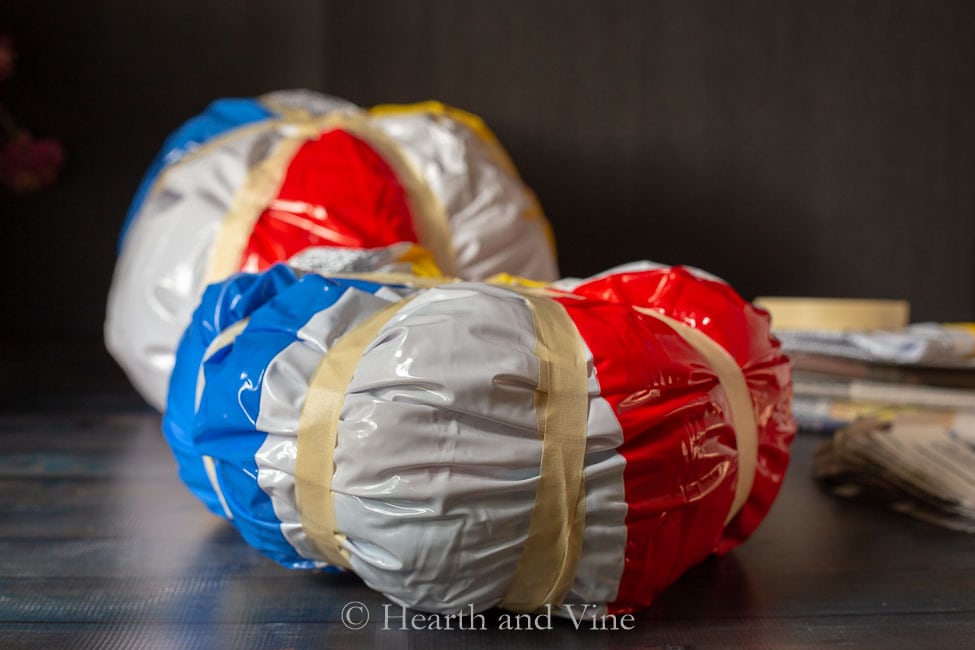
The largest pumpkins were made with beach balls I picked up at Target for $1 each.
Just blow them up a little and then use some masking tape to help create the shape you want.
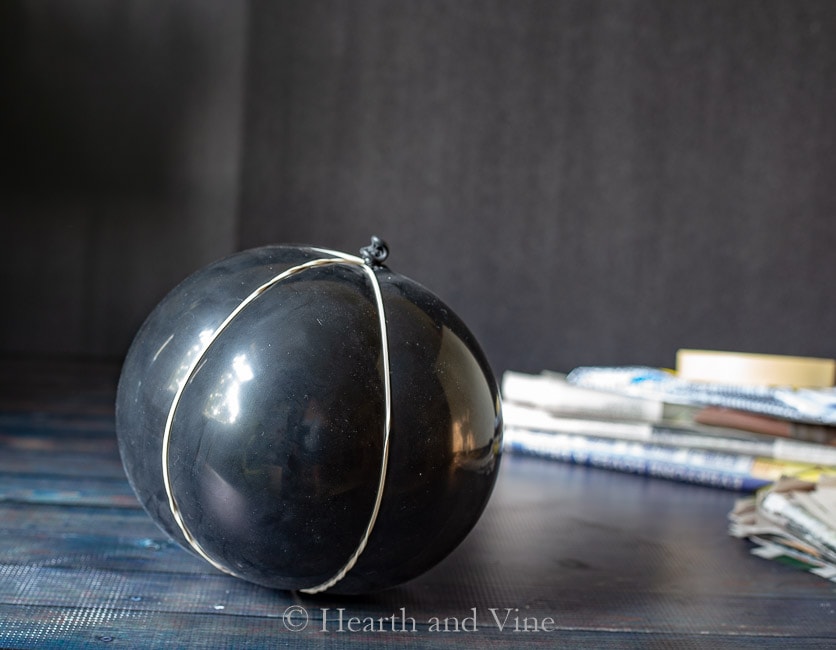
You can use a balloon for the top pumpkin and place rubber bands around it to create folds and ridges.
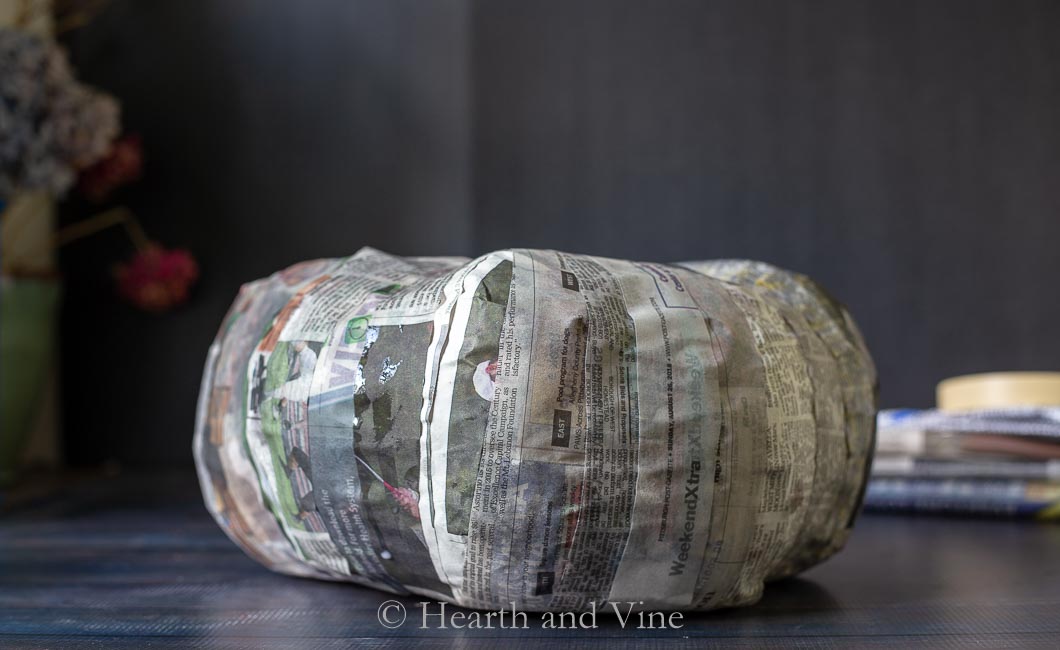
Cover the base pumpkins with strips of newspaper ala paper mache. I used white glue and water instead of the traditional flour and water paper mache method. Why? Well, the pumpkin topiary will be sitting on my front porch, so I thought there would be less likelihood of mold issues. Also, I think they will hold up better with white glue.
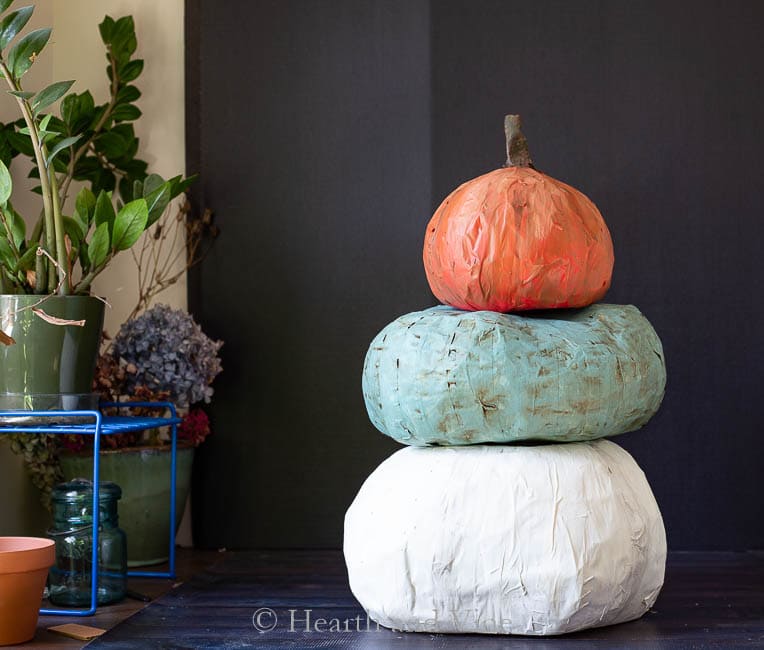
Once the newspaper dried I painted the paper mache pumpkins with chalk-like and craft paints in heirloom pumpkin colors.
I thought about spraying them with polyurethane to protect them from rain, but since that area is covered I decided against it.
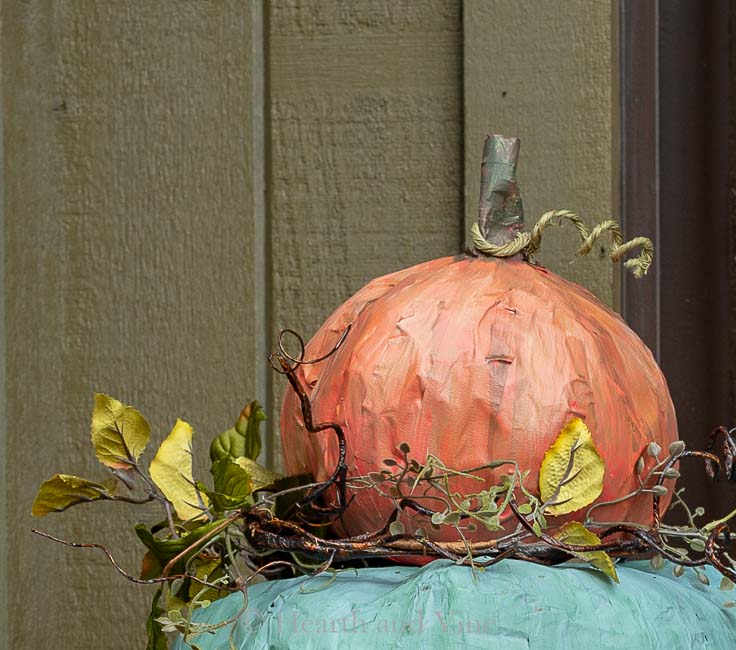
Oh yeah, the stem on the little pumpkin is simply made with some newspaper rolled up and taped on top before painting. You can also add a little tendril by wrapping a green grapevine wire around a pencil and pinching it onto the stem.
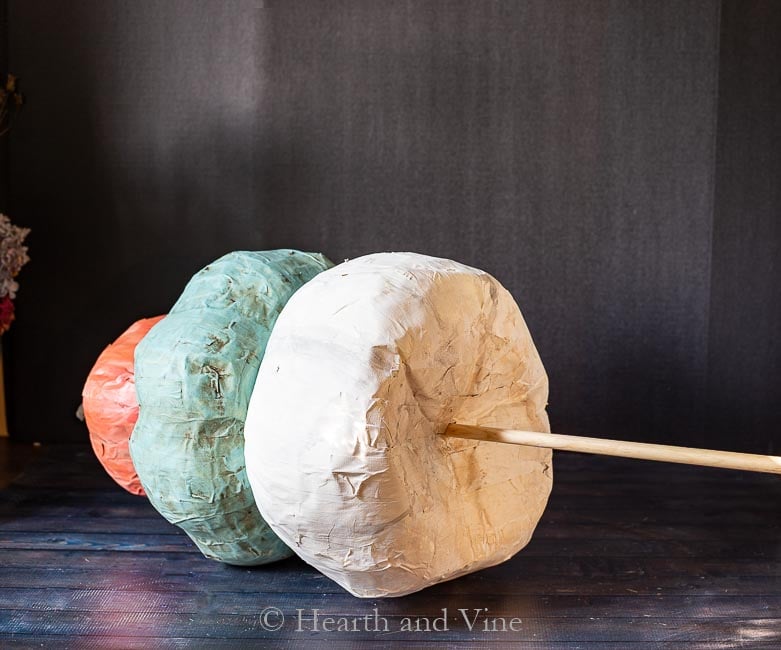
Use a dowel rod through the middle of each pumpkin to hold them all together.

DIY Pumpkin Topiary
The dowel rods were placed into the same pots that my flower pot trellises were in all summer. If you don't already have a pot filled with soil you could use styrofoam to hold the dowel rod in place.
But first I placed a grapevine wreath with some dried hydrangea for a little texture and height.
The whole look was complete with a little faux vine and some pots of pretty fall plants at the base.
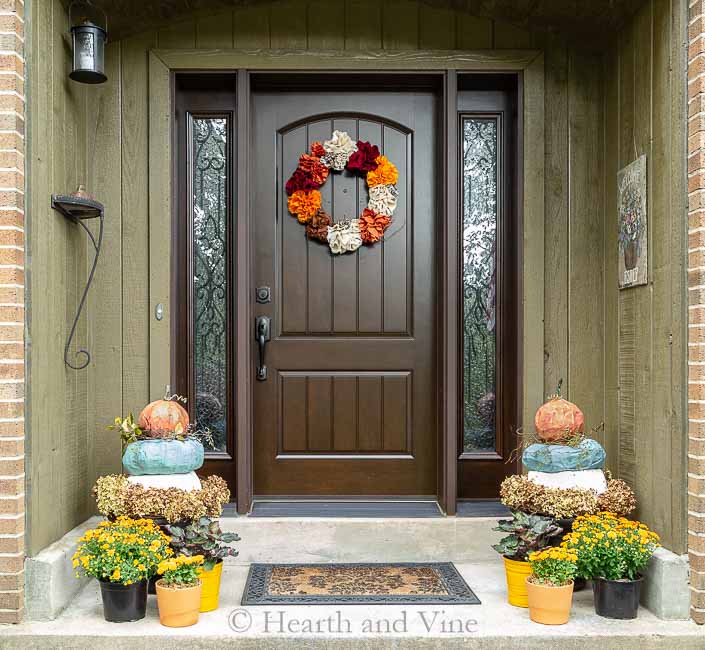
My front entrance is almost ready for fall. The fabric flower wreath from a few weeks ago looks great with the pumpkin topiary and fall Mums. However, I really feel like the door frame needs a garland. Maybe I can go out and forage some bittersweet vine. What do you think?

P.S. You may also like this similar Cinderella Fabric Pumpkin Topiary craft or these fun felted Dryer Ball Pumpkins. You can find them and much more on my DIY Projects page.


Pumpkin Topiary - Large Heirloom Pumpkins Made Easy with Paper Mache
Materials
- Beach Balls
- Balloons
- Masking Tape
- Rubber Bands
- Newspaper
- White Glue
- Water
Instructions
- Use beach balls for the large pumpkins.
- Blow them up a little and use masking tape to help create the shape you want.
- Use a balloon for the top pumpkin and place rubber bands around it to create folds and ridges.
- Cover the base pumpkins with strips of newspaper.
- Cover with a mixture of white glue and water. Let dry.
- Paint the paper mache pumpkins with chalk-like and craft paints in heirloom pumpkin colors.
- Use a dowel rod through the middle of each pumpkin to hold them all together.
Karen
How did you put the dowel through each of the pumpkins? If you used beach balls, I can't imagine you could just push them down through the middler. Did you make holes in the tops and bottoms of the "pumpkins" first to shove the dowel through? These are super cute and I'd love to try making them!
Patti Estep
Karen, I'm so glad to hear that you like this project. These are inflatable beach balls and are much like a balloon. Once the newspaper has dried you can pop the beach ball inside and maneuver the dowel through the pumpkin.
Leanna
These are absolutely beautiful. A gorgeous display for those of us on budgets. I can't pin this fast enough. I love it.
Patti Estep
Thanks Leanna. They were fun to make.
Laurie @ Vinyet Etc
How cool, what a clever idea! I love that you can create a symmetrical look without going crazy trying to hunt for the perfect pumpkins! and no worries about getting rid of all the pumpkins after Fall is long gone AND so pretty, well done!
Angie @ Postcards from the Ridge
These are so pretty! I love the rustic look of them. I would have never thought to do this! Thanks for sharing such a creative idea and for joining the tour this year.
Mary Beth
You are so creative! I love these. The colors and textures are gorgeous.
Patti Estep
Thanks Mary Beth.
Nancy @ Foodie Chicks Rule
Now, that is about the most creative thing ever! Love it! xo
Patti Estep
Thanks Nancy. 🙂
Susan
Your pumpkins are adorable! I have always wanted to try paper mache'. Thanks for inspiring me!
Patti Estep
I'm so glad you like them Susan.
Lynn B Spencer
Patti...I knew that whatever project you did I would LOVE! And you didn't disappoint. Those paper mache pumpkins are gorgeous...truly prettier than the real thing. Very 'artsy' and fun....espeically that turquoise/blue one!
Thanks for another brilliant idea my friend.
Hugs, Lynn
Patti Estep
Lynn, you are too kind. I'm glad you like the pumpkin topiary. They ended up taking way longer to make than I thought. Luckily they turned out pretty good in the end.
Maryann
What a fun project! They turned out adorable.
Patti Estep
Thanks Maryann. So much fun and inspiration on this tour. I was happy to be part of it.
Leen Curinga
Patti, your topiaries are so cute and clever! They look perfect on your cute Fall porch 🙂
Patti Estep
Thanks Leen. I still feel like it needs something around the door. Maybe a pine cone garland.
Pamela
These turned out so cute, I love them. Now I need to paint them. 🙂
Patti Estep
Thanks Pamela. Can't wait to see your painting!!
Vicki and Jenn 2 Bees in a Pod
You are so smart and creative! We all know how expensive these large pumpkins are and you have created a brilliant solution! Beautiful too!
Patti Estep
Thanks Vicki and Jenn. I really appreciate it. 🙂
Kim Jones
this is a genius idea! I just love how you were able to make large pumpkins so inexpensively! gorgeous!
Patti Estep
Thanks Kim. Yeah, I just couldn't justify spending a ton of money on pumpkins that would eventually rot. Besides, I would have to figure a way to keep them from toppling over which would be a challenge.
Cindy
This is the cleverest idea I've seen all year! Love the pumpkins!!
Patti Estep
Thanks Cindy. ♥
Kristi Dominguez
This is just SO clever!! I'm seriously wanting to make them for my own porch now...adorable!!
Patti Estep
Thanks Kristi!
Randi
The topiary is gorgeous! I love the paper mache pumpkins and the colors you chose!
Patti Estep
Thanks Randi. I think the blue was the hardest and I still feel like it's a little too dark but they still turned out okay.
Patti
Very nice! I have been thinking about making paper mache pumpkins, thanks for posting your tutorial. And yes, absolutely do a bittersweet garland!
Patti Estep
Thanks Patti. I know of one spot that I have found bittersweet in the past but it's a little bit of a drive. Might have to go for it anyway. I just love that stuff.
Janie
Patti, what a great craft idea for your front porch. I love the large heirloom pumpkins but the cost always stops me. This is an economical way to make them and they look awesome.
Patti Estep
Thank you Janie. I agree the cost is always so high and if you want large ones even higher. Also, large pumpkins are so heavy and I have no idea if I could stack them and keep them stable, so this worked out well for me.
Paula
What a clever project, Patti! I never would have thought to make a paper mache pumpkin. I absolutely love this idea and the colors that you used to paint them are fall perfection!
Patti Estep
Thanks Paula. It took longer than I anticipated especially since there were two of each, but I like the way they turned out.
Carole West
Patti this is brilliant! Every little detail is perfect and love how you presented such an inviting space for fall. It's moments like this when I miss space. Love everything about this and the color pallet is perfect.
Patti Estep
Thanks Carole. You still have lots of wide open spaces to work with and I know it will be gorgeous whatever you do.