• Skip to primary navigation
  • Skip to main content
  • Skip to primary sidebar
  • Home
  • DIY Projects
    • Homemade Bath and Body
    • Sewing - Fabric Crafts
    • Flower Crafts/Decor
    • Thrift Store/Vintage
  • Gardening
    • Flower Gardens
    • Container Gardening
    • Houseplants
    • Indoor Gardening
    • Landscaping
    • DIY Garden Art
  • Decorate
    • Spring Decor
    • Summer Decor
    • Fall Decor
    • Winter Decor
    • Home Decor Projects
  • Recipes
    • Breakfast Recipes
    • Lunch Recipes
    • Dinner Recipes
    • Dessert
    • Salad Recipes
    • Soups and Stews
    • Side Dish Recipes
    • Appetizers and Snacks
    • Healthy Recipes
  • Holidays
    • Valentine's Day
    • Easter
    • Mother's Day
    • Halloween
    • Thanksgiving
    • Christmas
Hearth and Vine
menu icon
go to homepage
  • About
  • DIY
    • ...Flower/Gardening Crafts
    • ... Bath and Body
    • ...Sewing/Fabric Crafts
    • ...Thrift Store/Upcycle
  • Gardening
    • ...Flower Gardens
    • ...Container Gardening
    • ...Indoor Gardening
    • ...DIY Garden Art
  • Decorate
    • ...Home Decor Projects
    • ...Spring Decor
    • ...Summer Decor
    • ...Fall Decor
    • ...Winter Decor
    • ...Room Makeovers
  • Recipes
    • ...Appetizers and Snacks
    • ...Dinner Recipes
    • ...Side Dish Recipes
    • ...Salad Recipes
    • ...Dessert
    • ...Drinks
  • Holidays
    • ...Valentine's Day
    • ...Easter
    • ...Mother's Day
    • ...Halloween
    • ...Thanksgiving
    • ...Christmas
  • Subscribe
  • Instagram
    • Facebook
    • Instagram
    • Pinterest
    • Twitter
  • subscribe
    search icon
    Homepage link
    • About
    • DIY
      • ...Flower/Gardening Crafts
      • ... Bath and Body
      • ...Sewing/Fabric Crafts
      • ...Thrift Store/Upcycle
    • Gardening
      • ...Flower Gardens
      • ...Container Gardening
      • ...Indoor Gardening
      • ...DIY Garden Art
    • Decorate
      • ...Home Decor Projects
      • ...Spring Decor
      • ...Summer Decor
      • ...Fall Decor
      • ...Winter Decor
      • ...Room Makeovers
    • Recipes
      • ...Appetizers and Snacks
      • ...Dinner Recipes
      • ...Side Dish Recipes
      • ...Salad Recipes
      • ...Dessert
      • ...Drinks
    • Holidays
      • ...Valentine's Day
      • ...Easter
      • ...Mother's Day
      • ...Halloween
      • ...Thanksgiving
      • ...Christmas
    • Subscribe
    • Instagram
    • Facebook
    • Instagram
    • Pinterest
    • Twitter
  • ×
    Home » DIY Projects

    Tila Bead Bracelet Tutorial

    by Patti Estep · Aug 23, 2023

    Jump to How-to Card
    A wrist with three tila bracelets over a box of tila beads and stretch cording with several beads strung on it.

    Learn how to make a stretchy bracelet with beautiful tila beads. Once you make one you'll want to have several for yourself and maybe a few more for friends.

    Three bracelets on a wrist with tila beads.

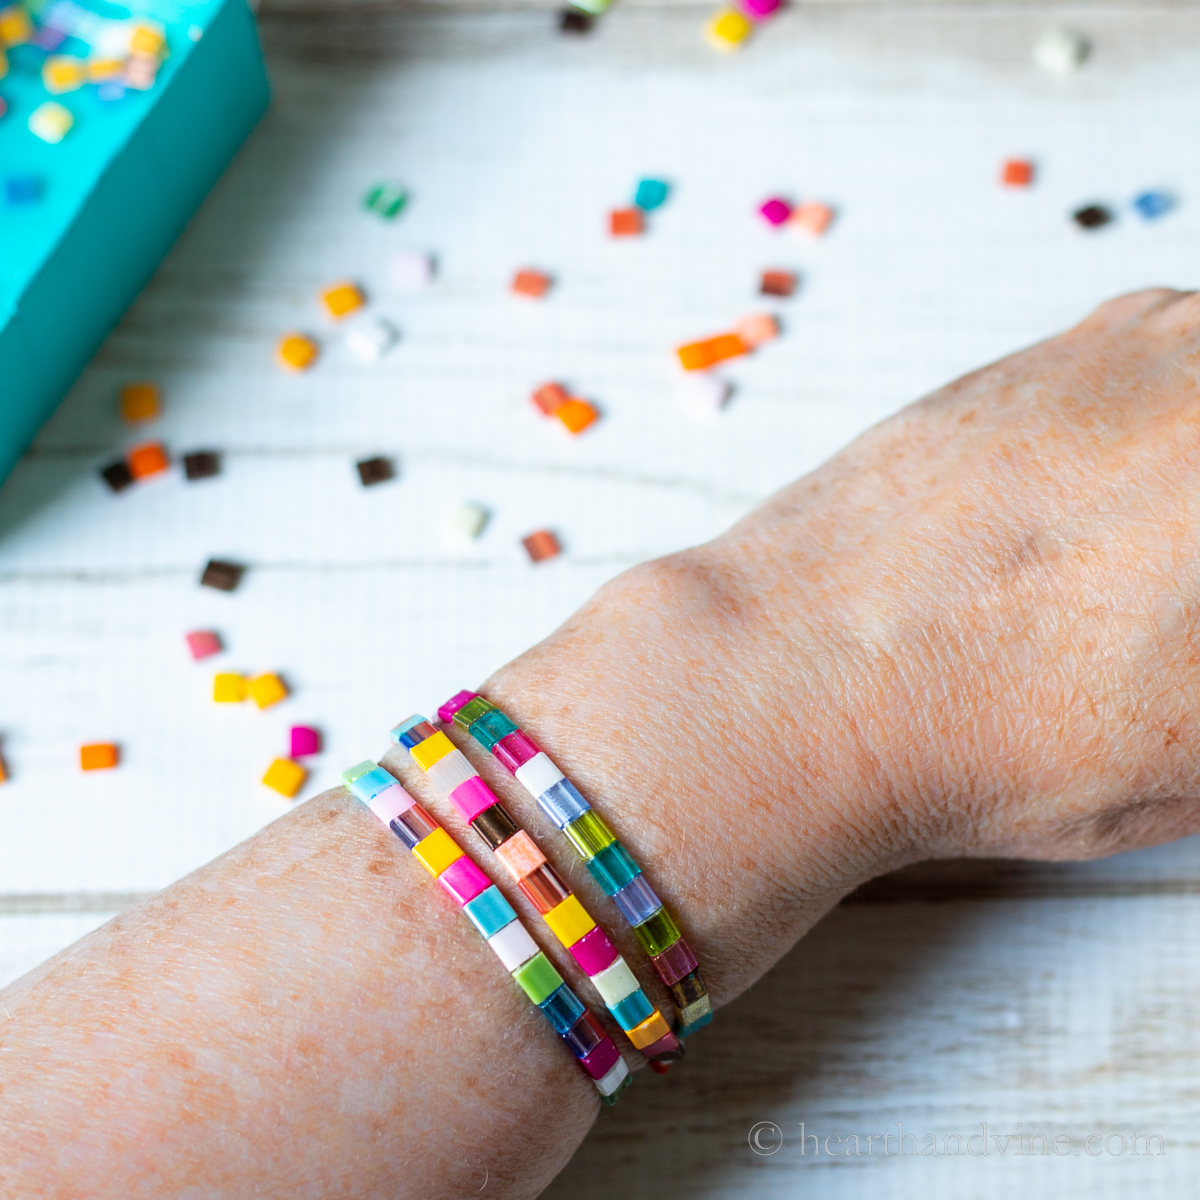
    Today I'm sharing a fun creative project with step-by-step instructions on how to make stretch bracelets with pretty tila beads.

    There's something about these flat rectangular-shaped tila beads that I really like.

    Supplies

    • tila beads with .8 mm holes
    • elastic string or stretch cord 0.8 mm
    • clear nail polish or super glue
    • scissors

    This post contains some affiliate links (that means if you make a purchase after clicking a link, there's no additional cost to you, but I will earn a very small commission. ) i.e. as an Amazon Associate, I earn from qualifying purchases.  Click here to read my full disclosure policy.

    Two pieces of elastic string tied together at one end.

    How to Make a Tila Bead Bracelet

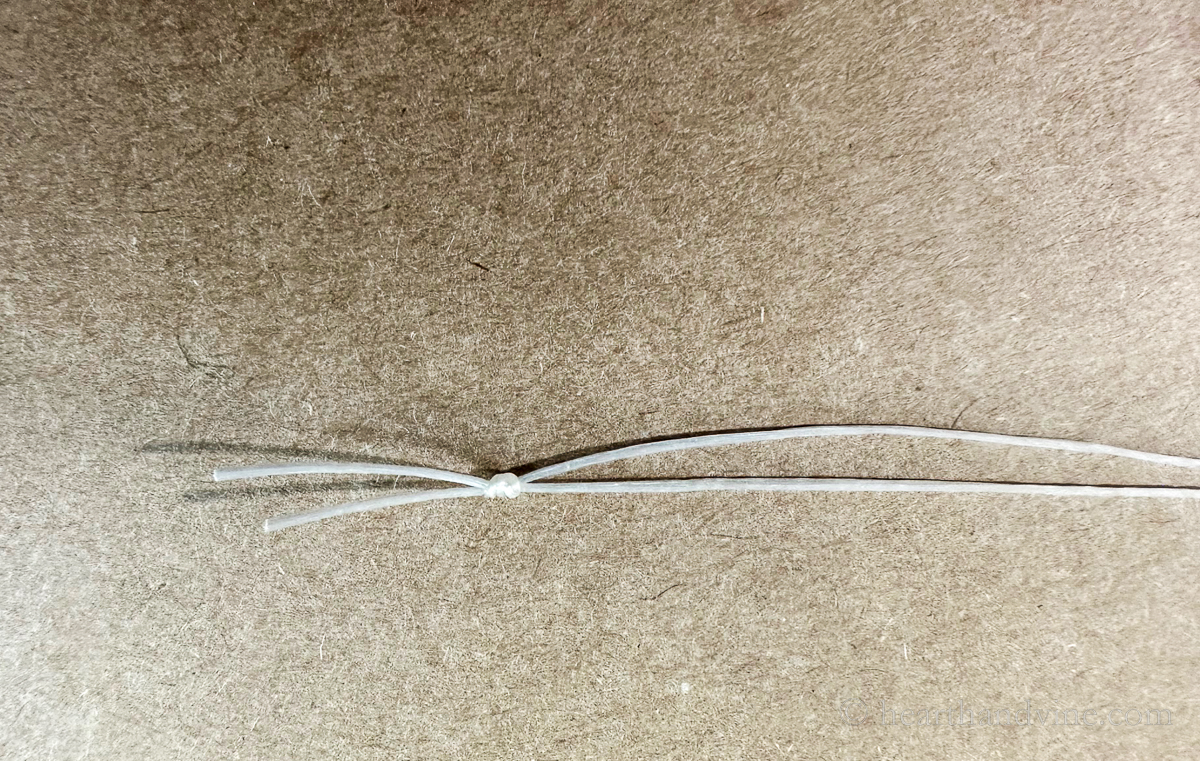
    Start with two pieces of elastic cord about 15 inches long. You want them to be much longer than you ultimately need to make it easier to tie together after you string the beads.

    Make a knot at one end of the cords to anchor the beads. You can also add a little dot of clear nail polish or glue to the knot. This will help the knot stay in place because the stretchy cord can easily become undone.

    You could also use a bead stopper, a binder clip, or a piece of tape at one end of the strands.

    Newsletter Signup
    Join Our Newsletter List!

    Be the first to receive new posts and get access to our Subscribers Only Page.

    Twelve tila beads strung onto elastic strings.

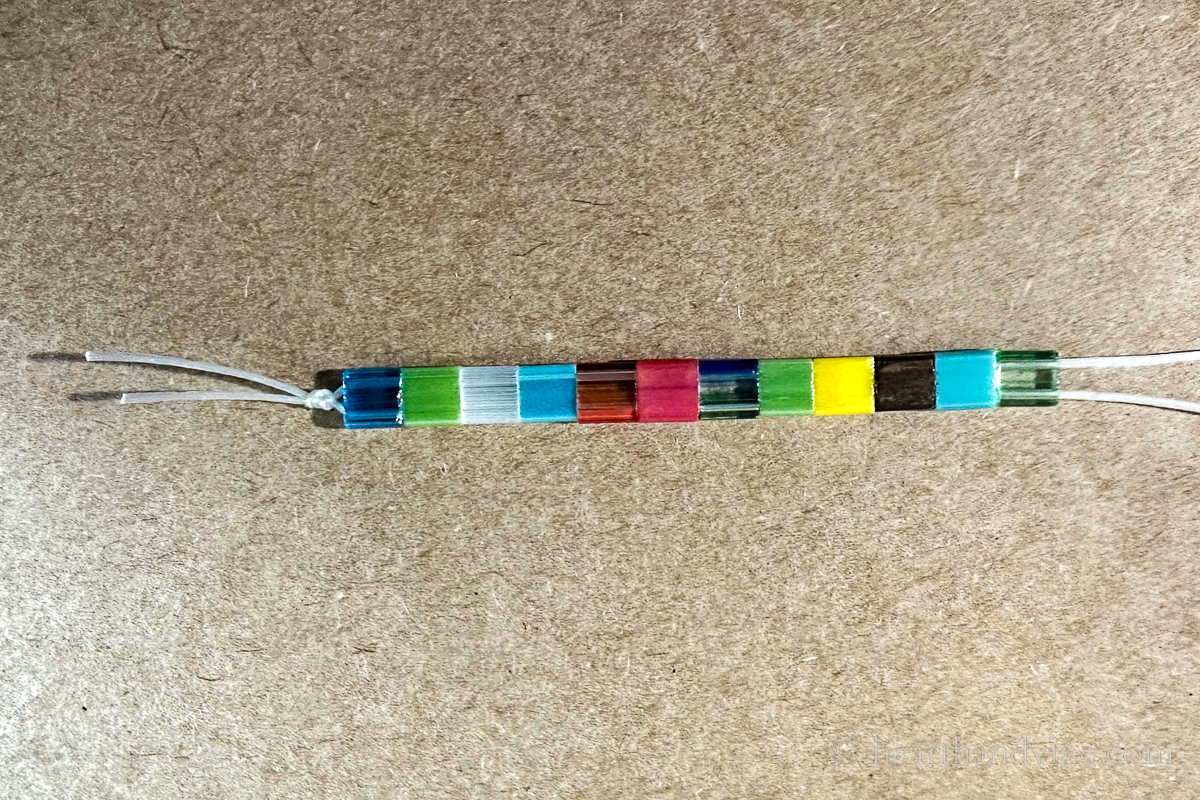
    Start threading the beads onto the cords. You can get creative here and make any pattern you like or create an entire bracelet out of one color bead.

    Thirty tila beads in different colors thread onto two elastic strings in the middle.

    After you've reached around 25 beads hold the bracelet to your wrist to see how it fits. Then add as many as you need. I ended up using about 31 beads for my bracelets.

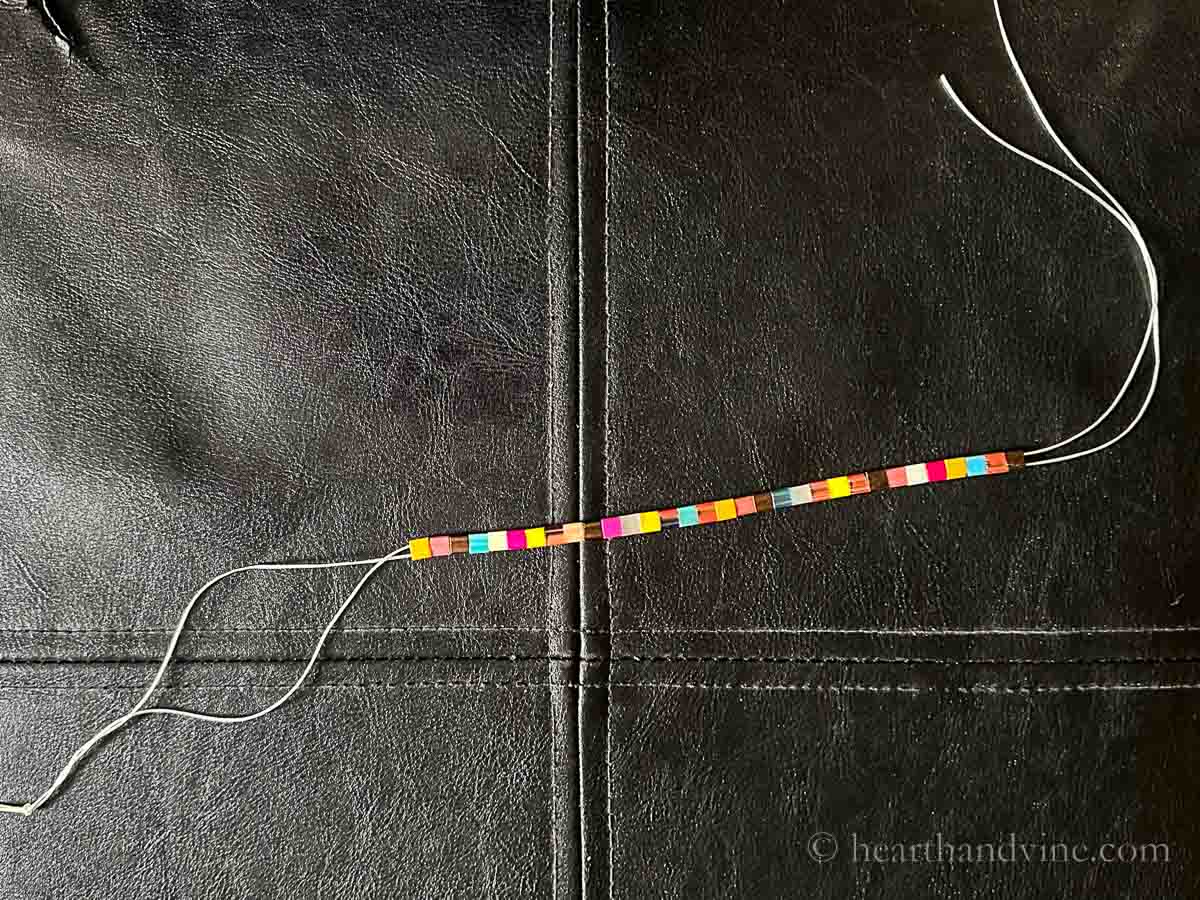
    Next, move all the beads to the center of the strings. (see image above)

    Tila bead stretchy bracelet end knot.

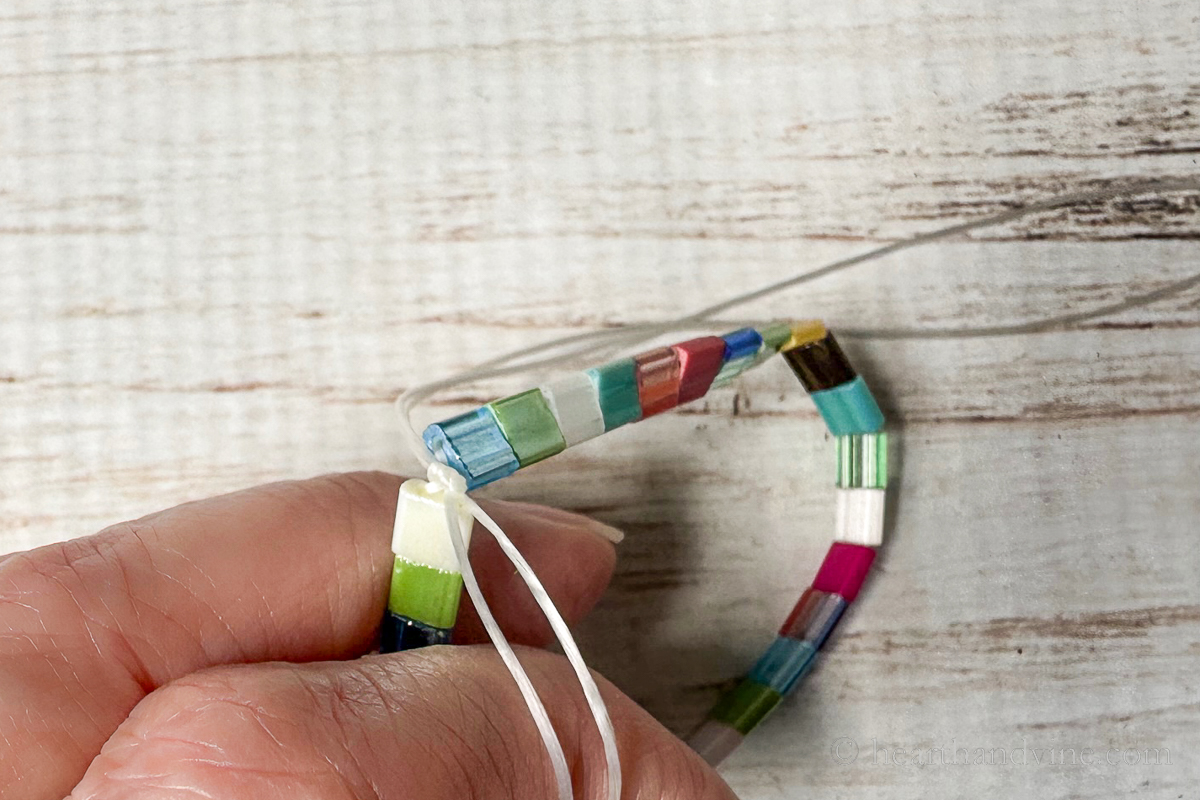
    Tie the cords together in a double or triple square knot as tight as you can. I also tried a surgeon's knot but it didn't seem to hold any better.

    Clear nail polish placed on the knot of the stretchy bracelet cording.

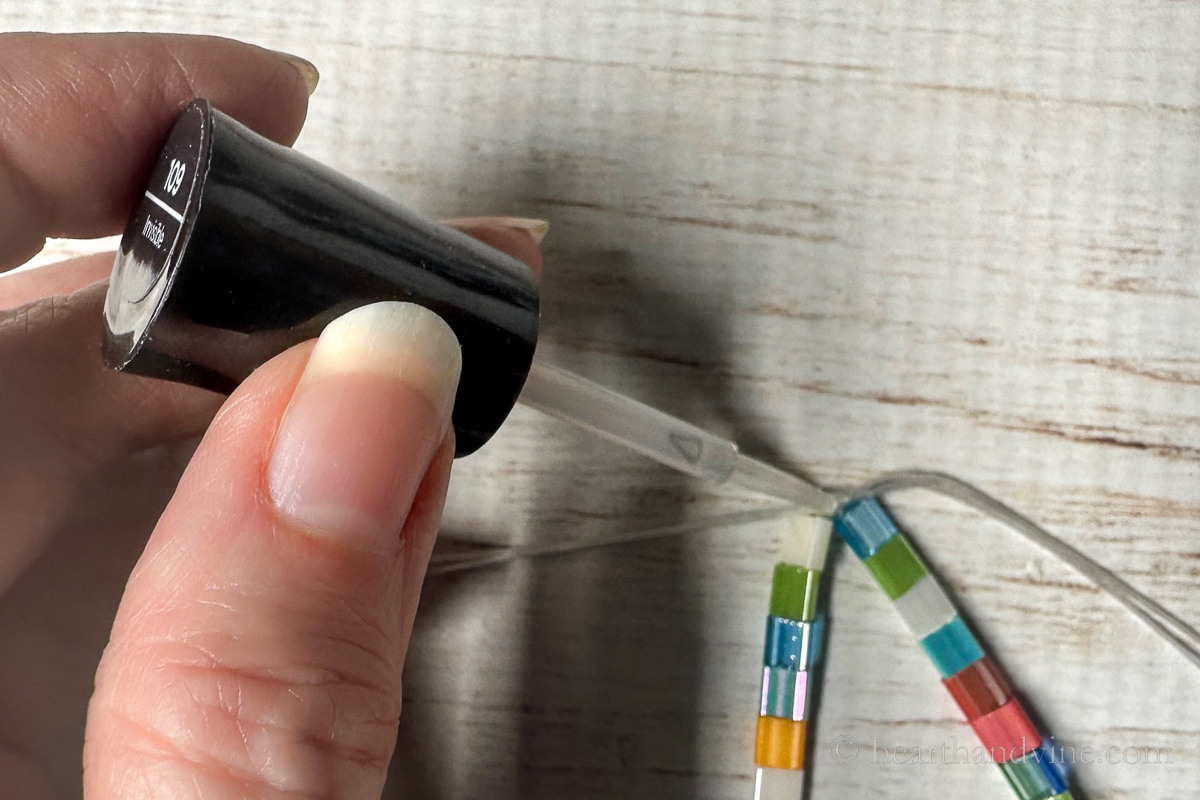
    Then dab on some clear nail polish or super glue to hold the knot in place and make it more durable.

    Once the polish or glue has dried, cut off any excess thread.

    A wrist with three tila bead stretchy bracelets next to several additional beads and a box of more tila beads.

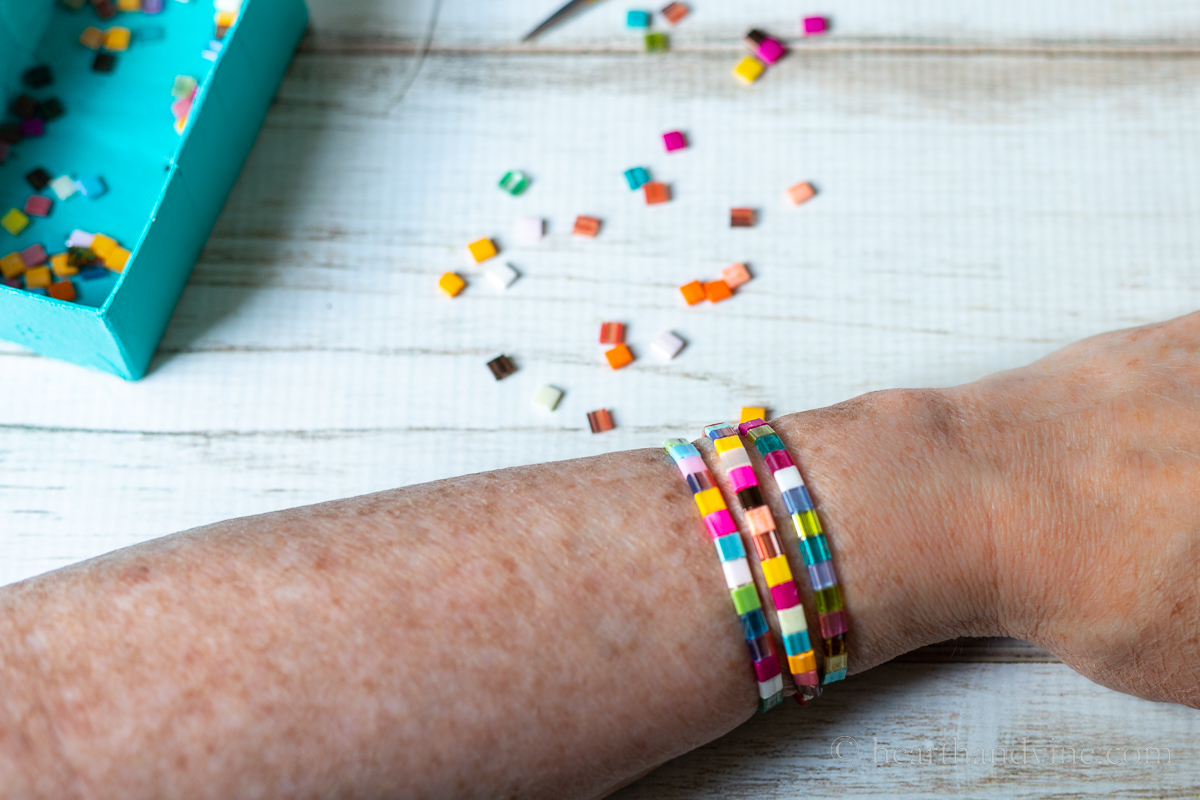
    Try on the bracelet(s) and enjoy. Wouldn't these make a great gift?

    Patti signature

    More Bead Ideas

    • Healing Stone Bracelets
    • Easy Beaded Coasters
    • Wooden Bead Diffuser
    Three tila bead stretchy bracelets on a wrist next to several additional beads and a box tila beads.
    Three bracelets on a wrist with tila beads.
    Print

    Tila Bead Bracelet Tutorial

    Learn how to make a stretchy bracelet or two or three with beautiful tila beads.
    Active Time45 minutes mins
    Total Time45 minutes mins

    Equipment

    • small scissors

    Materials

    • tila beads with .8 mm holes
    • elastic string .8 mm
    • clear nail polish or super glue

    Instructions

    • Cut two 15 inch pieces of the elastic string.
    • Tie a knot on one end with both pieces
    • Add a drop of clear nail polish to the knot to secure it.
    • Start threading on the tila beads in any order you like
    • When you reach the 25th bead check the bracelet on your wrist and add as many more beads that you need to cover your wrist. Mine ended up around 30-31 beads.
    • Next, move all the beads into the center of the strings leaving plenty of room to tie them together.
    • Tie the cording into a double knot as tight as possible.
    • Dab on some clear nail polish to secure the knot.
    • Once the polish or glue has dried slide your new bracelet onto your wrist and start a new one.

    Notes

    I used clear nail polish to my knots but you could use super glue or jewelry glue if that's what you have on hand.
    You can make a multi-colored bracelet or one with all the tiles in the same color.
    Stretch Magic is a popular elastic thread or stretch floss that you can get at many craft stores. I just used a standard elastic string from Amazon.
    Tried this project?Tag @hearthnvine on Instagram
    « Kalanchoe fedtschenkoi - A Beautiful and Easy Houseplant
    Burrata Caprese Salad or Party Appetizer »

    About Patti Estep

    Patti is the creator of Hearth and Vine, a home and garden blog filled with projects to inspire your creative side. She loves crafting, gardening, decorating and entertaining at her home in Pennsylvania. When she is not working on a project at home or searching for treasures at nurseries and thrift stores with her girlfriends, you’ll probably find her with family and friends, at a restaurant, or home party enjoying new and different food adventures.

    Reader Interactions

    Leave a Reply Cancel reply

    Your email address will not be published. Required fields are marked *

    Recipe Rating


    Primary Sidebar

    A wrist with three tila bracelets over a box of tila beads and stretch cording with several beads strung on it.
    Patti Estep Profile Picture

    Hi!

    I'm Patti

    Join me to create lots of fun DIY projects, including crafts, gardening, home decor, and tasty recipes

    More about me

    Popular Posts

    • Baked zucchini bite on a slated tray with a bowl of horseradish sauce.
      Make Tasty Zucchini Bites in Under an Hour
    • Three tin cans in descending sizes hanging from twine.
      DIY Wind Chimes with Tin Cans
    • Blue jean crossover bag
      DIY Crossbody Bag from Jeans
    • Ham barbecue sandwich on plate
      Chipped Ham Barbecue Sandwiches - A Pittsburgh Favorite
    • Echievera planter
      What to do With a Stretched Succulent
    • Make a Mason Jar Oil Candle Lamp with botanicals and essential oils. ~ gardenmatter.com
      DIY Oil Candle - Gifts for the Holidays

    Footer

    A wrist with three tila bracelets over a box of tila beads and stretch cording with several beads strung on it.

    ^ back to top

    About
    Contact
    Privacy Policy
    Disclosure Policy

    Sign Up Here!
    for our
    newsletter &
    special offers

    Follow Me

    facebook
    Pinterest
    instagram

    As an Amazon Associate, I earn from qualifying purchases. i.e. as an Amazon Associate, I earn from qualifying purchases.

    Copyright © 2025 Hearth and Vine

    Rate This Recipe

    Your vote:


    A rating is required
    A name is required
    An email is required