

Learn how to turn a wooden round into a beautiful serving tray with this basic acrylic pour art technique.
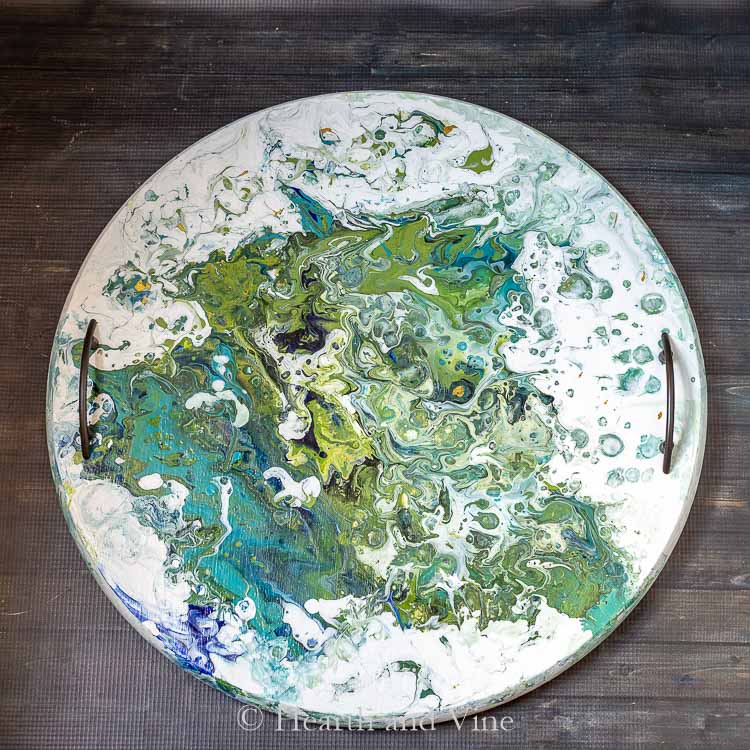
If you haven't tried this fluid art called acrylic pour painting yet, you are in for a treat. It's so fun! I tried it on this round wood piece and added a couple of handles to make a beautiful abstract art serving tray.
Perhaps some of you have seen this technique on Pinterest or Instagram. I have been admiring it for a while and had to try it. There are many, many posts and video "how-tos" about this subject. This post just touches on some of the basics from my experience.
This post contains some affiliate links (that means if you make a purchase after clicking a link, there's no additional cost to you, but I will earn a very small commission.) Click here to read my full disclosure policy.
Similar Art Techniques to Try
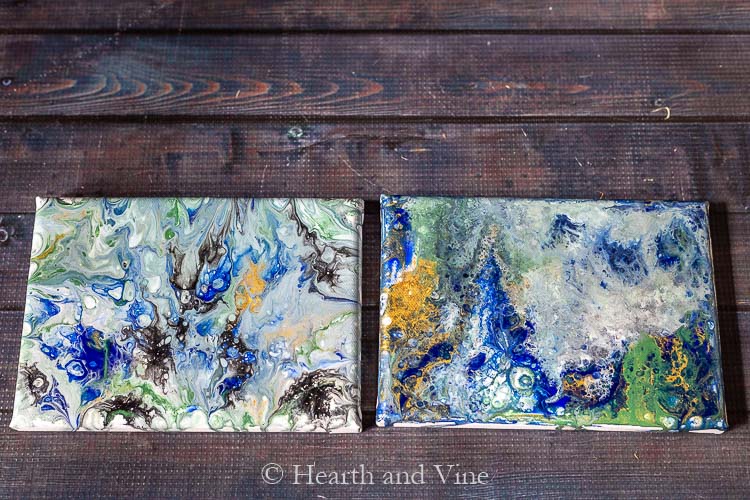
Before attempting the "dirty pour" on the wood, I experimented on a couple of canvases to get the feel for the process. Even though I used the same paint colors, they both turned out completely different.
What's a Dirty Pour?
A dirty pour technique is what some refer to as the process of combining several different paints into one cup on top of each other to pour onto the canvas. This is pretty easy and good for beginners. However, there are many different acrylic paint pouring techniques. For example, some use water with the paints and use air from a hair dryer to move the paint around, called a Dutch Pour.
Supplies for Acrylic Pour Art Tray
- Large wooden round
- 2 Handles (mine were leftover from our kitchen update)
- Primer - gloss white
- Acrylic craft paints - any brand will do
- Triart Liquid Glass Pouring Medium
- Silicone lubricant
- Pipette or eye dropper
- Plastic/paper cups (small for individual paints and one larger for the dirty pour)
- Stirring sticks
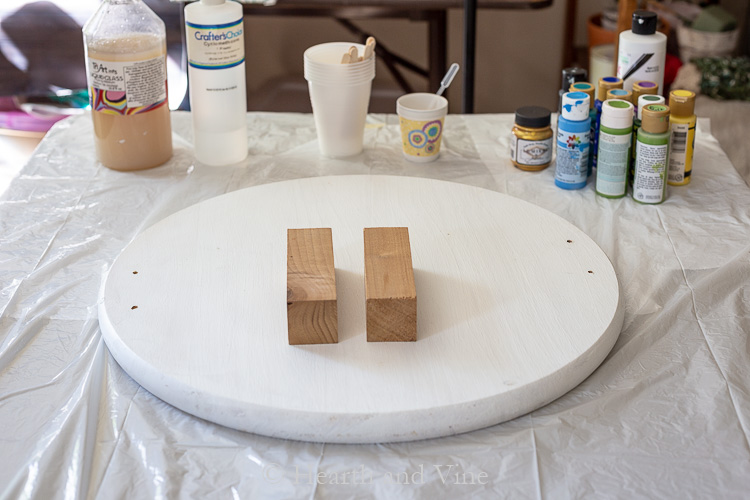
Most of the time, you will see this art technique on prepared canvases, so I thought I'd better prime the wood first to make sure it had a nice slick surface.
Be the first to receive new posts and get access to our Subscribers Only Page.
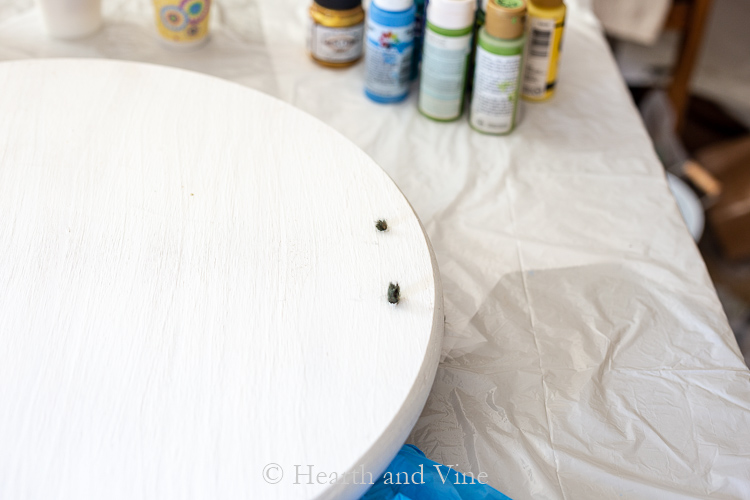
I also drilled my holes for the handles ahead of time, but in hindsight, it may have been better to wait until later. Some pieces of yarn were placed through the holes where the handles will go, to keep the paint from filling in.
Creating a Serving Tray with Acrylic Pour Painting
This is a very messy project. Be sure to work on a protected surface and perhaps cover the floor. (I used garbage bags.) Also, you will definitely want to wear gloves.
Start by spraying the wood with a layer of white gloss spray paint.
Once dry, lift the wood up off the table by placing blocks, jars, or anything you have underneath.
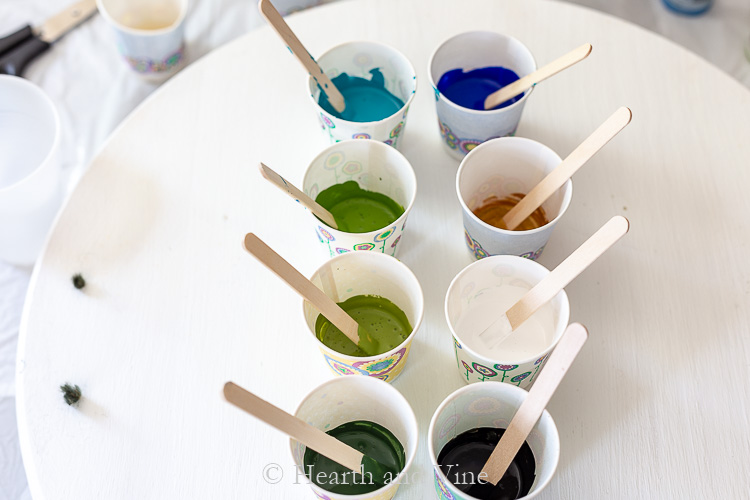
Here are the paint colors I decided to use. The choice is totally up to you.
Start by pouring some craft paint into your cups. Some may be thicker than others. Add the pouring medium. For me, most required a 50/50 ratio, but if your craft paint is very thin, you may want to add less pouring medium, or you may end up adding more craft paint if the result is thin. The same goes for thick paint. Ultimately, you are looking for a consistency of paint that pours off the stick like warm honey. Not too fast and not in gloppy drips.
Next, add a few drops of silicone. This helps the paint repel each other and create those interesting cells within the acrylic pour.
Stir well.
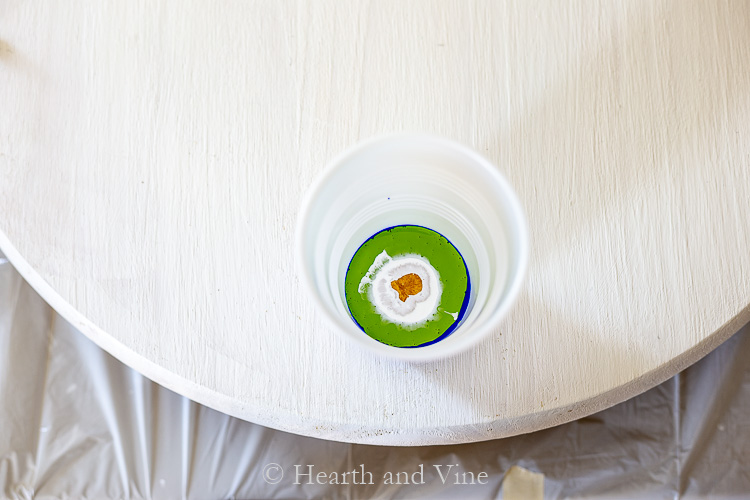
Now you are ready for your dirty pour. Start pouring your prepared paints into one larger cup, one on top of the other. Again, this is a matter of choice. You can pour each one completely or just a small amount. I ended up using some of each and kept some for a second pour.
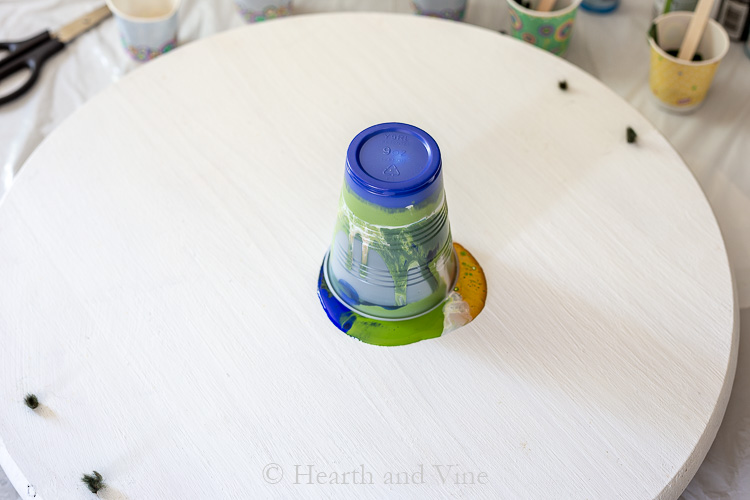
Next, use one hand to hold the tray as you flip the cup upside down.
Then slowly lift the cup up, allowing the paint to pour onto the surface.
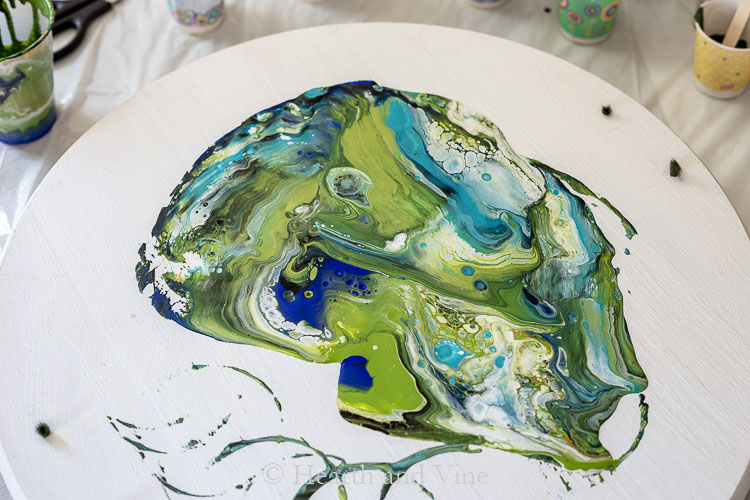
Now you can tip the tray back and forth, allowing the paint to run over the wood to cover.

Add a second pour if needed. The teal color on the right came from a second pour. Then I ended up using white on the outer edges to give the piece some white space, which I really liked.
After that, it was a free-for-all where I dripped a little here and there of the leftover paint to create this beauty.
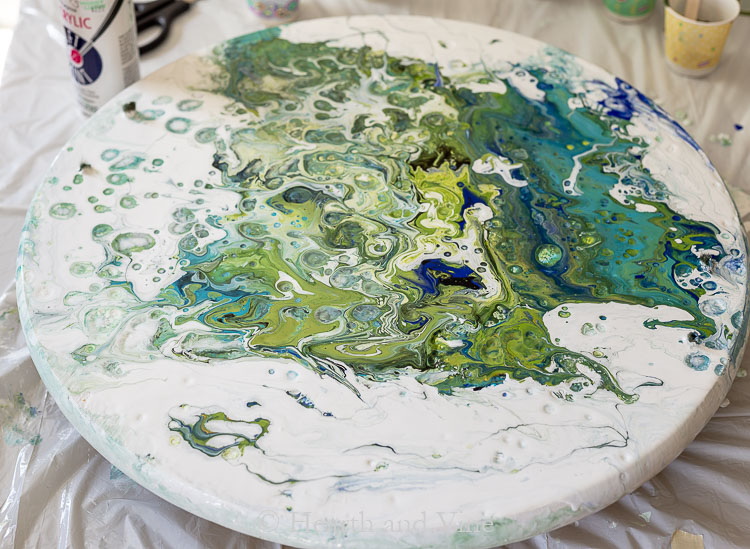
Make sure to cover the edges and use your fingers to dab off the extra and dab on the empty spots.
Acrylic Pour Painting Issues:
- You have to be a little free with this technique and see where it takes you. Not always easy for us control freaks.
- You need to know when to stop. It's easy to get carried away adding more and more. But, sometimes more is just more and doesn't add value.
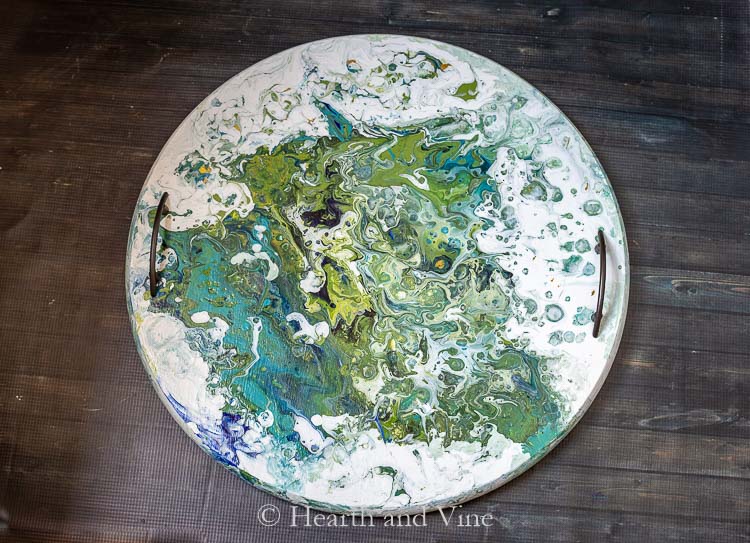
After the tray has totally dried (24 - 48 hours), use a couple of coats of your favorite polyurethane to protect the tray and enjoy.


Acrylic Pour Art Tray
Equipment
- Disposable cup small and a couple larger ones
- Stirrers
- Disposable Gloves
- Paintbrush
Materials
- 1 Wooden Round
- 2 Handles
- White Gloss Primer
- Variety of Acrylic Paints
- Triart Liquid Glass Pouring Medium
- Silicone lubricant
- Brush on polyurethane
Instructions
- Cover your work area with plastic and consider covering the floor too, as this is a messy project. Wear disposable gloves.
- Spray paint the wood with a white gloss to use as a base.
- Raise the wood on a couple of blocks or anything to have the paint drip off.
- Pour some craft paints into small cups about 1/3 of the way full.
- Add some pouring medium in the same amount so you have a 50/50 mix.
- Add a few drops of the silicone. This is what makes the magic happen by repelling the others and creating interesting patterns.
- Stir each cup well.
- Next, make a dirty pour by combining the small cups into a larger cup.
- Next, use one hand to hold the tray as you flip the cup upside down.
- Then slowly lift the cup up, allowing the paint to pour onto the surface.
- Move the tray around, tipping it back and forth, allowing the paint to run over the wood covering as much as you can or want.
- Add a second pour if desired.
- Also, consider using white on the outer edges to give your piece some white space.
- Use any leftover paint from the cups to add color here or there and cover the edges if needed.
- Allow the tray to dry for a day or two.
- Once completely dry, give it 1-2 coats of polyurethane.
- Screw in drawer pulls for handles.

Vicki Jackimiec
I just did my first dirty pour on a round wooden disk and it was so much fun. However I did read that removing silicone residue before doing the resin is recommended. Is that true on wood because I’m not seeing the oily areas described on canvases?
Patti Estep
Vicki, I can only speak to my experience. After my piece was dry I applied a couple of coats of polyurethane to protect it and have had no problems with the finish.
Carole West
This is so cool and I already pinned to my workshop board. Love this and the color combination is perfect. I'm honestly speechless this is my new favorite from Hearth and Vine.
Patti Estep
Thanks Carole. It was so easy and fun to do. A bit messy though. 🙂