

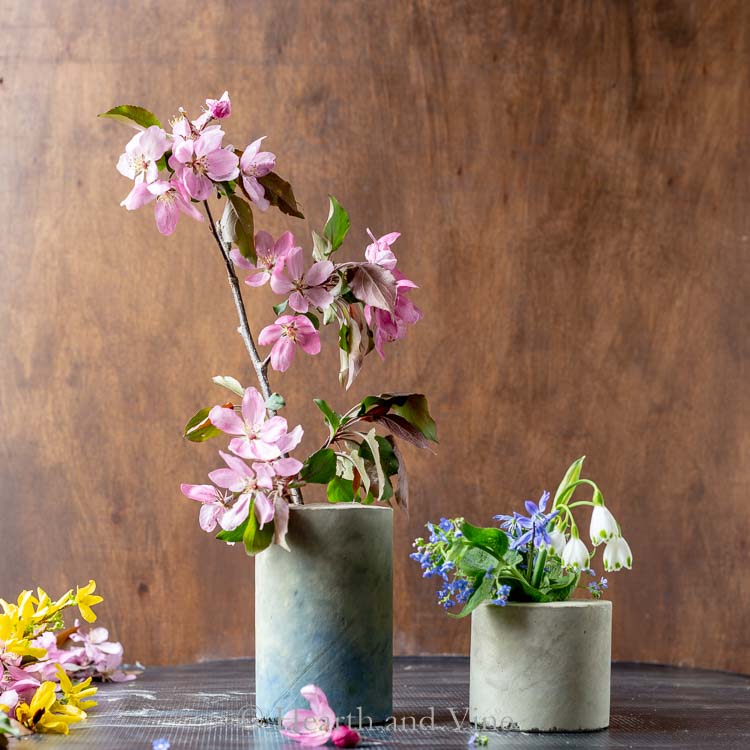
Learn how easy it is to make simple DIY concrete vases with cement and ordinary materials you may already have around the house.
Sections At A Glance
This post contains some affiliate links (that means if you make a purchase after clicking a link, there's no additional cost to you, but I will earn a very small commission. ) i.e. as an Amazon Associate, I earn from qualifying purchases. Click here to read my full disclosure policy.
Supplies
- Cement
- Bowl for mixing cement
- Disposable spoons for mixing
- Outer containers
- Inner containers
- Vegetable oil
- Tape
- Sandpaper
- Pigment dye (optional)
- Safety Gear while working with cement (gloves, eyewear, mask)
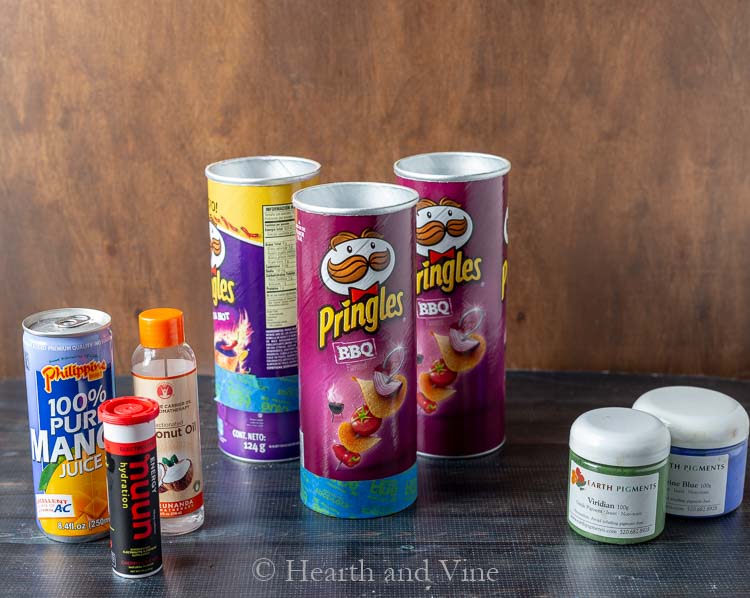
These concrete vases are fun to make and cost very little. Besides the concrete, (actually cement), you need to search the house or store for containers to use as molds.
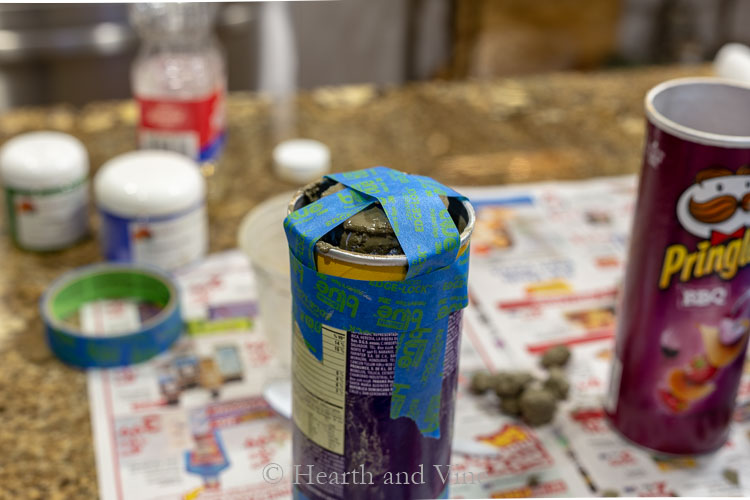
Outer Containers: Those that can be torn away such as paper coated milk cartons. In this case, I bought some Pringles from the dollar store. The inside has a nice slick surface which is what you want to look for and I knew that these would be easy to cut away to release the final product.
Inner Containers: You'll also need to find something to fit inside your container. It also helps if they are plastic and/or have a slick surface. I ended up trying three different sizes to make three different vases. A small can of juice, a hydration tablet container, and a small plastic bottle of coconut oil.
And if you like you can add some natural pigment powder for color but that's optional.
How to Make Concrete Vases
Safety Note: Even though this project is simple, it is super messy and somewhat dangerous. You need to wear a mask when working with cement and water and always wear gloves. I used Quikcrete Portland Cement. Here's more information on their safety data sheet.
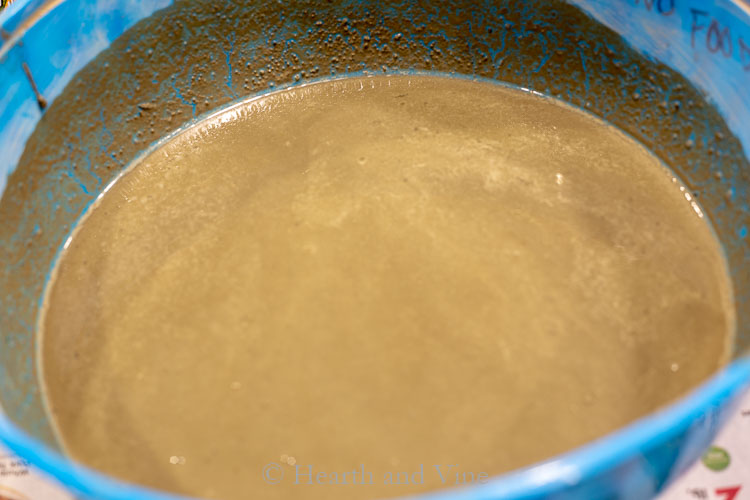
Step 1. Mix cement and water in a plastic bowl until it has a pudding-like consistency. You can make it a little thicker which will help with drying time but might be harder to pour.
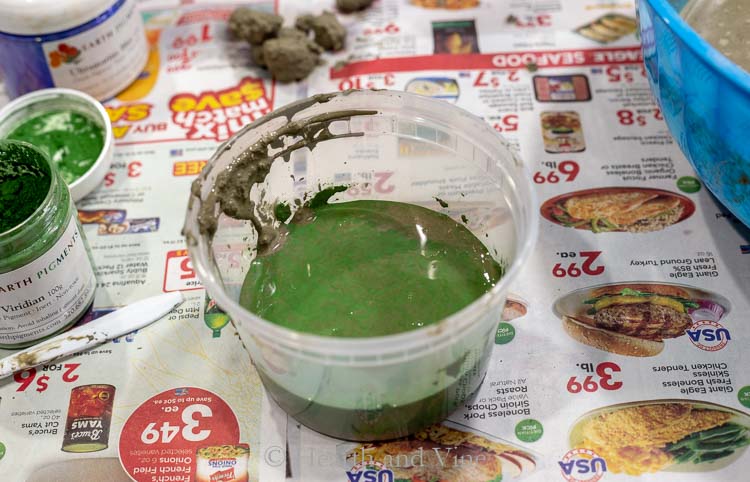
Step 2. Pigments(Optional) If you'd like you can pour some of the cement mixture into a separate container and add some natural pigment powder for color. I had plenty left from my Paint Pigment Pot Project so I tried a little green and then blue pigment. The pigments I used were purchased from Earth Pigments, but you can also buy Mica Powders that are similar online.
Step 3. Start by pouring some of the concrete mix into the bottom of the outer container.
Step 4. Rub a little bit of or spray oil over the inner container and then place it inside the larger container. You may want to fill it with water to give it some weight.
Step 5. Then pour the cement around the inner container. Use tape or something heavy like a rock, to keep the inner container in place.
Step 6. Tap the container lightly on the table to remove any air bubbles.
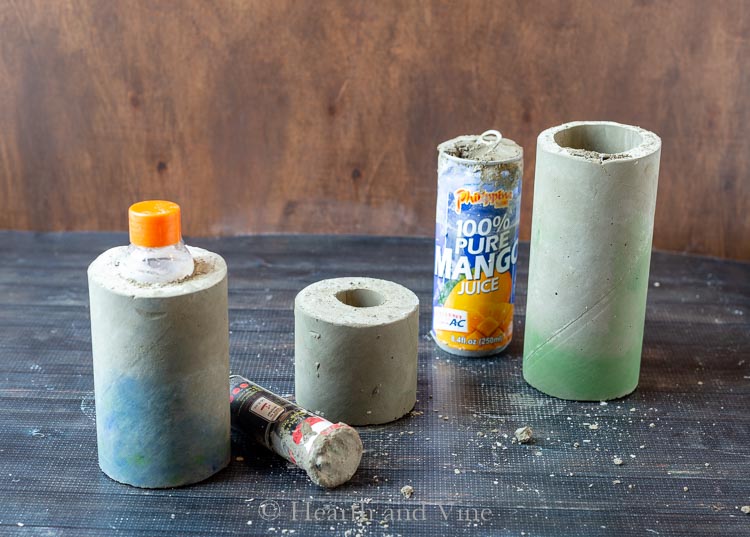
Step 7. After 48 hours the concrete should be pretty dry. You can remove the weights or tape and cut or tear away the outer container.
Step 8. Then gently twist out the inner container.
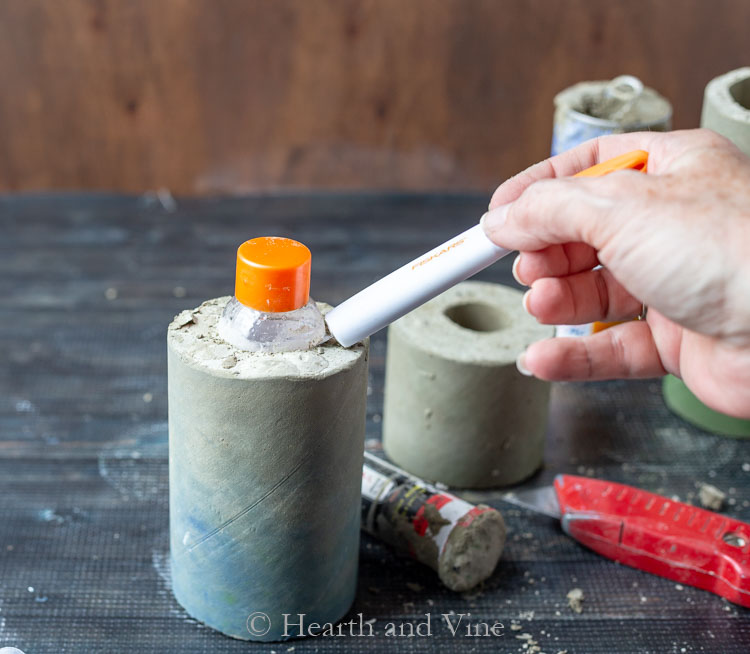
For some reason the coconut bottle would not come out for me, so I used an exacto knife to cut away the top and left it inside.
Step 9. The cement should still be a little soft at this point allowing you to sand and carve out any rough spots.
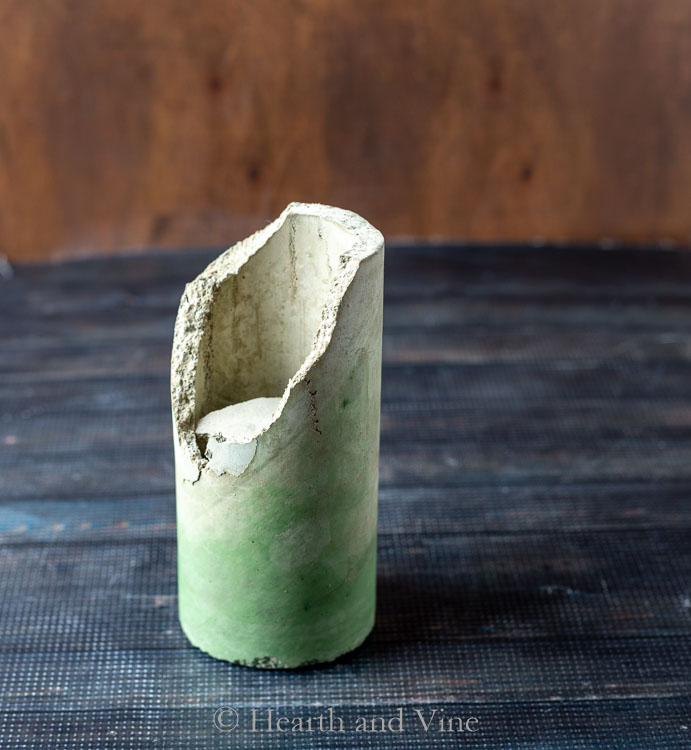
Depending on the humidity the concrete may be too soft and you may end up breaking it like the one above. If it seems like it's still pretty wet you are better off waiting another day. Also, I wonder if the walls were a little too thin on this vase.
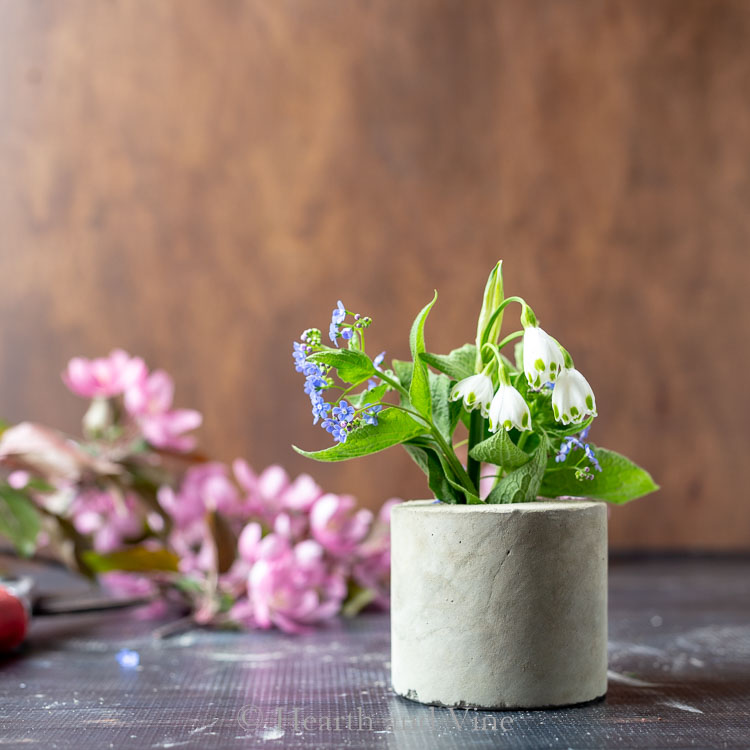
Overall I'm pretty happy with the way they turned out.
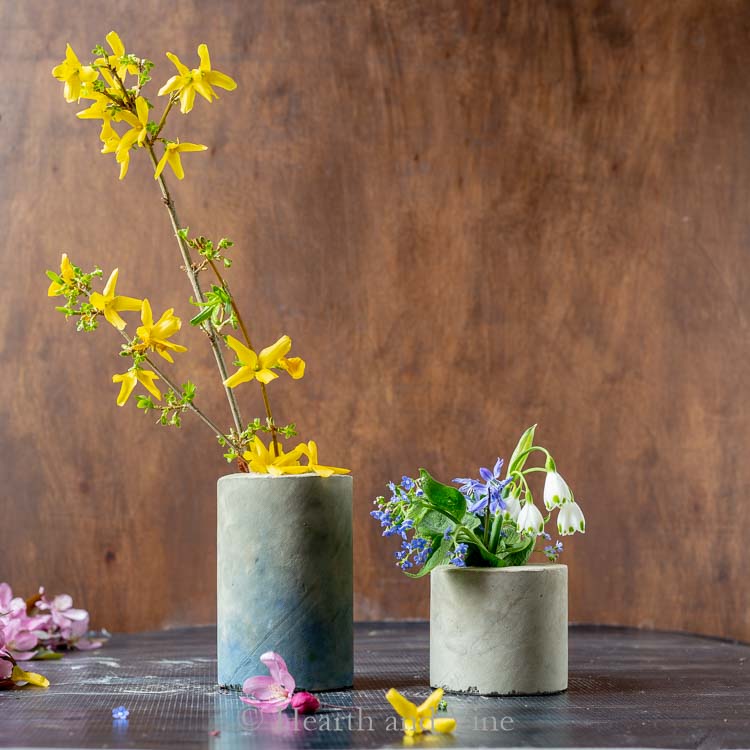
I really love the way the pigment looks on these concrete vases. I also left the seam from the chip can as a graphic element. However, it would be fine to sand or carve away all the ridges if you want the end result smoother.
As with many projects, the biggest issue (outside of the mess) was being patient. Something I'm always working on.

More Concrete/Cement Look Projects
DIY Concrete Vases with Ordinary Materials
Materials
- Plastic Bowl for mixing cement
- Disposable Spoons for mixing
- Safety gear (gloves, mask, eyewear) working with cement
- Quikrete or other quick curing concrete
- Outer containers for the size of the vase milk cartons, pringle containers
- Inner containers to fill the space inside the outer container small plastic bottles or tubes
- Vegetable oil or cooking spray
- Tape to hold the containers together
- Sandpaper
- Pigment dyes Optional
Instructions
- Put on safety gear and mix the cement with water in a plastic bowl until it has a pudding like consistency.
- If you want to color the concrete add some pigment powder and stir well. Or add some pigment to just some of the concrete in a separate plastic bowl.
- Pour a little of the cement into the bottom of the outer container.
- Rub some vegetable oil or cooking spray on the outside of the inner container.
- Place the inner container into the poured cement and gently pour more cement around the inner container.
- Use tape to tape the inner container flush with the top of the outer container.
- Wait 48 hours or more and gently peel away the outer container.
- Then twist out the inner container.
- Use sandpaper to smooth out any rough edges or unwanted marks.
Notes

Jo-Anne Lemaire
Hi, Patti. I see by past comments that this post originated many years ago. But since I only just saw it in your newsletter, I hope you can help me with a couple of questions.
How long after these vases are dried did you put in water and your bouquets? Also, If I made larger containers to use outdoor, would there be any need to use a protective coating of some sort? Thank you for this great craft idea. Looking forward to your response. Please and thank you, Patti.
Patti Estep
Jo-Anne, yes it is an older post. After blogging for over 10 years I have started recycling and updating older posts along with posting some new ones. Regarding the concrete vases. If you want to make some for outdoors you may want to consider using a sealer to protect your work. I believe I started using them after a day once they were dry. There is always some concern with water as concrete is porous. However, I never had water in them for any long length of time. Of course, one of them had the plastic jar left inside so there was no concern and that may be a good way to go.
Denise
How do you come up with all these crazy cool ideas! This is really neat!
Patti Estep
Thanks Denise. It not new but something I've been wanting to try for a while.