
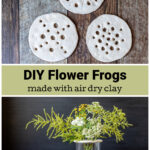
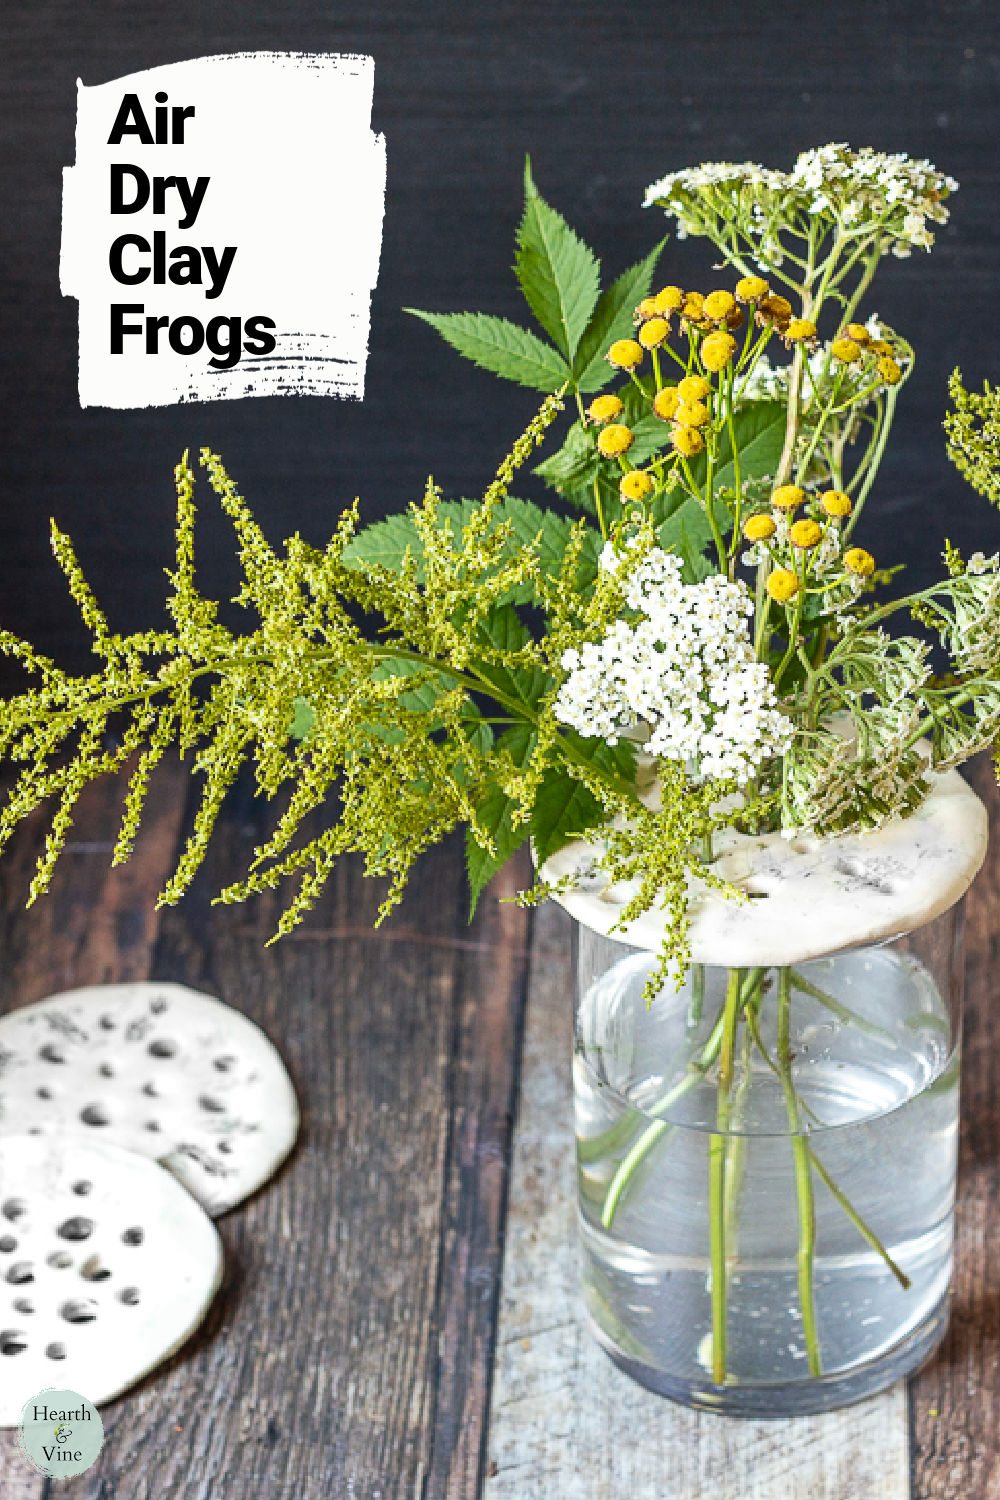
These DIY flower frogs created with air dry clay are pretty on their own and will make your flower arranging tasks a cinch.
Air dry clay is so easy to work with so when I saw this idea for ceramic pierced flower lids I had to try making some with air dry clay. They basically act as a flower frog to hold flowers upright in a vase. No need for chicken wire or floral foam. It's even easier than creating a grid with strips of tape.
What is a Flower Frog?
If you are a flower lover then you may already be familiar with flower frogs. They are items traditionally used by floral designers to hold flowers in place. Today they are more of a collector's item. You can sometimes find them at antique shops, vintage stores, flea markets, or thrift stores. See more about flower frogs including pictures of my friend's collection in my flower frog post.
This post contains some affiliate links (that means if you make a purchase after clicking a link, there’s no additional cost to you, but I will earn a very small commission. ) i.e. as an Amazon Associate, I earn from qualifying purchases. Click here to read my full disclosure policy.
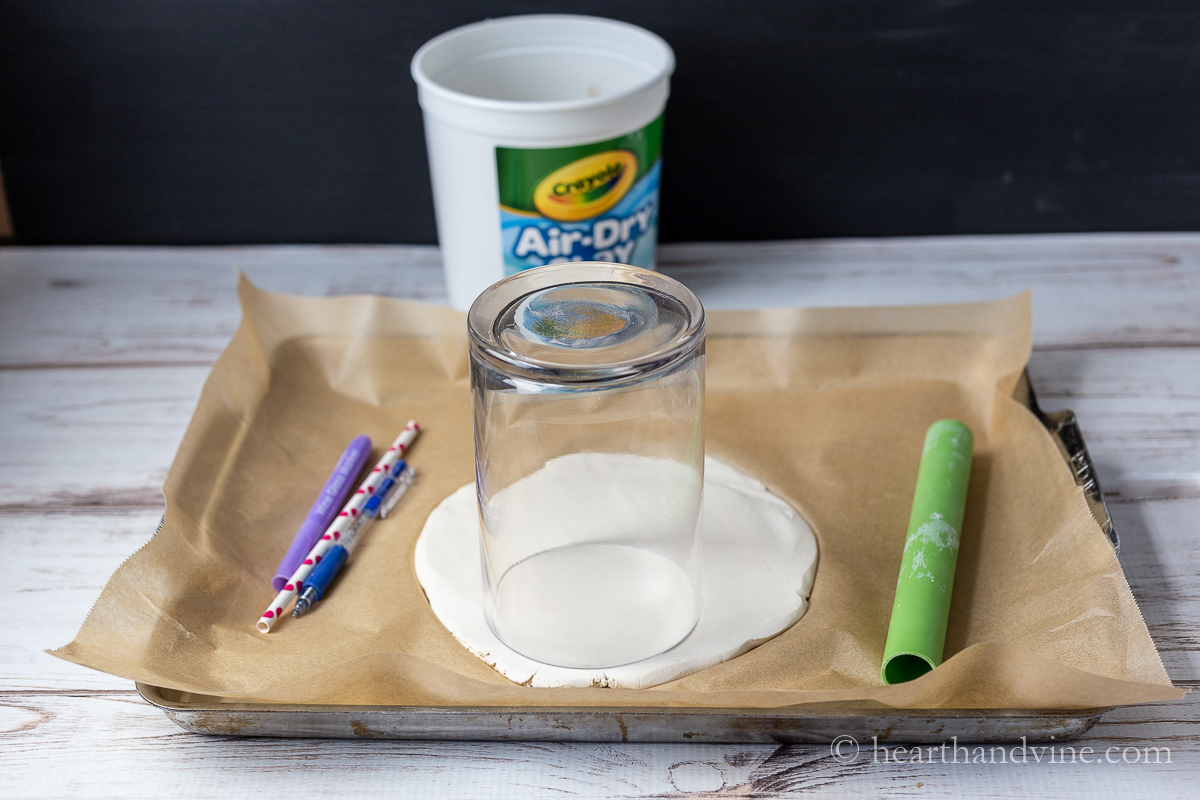
DIY Flower Frog Supplies
- Air Dry Clay
- Roller
- Various pen caps and a straw
- Craft knife
- Vase
- Herbs or leaves for pressing
Making Your Own Flower Frog from Clay
Instead of a typical flower frog that is set at the bottom of a container, these are set on top of the vase. I have a few cylindrical flower vases that work well for this purpose but any vase with a flat even top or even mason jars would work.
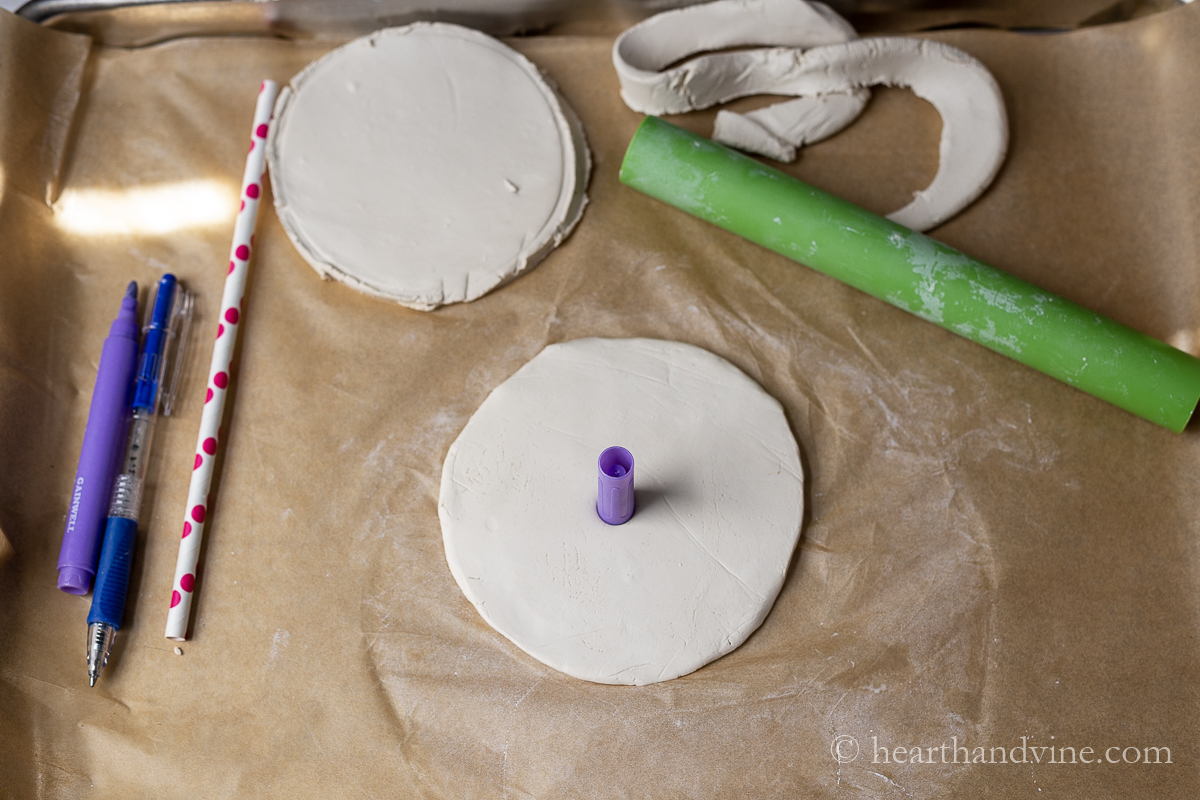
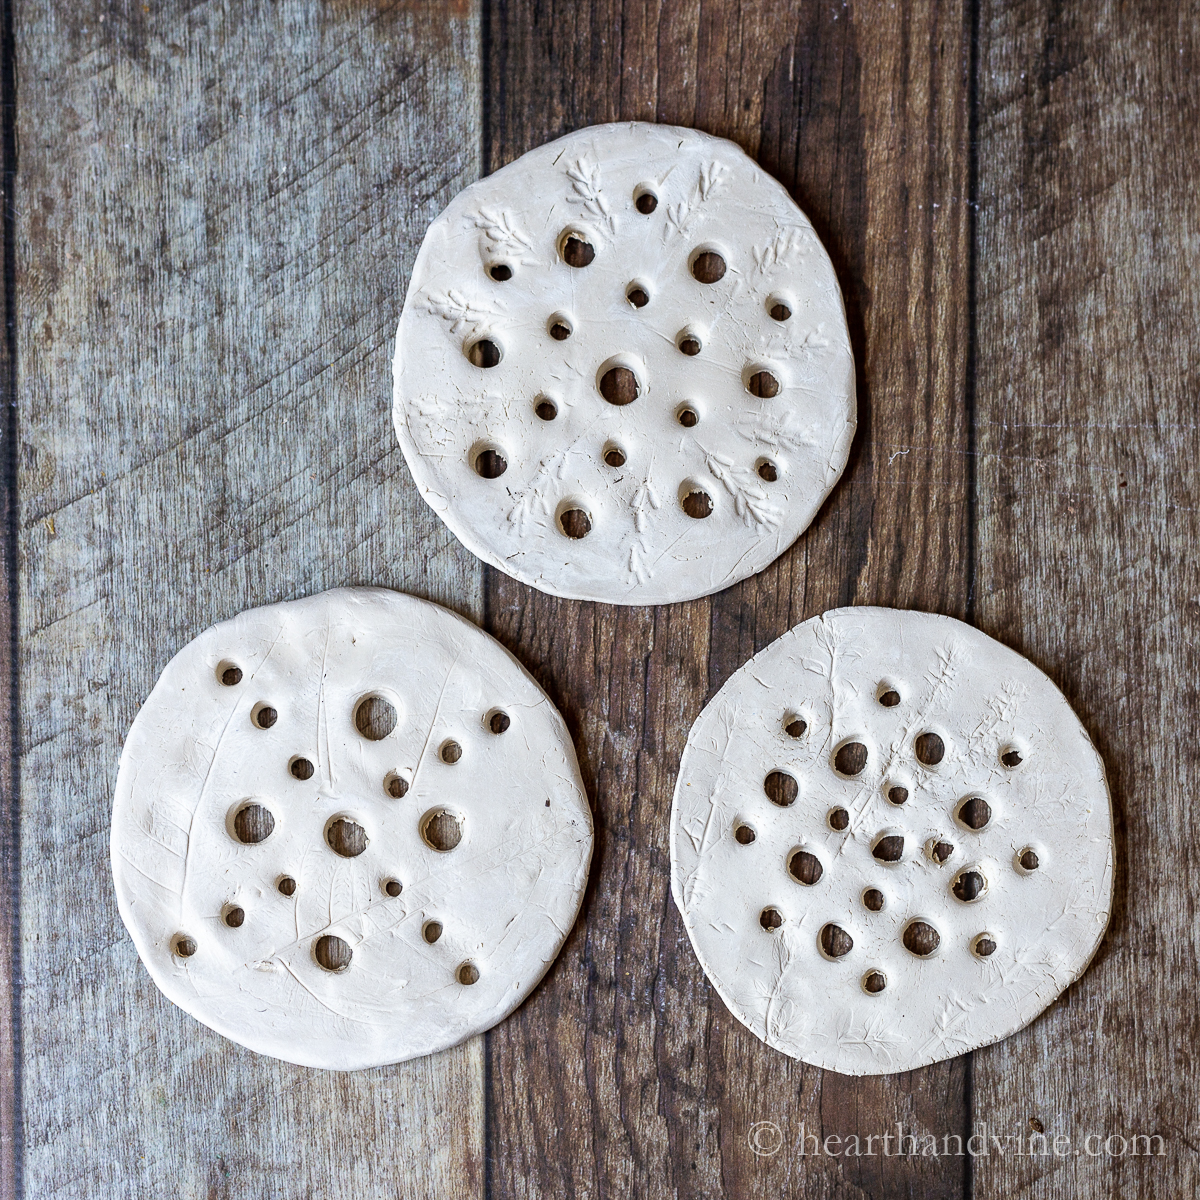
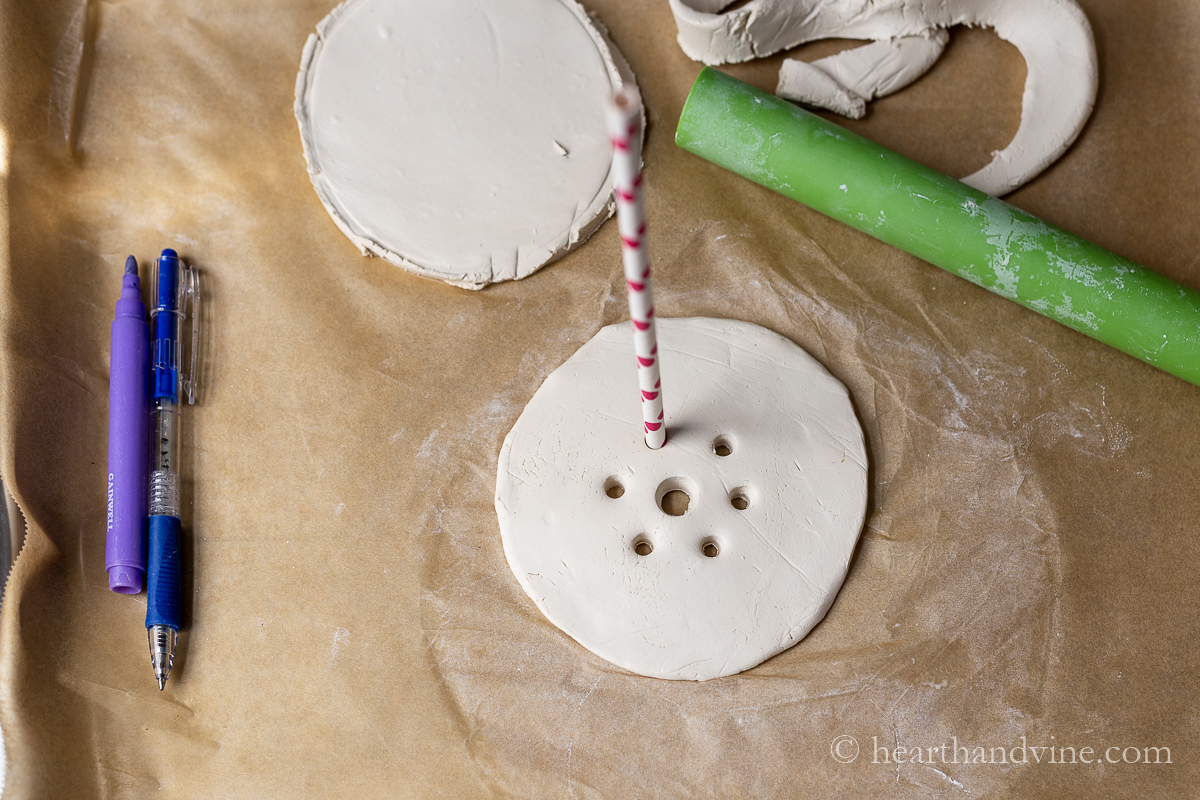
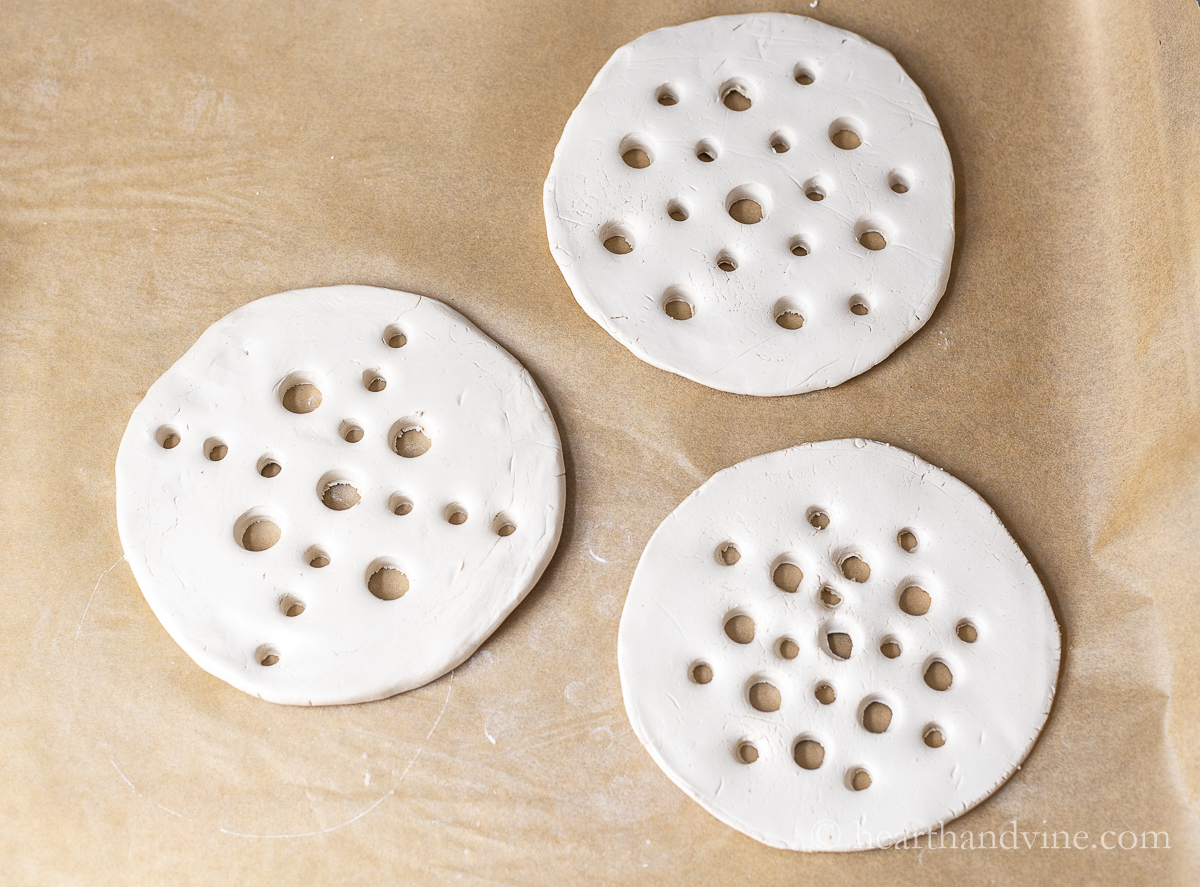
After cutting out your shape you use various ordinary objects to make holes in a pretty pattern through the clay. I used a marker, a pen cap, and a straw. Each is a little different in diameter but I don't see why you couldn't use the same size for each hole. Just make sure it's big enough for thick flower stems.
This idea, at least to my mind, is to make something pretty on its own. I'm sure that a potter or ceramicist would do a much better job. However, I thought they turned out pretty good.
Since this is air dry clay they need to be used indoors as significant amounts of water will ruin them.
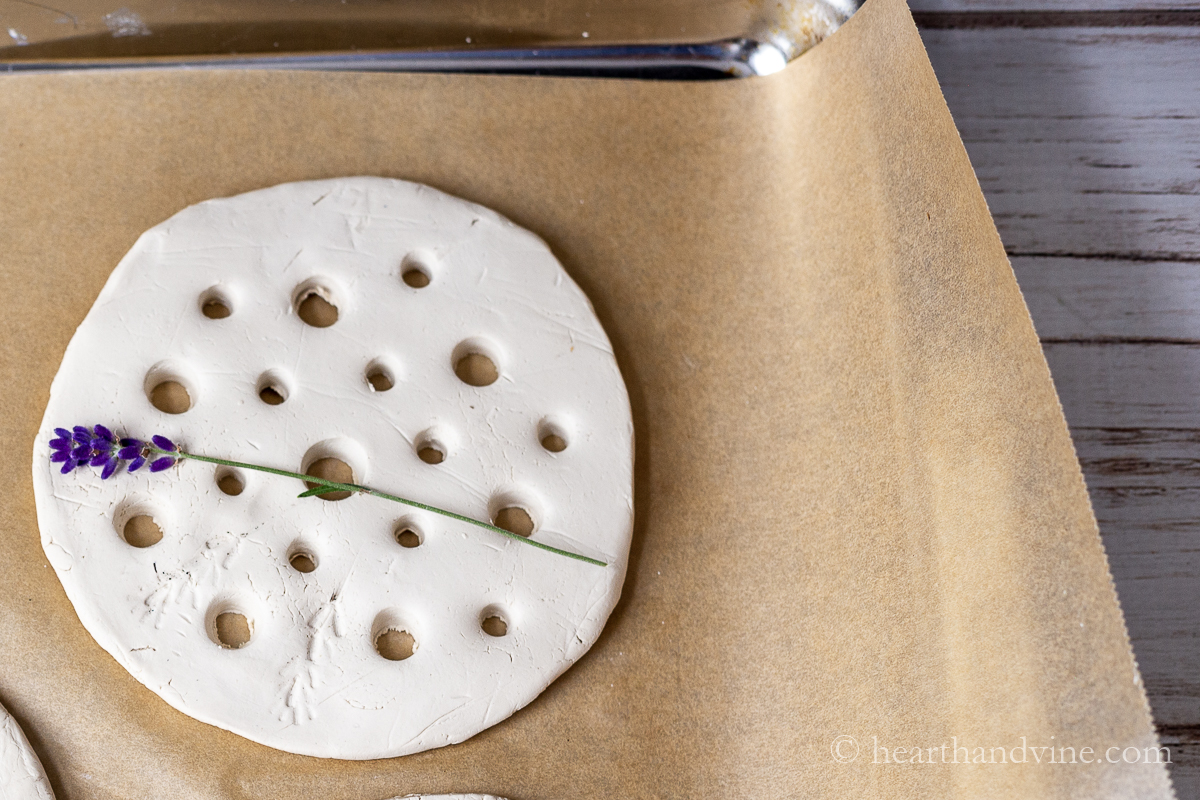
For a little extra bit of decoration, you could use flowers or leaves and press them into the clay before they dry.

I tried lavender, thyme leaves, and ferns. They look okay but I think they probably weren't needed.
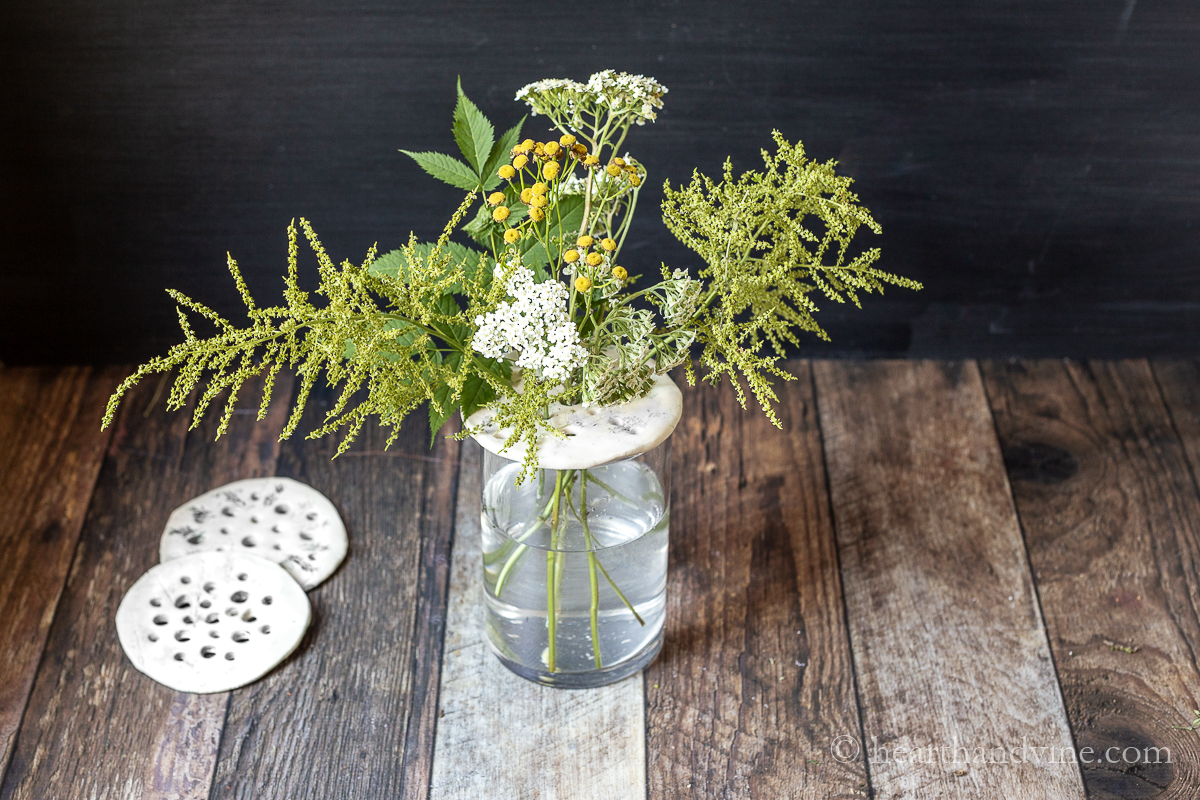
Here you can see that I left some of the floral frog showing. Just a few fresh cut flowers make a pretty arrangement.
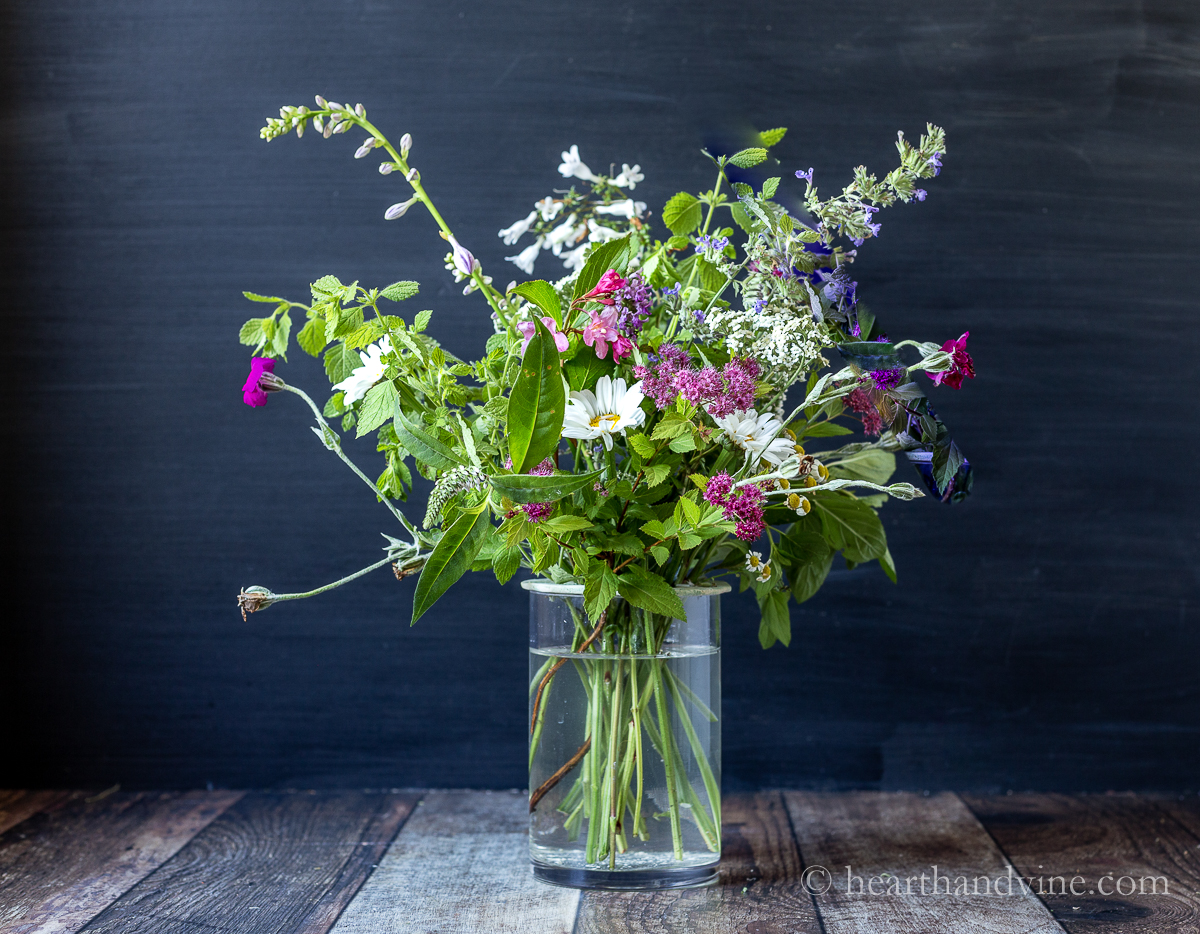
In this one, I placed many flowers and foliage, some with two or more stems of flowers in one hole. My flowers are from the garden but just think how easy bouquets from the grocery would be to arrange with these guys. Gorgeous, huh? It really makes creating beautiful floral arrangements so easy.

How to Make Clay Flower Frogs
Equipment
- Craft knife
- Roller
- Assorted pen caps
- Straw
Materials
- Air dry clay
- Vase
- Herbs optional
Instructions
- Roll out the air dry clay with a roller or the side of a bottle to about 1/4 inch thick.
- Draw a circle slightly larger than the vase you want to use.
- Remove the circle disc and start creating holes in a pattern you like with the pen caps and straw.
- Smooth out all edges with your fingers.
- Press some herbs into the clay for additional decoration if desired.
- Allow the clay to dry overnight.
- To use: Set the clay flower frog on top of your vase that's filled with water.
- Then start placing flower stems into the holes until you have a look that you like.
Notes
- You can make the holes all the same size. Just be sure to make some or all of them big enough to hold larger thick stems.
- You don't have to fill every hole in your arrangement.
- You can often fit more than one flower stem or greenery in each hole.
- Starting in the middle with taller flowers and heavier stems might make the arranging a little easier to create, but it's not absolutely necessary.
Anna Marie
Hey Patti thanks for the idea. Been digging an processing my own natural clay. I made one and fired it in fire pit. I was testing my clay. It turned out great. I placed my own assorted flowers with a mason jar.
Patti Estep
Wow. That sounds like so much fun. I bet they are beautiful!
Leah W.
Love this! Never knew I needed it until I saw it. I plan to try it using homemade playdough. It may take longer to air-dry but it’ll be natural material.
Patti Estep
That's a fun idea Leah. Thanks for sharing.
Sherry
Might be easier to press the pattern prior to poking the holes. I’ve been wanting to make in if these for years just haven’t done it yet. Would sealing it with polyurethane be prudent to protect from water?
Patti Estep
Sherry that's a good idea. Thanks for sharing. And, yes you could give it a few light coats of poly on each side to help with any water issues. Air-dry clay will break down in water.