

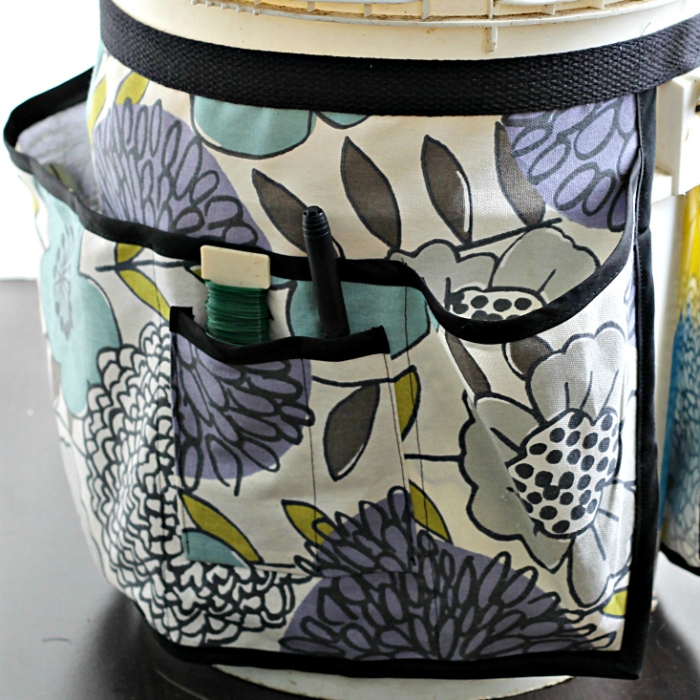
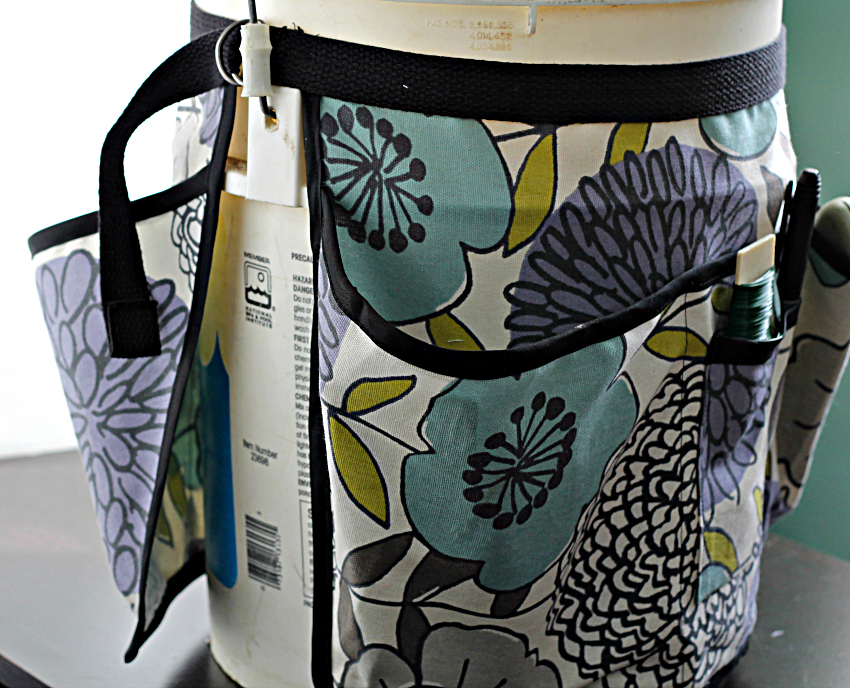
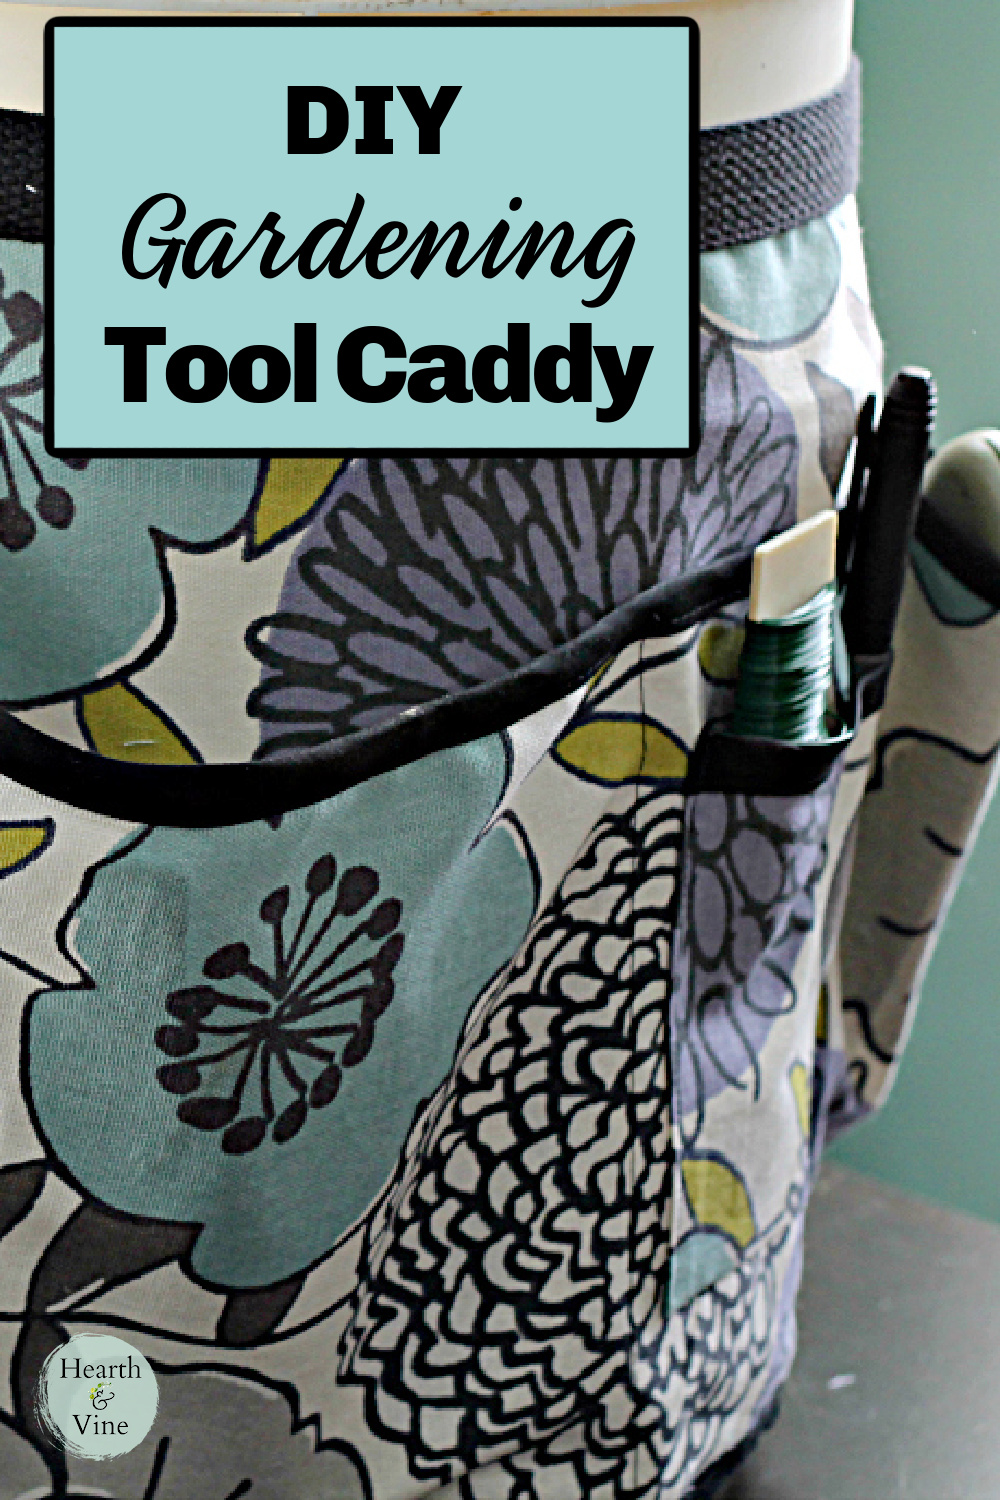
Learn how to make a garden tool belt that you can tie onto your waist or a large bucket to haul around the garden carrying your tools, seeds, and other gardening necessities.
When I garden I always carry around a bucket with a handle for weeds or extra soil depending on what I am doing.
Several years ago I made a garden bucket tool belt or apron, which is great for holding my pruners, twine, and other garden necessities. Today, I'm upgrading it with some of the beautiful duck cloth fabric from Hobby Lobby.
This post contains some affiliate links (that means if you make a purchase after clicking a link, there's no additional cost to you, but I will earn a very small commission. ) i.e. as an Amazon Associate, I earn from qualifying purchases. Click here to read my full disclosure policy.
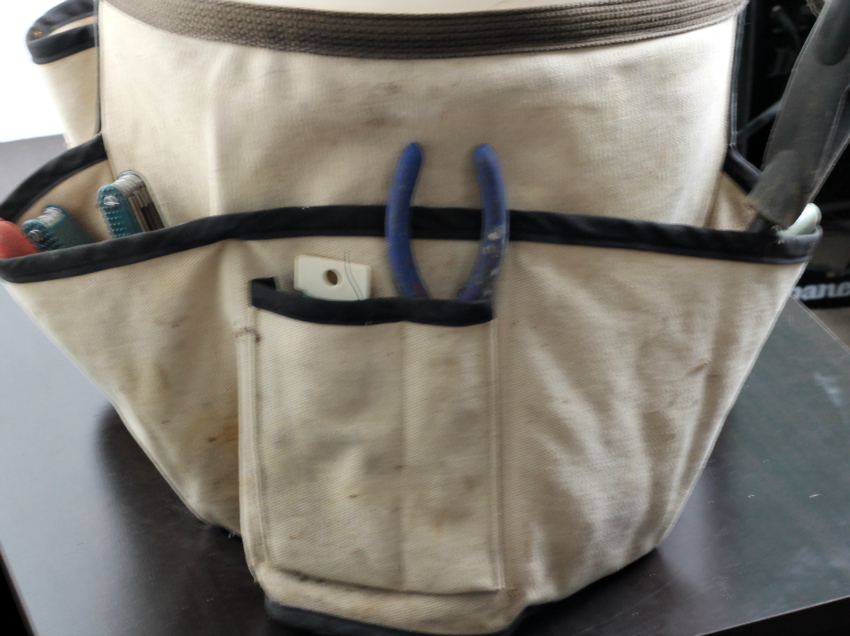
Here's what the original looked like. It's still pretty functional, but with all the pretty fabric on the market today I thought I'd treat myself to a new one and show you how it's made.
Sections at a Glance
Supplies
- 3/4-1 yd sturdy fabric (duck or heavy twill, denim)
- coordinating thread
- 1.25 yds - 1-inch cotton twill

- 4 yds -1/2 inch double fold bias tape
- 2 1 inch D rings


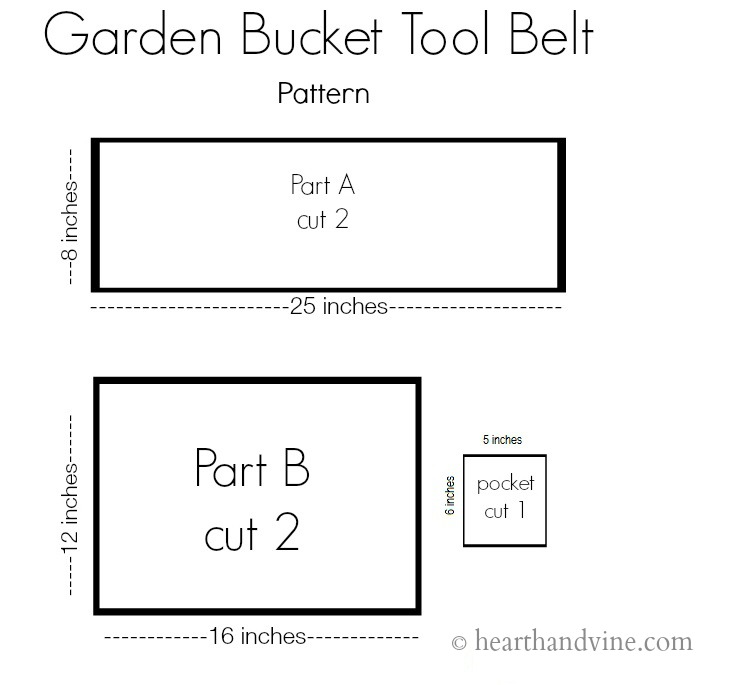
Garden Tool Belt Pattern
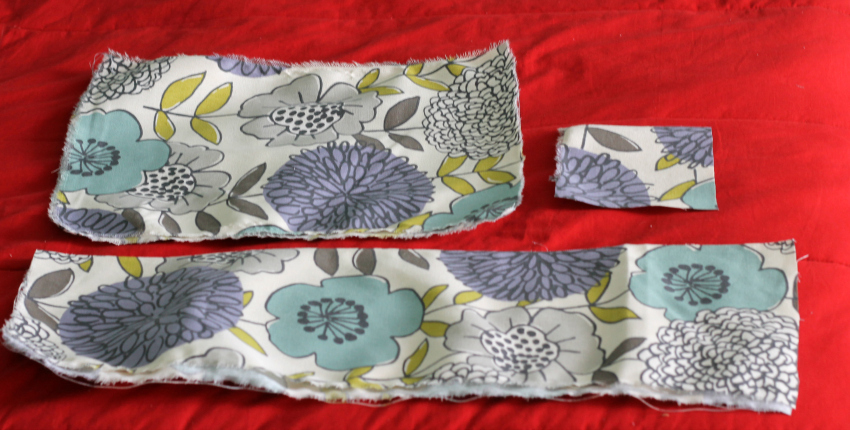
Cut the fabric according to the pattern shown below:
How to Make a Garden Toolbelt
Step 1. Sew the bias tape on the small pocket first.
Step 2. Press 1/4 inch of the sides and bottom of the pocket.
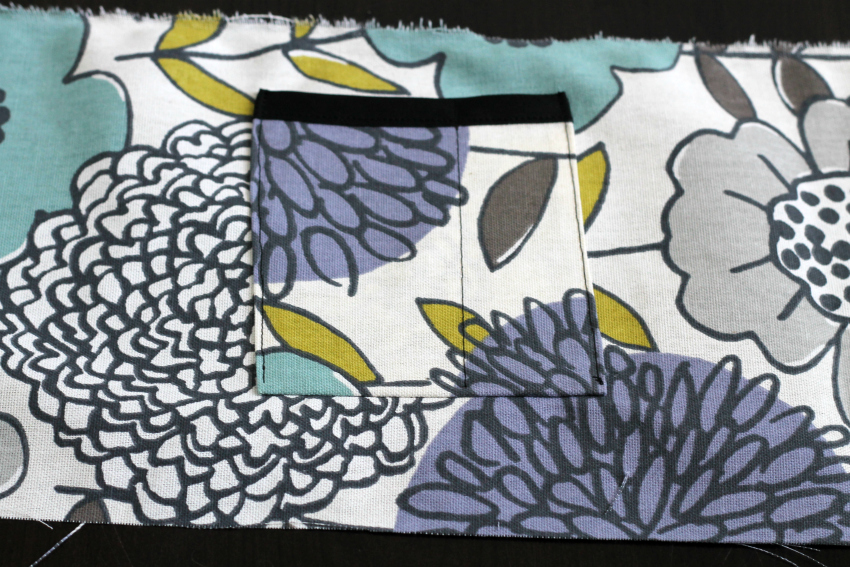
Step 3. Place the pocket on the long piece (Part A), face down with the bottom edge 2 inches from the edge, and sew along the bottom edge.
Step 4. Flip up and topstitch the sides. Then sew another line of stitching about 1/3 of the way in to make 2 pockets within the pocket.
Step 5. Sew bias tape on top of Part A.
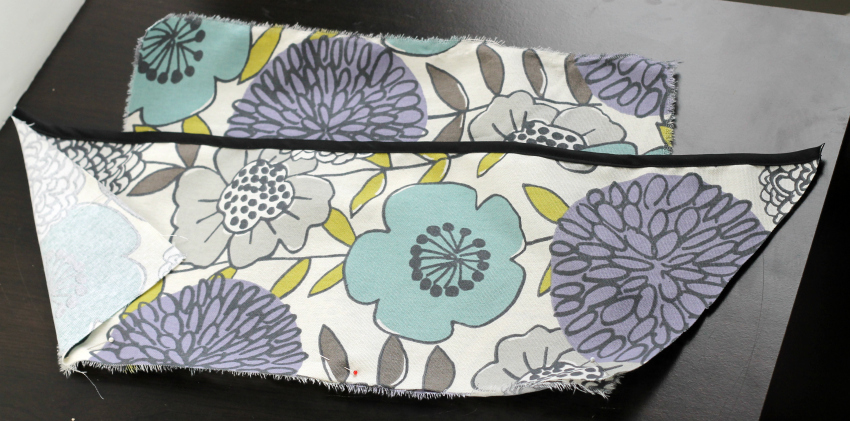
Step 6. Next, pin Parts A and B together lining up the bottom edge with the right sides showing.
You need to have the larger fabric piece (Part A), the same bottom length as part B while leaving the top edge alone. So match up the bottoms as shown above and fold the corner over to the spot where both fabrics meet at the bottom.
Step 7. Then cut away the excess fabric (the triangle) at the fold. You now have part A shaped like a trapezoid, and the bottom the same length as part B. The top edge of part A remains untouched.
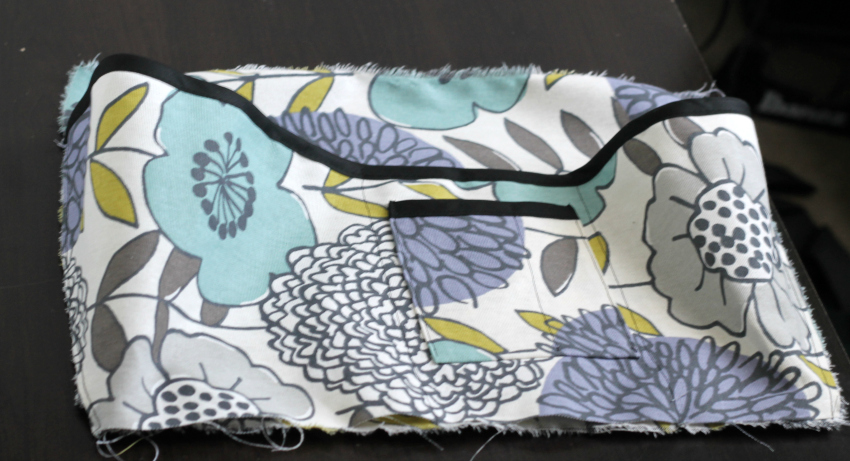
Step 8. Pin the bottoms together. Then match up the sides and pin them together. Sew the two together by starting at the top right side of part A, along the bottom, and up the other side. You will now have a large floppy pocket.
Step 9. Sew a line of stitching about 1/4 inch on both sides of the small pocket from the bottom, creating three large pockets instead of one.
Step 10. Then sew the bias tape all along the outer sides and bottom for a finished look. Repeat with the remaining pieces. (except for the small pocket)
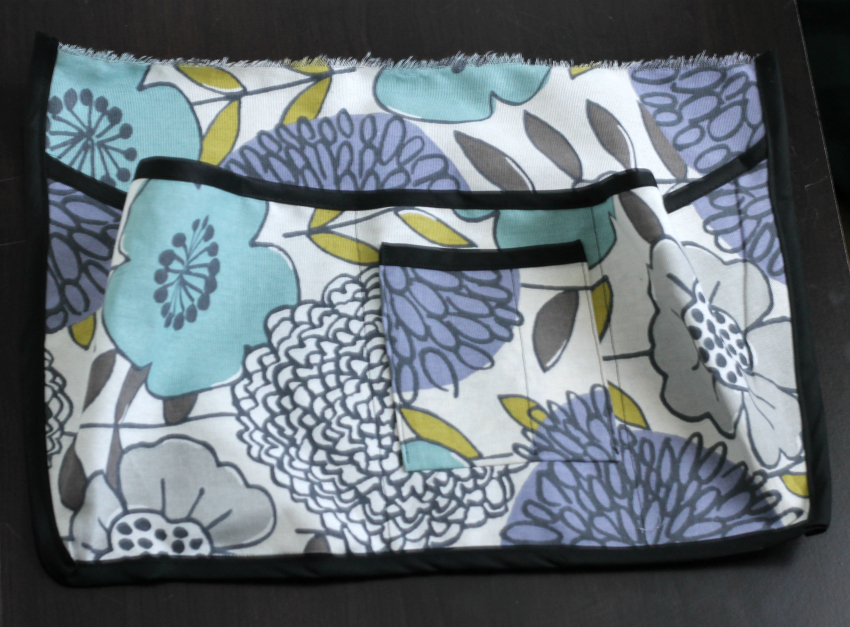
Step 11. Attach the two sections together with the 1-inch cotton twill trim at the top leaving enough space between the two pieces to fit around the handles.
Note: I used two rows of stitching for stability.
Step 12. Turn in 1 inch of the end of the cotton twill trim and sew.
Step 13. Sew D rings on the other end of the trim and you are finished.
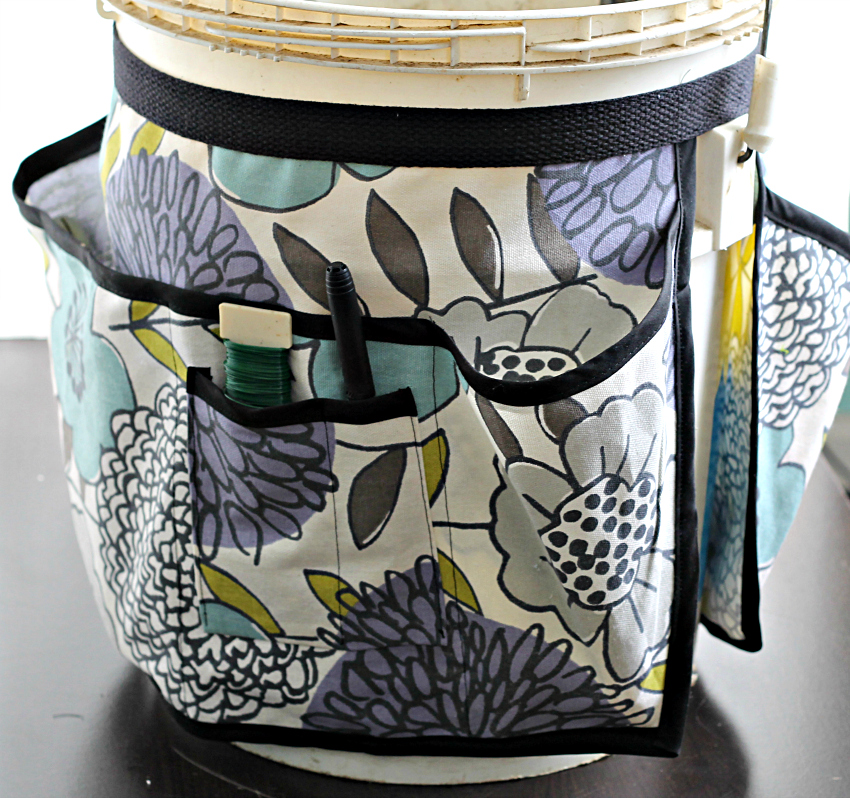
Much prettier, right?
Now I just need to clean my bucket and tools.

More Easy Fabric Crafts
DIY Garden Tool Belt
Equipment
- Sewing Machine
- Fabric scissors
Materials
- 3/4-1 yd sturdy fabric duck or heavy twill, denim
- 1.25 yds – 1 inch cotton twill
- 4 yds -1/2 inch double fold bias tape
- 2 - 1 inch D rings
- coordinating or contrasting thread
Instructions
- Cut the fabric according to the pattern.
- Sew the bias tape on the small pocket first.
- Press 1/4 inch of the sides and bottom of the pocket.
- Place the pocket on the long piece (Part A), face down with bottom edge 2 inches from the edge and sew.
- Flip over and topstitch sides. Then sew another line of stitching about 1/3 of the way in to make 2 pockets within the pocket.
- Sew bias tape on top of Part A. Next, pin Parts A and B together lining up the bottom edge with the right sides showing. You need to have the larger fabric piece (Part A), the same bottom length as part B while leaving the top edge alone. Match up the bottoms as shown above and fold the corner over to the spot where both fabrics meet at the bottom. Then cut away the excess fabric (the triangle). You now have part A shaped like a trapezoid, and the bottom the same length as part B. The top edge of part A remains untouched.
- Pin the bottoms together. Then match up the sides and pin them together. Sew the two together by starting at the top right side of part A, along the bottom, and up the other side. You will now have a large floppy pocket.
- Sew a line of stitching on both sides of the small pocket from the bottom, creating three large pockets instead of one.
- Sew the bias tape all along the sides and bottom for a finished look.
- Repeat with the remaining pieces. (except for the small pocket)
- Attach the two sections together with the 1-inch cotton twill trim at the top leaving enough space between the two pieces to fit around the handles. I used two rows of stitching for stability.
- Turn in 1 inch of the end of the trim and sew.
- Sew D rings on the other end of the trim.
Nancy Rabe
This is ingenious!!! Thanks for sharing.
Patti Estep
So glad you like it Nancy.
LeaEtta
Hi Patti this is so neat and I’ll wanting to try it soon to make myself a Beautiful Gardening Bucket. My Son made me a Beautiful potting bench for my back porch in French Blue so I’m going to coordinate a beautiful fabric Bucket cover that will look good sitting on the bottom shelf thank you for sharing your ideas with all of us Sewist. I will try to sen photo of my potting bench if I can. LeaEtta
Patti Estep
That's great to hear LeaEtta. It's very handy in the garden and I would love to see your finished piece.
Karen Peterson
I just finished making a bucket for my daughter and it turned out so great! Wasn’t sure of the seam allowances but went ahead and I am trying to send a photo. Thank you for sharing this idea.
Patti Estep
Yay! I'm so glad you like this project Karen. I use mine all the time.
Danielle Reagle
I'm so confused about the pinning of parts A and B and then trimming excess fabric. Please help!
Patti Estep
Hi Danielle,
I'm sorry that the instructions are not clear.
What you need to do is place part A on top of B lined up at the bottom. Then fold over the fabric on each side of A, to the point where it meets the edge of B. Look at the photo. Then cut that triangle off. Part A will now look like a trapezoid. Where the bottom is the same length as part B, and the top edge does not change.
Pin the sides together and sew along the sides and bottom. This will give you a big pocket. Sew a line of stitching from the bottom on each side of the little pocket the make three pockets.
I hope this helps. Let me know if you have any problems.
Patti
Karrie
I made this for my husband in one afternoon, it came out so nicely! Very straightforward and glad I could finish it in a few hours. Thanks for a great tutorial! I used denim. A functional gift I know we will both use.
Patti Estep
Hi Karrie,
So glad you like the tutorial. Denim is a great idea and should last a long time.
Thanks for stopping by,
Patti
Debi Tabor
I am making the Garden Bucket Tool Belt for a gift. It is a wonderful gift for gardeners. I use a bucket like this all the time. After making several for spring gifts, I will make me one.
Thank you for the guide. Question: did you show a method to cut bias tape? It was a wonderful way to fold a square and cut the tape from left over materials. I was wanting to match the bias tape with the bucket materials. Thanks... Love your blog.
Patti Estep
Hi Debi,
I'm so glad you liked the garden bucket tool belt project. Unfortunately my bias tape was purchased. I've noticed a few other posts on how to make your own. Many use a little tool but I did find this video from McCalls that may be helpful. http://www.mccallsquilting.com/mccallsquilting/articles/continuous_bias however, it is only a single fold binding tape.
Thanks for stopping by,
Patti
Becky
Thank you for posting this tutorial!
Patti
Hi Becky,
So glad you like it!
Pam Carlson
Just wanted to let you know I used your tutorial for the garden bucket apron and it turned out fantastic. Can't wait til spring to use it. I'm here at your website now to reprint the pattern so I can make one for a gardening friend. Thanks so much for posting this. The pattern is very easy to follow. I used double thickness material and used upholstery weight material so it would be really sturdy. and I used some ready made quilt binding that I happened to have on hand for the edging. Thanks again!!
Patti
Hi Pam,
Thank you so much for sharing that with me. You made my day!