

This mason jar tissue holder DIY will show you how to create a few decorative styles to use in your home or as pretty handmade gifts.
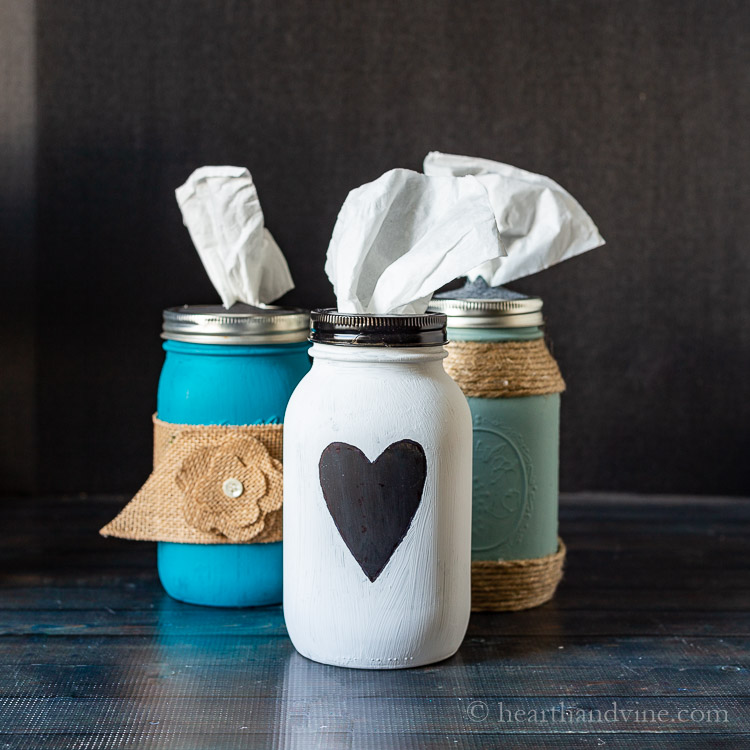
If you are looking for an easy gift to make or something to spruce up your powder room, you may love this easy mason jar tissue holder craft. They are super easy to create, and today, I'm sharing a few different styles to choose from.
Sections at a Glance
This post contains some affiliate links (that means if you make a purchase after clicking a link, there's no additional cost to you, but I will earn a very small commission. ) i.e. as an Amazon Associate, I earn from qualifying purchases. Click here to read my full disclosure policy.

Supplies
- Quart Mason Jars

- Chalk Paint/Craft Paint
- Box of tissues (travel size or small box)
- Felt
- Cardstock
- Jute
- Burlap Ribbon
- Scissors
- Paint Brushes
- Pencil or pen
- Hot glue and glue gun


 or small box)
 Scissors
Making Mason Jar Tissue Holders
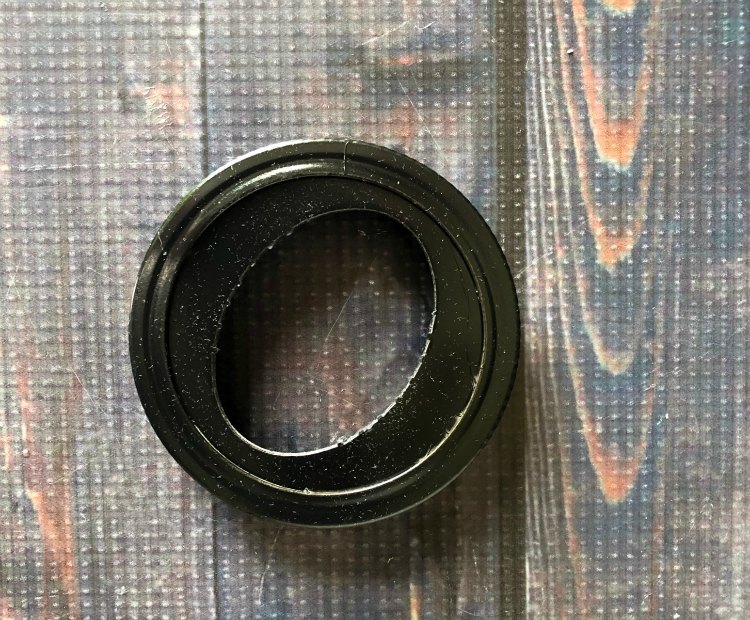
Start by making an opening for the tissues to be pulled through. One was made with felt by tracing a circle around the mason jar lid insert.

Fold the felt circle in half and cut a 1 inch slit. Then fold it in half the other way and cut another slit.
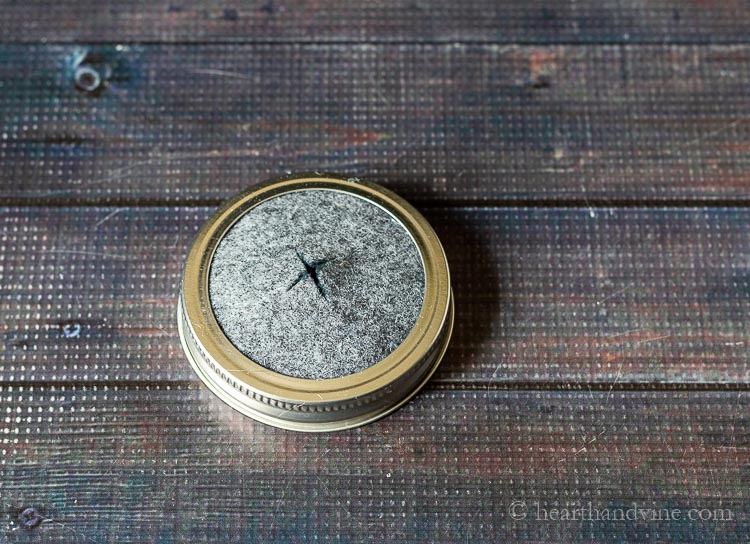
Then, hot glue the felt on the inside of the mason jar ring. Keep or discard the metal insert. You can also do this with a piece of cardstock paper.
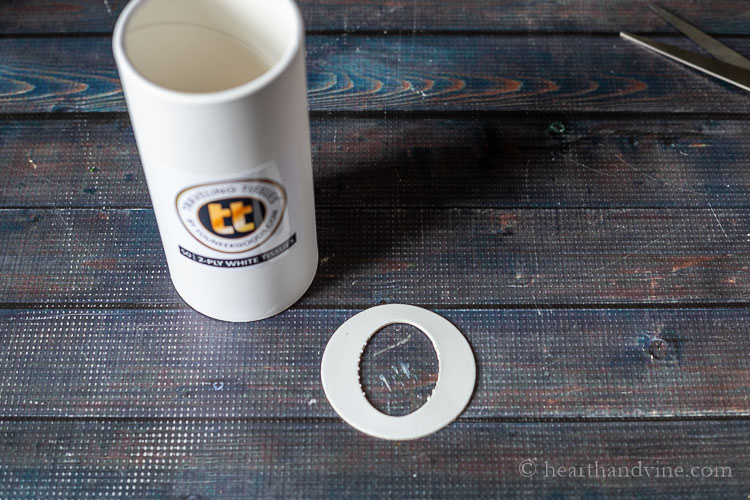
Another option is to use the top of the travel tissue box.
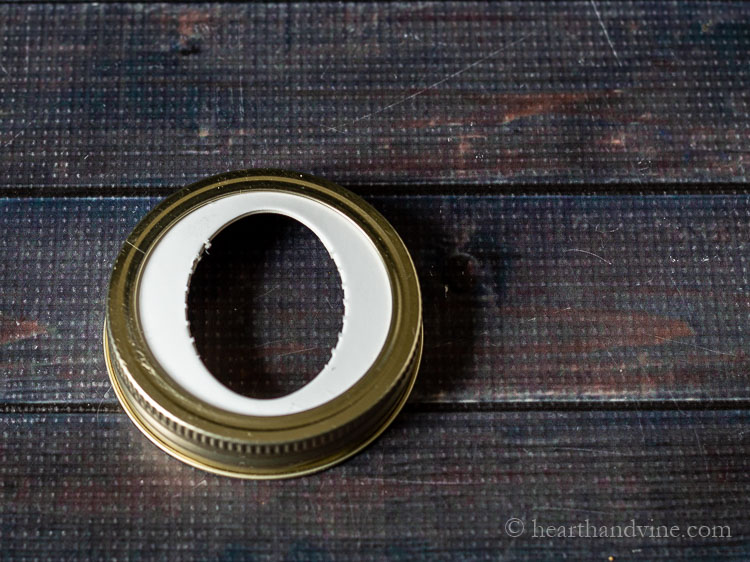
It fits nicely in the mason jar ring.
You can spray paint it to make the two pieces look more cohesive.
Decorating the Tissue Holders
I decorated the holders in three different styles. Each uses a quart mason jar.
Farmhouse or Country Holder
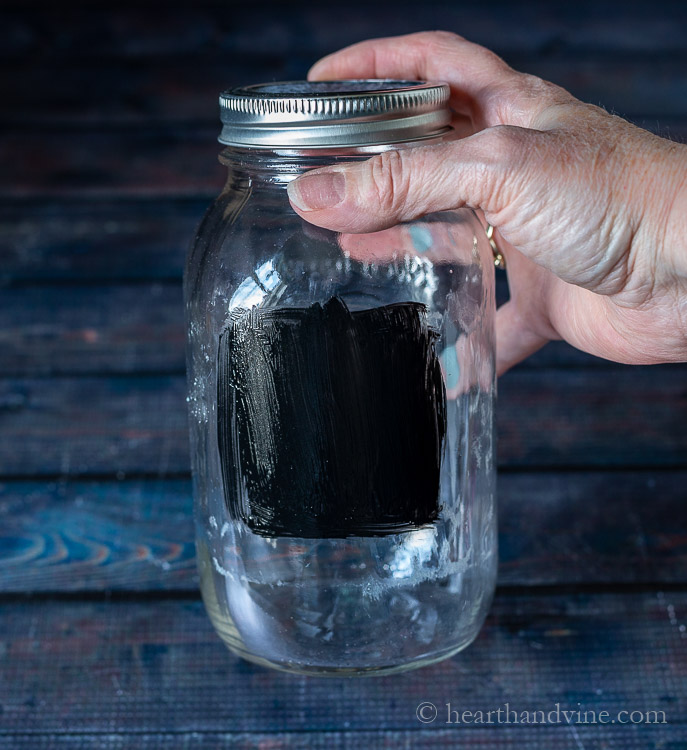
Start by painting the center of one side black. (see image above)
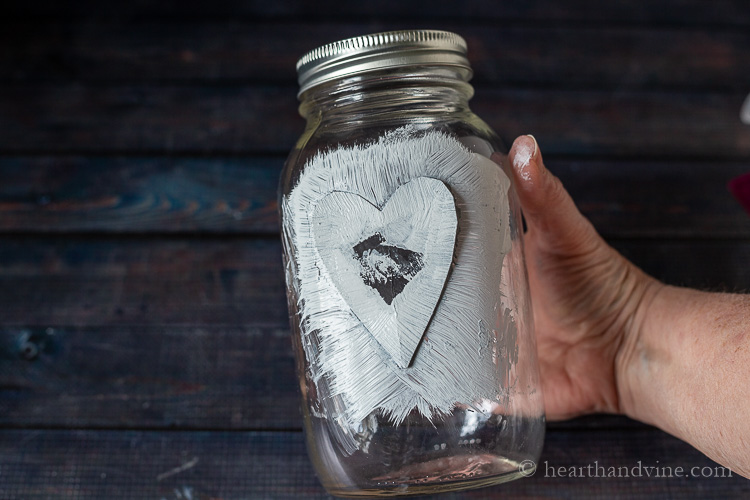
Next, cut out a heart or use a sticker, maybe even an initial, to mask the black paint.
Hold it on the black paint or use a bit of double sided tape and brush white paint over top.
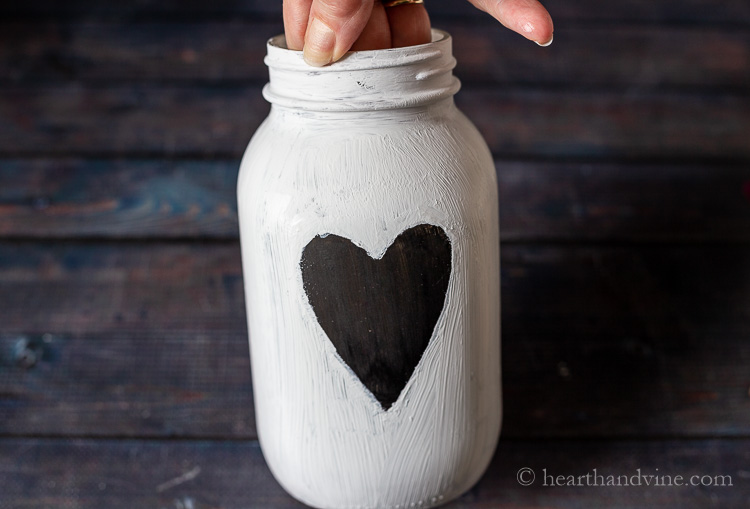
Remove the cardboard cutout or sticker and reveal the black underneath.
Tip: If the edges are messy, just use a Sharpie pen to clean them up.
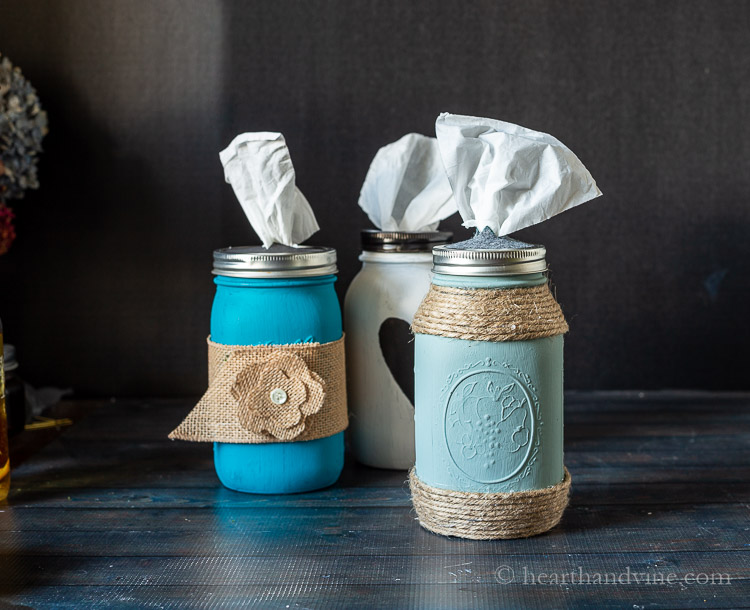
Coastal Holder
The second style is a coastal look with pretty aqua paint and jute wrapped around the top and bottom.
Using a short bead of hot glue, place the jute along the bottom of the jar, and slowly keep adding glue and pressing the jute into place. Add as much or as little as you like and continue the same on the top.

Blue Floral Holder
This last one has a bright peacock blue color with a burlap ribbon and a flower. You could do this with any ribbon you have.
The flower is made by cutting three flower shapes. Two of the same size and one slightly smaller.
Glue a length of ribbon onto the jar first. Then, glue the three burlap flower shapes on top of each other,r followed by a small button.
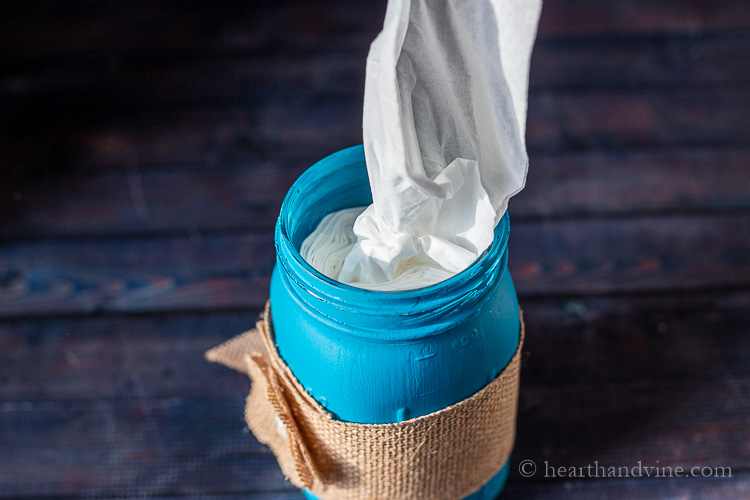
When placing the Kleenex tissues inside, I found that rolling them inward with the top tissue in the middle worked best.

These are just some inspiring ways to create this fun and easy craft. Use your favorite colors and craft supplies to make one for your office or nightstand. Just another simple idea for a teacher's gift or a thank you present to anyone in your life.


How to Make Mason Jar Tissue Holders
Materials
- Quart Mason Jars
- Chalk Paint/Craft Paint
- Box of tissues travel size or small box
- Felt
- Cardstock
- Jute
- Burlap Ribbon
- Scissors
- Paint Brush
- Pencil
- Hot glue and glue gun
Instructions
- Make an opening for the tissues to be pulled through by tracing a circle around the mason jar lid insert.
- Fold the felt circle in half and cut a 1 inch slit.
- Fold it in half the other way and cut another slit.
- Hot glue the felt on the inside of the mason jar ring.
- Spray paint it to make the two pieces look more cohesive.
- Decorate the mason jar however you like.
Farmhouse Style
- Paint the center of one side black.
- Cut out a heart or use a sticker to mask the black paint.
- Hold it on the black paint or use a bit of double sided tape to brush white paint over top.
- Remove the cardboard cutout or sticker and reveal the black underneath.
Coastal Style
- Use a short bead of hot glue to place the jute along the bottom of the jar.
- Keep adding glue and press the jute in place.
- Add as much or as little as you like and continue the same on the top.
Blue with Flower
- Make a flower by cutting three flower shapes. Two the same size and one slightly smaller.
- Glue a length of ribbon onto the jar first.
- Glue the three burlap flower shapes on top of each other.
- Glue a small button.

Carole West
This project is perfect because with it being allergy season it would be a great fit for the RV. Great way to recycle because I find it very difficult to part with empty jars. So my question is how does the chalk paint hold up on glass? Do you need a clear coat?
Patti Estep
Thanks Carole. So far the chalk paint is holding up great. However, I don't think a coat of poly would be a bad idea at all. Thanks for the suggestion.