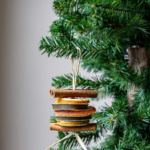

Enjoy the beauty of natural Christmas decorations when you make these easy DIY dried fruit ornaments to adorn your tree or packages this holiday season.

A while ago I made a dried orange garland with orange slices, bay leaves, and cinnamon sticks. This has been one of my most popular posts. It smelled wonderful when I made it. I still have it, and though the scent has faded it still looks pretty. So I thought it would be fun to decorate the tree this year with dried fruit ornaments.
This post contains some affiliate links (that means if you make a purchase after clicking a link, there’s no additional cost to you, but I will earn a very small commission. ) i.e. as an Amazon Associate, I earn from qualifying purchases. Click here to read my full disclosure policy.
How to Make Dried Fruit Ornaments
Supplies
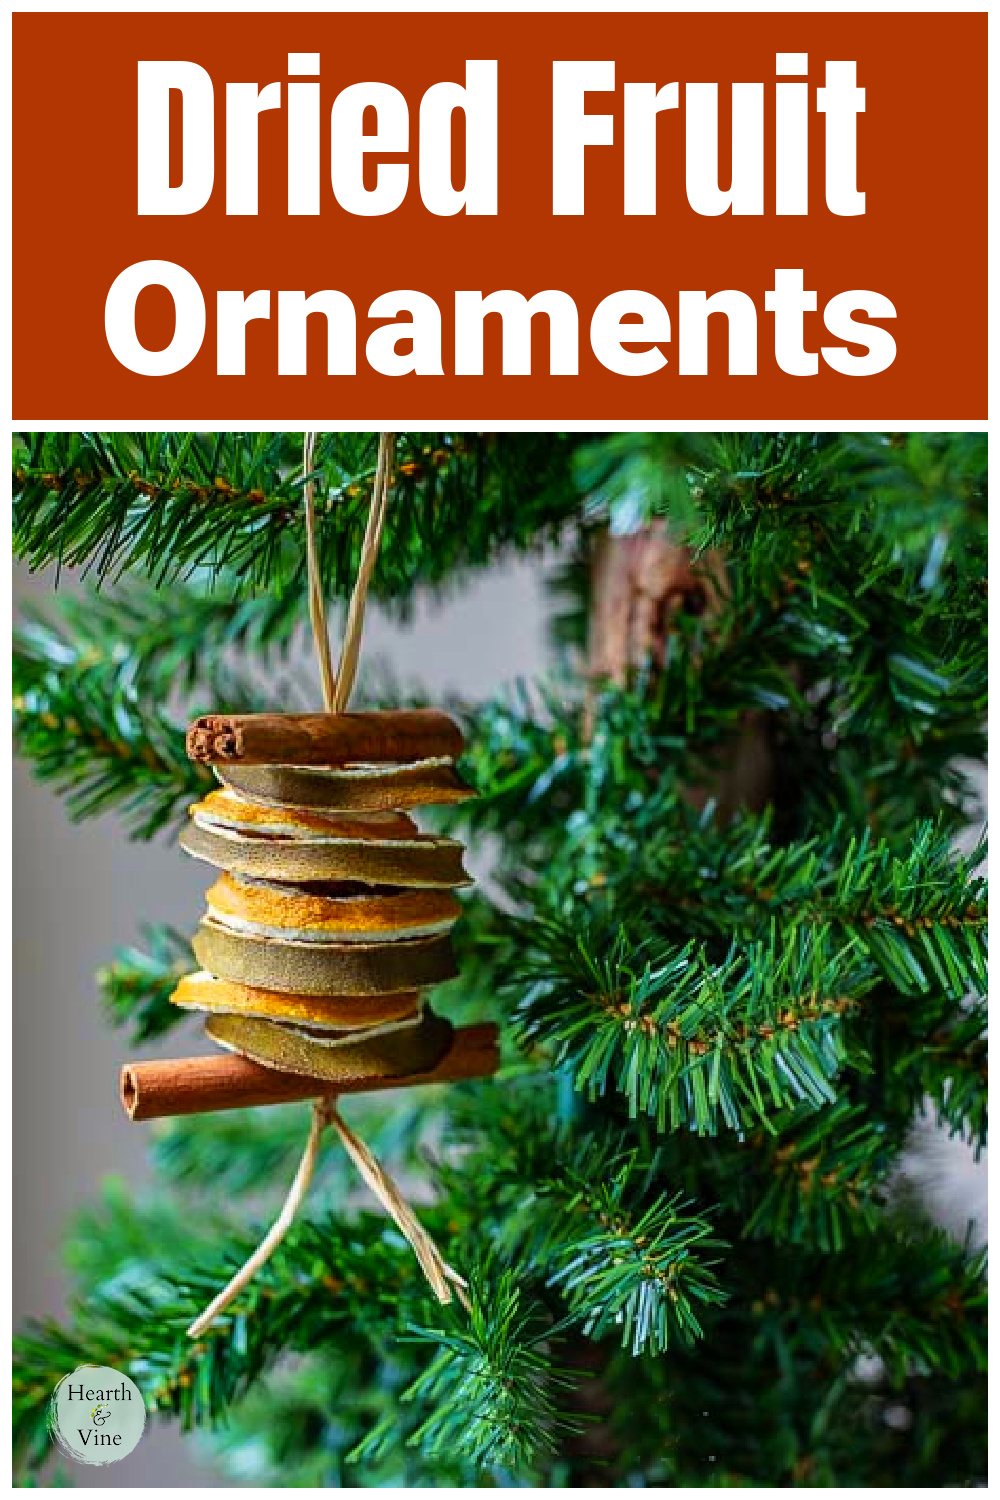
- Dried fruit slices. Oranges, lemons, and limes. (try apples too)
- 3-inch cinnamon sticks
- Raffia (twine or ribbon)
- Electric Drill
- Scissors
- Large Embroidery Needle or Toothpick
Making Dried Fruit Slices
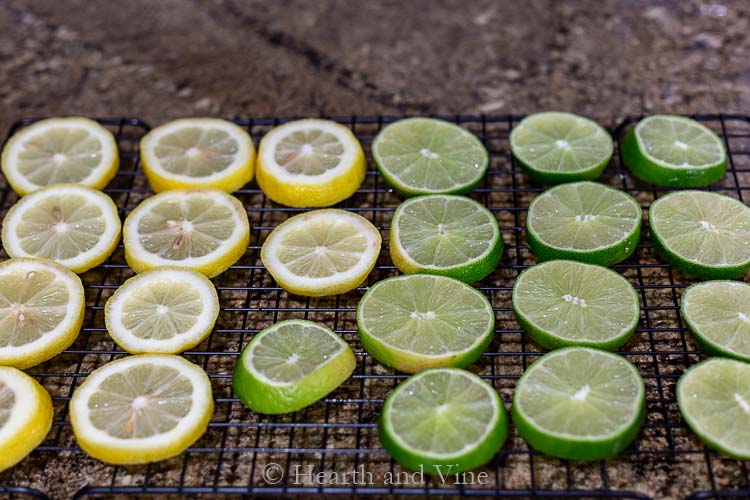
I used citrus fruits; lemons and limes with a few orange slices thrown in from last year's homemade apple and orange potpourri. This variety of citrus was also perfect for making a natural dried fruit wreath.
Originally when I made dried orange slices I placed them directly on the oven racks. However, these lemon and lime slices are too small for that so using a small baking wire rack was in order.
Use paper towels to dab and soak up as much juice as you can before placing them in the oven. Bake in the oven on a low heat level around 200 degrees for about 3-4 hours, turning every hour until they look dry. Keep an eye on them. If you leave them too long they may start to burn and that's not pretty. If they look good but feel a little sticky go ahead and remove them and let them sit out for a couple of days on the racks.
Creating the Ornaments
Step 1. Drill a small hole in the middle of the 3-inch cinnamon sticks
 . Use a scrap piece of wood underneath to protect your work surface while drilling.
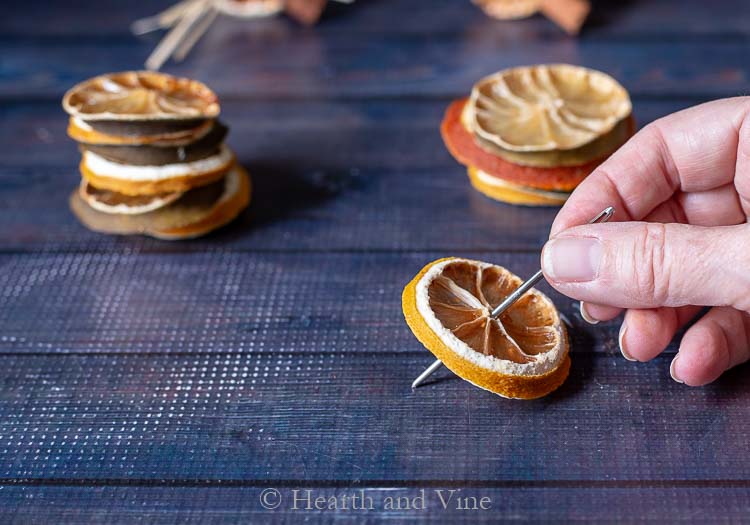
Step 2. Poke a hole in the fruit slices with a large needle, a toothpick, a wooden skewer, or something like a large paper clip would work.
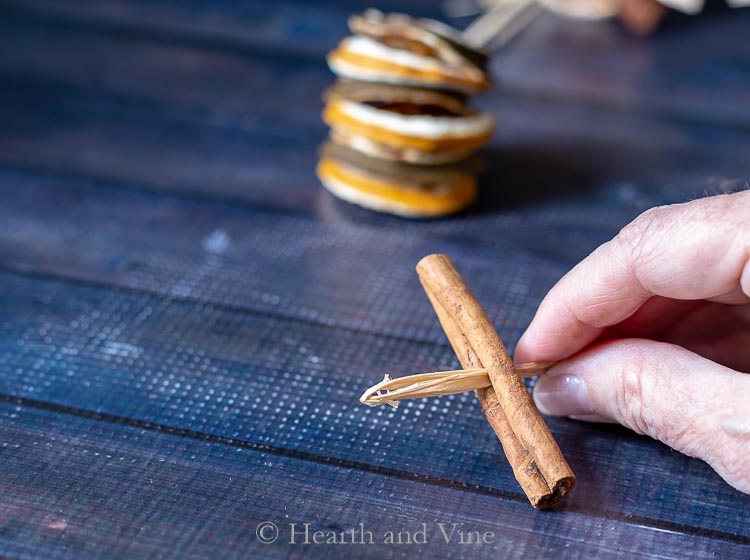
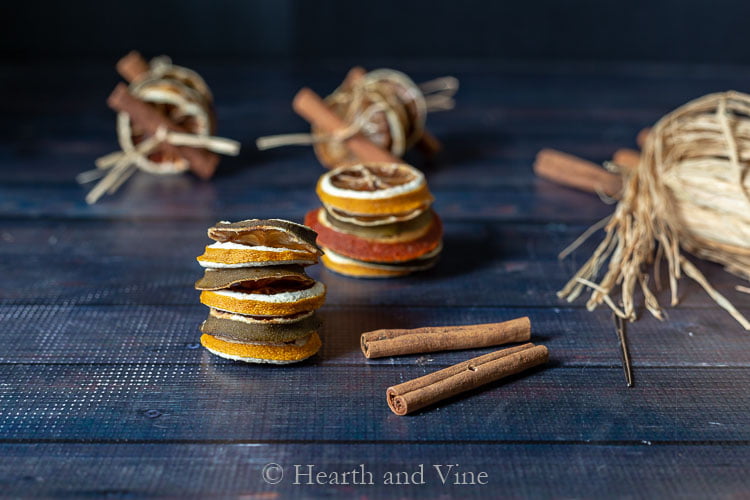
Step 3. Take a piece of raffia or ribbon about 20 inches long and fold it in half. Start with the loop end and thread one of the cinnamon sticks through, followed by the dried fruit slices.
Step 4. Finish with another cinnamon stick, and tie a double knot at the end of the raffia.
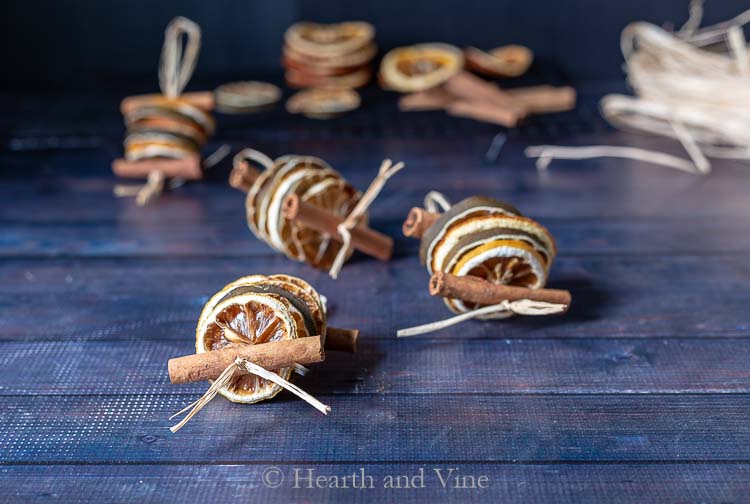
Step 5. Complete the dried fruit ornament by trimming any excess raffia.
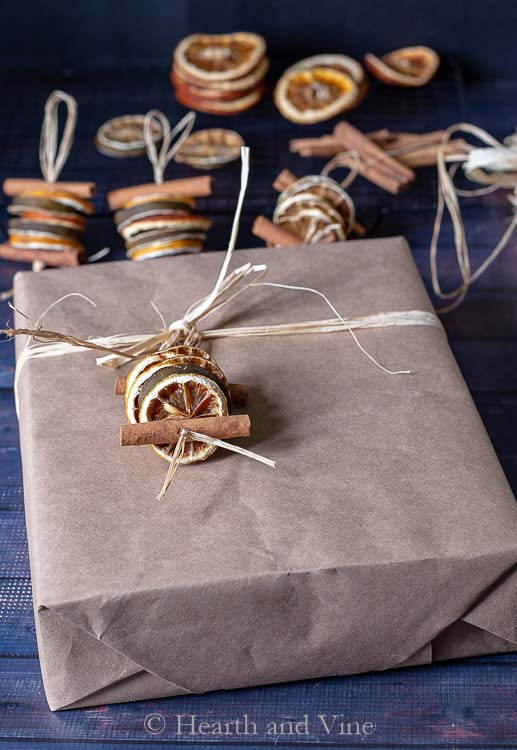
Wouldn't they look cute on a gift package? It's a gift with a gift!
Options
- You can vary the ornament with different patterns and number of slices, creating shorter or longer ornaments.
- You can also add cinnamon sticks between the slices, and add dried small apple slices or other botanicals like bay leaves
 .
. - You can use natural twine or a thin ribbon instead of the raffia to thread and hang the dried fruit on.
 .
.
Once again, dried fruits, spices, and other plant materials are so gorgeous on their own. They make it easy to create beautiful natural Christmas decorations.

More Dried Fruit Projects

How to Make Dried Fruit Ornaments
Equipment
- Drill
- Large needle or paperclip
- Scissors
Materials
- Dried fruit slices. Oranges, lemons, and limes. (try apples too)
- 3- inch cinnamon sticks
- Raffia ribbon
Instructions
- Slice and dry fruit in the oven on the lowest heat for about 2 - 4 hours, flipping every 30 minutes.
- Drill a small hole in the middle of the cinnamon sticks
- Poke a hole in the middle of the dried fruit slices with a large needle, paperclip, or skewer.
- Take a piece of raffia ribbon twice the length of the desired stack size plus 4 inches and fold it in half.
- Make a knot on the non-folded end. Thread a cinnamon stick over the folded end of the raffia and slide it down to the knot.
- Continue threading on slices of fruit.
- Finish with another cinnamon stick.
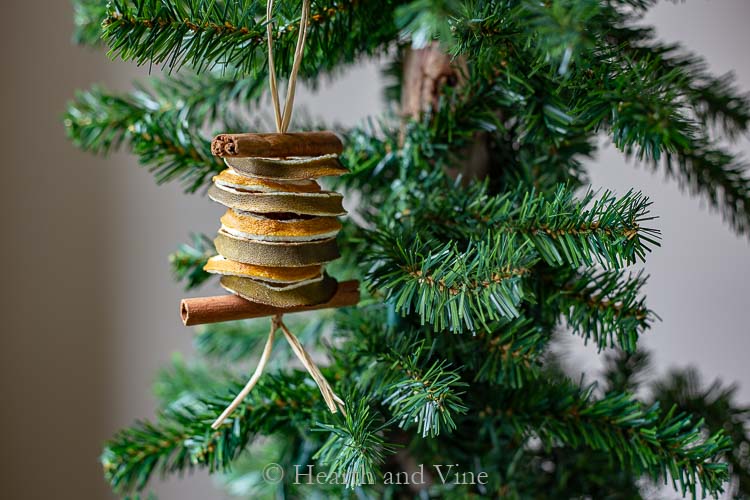
- Hang your creation on your Christmas tree.
Notes
lynn
You have completely inspired me with all your beautiful dried fruit decorations! Keep em coming!
Mary
Patti you know I am a fan of all your dried flowers and fruit crafts. But this one is just remarkable. I will definitely be adding this to my list of to do's!
Barbara Chapman
Hello Patti, dried fruit adds such a pleasant scent to any room but especially at Christmas time! Thank you for a fun tutorial on making these beautiful, natural ornaments. Happily pinning to several boards for you. <3
Happy crafting,
Barb 🙂
Patti Estep
Thanks Barbara!
Kim @Serving Up Southern
These are adorable! I love the idea of using them as embellishments on gift packages. What a great idea for Christmas!
Patti Estep
I know, right. It's fun to have a little gift to adorn your packages.
Julie Briones
I love the idea of using these for package decor! I need to incorporate this into my gift wrapping!
Karen
Oh, Patti, I'm getting all eager for Christmas now! The weather has finally picked up a cool breeze in the early mornings and later evenings, and now with your gorgeous project, I'm all inspired. I've got a huge dehydrator that would do perfect work of drying out some citrus slices for this project and I can imagine the house would smell amazing as they dry!
Thanks for sharing. The kids will have a blast helping me make these - and I love the addition to packages too - truly and gift with a gift!
Patti Estep
Karen it's getting cold up here in the north too, although a little too cold. I'm glad you like the project and am thrilled to hear that you'll get your kids involved.
Carole West
This I love because I'm really into the natural kind of Christmas these days. This started when we lived on our farm and it has just kind of blossomed from there. I remember that garland absolutely fantastic and it inspired my fresh garland I made for the birds last year. Your tree is going to look fantastic with these ornaments. You're style is great it's simple and makes a grand presentation.
Patti Estep
Aww thanks Carole. You are so kind. I do like it when Mother Nature does all the heavy lifting. 😉