

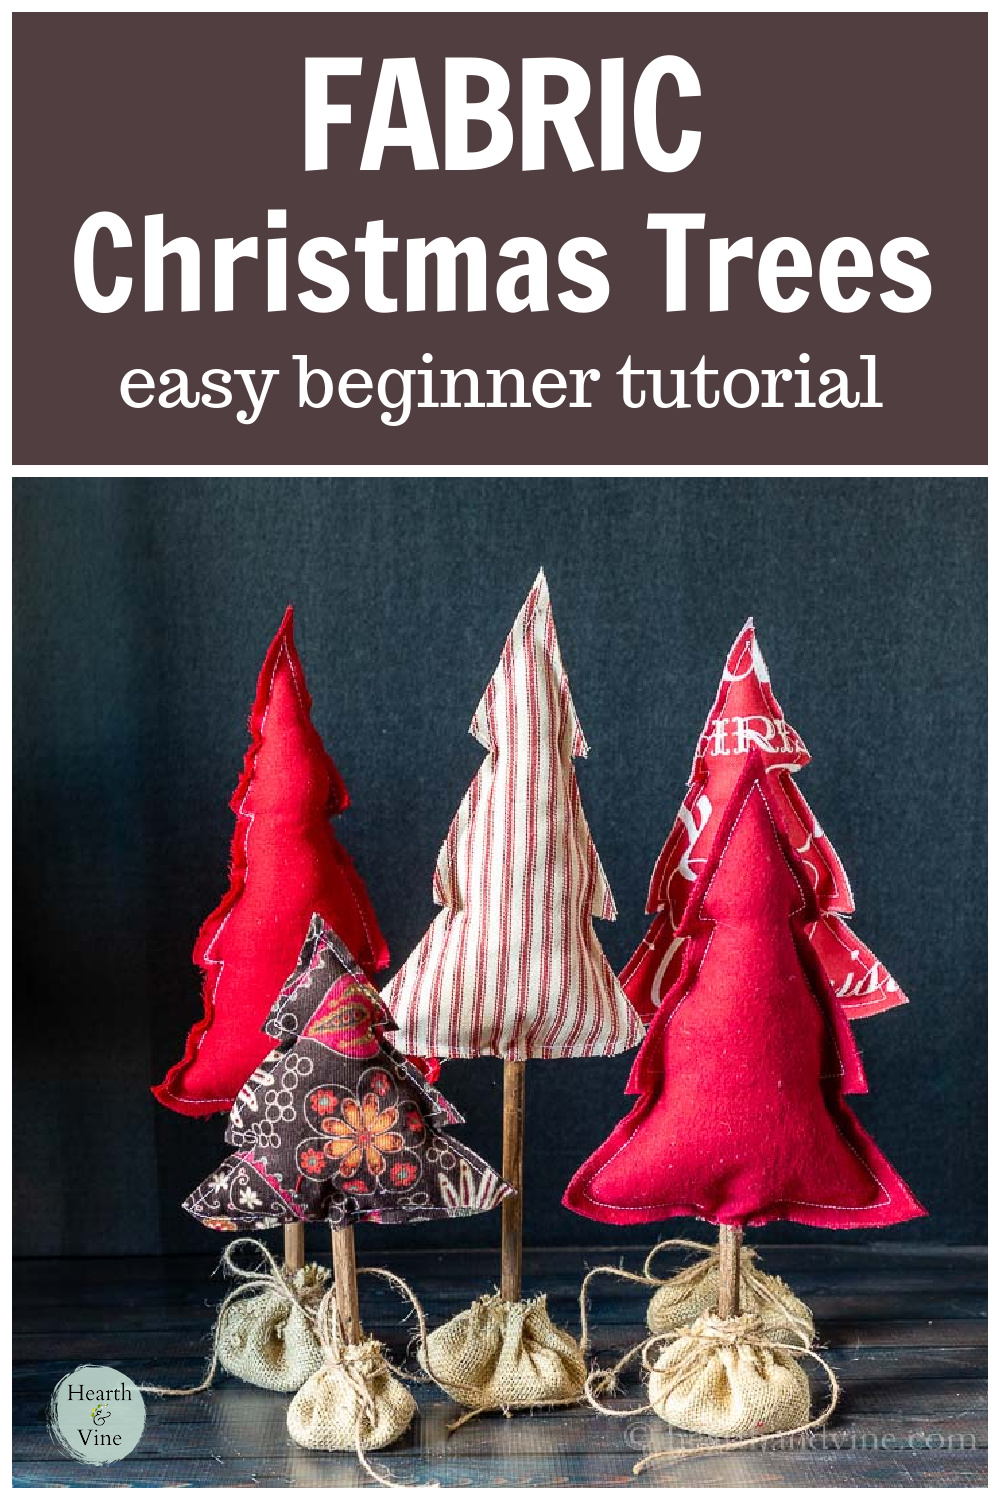
Make these fun and festive tabletop fabric Christmas trees from simple printable patterns, basic sewing skills, and scrap fabric.
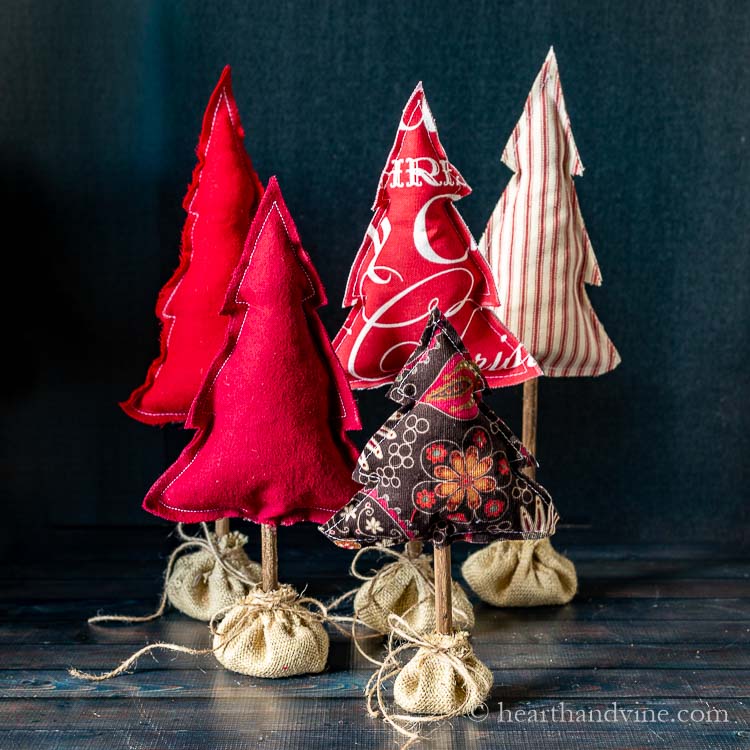
Can you ever have too many Christmas trees? In addition to the traditional 6 foot or more trees in our home, I always like to create a few DIY tabletop trees as part of our holiday decor. These fabric stuffed trees were super fun and easy to make and look great on the chest in our foyer for all that enter to see.
This post contains some affiliate links (that means if you make a purchase after clicking a link, there’s no additional cost to you, but I will earn a very small commission. ) i.e. as an Amazon Associate, I earn from qualifying purchases. Click here to read my full disclosure policy.

Making Stuffed Fabric Christmas Trees
Supplies
- 5 different coordinating fabrics
- 5 dowel rods in varying sizes
- Burlap or similar fabric
- Fiberfill
- Ground walnut shells or sand
- Twine or thin ribbon
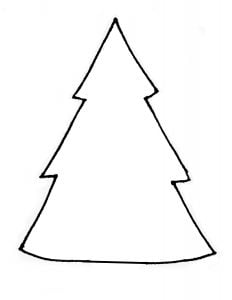
Christmas Tree Templates
Click on the templates below and print them out to make the trees. There are four sizes. I made five trees using the 8.5 inch narrow template twice.
- 8.5 inch tree
- 8.5 inch narrow tree - I made two of these
- 7 inch tree
- 6 inch tree
Instructions
Step 1. Print out the template and cut out the tree shape.
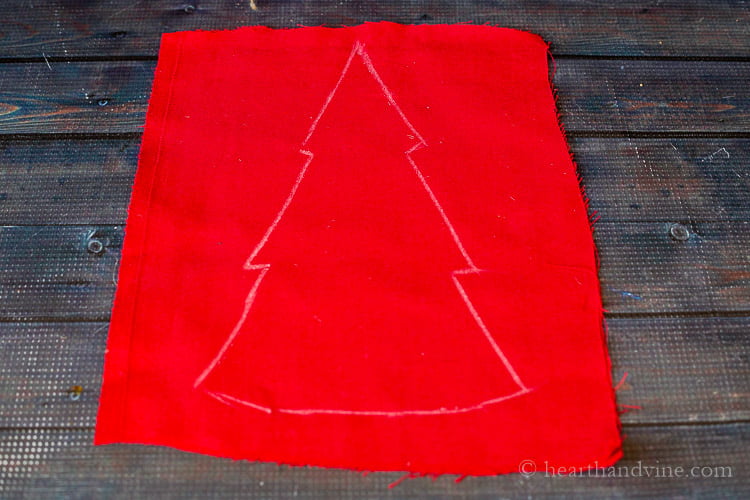
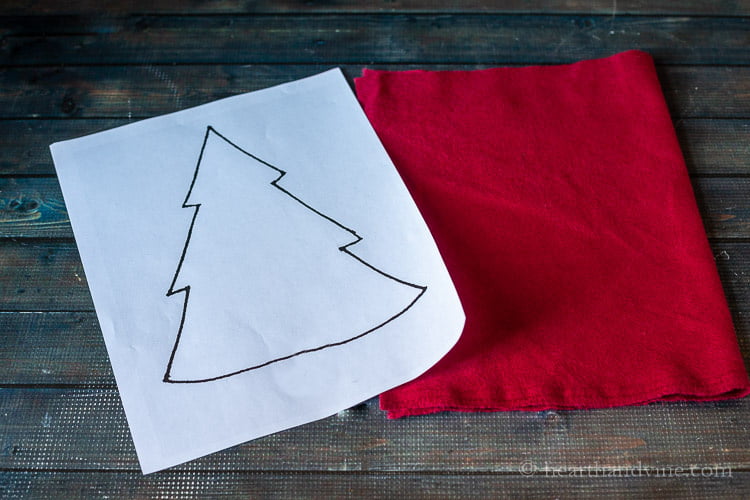
Step 2. Trace around the tree onto two pieces of fabric with "wrong sides" together using a tracing pen or light pencil. Often when sewing you want the right sides together, however, with this project you will not be turning the tree inside-out so you want the wrong sides facing.
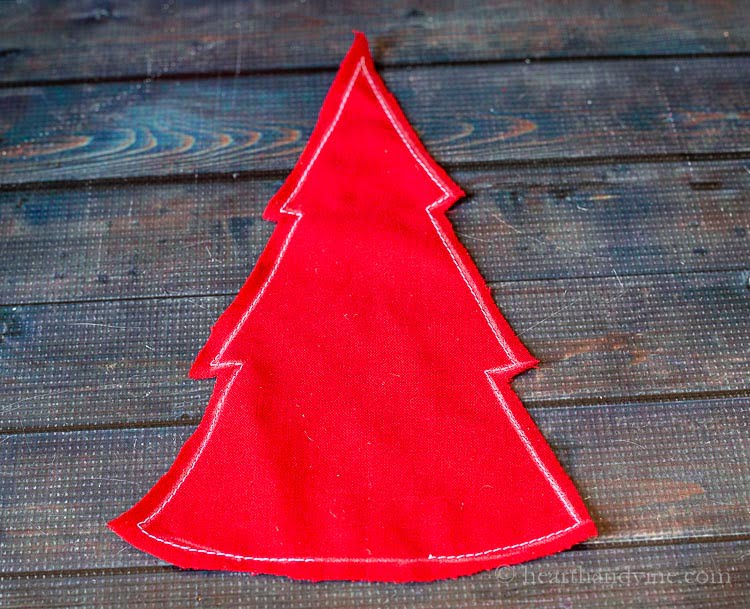
Step 3. Sew on the traced lines leaving two inches at the bottom open. Then cut out the tree about 1/4 inch from the stitches. You could also cut out the tree and then sew a 1/4 inch seam from the edge leaving space open at the bottom center.
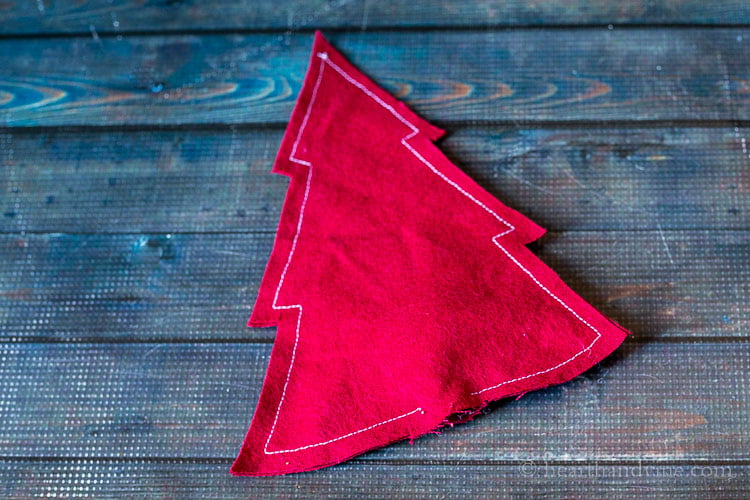
Step 4. Stuff the tree with fiberfill or other stuffing material.

Step 5. Decide how tall you want your tree and cut the dowel rod to fit. Paint or stain one end that will show. The other end will be inside the tree.
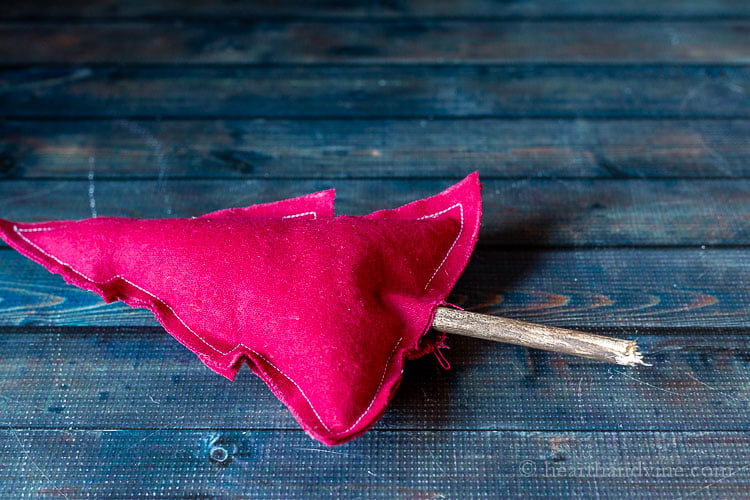
Step 6. Push the rod into the center of the tree and hot glue the opening around the wooden dowel.
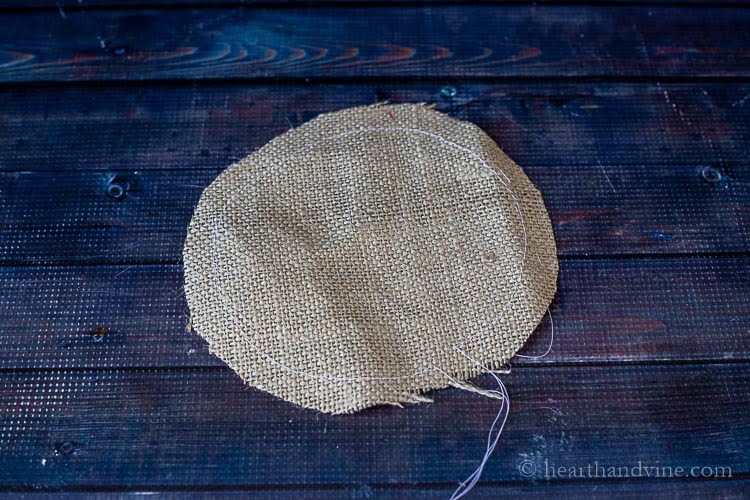
Step 7. Use a 6 inch round of burlap to create a sack. Sew basting (loose) stitches all around about 1/2 inch from the edge. You can do this on the sewing machine or hand-baste with a needle and thread.
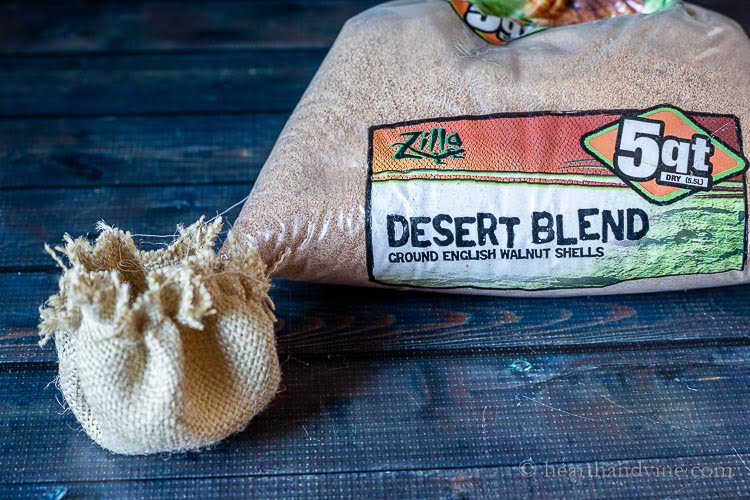
Step 8. Pull on the threads to gather the burlap and tie them together. Fill the sack with ground walnut shells, sand, or other similar material.
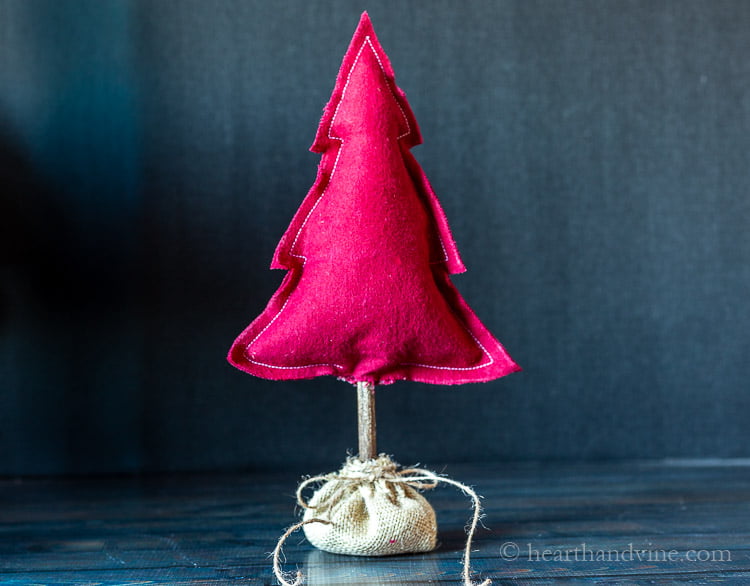
Step 9. Place the tree into the sack and hot glue the top of the burlap to the dowel rod. The ground walnut shells or sand will anchor and hold the dowel rod in place.
For an added touch you can then tie a piece of twine around the top.
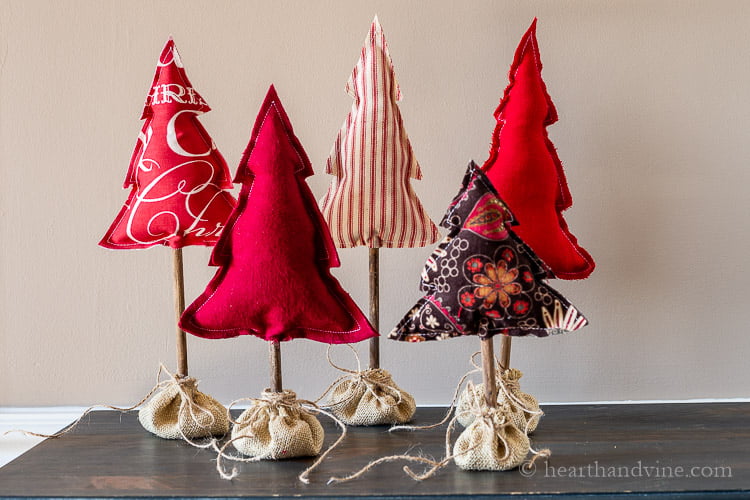
Display your fabric trees on a table, mantel, or anywhere that you want to add a bit of whimsy and cuteness.
Wouldn't they make a great gift?

More Fun Christmas Trees

Fabric Christmas Trees
Equipment
- Fabric marker
- Computer
- Printer
- Sewing Machine
- Scissors
- Hot glue gun and glue
Materials
- Coordinating Fabric for Trees
- Dowel rods
- Brown craft paint or stain
- Fiberfill
- Burlap fabric
- Ground walnut shells or sand
- Twine
Instructions
- Print out the template and cut out the tree shape.
- Trace around the tree onto two pieces of fabric with wrong sides together using a tracing pen or light pencil.
- Sew on the traced lines leaving two inches at the bottom open.
- Cut out the tree about 1/4 inch from the stitches.
- Stuff the tree with fiberfill.
- Cut the dowel rod to the desired length.
- Paint or stain one end that will show.
- Insert the rod into the center of the tree and hot glue the opening closed at the base.
- Use a 6 inch round of burlap to create a sack.
- Sew basting (loose) stitches all around about 1/2 inch from the edge.
- Pull the threads to gather the burlap and tie them together.
- Fill the sack with ground walnut shells, sand, or other similar material.
- Place the tree into the sack and hot glue the top of the burlap to the dowel.
- Wrap a piece of twine around the top of the sack and tie it into a bow.
Notes
Sue Henry
Thank you for these adorable trees! I saved the pattern a couple of years ago, and just found it again. I was looking for a project to mass-produce Christmas gifts and this was perfect! I made over a dozen in less than a day. I used Christmas prints for mine and twigs from my maple tree instead of dowels. I added some lichen as an accent on the burlap bag. They turned out so cute! Thanks! 🙂
Patti Estep
Sue, they sound adorable. Thanks for sharing your ideas.
Sandi
Super cute. I’ve made similar. An added interest would be to use pinking shears to cut out the trees. I love the little burlap bags at the bottom. I put mine in an arrangement using styrofoam.
Patti Estep
Using pinking shears is a great idea. Thanks for sharing Sandi.
Steve Sews Stuff
I might try this, but use styrofoam instead of sand. Thank you for sharing.
Patti Estep
Steve, styrofoam is something I've never thought of for this type of application. Thanks for sharing your ideas.
Carol Avery
Thanks so much. The trees are lovely & cute. Just what we need for Xmas here in hot Qld Australia. Ex pat 20 years from UK , hot Xmas is still strange.
Thanks over the years for all your wonderful ideas, and thanks for the vintage printables, you are such a gem to us all
Carol
Patti Estep
Carol, how nice to wake up to such kind words. Thank you so much for letting me know that you enjoy the blog. I hope you have a fabulous Christmas in Queensland.
Claire
Lovely trees, I like the burlap bases a very creative touch.
Patti Estep
Thanks Claire. They were fun to make and are bringing in some much needed cheer to the house.
Emily
Super cute! And great tutorial! Can't wait to try them out! Thanks for sharing.
Patti Estep
Thanks Emily. They were so fun to make.
Lisa
These are so adorable Patti! I love your choice of fabric and the little burlap bottoms are so cute! I made something similar last year out of felt and they were so fun to decorate with.
Patti Estep
Thanks Lisa. Your felt trees are super cute too.
Wendy
Patti these trees are adorable! I just love how they look all together.
Patti Estep
Thanks Wendy. They were fun to make.
Kathleen
These are adorable! So cheery and festive. 🙂
Patti Estep
Thanks Kathleen. I'm really enjoying lots of cheery red this year.
Leigh
Patti,
These are so incredibly cute! Great tutorial and thank you for the printables!
Patti Estep
Thanks Leigh, we need a little cuteness right now.
Jen @ JENRON DESIGNS
Patti these are so adorable, and would be darling on dining table in wreath, tree or even as package decor. So many great uses thanks for sharing this season!
Patti Estep
Thanks Jen. They are cheerfully adorning the table in our foyer. Maybe I'll move them to the dining room yet. Merry Christmas!