• Skip to primary navigation
  • Skip to main content
  • Skip to primary sidebar
  • Home
  • DIY Projects
    • Homemade Bath and Body
    • Sewing - Fabric Crafts
    • Flower Crafts/Decor
    • Thrift Store/Vintage
  • Gardening
    • Flower Gardens
    • Container Gardening
    • Houseplants
    • Indoor Gardening
    • Landscaping
    • DIY Garden Art
  • Decorate
    • Spring Decor
    • Summer Decor
    • Fall Decor
    • Winter Decor
    • Home Decor Projects
  • Recipes
    • Breakfast Recipes
    • Lunch Recipes
    • Dinner Recipes
    • Dessert
    • Salad Recipes
    • Soups and Stews
    • Side Dish Recipes
    • Appetizers and Snacks
    • Healthy Recipes
  • Holidays
    • Valentine's Day
    • Easter
    • Mother's Day
    • Halloween
    • Thanksgiving
    • Christmas
Hearth and Vine
menu icon
go to homepage
  • About
  • DIY
    • ...Flower/Gardening Crafts
    • ... Bath and Body
    • ...Sewing/Fabric Crafts
    • ...Thrift Store/Upcycle
  • Gardening
    • ...Flower Gardens
    • ...Container Gardening
    • ...Indoor Gardening
    • ...DIY Garden Art
  • Decorate
    • ...Home Decor Projects
    • ...Spring Decor
    • ...Summer Decor
    • ...Fall Decor
    • ...Winter Decor
    • ...Room Makeovers
  • Recipes
    • ...Appetizers and Snacks
    • ...Dinner Recipes
    • ...Side Dish Recipes
    • ...Salad Recipes
    • ...Dessert
    • ...Drinks
  • Holidays
    • ...Valentine's Day
    • ...Easter
    • ...Mother's Day
    • ...Halloween
    • ...Thanksgiving
    • ...Christmas
  • Subscribe
  • Instagram
    • Facebook
    • Instagram
    • Pinterest
    • Twitter
  • subscribe
    search icon
    Homepage link
    • About
    • DIY
      • ...Flower/Gardening Crafts
      • ... Bath and Body
      • ...Sewing/Fabric Crafts
      • ...Thrift Store/Upcycle
    • Gardening
      • ...Flower Gardens
      • ...Container Gardening
      • ...Indoor Gardening
      • ...DIY Garden Art
    • Decorate
      • ...Home Decor Projects
      • ...Spring Decor
      • ...Summer Decor
      • ...Fall Decor
      • ...Winter Decor
      • ...Room Makeovers
    • Recipes
      • ...Appetizers and Snacks
      • ...Dinner Recipes
      • ...Side Dish Recipes
      • ...Salad Recipes
      • ...Dessert
      • ...Drinks
    • Holidays
      • ...Valentine's Day
      • ...Easter
      • ...Mother's Day
      • ...Halloween
      • ...Thanksgiving
      • ...Christmas
    • Subscribe
    • Instagram
    • Facebook
    • Instagram
    • Pinterest
    • Twitter
  • ×
    Home » DIY Projects

    DIY Fabric Owls Pattern

    by Patti Estep · Sep 24, 2024

    Jump to How-to Card
    Fabric owl in different patterns with button eyes.
    A small fabric owl over a set of three fabric owls in different sizes.

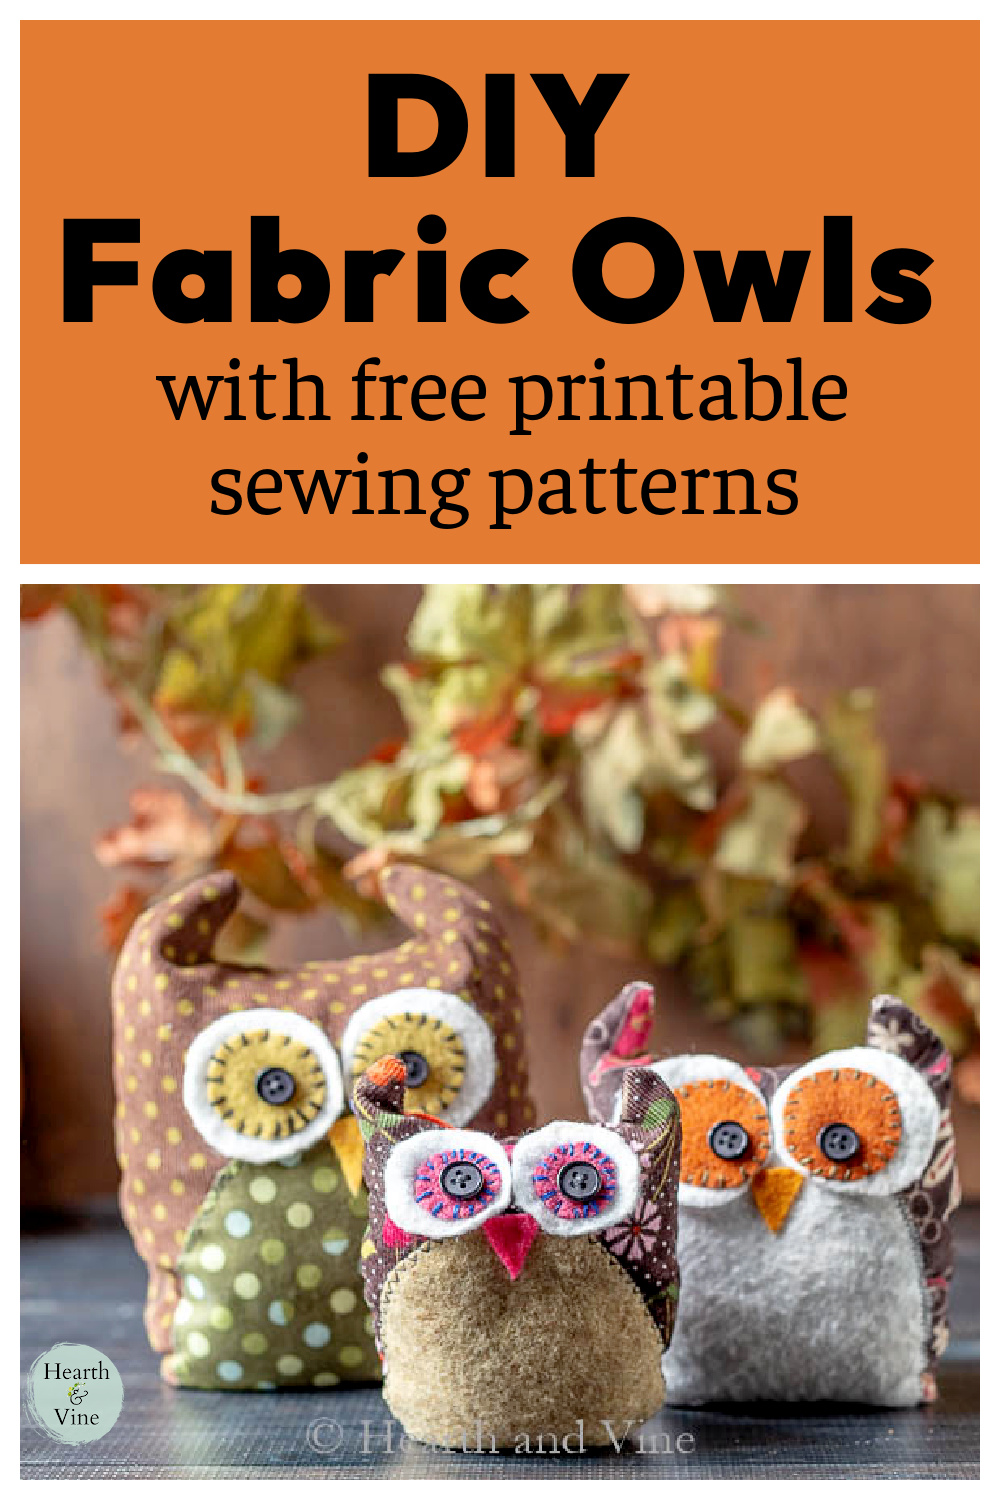
    Learn how to use a fabric owl pattern to create one or more of these adorable plush owls using felt and scrap fabric in an afternoon.

    Three fabric owls

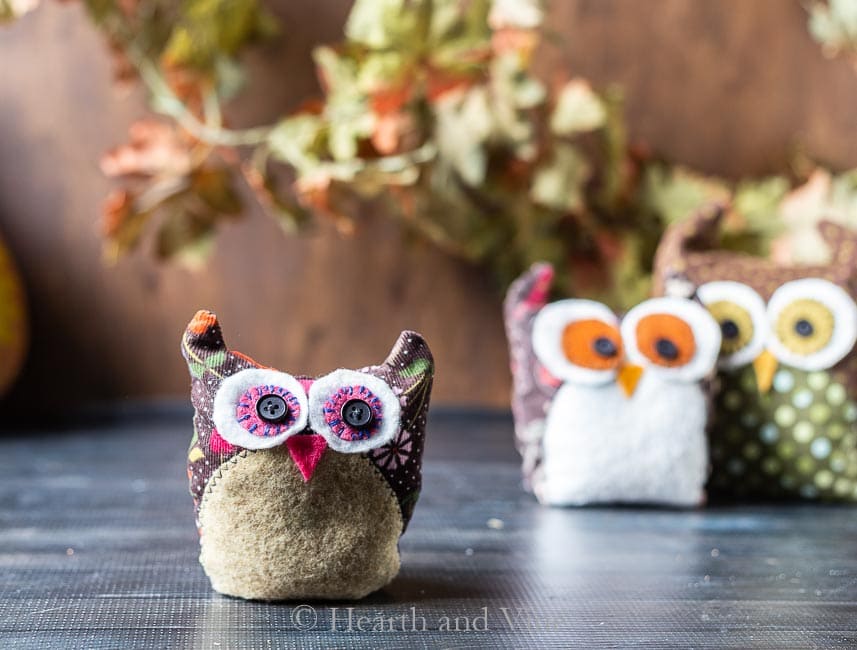
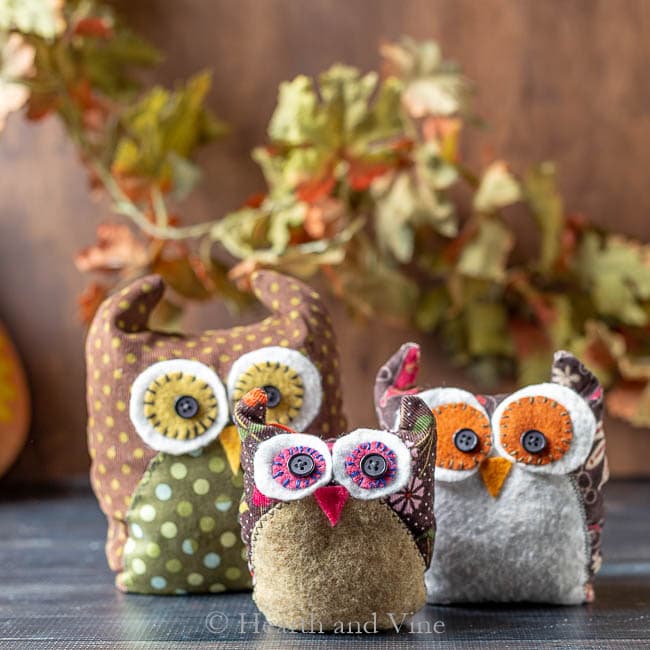
    There's something about owls and the fall that makes the cutest decorations. I made this trio one afternoon and they turned out great. Here's how you can make some adorable owl softies for your own home. It's an easy beginner sewing project anyone can do.

    This post contains some affiliate links (that means if you make a purchase after clicking a link, there’s no additional cost to you, but I will earn a very small commission. )) i.e. as an Amazon Associate, I earn from qualifying purchases.  Click here to read my full disclosure policy.

    How to Make Fabric Owls 

    Supplies

    • Pattern Template - see below
    • Patterned fabric and colored felt
    • Fabric glue
    • Embroidery needle and thread
    • Buttons
    • Fiberfill for the stuffing
    • Crushed walnut shells
    Owl Body template
    owl body parts pattern

    Here is a template that you can use to create the owls. You can find the free full page PDF version here. 

    Sewing on body parts of the owl pattern.

    Creating the Owl's Body

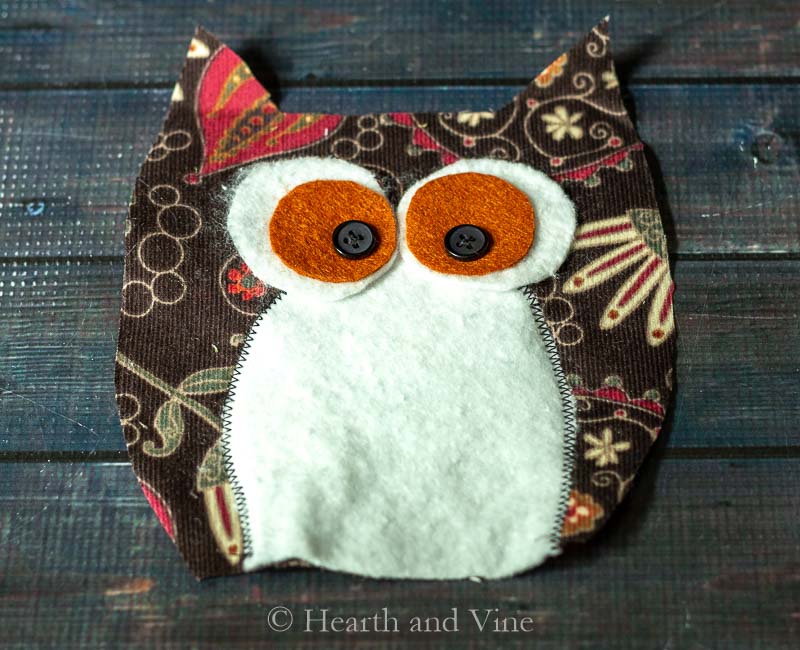
    First, pick out some coordinating fabrics and felt. I used quilt batting for this one's belly and all of the white eyes.

    Sew the owl parts to the right side of one of the body pieces. 

    I used the sewing machine to sew the belly to the body with a zigzag stitch. However, you could hand stitch the pieces onto the body. Or, use fabric glue. In fact, I used fabric glue for the beak.

    Newsletter Signup
    Join Our Newsletter List!

    Be the first to receive new posts and get access to our Subscribers Only Page.

    The eyes were sewn into place with a little 7/16-inch black button.

    Embroidered eyes on owl.

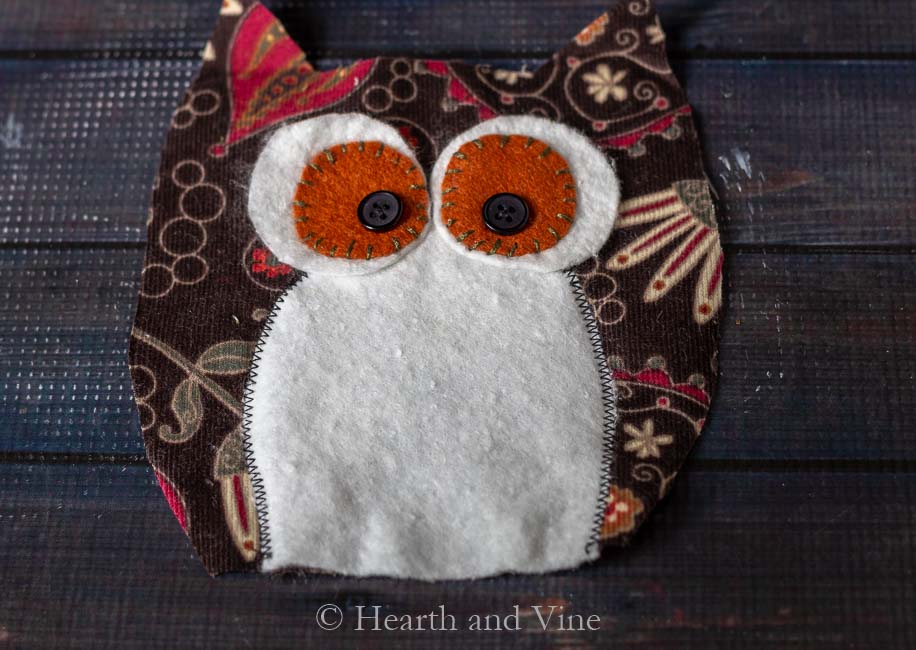
    For added dimension and whimsy, I used embroidery floss to sew around the inner eye with a contrasting color thread.

    Owl body pieces right sides together, wrong side up.

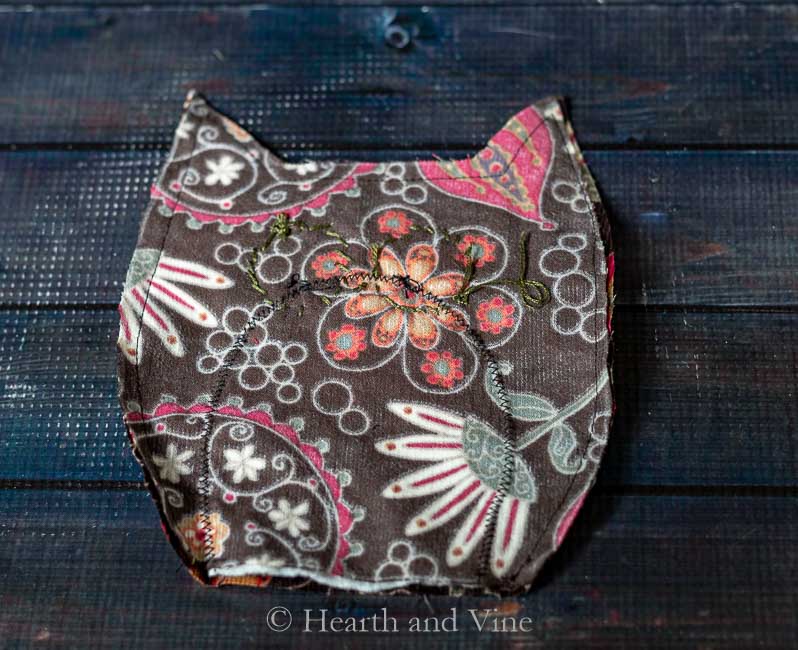
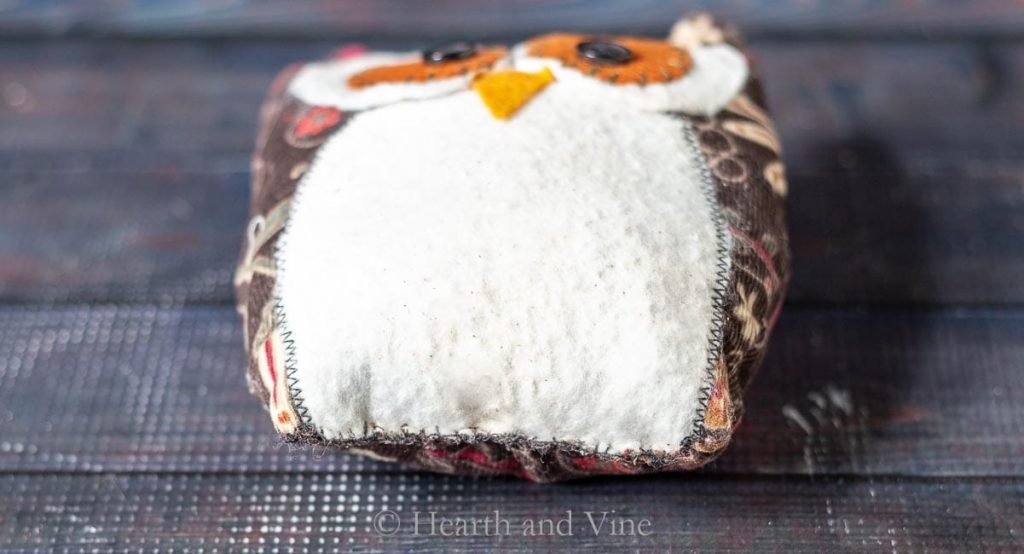
    Once the body parts are on you can match up the two body pieces, with the right sides together. Sew all along the outside edge, leaving the bottom open for turning.

    Turn the body right side out and prepare to fill the cavity.

    Crushed walnut shells

    Filling The Fabric Owls

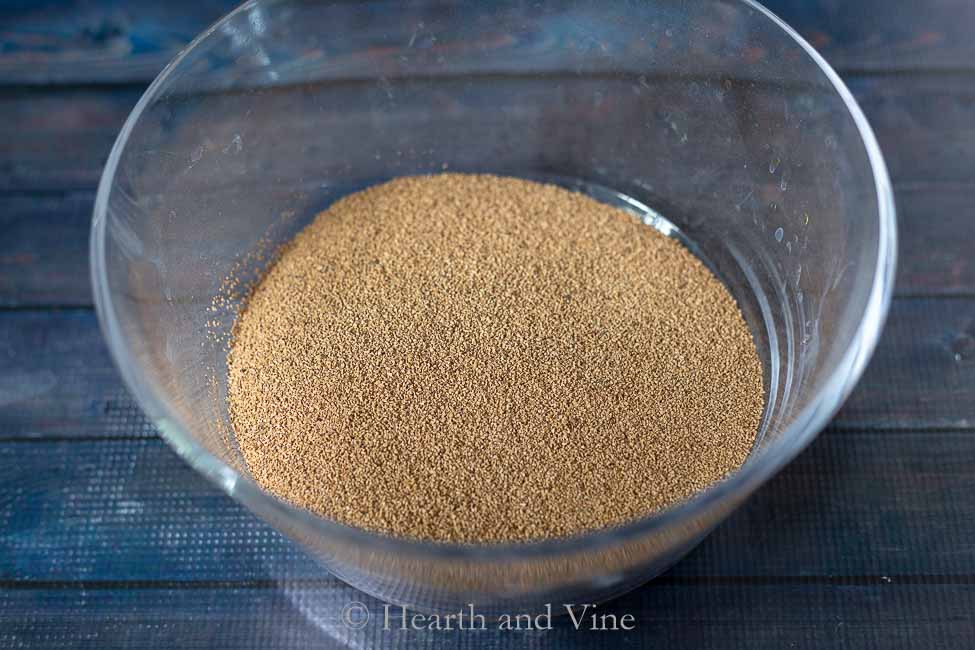
    To fill the owl use something like fiberfill or this crushed walnut shell material. I got the idea for this material from my sister's daughter-in-law. She had some new velvet pumpkins that were heavy and I wondered what was in them.

    After some research, I found that crushed walnut shells are used for pincushions. It makes the owls sturdy and helps them stand up straight.

    You could use sand but some suggested that it's a little too messy. However, if I had sand on hand I would have probably used it.

    Once I used birdseed for a snowman craft but that was a mistake because we stored them in the attic and something, I don't even want to think about what, got into them.

    Sew opening closed at the bottom of the owl.

    Fill the owl's body until it is totally full. It takes a bit of patience and practice. I might even suggest filling the ears with fiberfill first. 

    Finish by hand stitching the opening at the bottom of the owl closed.

    Middle size fabric owl.

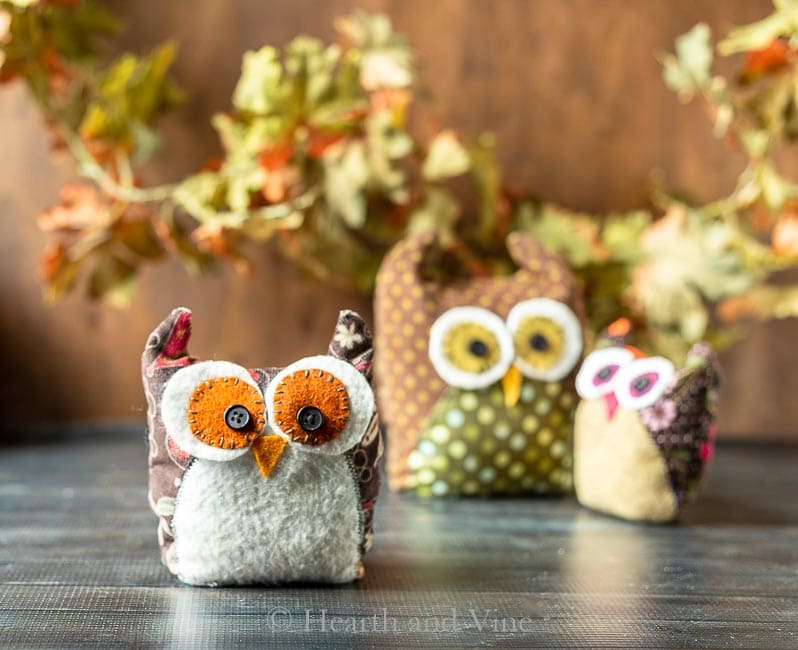
    The template will make this (see above) medium size owl.

    Large fabric owl in front of two other sized owls.

    To make one a little larger simply extend your cutting lines beyond the template about 1/2 - 1 inch. I did this for the body and the belly but left the eyes the same.

    Small fabric owl with two larger in the background.

    The same goes for making this smaller owl. Just trace the template but cut inside the lines.

    On this one, I used the small eye template for the larger eyes and then cut smaller ones, along with the body and belly.
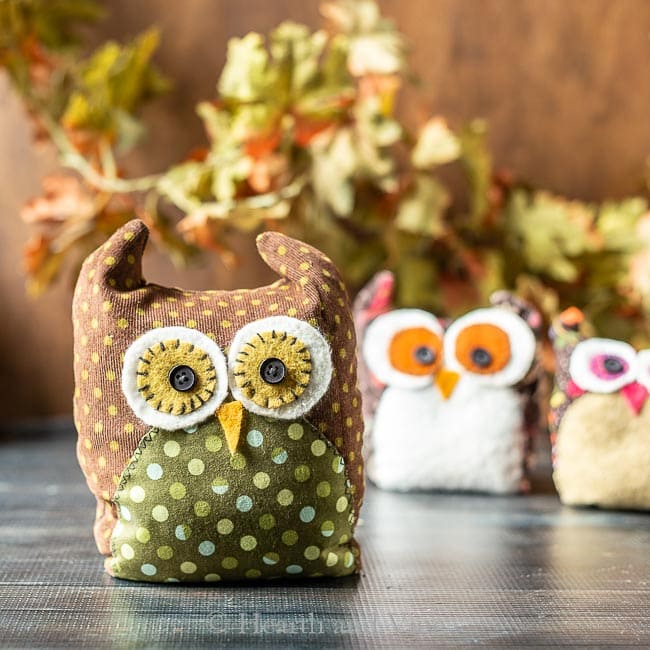
    Trio of fabric owls.

    Fabric Owl Family

    This little family of fabric owls is perched on our mantel to help us celebrate all things fall. They will be there through Thanksgiving.

    Fall mantel with fabric owls perched on top of a wooden crate.

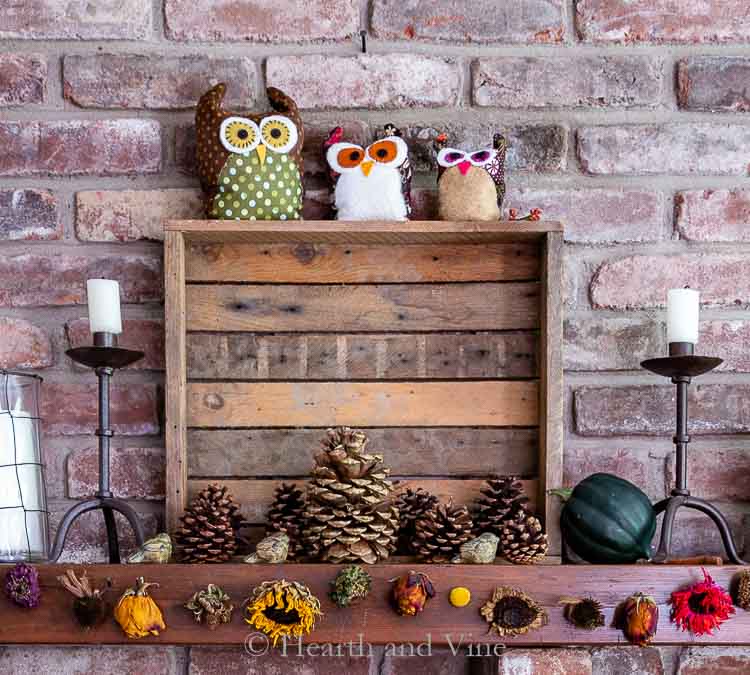
    Here they are on my mantel sitting on a crate with pine cones, candlesticks, and this fun dried flower garland DIY. 

    Patti signature

    More Owl & Felt Crafts

    • Nature Inspired Owl Wreath
    • DIY Felt Succulent Planter
    • Handmade Felt Pincushion
    Three fabric owls in different sizes.
    Print
    5 from 1 vote

    How to Make Fabric Owls - Free Pattern Template

    Here's a great tutorial that will show you how to use leftover fabric scraps and felt from your sewing projects, and a free printable pattern to make these adorable fabric owls.
    Prep Time30 minutes mins
    Active Time30 minutes mins
    Total Time1 hour hr
    Course: DIY Projects
    Yield: 1 Owl
    Author: Patti Estep
    Cost: $10

    Equipment

    • Sewing Machine

    Materials

    • Template
    • Patterned fabric and colored felt
    • Fabric glue
    • Embroidery thread
    • Buttons
    • Fiberfill
    • Crushed walnut shells

    Instructions

    • Pick out some coordinating fabrics and felt.
    • Use quilt batting for the owl's belly and all of the white eyes.
    • Sew the owl parts to the right side of one of the body pieces. 
    • Use the sewing machine to sew the belly to the body with a zigzag stitch.
    • You could hand stitch the pieces onto the body, or use 
      fabric glue.
    • Use fabric glue for the beak.
    • Secure the eyes with a little button.
    • Sew around the inner eye with a contrasting color.
    • Match up the two body pieces, with the right sides together.
    • Sew all along the outside edge, leaving the bottom open for turning.
    • Turn right side out and prepare to fill the cavity.  
    • Fill the owl with fiberfill or crushed walnuts.
    • Fill the owl's body until it is totally full. 
    • Finish by hand stitching the opening closed.
    Tried this project?Tag @hearthnvine on Instagram
    Set of three plush fabric owls made from scrap fabric.

    « Decorating Pumpkins with Leaves
    Baked Rigatoni with Sausage »

    About Patti Estep

    Patti is the creator of Hearth and Vine, a home and garden blog filled with projects to inspire your creative side. She loves crafting, gardening, decorating and entertaining at her home in Pennsylvania. When she is not working on a project at home or searching for treasures at nurseries and thrift stores with her girlfriends, you’ll probably find her with family and friends, at a restaurant, or home party enjoying new and different food adventures.

    Reader Interactions

    Comments

    1. Cheryl

      October 05, 2024 at 8:10 pm

      5 stars
      Such a cute idea! Love it. Simple!

      Reply
      • Patti Estep

        October 06, 2024 at 7:40 am

        So glad you like it Cindy. They were fun to make.

        Reply
    2. PAULI STERN

      June 05, 2021 at 12:10 pm

      Hi, these are adorable! How much of the crushed walnut shells did you use for the standard-sized owl? Thanks.

      Reply
      • Patti Estep

        June 06, 2021 at 7:14 am

        Pauli, I think it was about 2 cups, maybe a little more. 

        Reply
    3. Robyn

      September 24, 2018 at 1:59 pm

      These are so very cute!! I love Owls, thanks for the pattern, you did a great job!

      Reply
      • Patti Estep

        September 24, 2018 at 2:09 pm

        Thank you for such a kind comment Robyn. I hope you have as much fun making them as I did.

        Reply
    4. Carole West

      September 24, 2018 at 8:51 am

      These are so cute and clever. When I was a kid my sister made stuffed frogs with those google eyes. Anyways they always filled them with sand. So the one with the pink eyes is my favorite, great way to spice up fall with a different color. LOVE!

      Reply
      • Patti Estep

        September 24, 2018 at 9:09 am

        Thanks Carole. Frogs would be cute too. Might have to keep them in mind for the future.

        Reply
    5 from 1 vote (1 rating without comment)

    Leave a Reply Cancel reply

    Your email address will not be published. Required fields are marked *

    Recipe Rating


    Primary Sidebar

    Patti Estep Profile Picture

    Hi!

    I'm Patti

    Join me to create lots of fun DIY projects, including crafts, gardening, home decor, and tasty recipes

    More about me

    Popular Posts

    • Baked zucchini bite on a slated tray with a bowl of horseradish sauce.
      Make Tasty Zucchini Bites in Under an Hour
    • Three tin cans in descending sizes hanging from twine.
      DIY Wind Chimes with Tin Cans
    • Blue jean crossover bag
      DIY Crossbody Bag from Jeans
    • Ham barbecue sandwich on plate
      Chipped Ham Barbecue Sandwiches - A Pittsburgh Favorite
    • Echievera planter
      What to do With a Stretched Succulent
    • Make a Mason Jar Oil Candle Lamp with botanicals and essential oils. ~ gardenmatter.com
      DIY Oil Candle - Gifts for the Holidays

    Footer

    ^ back to top

    About
    Contact
    Privacy Policy
    Disclosure Policy

    Sign Up Here!
    for our
    newsletter &
    special offers

    Follow Me

    facebook
    Pinterest
    instagram

    As an Amazon Associate, I earn from qualifying purchases. i.e. as an Amazon Associate, I earn from qualifying purchases.

    Copyright © 2025 Hearth and Vine

    Rate This Recipe

    Your vote:


    A rating is required
    A name is required
    An email is required

    Recipe Ratings without Comment

    Something went wrong. Please try again.