This project for holiday burlap pillow covers is really easy and I'll show you two tricks that you can use in the future for any time of year.
Holiday Burlap Pillow Covers
Do you like all the pretty burlap projects are shown on the web? I do, and this season I thought I'd add a couple of projects to my holiday decor using burlap. This project for holiday burlap pillow covers is really easy, and I'll show you two tricks that you can use in the future, for any time of year.
One of the best parts is that burlap fabric is very inexpensive. I think I purchased 1.5 yards at $3.00 which is very affordable for two large pillows. Especially this time of year when I am spending money right and left.
Start by measuring your existing pillows. Mine was 18.5 inches square. So I added 2 inches to the top for seam allowance, and to add a little extra breathing room. Then I added 4 inched to the sides. This is because you need to fold under some of the sides and have an overlap to make the envelope.
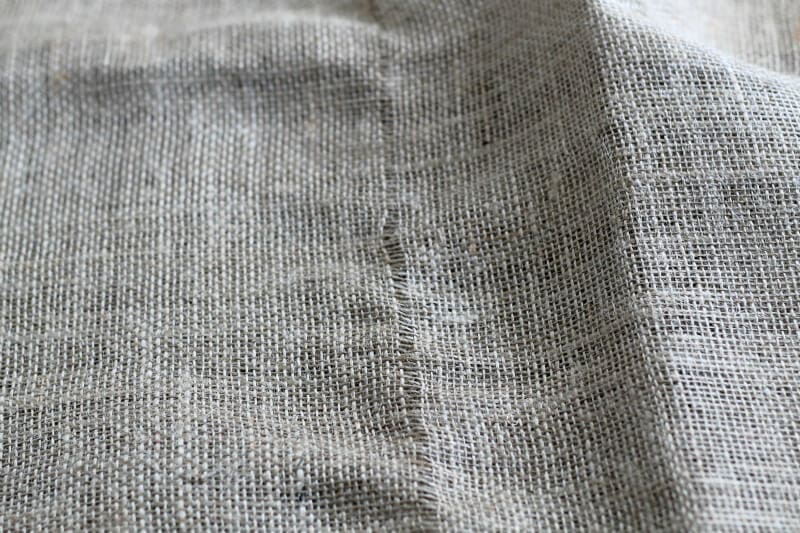
Here's a tip: The lady at Hobby Lobby showed me a neat trick to cutting burlap. Make a small snip where you want to cut them pull out one of the strands and it will leave a channel as shown in the pictures above. Now you can easily see where to cut by following the channel.
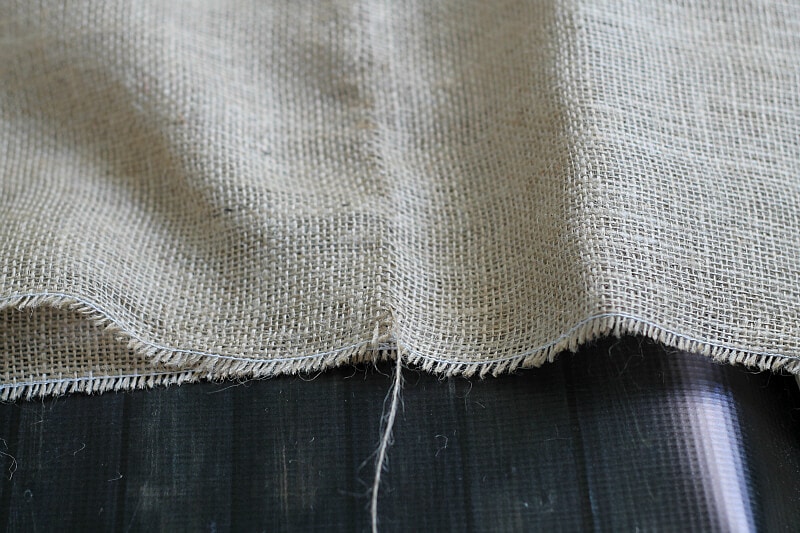
Fold over about 1 inch to the wrong side (the burlap didn't really seem to have a wrong side but in case you use a different material) and press with an iron. Stitch about 1/2 inch to finish the edge.
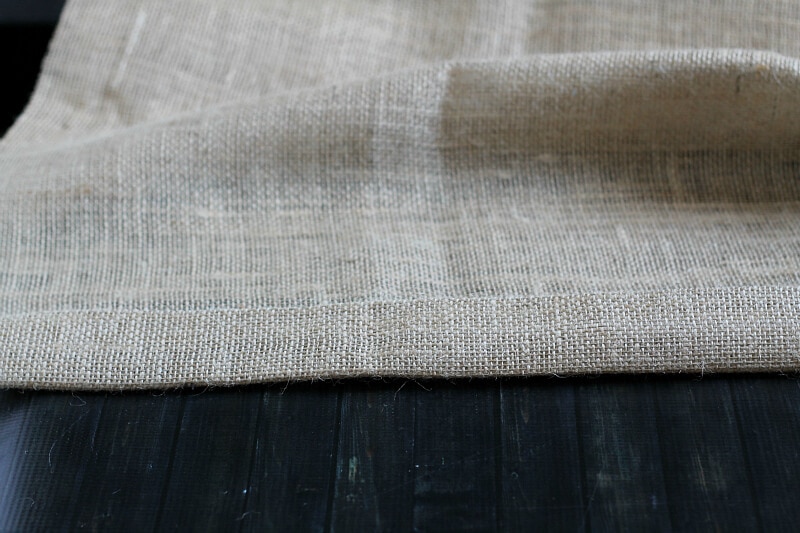
On the other side fold over once, and then fold it again about 1.5 inches. Press. Stitch to finish the edge.
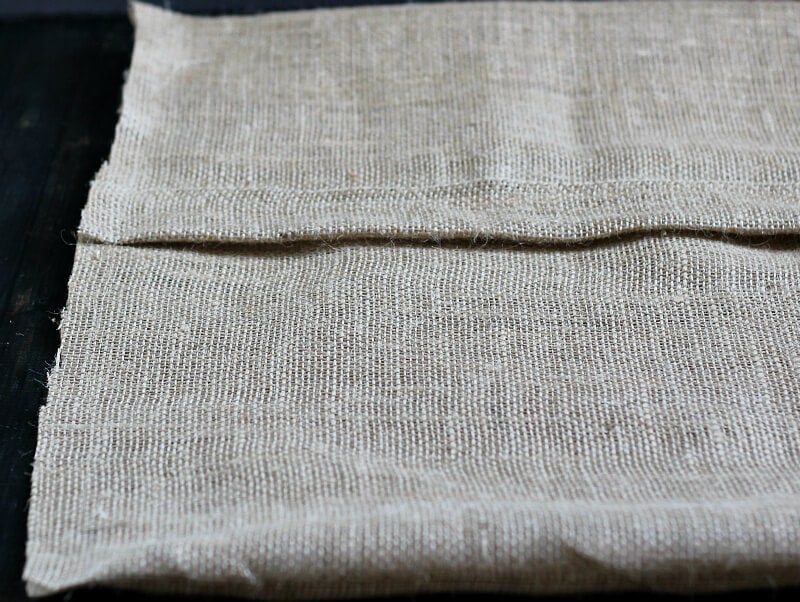
With right sides together, bring the folded pieces towards the middle or slightly to the side, overlapping until your total width is just slightly larger than the pillow width. Then sew a 1-inch seam along the raw edges. Clip corners and turn right side out. Stuff with the original pillow or a pillow form.
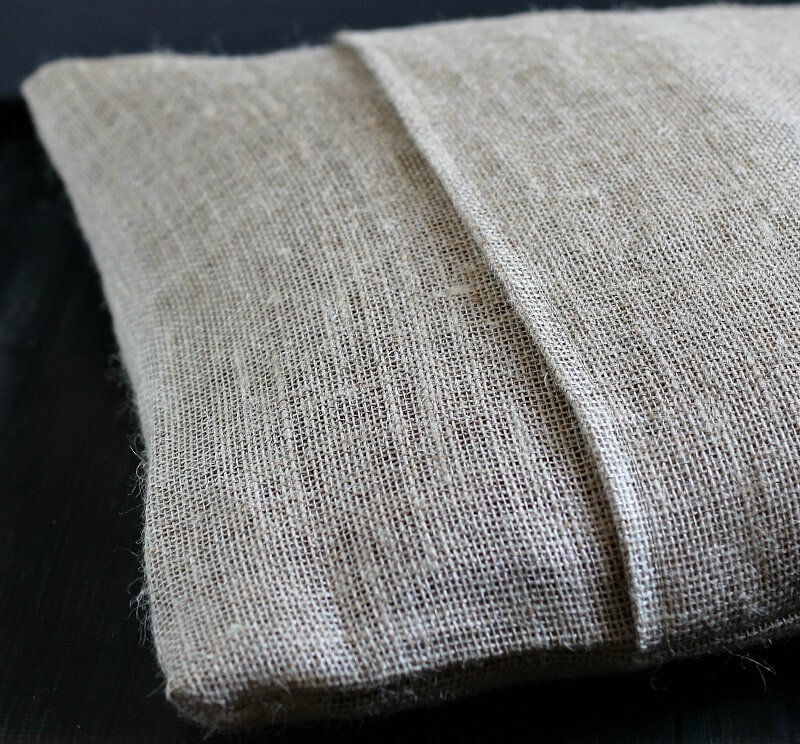
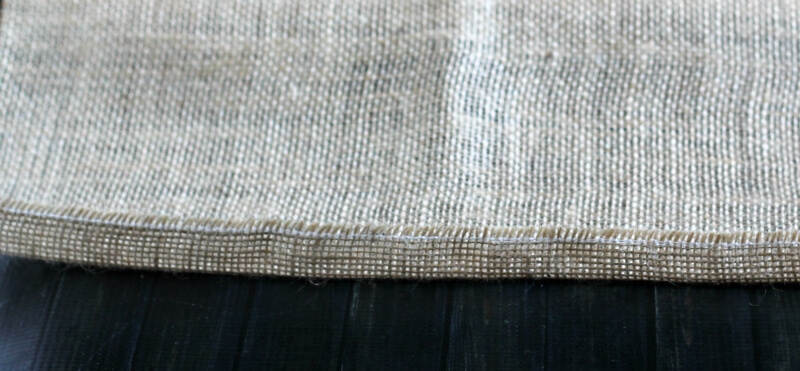
This is what it looks like on the back.
That's it for the envelope pillow cover. You can do this with any fabric or pillow. You can also buy pillow forms at craft stores, or buy some regular pillows at thrift stores for cheap, and change out your covers with the seasons.
Transferring An Image Using Waxed Paper
In the past, I showed you how to transfer an image on a pillow using transfer paper and freezer paper in my post, Botanical Pillows. This time I used regular waxed paper and it worked like a charm.
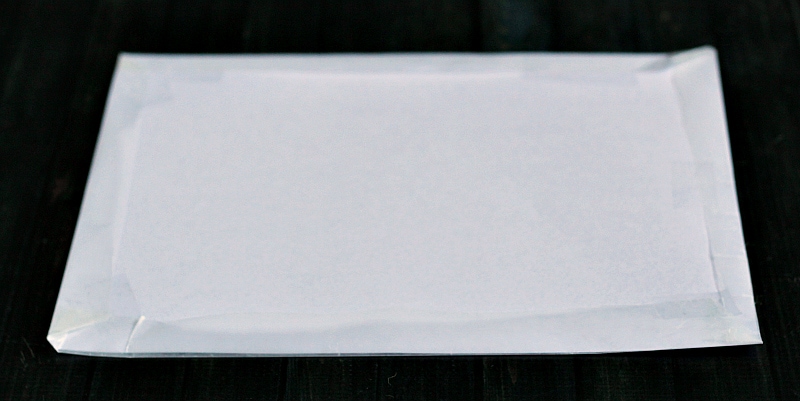
All you have to do is tape waxed paper to a regular sheet of copy paper as shown above.

Then print your image (make sure it is reversed), on an inkjet printer.
Note: Be very careful when the paper comes off the printer. The slightest touch will smudge the graphic.
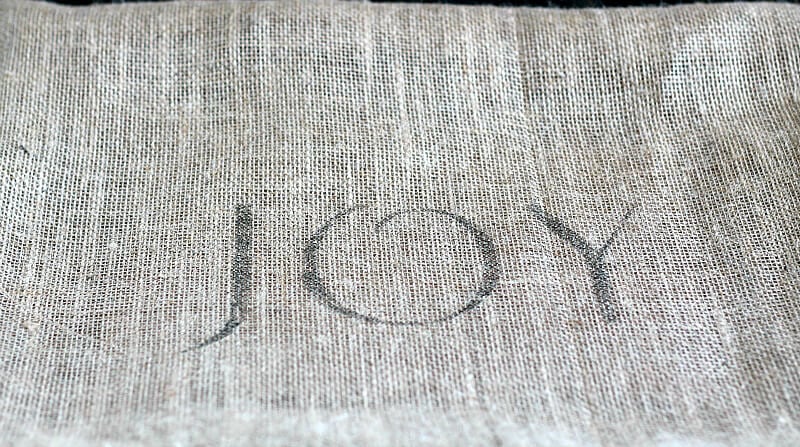
Flip the image onto your fabric and gently press down on all areas with your hands.
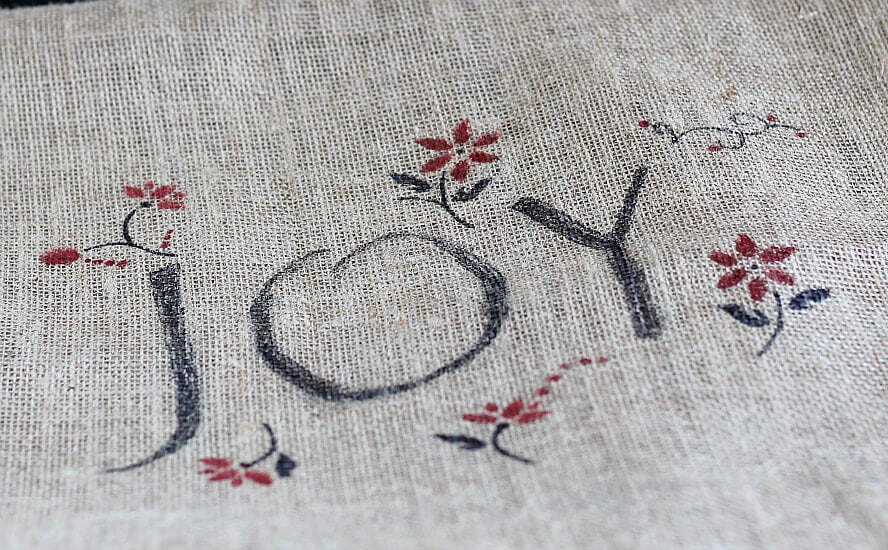
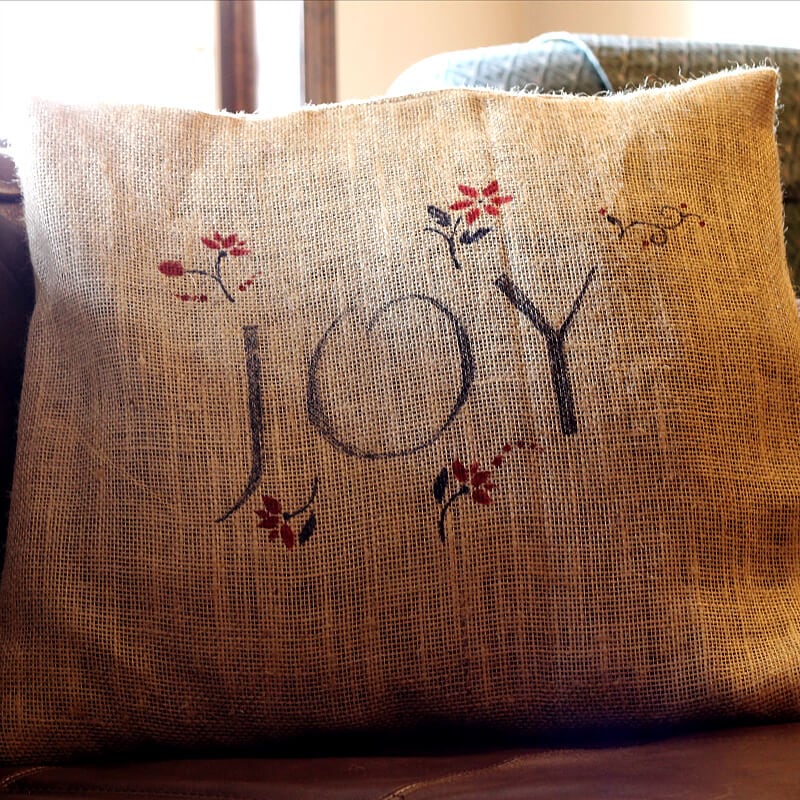
If the image is too light you can easily fill it in with sharpie markers. On these, I added a little embellishment with the same stencil I had for my bulletin board post with some craft paint and a black sharpie.
One last tip: Use the end of your paintbrush or a pencil eraser and dip it into the craft paint. Then dab it on the fabric for perfect dots.
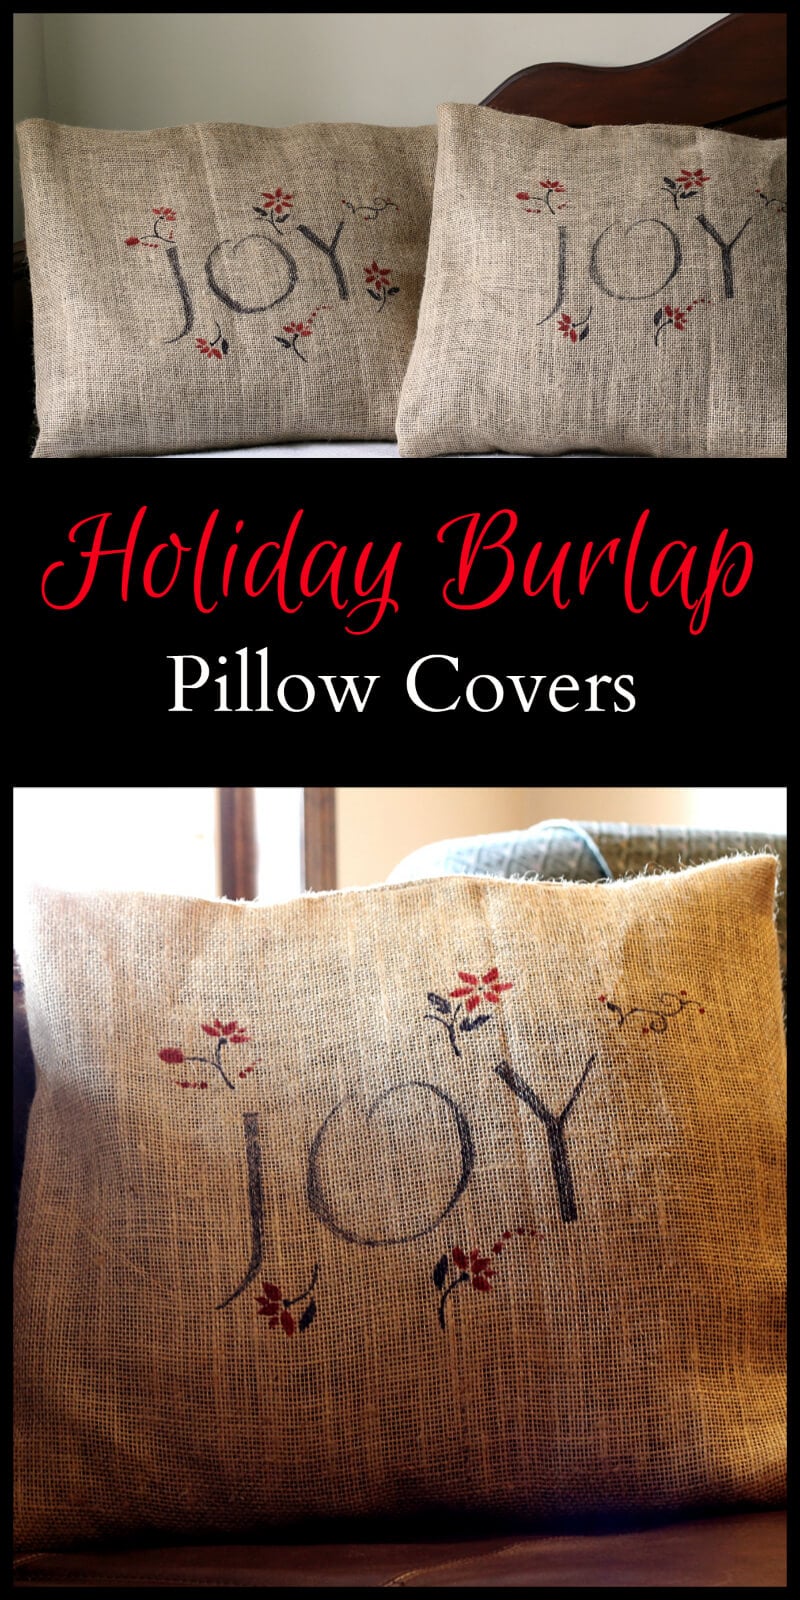
Holiday Burlap Pillow Covers For A Casual Rustic Feel
Equipment
- Printer
- Scissors
- Iron
Materials
- 1.5 yards of Burlap
- Wax Paper
- Sewing needle and thread
- Sharpie
- Red and Green Paint
- Pencil
Instructions
- How to make a burlap pillow
- Measure your existing pillows. Mine were 18.5 inches square.
- Add 2 inches to the top for seam allowance.
- Add 4 inches to the sides.
- Fold over about 1 inch to the wrong side.
- Press with an iron.
- Stitch about 1/2 inch to finish the edge.
- On the other side fold over once, then fold it again about 1.5 inches. Press.
- Stitch to finish the edge.
- With right sides together, bring the folded pieces towards the middle.
- Overlap until your total width is just slightly larger than the pillow width.
- Sew a 1-inch seam along the raw edges.
- Clip corners and turn right side out.
- Stuff with the original pillow or a pillow form.
- How to transfer image
- Tape waxed paper to a regular sheet of copy paper.
- Print your image on an inkjet printer.
- Flip the image onto your fabric and gently press down on all areas with your hands.
- Fill it in with sharpies if it is too light.
- Use the end of your paintbrush or a pencil eraser and dip it into the craft paint.
- Dab it on the fabric for perfect dots.
Melony
Thanks for the hints on transferring an image using wax paper! Your pillows are charming!
debbie
Not sure I understand the wax paper but I will read through that again. What a great idea! I had no idea you could transfer like that. The pillows are lovely.
Patti Estep
Hi Debbie,
The wax paper really works. Try it. I've used it a few times now. Some people like freezer paper but I found the wax paper to be easier to use. If you have any questions shoot me an email.
Patti
Laurie
Love these! Glad you added them to the Bloggertunities Share Thread. I shared them on my Friday Faves this week.
Patti
Thanks Laurie,
I'll be sure to check it out!
Have a great weekend,
Patti
Chris
Love these!!
Found them at Tips and Tricks Link Party
Patti
Thanks Chris. I love the way they look in the family room.