• Skip to primary navigation
  • Skip to main content
  • Skip to primary sidebar
  • Home
  • DIY Projects
    • Homemade Bath and Body
    • Sewing - Fabric Crafts
    • Flower Crafts/Decor
    • Thrift Store/Vintage
  • Gardening
    • Flower Gardens
    • Container Gardening
    • Houseplants
    • Indoor Gardening
    • Landscaping
    • DIY Garden Art
  • Decorate
    • Spring Decor
    • Summer Decor
    • Fall Decor
    • Winter Decor
    • Home Decor Projects
  • Recipes
    • Breakfast Recipes
    • Lunch Recipes
    • Dinner Recipes
    • Dessert
    • Salad Recipes
    • Soups and Stews
    • Side Dish Recipes
    • Appetizers and Snacks
    • Healthy Recipes
  • Holidays
    • Valentine's Day
    • Easter
    • Mother's Day
    • Halloween
    • Thanksgiving
    • Christmas
Hearth and Vine
menu icon
go to homepage
  • About
  • DIY
    • ...Flower/Gardening Crafts
    • ... Bath and Body
    • ...Sewing/Fabric Crafts
    • ...Thrift Store/Upcycle
  • Gardening
    • ...Flower Gardens
    • ...Container Gardening
    • ...Indoor Gardening
    • ...DIY Garden Art
  • Decorate
    • ...Home Decor Projects
    • ...Spring Decor
    • ...Summer Decor
    • ...Fall Decor
    • ...Winter Decor
    • ...Room Makeovers
  • Recipes
    • ...Appetizers and Snacks
    • ...Dinner Recipes
    • ...Side Dish Recipes
    • ...Salad Recipes
    • ...Dessert
    • ...Drinks
  • Holidays
    • ...Valentine's Day
    • ...Easter
    • ...Mother's Day
    • ...Halloween
    • ...Thanksgiving
    • ...Christmas
  • Subscribe
  • Instagram
    • Facebook
    • Instagram
    • Pinterest
    • Twitter
  • subscribe
    search icon
    Homepage link
    • About
    • DIY
      • ...Flower/Gardening Crafts
      • ... Bath and Body
      • ...Sewing/Fabric Crafts
      • ...Thrift Store/Upcycle
    • Gardening
      • ...Flower Gardens
      • ...Container Gardening
      • ...Indoor Gardening
      • ...DIY Garden Art
    • Decorate
      • ...Home Decor Projects
      • ...Spring Decor
      • ...Summer Decor
      • ...Fall Decor
      • ...Winter Decor
      • ...Room Makeovers
    • Recipes
      • ...Appetizers and Snacks
      • ...Dinner Recipes
      • ...Side Dish Recipes
      • ...Salad Recipes
      • ...Dessert
      • ...Drinks
    • Holidays
      • ...Valentine's Day
      • ...Easter
      • ...Mother's Day
      • ...Halloween
      • ...Thanksgiving
      • ...Christmas
    • Subscribe
    • Instagram
    • Facebook
    • Instagram
    • Pinterest
    • Twitter
  • ×
    Home » DIY Projects

    How to Make an Artificial Flower Arrangement for Spring

    by Patti Estep · Mar 13, 2024

    Jump to How-to Card

    This easy tutorial will show you how to make an artificial flower arrangement for spring or any time of year with just a few basic steps.

    White artificial flower arrangement in a terracotta pot.

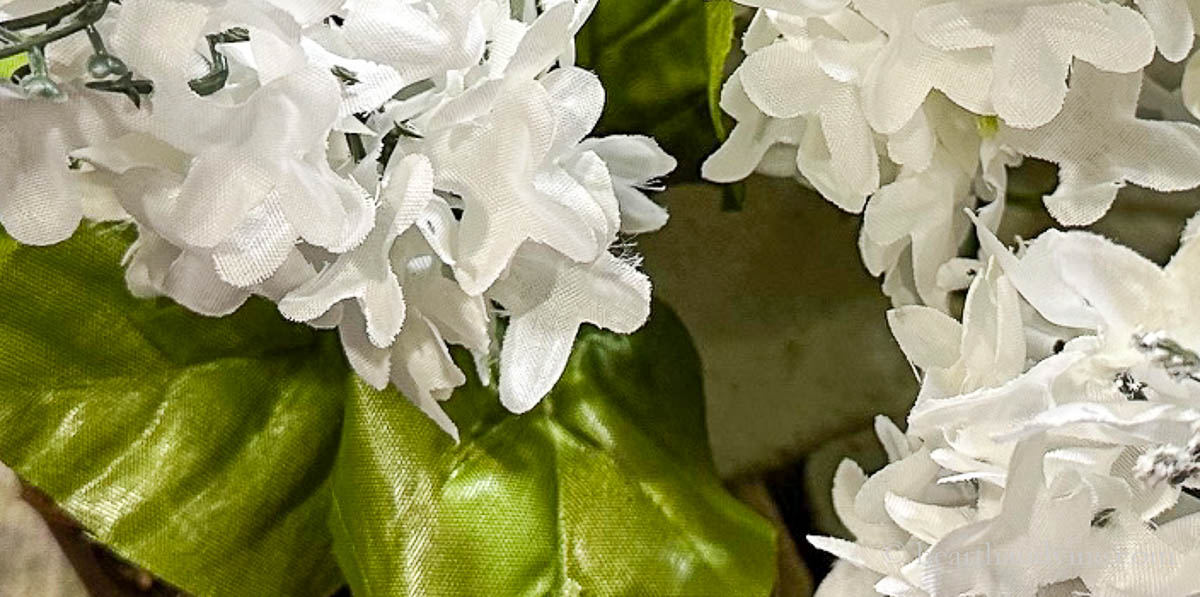
    I love the look of bright green for our spring home decor. Today I'm sharing a super easy faux floral arrangement using fake white lilacs, a clay pot, some bright green reindeer moss, and a couple of grapevines for texture.

    You can use any short container and other types of faux flowers. In fact, I was originally looking for white hyacinth flowers but ended up with these pretty lilacs instead.

    This post contains some affiliate links (that means if you make a purchase after clicking a link, there’s no additional cost to you, but I will earn a very small commission. ) i.e. as an Amazon Associate, I earn from qualifying purchases. Click here to read my full disclosure policy.
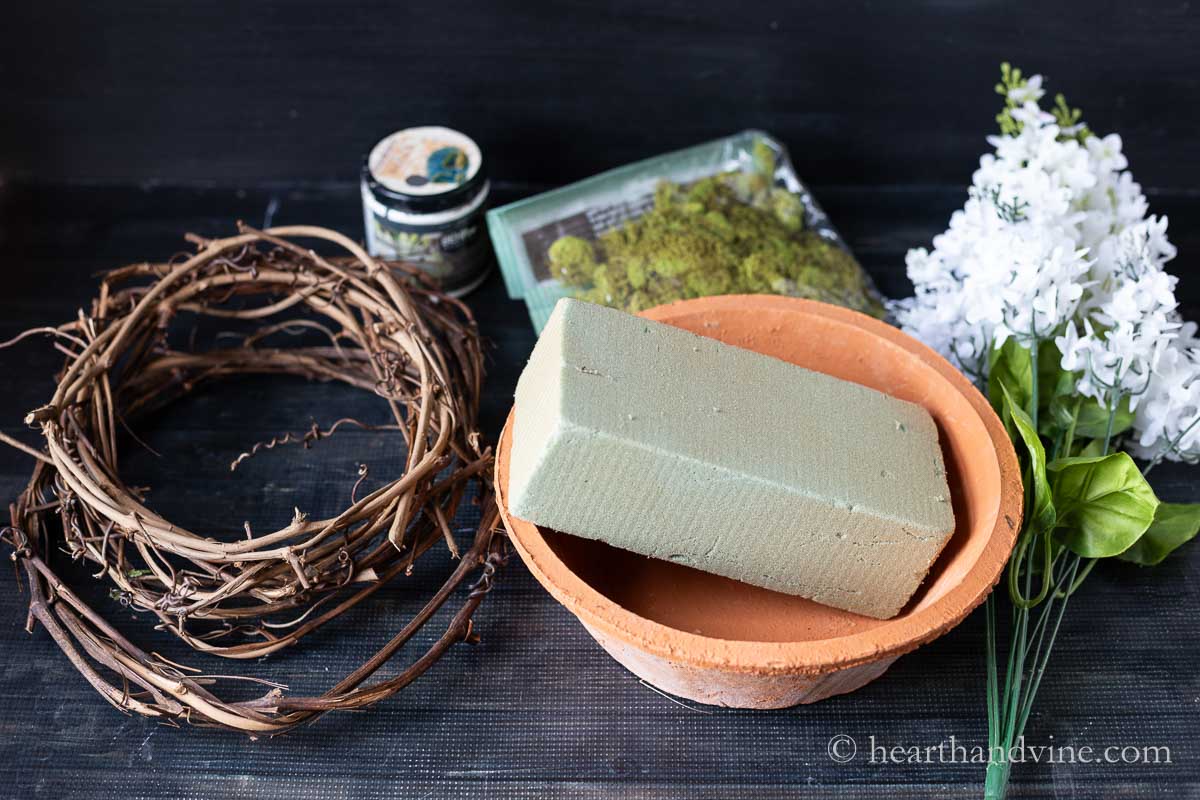
    Supplies on a table including white flowers, grapevine wreaths, a shallow clay pot, paint, floral foam and moss.

    Supplies

    • Short vessel for base - I used a terra-cotta pot
    • Floral foam
    • Grapevine wreaths
    • Moss
    • Artificial flowers - I'm using white but you can use any color.
    • Craft paint - optional
    A shallow clay pot painted with gray and green shades of craft paint.

    Make an Artificial Flower Arrangement

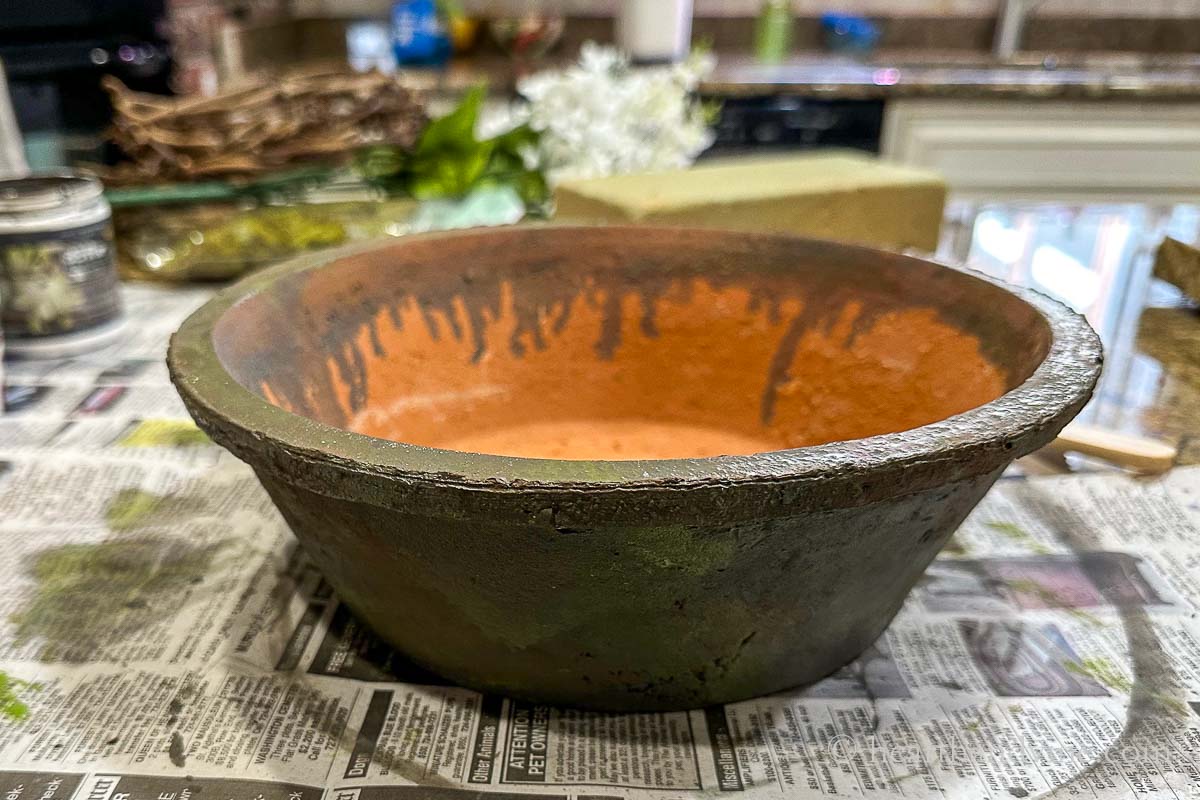
    Step 1: Take a shallow terracotta pot and paint it with craft paints in colors of gray and green to give it a vintage aged look. Make sure that you paint a few inches of the inside too in case some of it is visible when you are all done.

    Note:

    You could use white paint and dry brush the pot for a different look.

    Floral foam cut up and set into the terracotta pot.

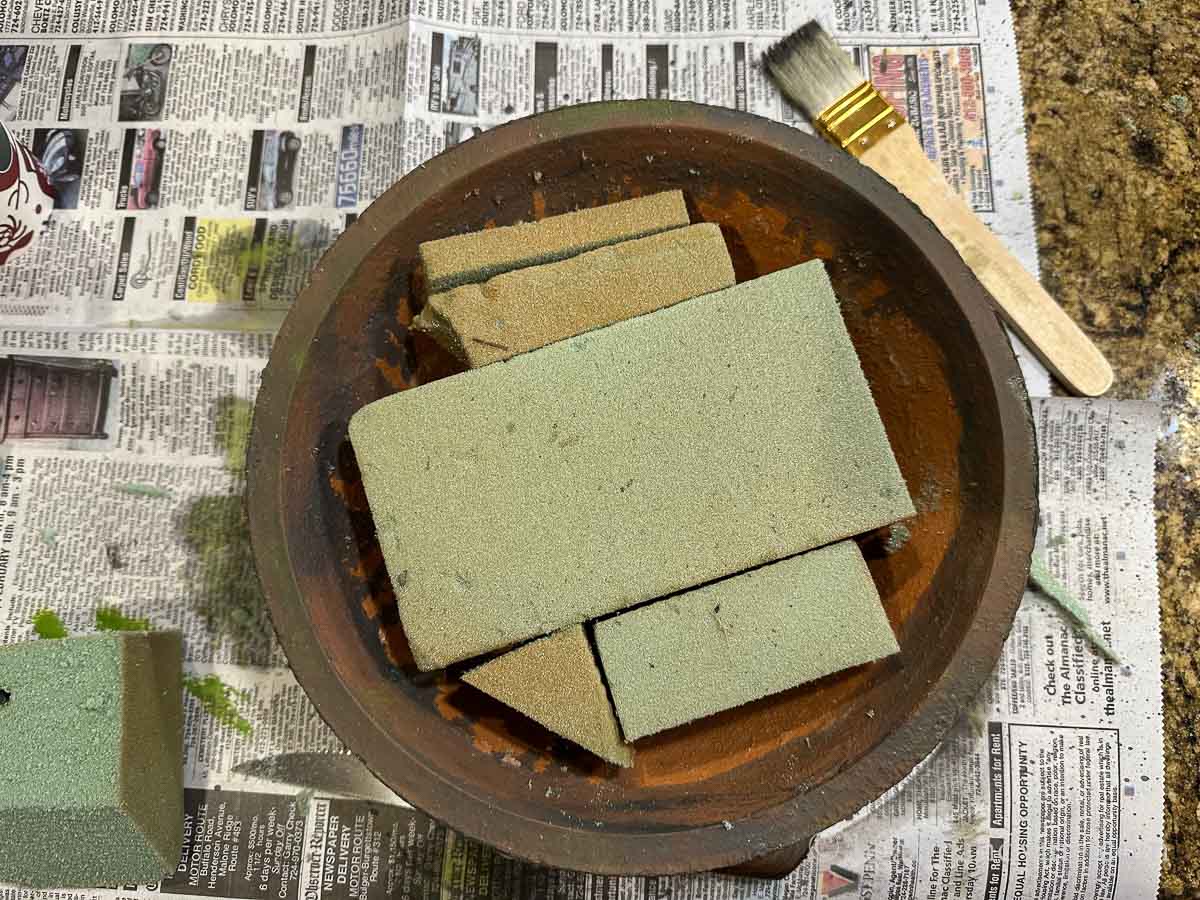
    Step 2: Cut up the floral foam and fit as much as possible into the pot.

    Newsletter Signup
    Join Our Newsletter List!

    Be the first to receive new posts and get access to our Subscribers Only Page.

    A bunch of faux lilacs cut from the stems.

    Step 3: Cut the flower stems to fit into the pot. You can hold them up to the pot or vase to see how much needs to be trimmed.

    White artificial lilacs set into the floral foam.

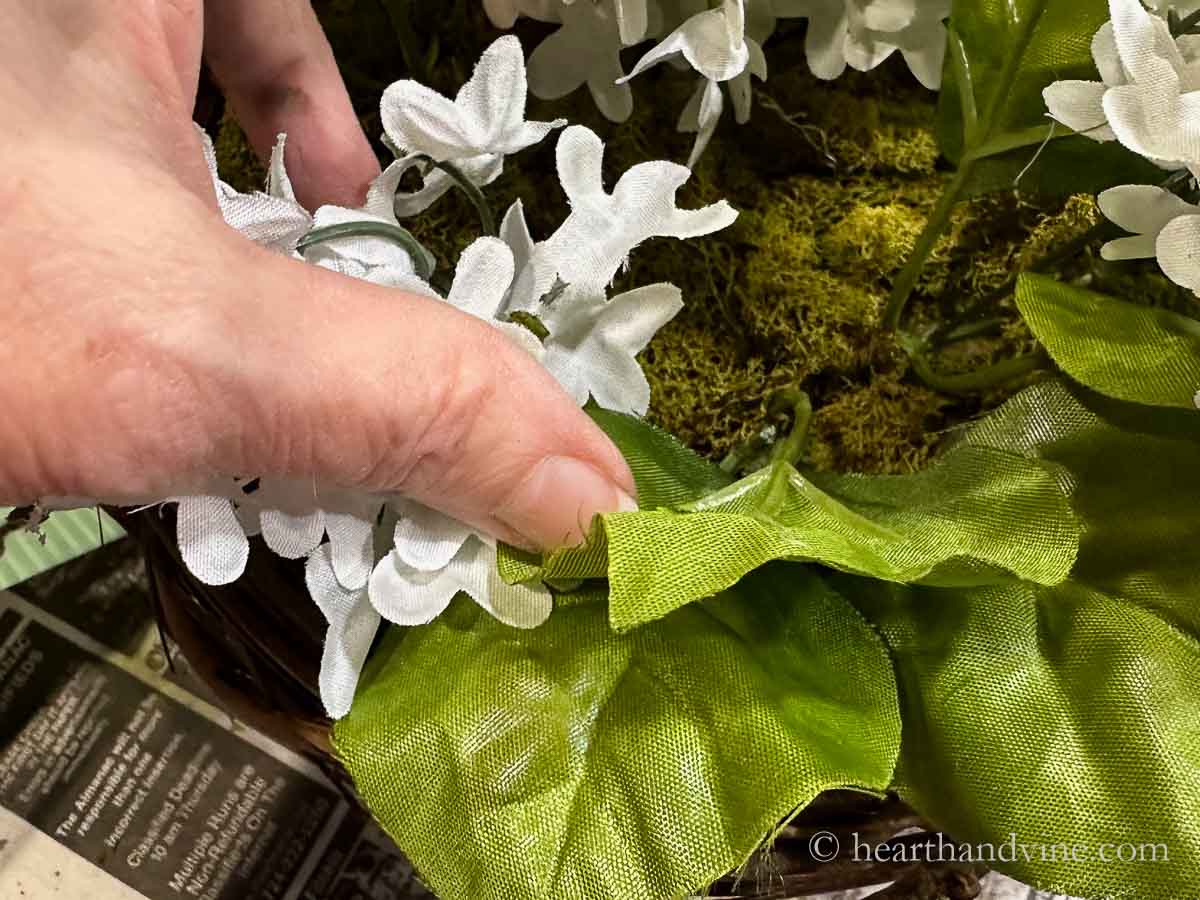
    Step 4: Place a couple of grapevine rings on the edge. Then start inserting the flowers into the floral foam. Start in the middle with large flowers and then continue with smaller blooms as you move outward.

    A close look showing the floral foam under the flowers.

    Step 5: Place pieces of moss around the flowers on top of the floral foam.

    Bright green reindeer moss set on top of the floral foam.

    Step 6: Turn the faux flower arrangement around and look at all sides. Then adjust the flowers as needed.

    A white artificial flower arrangement on a living room table.

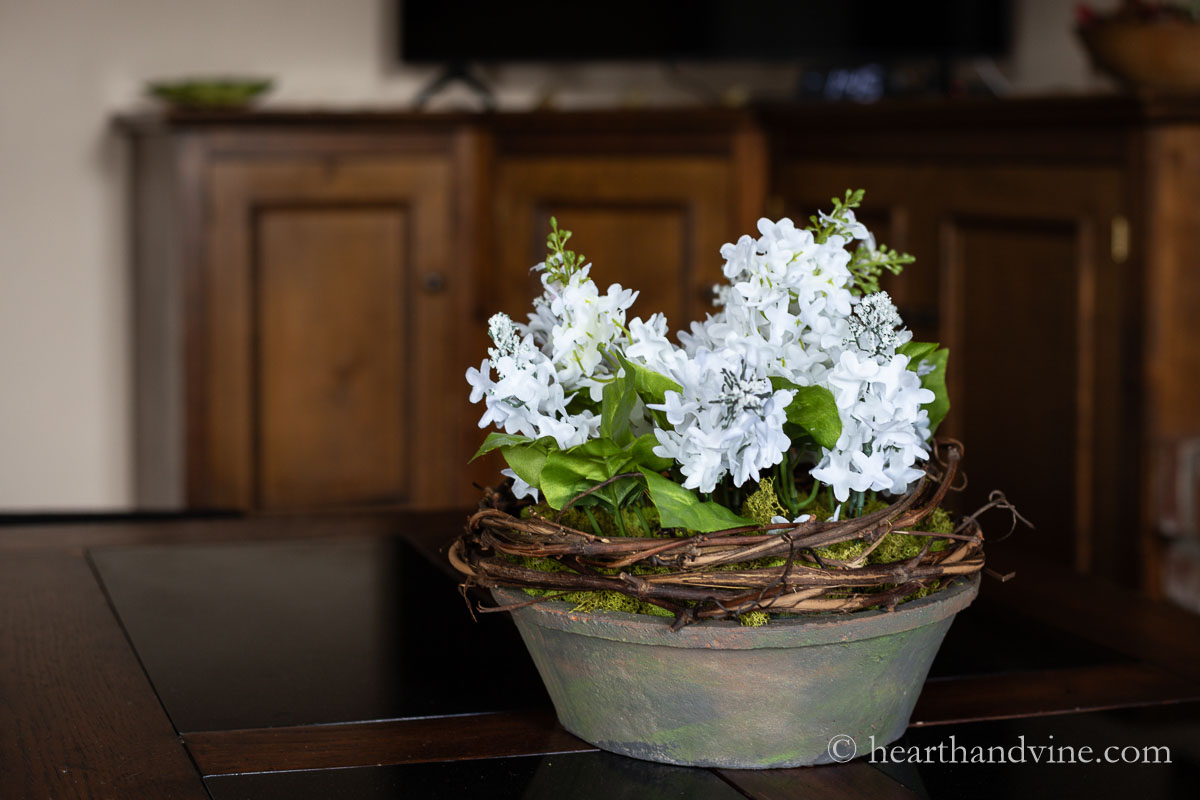
    Set the artificial flower arrangement on your living room table, or the foyer, or use it as a pretty centerpiece for the dining table.

    Note:

    You could use hot glue or craft glue to secure the flowers and moss in place. However, you don't need to and if you don't you can easily reuse the material for a future craft.

    I made this for spring. However, I think this color combination is one that you can use all year round. And since you are not using real flowers this artificial arrangement will last for years.

    Patti signature

    More Flower Arrangement Ideas

    • Spring Flower Basket
    • Easter Lily Centerpiece
    • Foraged Spring Floral Arrangement
    A close up image of an artificial flower arrangement with white lilacs, moss, grapevine in a clay pot.
    White artificial flower arrangement in a terracotta pot.
    Print

    How to Make an Artificial Flower Arrangement for Spring

    This DIY flower arrangement is a quick and easy way to make a fresh centerpiece with white artificial flowers that you can keep for a long time.
    Prep Time15 minutes mins
    Active Time30 minutes mins
    Total Time45 minutes mins
    Yield: 1

    Equipment

    • scissors or wire cutters
    • Paint Brush
    • Serrated knife

    Materials

    • short terra cotta pot or other short vessel
    • floral foam
    • artificial flowers in white
    • moss
    • craft paints optional

    Instructions

    • Paint your clay pot if desired with rustic grays and greens to give it a weathered look. Be sure to paint the first inch or so on the inside of the pot too.
    • Cut the floral foam block to fit the base vessel with a serrated knife.
    • Set a couple of grapevine wreaths around the edge.
    • Cut the flowers from the stems to fit into the foam.
    • Place the flowers into the foam starting with larger flowers in the middle and work your way outwards with smaller flowers.
    • Turn the arrangement around and view it from all sides. Adjust and bend the blooms and leaves as needed.
    • Add pieces of moss to cover any areas that you can see of the floral foam.

    Notes

    • You can save some money by buying bunches of the same flower instead of single stems. This entire arrangement was made with one bunch.
    • When painting your base you could use white paint and dry brush the pot for a different look.
    • You can use lots of different things for the vase/base. I'm using a terracotta pot but you could use a ceramic pot or large wooden bowl.  A glass bowl or low metal container would work too
    • You can skip the grapevine or use other materials such as willow and bend them around the pot, secured with some wire.
    • You could use hot glue or craft glue to secure the flowers and moss in place. However, you don't need to and if you don't you can easily reuse the material for a future craft.
     
    Tried this project?Tag @hearthnvine on Instagram
    « How to Make an Awesome Garden Twig Trellis
    Cheddar and Chive Biscuits »

    About Patti Estep

    Patti is the creator of Hearth and Vine, a home and garden blog filled with projects to inspire your creative side. She loves crafting, gardening, decorating and entertaining at her home in Pennsylvania. When she is not working on a project at home or searching for treasures at nurseries and thrift stores with her girlfriends, you’ll probably find her with family and friends, at a restaurant, or home party enjoying new and different food adventures.

    Reader Interactions

    Comments

    1. Carole West

      March 13, 2024 at 9:55 am

      I really love this - so simple and organic looking.

      Reply
      • Patti Estep

        March 13, 2024 at 10:08 am

        Thanks Carole. It's brightening up our living room after what seemed like a long winter.

        Reply

    Leave a Reply Cancel reply

    Your email address will not be published. Required fields are marked *

    Recipe Rating


    Primary Sidebar

    Patti Estep Profile Picture

    Hi!

    I'm Patti

    Join me to create lots of fun DIY projects, including crafts, gardening, home decor, and tasty recipes

    More about me

    Popular Posts

    • Baked zucchini bite on a slated tray with a bowl of horseradish sauce.
      Make Tasty Zucchini Bites in Under an Hour
    • Three tin cans in descending sizes hanging from twine.
      DIY Wind Chimes with Tin Cans
    • Blue jean crossover bag
      DIY Crossbody Bag from Jeans
    • Ham barbecue sandwich on plate
      Chipped Ham Barbecue Sandwiches - A Pittsburgh Favorite
    • Echievera planter
      What to do With a Stretched Succulent
    • Make a Mason Jar Oil Candle Lamp with botanicals and essential oils. ~ gardenmatter.com
      DIY Oil Candle - Gifts for the Holidays

    Footer

    ^ back to top

    About
    Contact
    Privacy Policy
    Disclosure Policy

    Sign Up Here!
    for our
    newsletter &
    special offers

    Follow Me

    facebook
    Pinterest
    instagram

    As an Amazon Associate, I earn from qualifying purchases. i.e. as an Amazon Associate, I earn from qualifying purchases.

    Copyright © 2025 Hearth and Vine

    Rate This Recipe

    Your vote:


    A rating is required
    A name is required
    An email is required