See how to easily make a simple snap bag in different sizes that you can use for your makeup brushes or anything you want with scrap fabric.
Another use for your scrap materials. I seem to have an endless supply of pretty fabric that I'll probably never use for that quilt I originally bought it for.
Sometimes you just have a fair amount of material left over from a project and this tutorial for making snap bags could be used with that scrap fabric too.
It's the kind of thing you might call thrifty, and just in time for this month's Thrifty Team challenge. Stop by and see what other thrifty ideas the team has created at the end of this post.
This post contains some affiliate links (that means if you make a purchase after clicking a link, there’s no additional cost to you, but I will earn a very small commission. ) Click here to read my full disclosure policy.
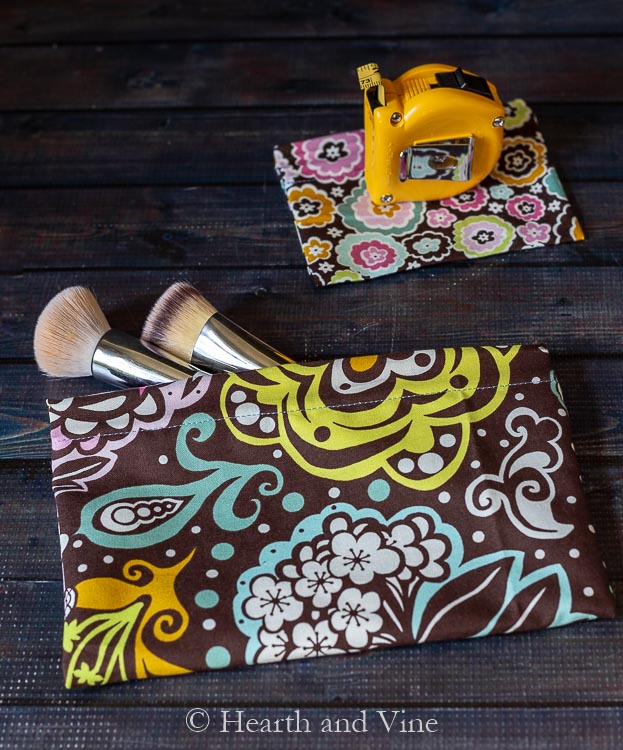
My inspiration for this project came from a need to have a separate bag for my makeup brushes. I'm always worried that something will spill and ruin the brushes when we travel. And for some reason, the other bags I have that are smaller are not wide enough for my brushes.
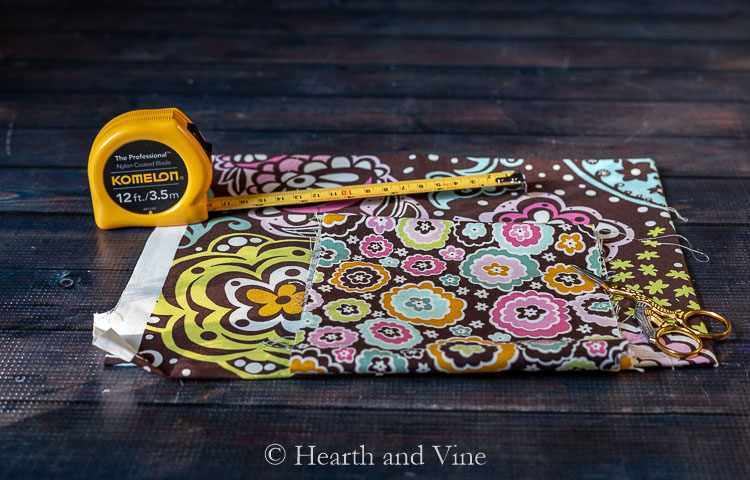
The key to these bags is using a piece of metal tape measure that will snap closed when shut.
You probably have one lying around the house or you can try looking at the dollar store or flea market. I actually purchased this tape measure for a small amount of money. I figured it would be worth it if I end up making several bags.
TIP: Make sure you crimp or tape the end of the tape after you cut the first strip or the rest will zip back into the casing. It happened to me and I had to take the whole thing apart and put it back together. As you can see from the image above I bent the end with some pliers to prevent it from scooting back inside. A piece of duct tape or masking tape a little wider than the tape would probably work too.
How to Make a Snap Bag
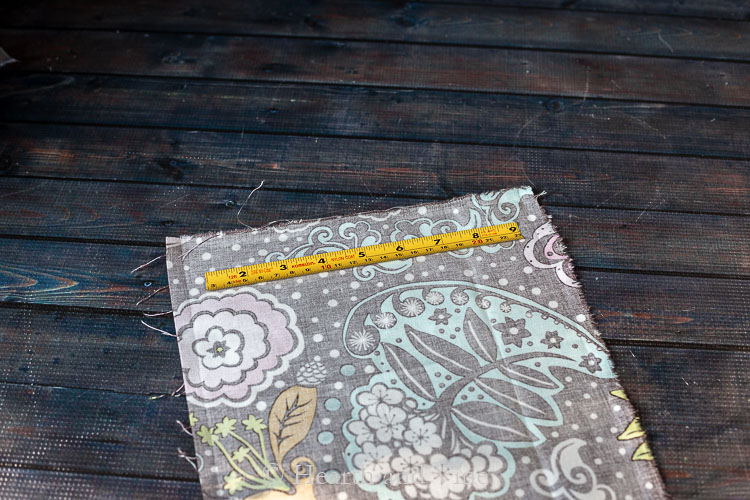
Decide how big you want your bag to be. I wanted mine to be at about 8 inches wide and 5 inches tall.
- Take your desired width and add 1 inch. (for a 1/2 inch seam on each side) For me, 8 + 1 = 9 inches
- Next, measure your height and double it. (5 x 2 = 10 inches) Then add 2 more inches for the channels that you will thread your tape into. (10 + 2 = 12 inches)
- Cut a piece of the metal measuring tape the same as the desired width or slightly shorter.
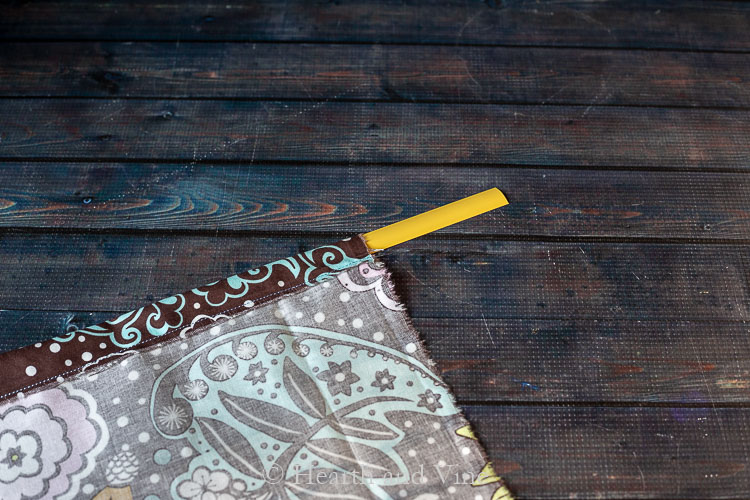
Next, turn over an inch of fabric to the wrong side and sew across making a channel.
Slide the piece of the metal measuring tape into the channel with the convex or rounded side up.
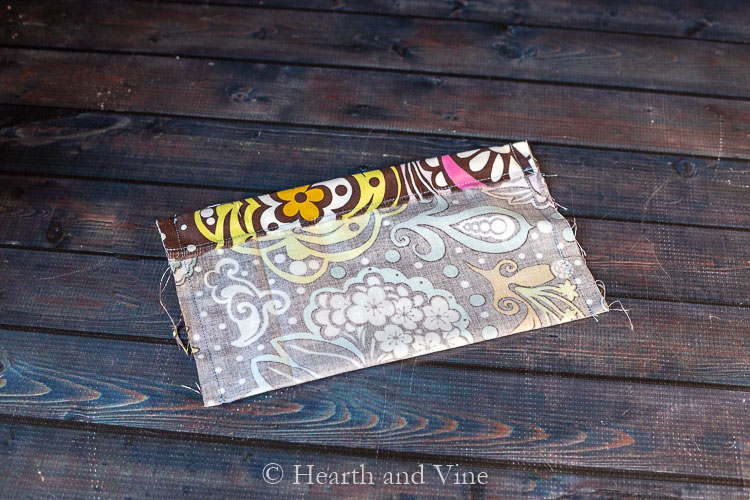
Repeat on the other end. Then fold in half with right sides together and sew side seams just outside the measuring tape.
Flip right side out and enjoy.
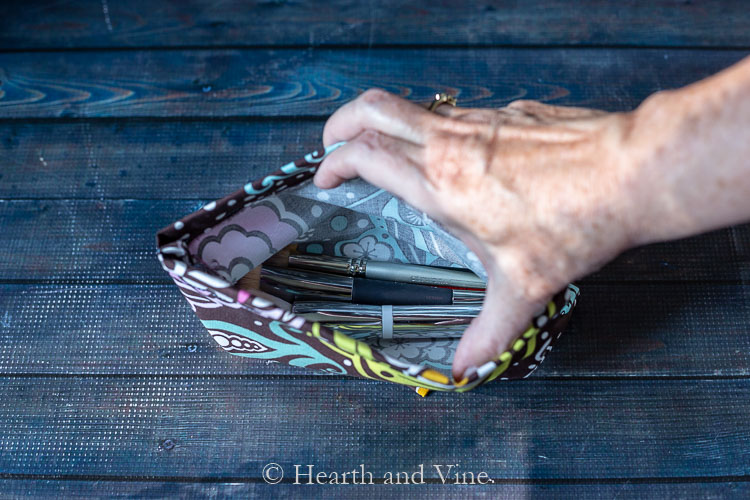
My brushes fit well in this bag and I still have room for more.
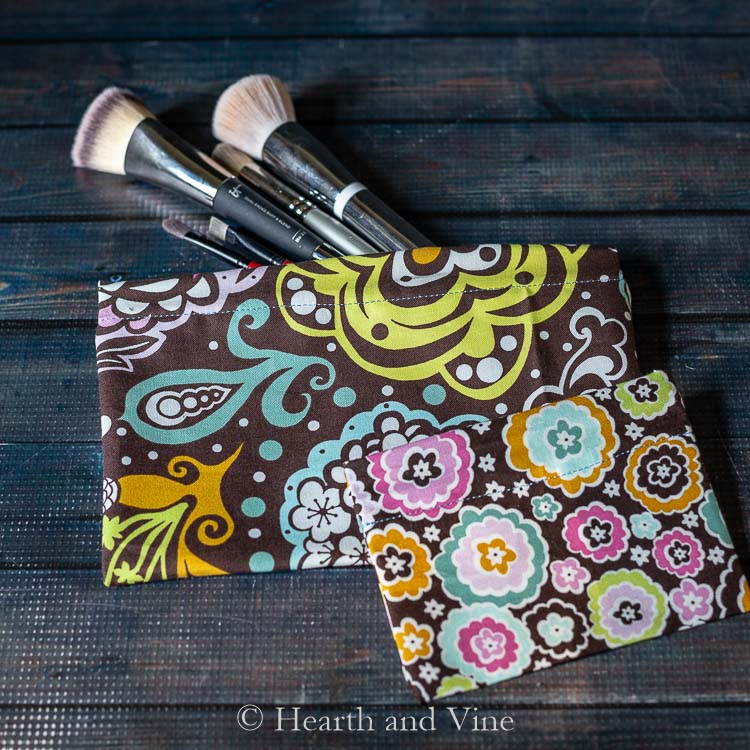
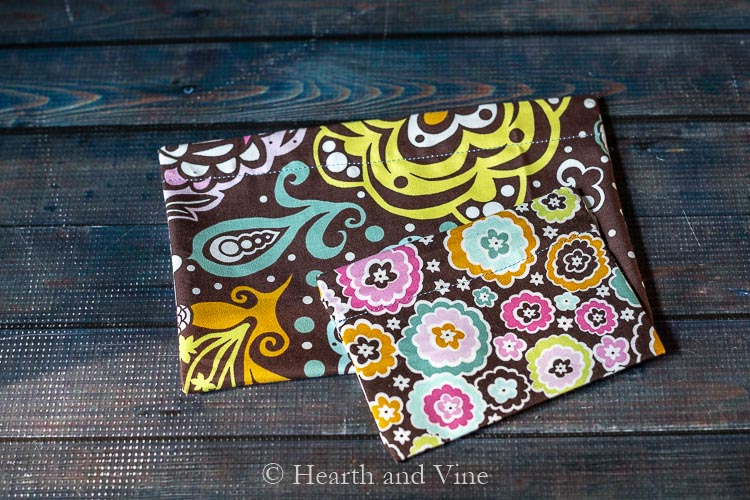
I also made a small snap bag with a cute coordinating pattern. I think they will make nice gifts at the holidays.

P.S. You may also like these fun little Fabric Card Holders or these DIY Luggage Tags. Find them and many more basic sewing ideas on my DIY Projects Page.
Click Here to Save to Pinterest!
![]()
 Let's see what the other fabulous Thrifty Style Team designers have created!
-
- DIY Rose Wedding Bouquet by Redhead Can Decorate
- 7 Thrifty Fall Decor Ideas by 2 Bees in a Pod
- DIY Trophy Bookends by Salvage Sister and Mister
- Snap Bag Simple Tutorial for Makeup Brushes and More by Hearth and Vine
- Plain Wood Crates, Stained & Lettered by Bliss Ranch
- Repurposed Drawers for Storage and Display by DIY Beautify
- Shabby Chic Farmhouse Hutch Makeover by The How to Home
- French Lavender Linen Spray by I Should be Mopping the Floor
- Cheap No Sew Curtain for the RV by Chatfield Court
- DIY Boxwood Wreath by Creekline House
- Updated Painted Metal Lanterns by Cottage at the Crossroads
- Thrifty String Art Made With Embroidery Hoops by Meegan Makes
- When an Idea is Worth the Risk by Duke Manor Farm
Snap Bag Simple Tutorial for Makeup Brushes and More
Equipment
- Scissors
Materials
- Fabric - cut to the size you want
- Metal tape measure
Instructions
- Take your desired width of fabric and add 1 inch.
- Measure your height and double it.
- Add 2 more inches for the channels that you will thread your tape into.
- Cut a piece of the metal measuring tape the same as the desired width.
- Turn over an inch of fabric to the wrong side and sew across making a channel.
- Slide the piece of the metal measuring tape into the channel with the convex side up.
- Repeat on the other end.
- Fold in half with right sides together and sew side seams just outside the measuring tape.
- Flip right side out and enjoy!
Pam H.
Do you think using fabric glue would work for thses bags?
What is your favorite fabric glue?
Thanks!
Patti Estep
Pam, I haven't tried it for this project but I do think it would work. I'm not sure if it will last for years and years but it's worth a try. I've used Aleene's fabric glue before and I think Gorilla has a fabric glue that might be good to try too.
Julie Briones
This is so stinkin' smart, Patti! And such an easy tutorial for a make-up brush snap bag. I would have NEVER thought of this! Pinned!
Patti Estep
Thanks Julie. There are so many ways you could go with it. Plus you can put your scrap fabric to work.
Deborah Sommerlot
💡😲💡😲👌 FABULOUS!!!!!!!!!!!!!!!!!!!!!!!!!!!!
Kristi @ Chatfield Court
What a great idea, Patty! We have lots of old tape measures waiting for a new use. They may just end up as Christmas gifts for the family.
laura janning
what a great way to use unused fabric. this would be perfect in a handbag as well! thanks for the inspo!
Meegan
Very clever, Patti! I think these are such great gift ideas for my grand daughters. They will have so much fun filling them up with all their bit and bobs .
Julie
Omg! On our trip my make up bag was a nightmare!! This is a perfect solution! I love it Patti! The measuring tape in there is genius!
Jane Windham
This is genius, Patti! We have many extra measuring tapes just waiting to be put to good use!
Cindy
What a smart idea Patti, these are great! I love that you can customize the size to fit your specific items!
Kristi Dominguez
I love this idea, Patti! So clever and functional! You're going to have me rootin' around looking for an old tape measure now, lol! It's always so fun learning great ideas from you and they others on the Thrifty Style Team! xoxo
Patti Estep
Thanks Kristi. It always surprises me to see what great ideas everyone has on the Team too.
Mary Beth
This is seriously the coolest! I love to sew but hate to sew in zippers. I honestly can't wait to try this and I may make some of these for Christmas gifts.
Patti Estep
I hate putting it zipper too Mary Beth. This is a whole new world. 🙂
Courtenay @ The Creek Line House
What?? This has to be the most clever use of a tape measure ever! So neat!
Patti Estep
I know right? So many possibilities are going through my head.
Bliss
Should I take a picture of my husbands face when I tell him to save his broken tape measures for me? I request a lot of him, but that would be a first. But how can I let him get rid of them now that I know they are useful in the afterlife?
Patti Estep
Definitely take a pic and I'll share it on here. 😉