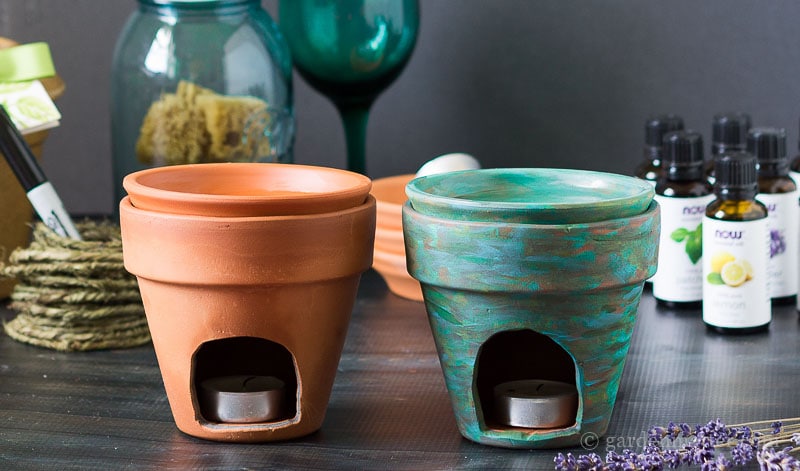
Learn how to make this DIY Essential Oil Diffuser with a simple terracotta pot. A super affordable gift to give and fun to create.
When my sister and I ran an herbal gift shop, we sold a lot of essential oils, items made with essential oils, and accessories to go with essential oils.
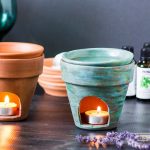
One was a pretty ceramic diffuser, which you heated water with a few drops of the essential oil(s), simply from a tea light below. So, recently, when I was decorating terracotta pots, I came up with the idea to create a diffuser using a flower pot.
If you are familiar with essential oils, then you know that their natural fragrance is beyond compare. In addition, many people believe that they have great healing properties. I am not a medical professional, however, and would not begin to claim any medicinal benefits, but I do love the way they smell.
This post contains some affiliate links (that means if you make a purchase after clicking a link, there’s no additional cost to you, but I will earn a very small commission. ) i.e. as an Amazon Associate, I earn from qualifying purchases. Click here to read my full disclosure policy.

Supplies for a DIY Essential Oil Diffuser
- 4-inch Terracotta pot and saucer that fits on the top.
- Tealight candle

- Essential Oils - Bergamot, Lavender, Lemon (a few of my favorites)
- Dremel tool


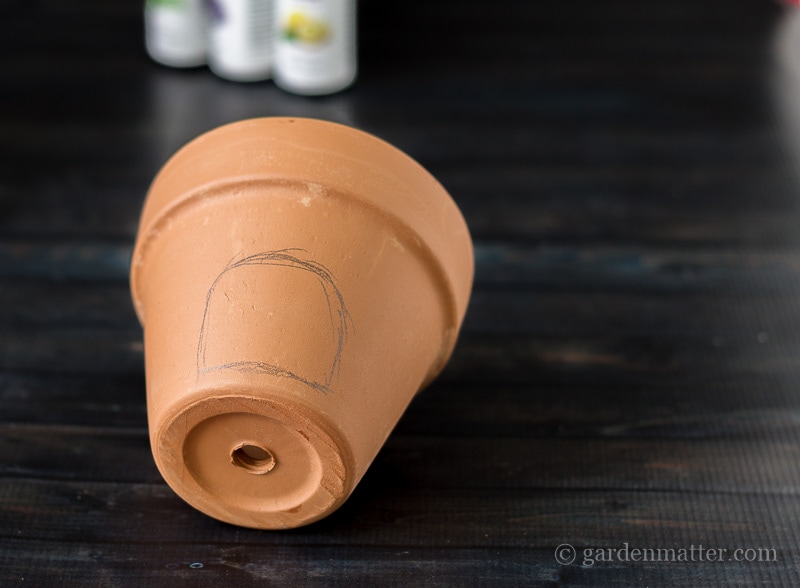
The key to getting the diffuser to work is to cut a hole in the side, to let oxygen in, so that the tealight stays lit.
I did a little research and found some people using hole saws and others using a Dremel tool. After watching this video, I decided to give it a try.
![First cut with dremmel ]](https://hearthandvine.com/wp-content/uploads/Dremel-Opening-DIY-Terracotta-Diffuser-gardenmatter.com-1.jpg)
Soak the pot in water for about 30 minutes.
On the second one I tried cutting it without soaking, and it took much longer to drill. As you can see, the first pass pretty ragged.
I went back and tried different speeds and worked on smoothing the opening the best I could.
Then, I also used a little bit of coarse sandpaper to sand the edges. No perfect, but I think this is something that requires a little practice.
Still, I was happy with the results.
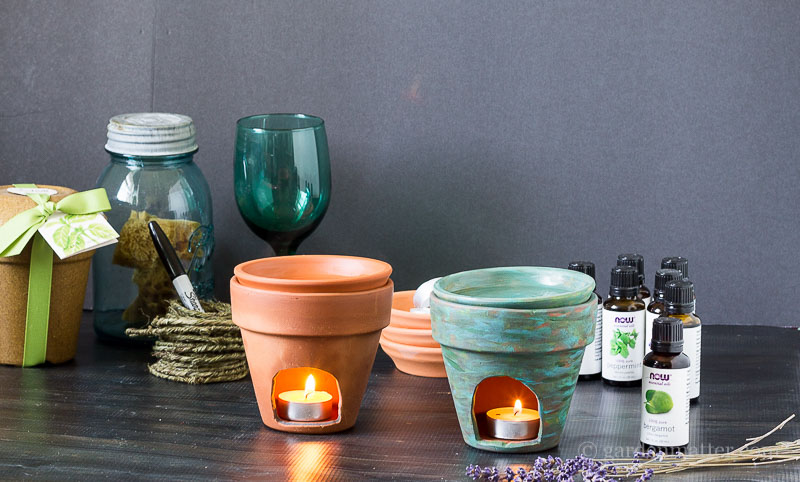
This DIY essential oil diffuser project turned out great. I ended up painting one of them for fun but it's not necessary.
Within minutes I could smell bergamot, my favorite oil, drifting throughout the room.

P.S. I really like working with essential oils and have several posts you may like, such as Top 10 Essential Oil Projects You'll Love, one about making your own Homemade Cleaners that make the whole process of cleaning so much nicer. Also some bath and body DIYs like Blush Sugar Scrub and invigorating Shower Steamers.
DIY Essential Oil Diffuser For All Your Favorite Scents
Equipment
- Dremel tool
Materials
- 4- inch Terracotta pot and saucer that fits on top
- Tealight candle
- Essential Oils
- Sand Paper
Instructions
- Soak the pot in water for about 30 minutes.
- Cut a hole the size you want in the side of the pot using a Dremel.
- Sand the edges with coarse sandpaper.
- Paint the pot, or leave it natural.
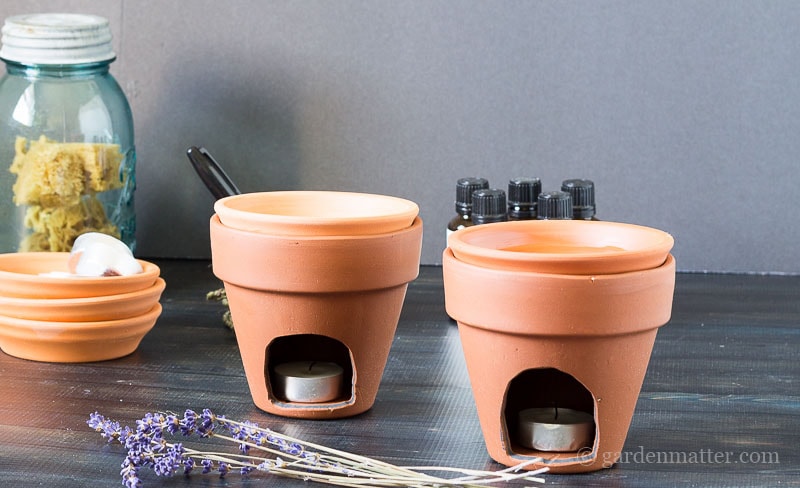
- Place a tea light in the pot.
- Add your favorite essential oils to the top.

Rita Clarke
This looks like a really cool project. The link to the video didn't work, but I found another video on YouTube that shows how to cut a terra cotta pot using a dremel. Anyway, I'm wondering if you think something like this would work for keeping batik wax melted? I took a workshop on the batik dying process, and the woman used small candle-heated bowls that sat atop of a ceramic stand. I'm not quite sure what to call them to do a search. Anyway, if you can tell me if you think this would work for my puposes, that would be great.
Patti Estep
Rita, I'm sorry the video isn't working. I'll have to look into it. Regarding using this for wax I'm not sure but I think you could use a candle wax burner. I just posted an article about making scented wax for burners that you can buy online line and in craft stores. They are sometimes called wax warmers and only cost around $12. Maybe they would work for your batik project.
Jody
So happy to see this. I want a diffuser but balk at the price. I can afford it just can’t tell myself it is ok to buy it but this aha! I can and will do. One in my grandbabies room. One in my son and daughter in law’s room and one in my husbands office while he works and one in our room for sleep. Very excited.
Patti Estep
I'm so glad you like this one Jody. The fragrance is subtle but that also depends on the essential oils you use and the amount you add to the base oil. Enjoy!
ketia a davis
Hello,
I love this idea! what size flower pots did you use? Would you use sand paper to smooth down the side openings and do you think stenciling would work on these pots?
Thank you.
Patti Estep
Hi Ketia,
I used standard 4 inch terracotta pots with saucers. I definitely used sand paper to smooth the edges and I don't see why you couldn't use stencils. Have fun!
Clarissa
Hello! I hope you see this even though it's been a month since your last reply!
I love this idea and it can match my home's aesthetic.
I have to use homemade wax melts instead of essential oils because I am allergic. Do you think this would work with pieces of wax melts?
Patti Estep
Hi Clarissa,
I have never tried wax. In theory it should work. The biggest issue I could see would be having the wax stick to the base. Maybe you could try a glossy sealer on the top to prevent sticking. Let me know how it turns out.
Mary
Did you use a non toxic paint? I have MCs, so would likely leave mine unpainted to avoid the release of chemicals and toxins from the heat. Does the EO sink into the Terra cotta? Do you label them with scent names to keep the fragrance true?
Patti Estep
Hi Mary,
I just used regular craft paint, but you could certainly leave them unpainted.. I'm pretty sure that the essential oils burn up in the water way before they get a chance to sink in to the terra cotta. I use the same diffuser for different essential oils. Again, I believe they burn up with the water so I don't think there is a concern about mixing.
Hope that helps,
Patti
John M
I tried using FolkArt Enamel Acrylic Craft Paint, Gloss Finish, Wicker White.
Its been days and I followed the directions 100%
I went to test it today and the Paint Bubbled up...
I think it needs paint or I noticed the Oil end up soaking into the saucer and its makes a smokey mess...
Walmart sells one for under $8. I may just have to go get one!
Patti Estep
John, I'm sorry it didn't work for you. I did not have this problem. The oil should burn off the water before being able to soak into the clay saucer. Not sure why that happened to you.
Kontogouris Nick
I think you NEED to drill a hole on the other side big enough to create airflow. As it is now the candle will not stay lit for long.
Patti Estep
Hi Nick,
That's an interesting observation. Did you try it, because this design works for me and I based it off the product we used to sell in the store. That being said I appreciate your input and maybe some readers would want to try that option.
Have a great week,
Patti
Nick Kontogouris
Yes on 2, everytime the light was going out after a shorttime, problem solved when i created a hole about the size of my pinky finger on the opposite side.
Thanx for inspiration anyway.
Patti Estep
Hi Nick,
Good to know. Glad you got it working.
tina miller
What kind of sealer did you use?
Patti Estep
Hi Tina,
I did not use a sealer. I guess you could use one for the pot itself but I didn't want to use one on the top because I didn't want it to possibly interfere with the oils.
Thanks for stopping by,
Patti
Hannah Sova
Hello,
I was told that essential oils and water don't work well together. Would it be better to use something like almond oil instead of water?
Patti Estep
Hi Hannah,
The essential oils sit on top of the water and the candle heats the water which allows the essential oils to diffuse through the air. I'm not expert but when my sister and I owned an herbal gift shop we sold similar clay vessels an the were meant for water with essential oils. I don't know if oil would work and haven't tried it. I think oil is better for blending in perfumes and other cosmetics.
Thanks for stopping by,
Patti
Jennifer
Love this. Could you tell me if you uses just the essential oil or do you add water and if so how much?
Thank you
Patti
Hi Jennifer,
I fill the saucer with water. Fill it as much as you feel comfortable without having spill over the side.
Then add a few drops of essential oils. Anywhere from 5-10 drops. You can experiment on what works for you.
Thanks for stopping by,
Patti
Sue
Hello!
Did you use a sealer on the part where tge oil goes?
Patti
Hi Sue,
I did put a sealer on the painted one but I do not think it is necessary for the natural one. First of all you will be filling it with water first. Then you add a few drops of essential oil on top of the water. When the water starts to get warm it will diffuse the essential oils into the air.
Hope that helps,
Patti