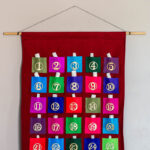

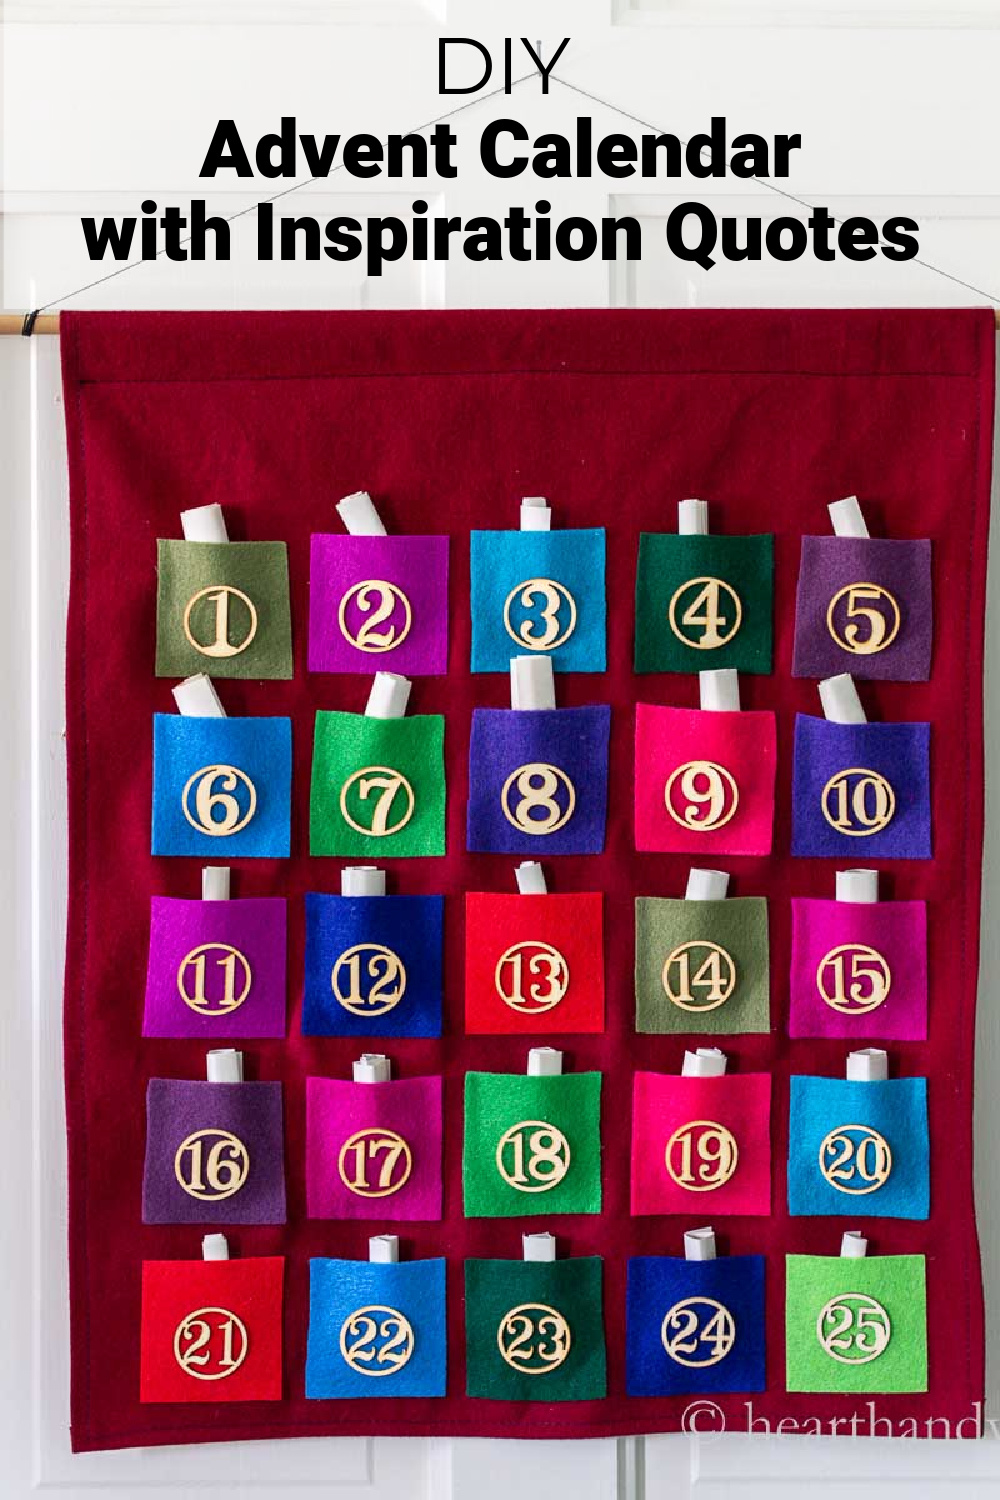
This DIY Felt Advent calendar tutorial includes printable inspirational quotes for all 25 days to get you into the Christmas spirit.
Advent calendars are always a fun way to enjoy the excitement of Christmas approaching. Today I'm sharing the colorful craft of a felt advent calendar complete with inspirational quotes that will lift you up each day.
This post contains some affiliate links (that means if you make a purchase after clicking a link, there’s no additional cost to you, but I will earn a very small commission. ) i.e. as an Amazon Associate, I earn from qualifying purchases. Click here to read my full disclosure policy.

How to Make a Felt Advent Calendar
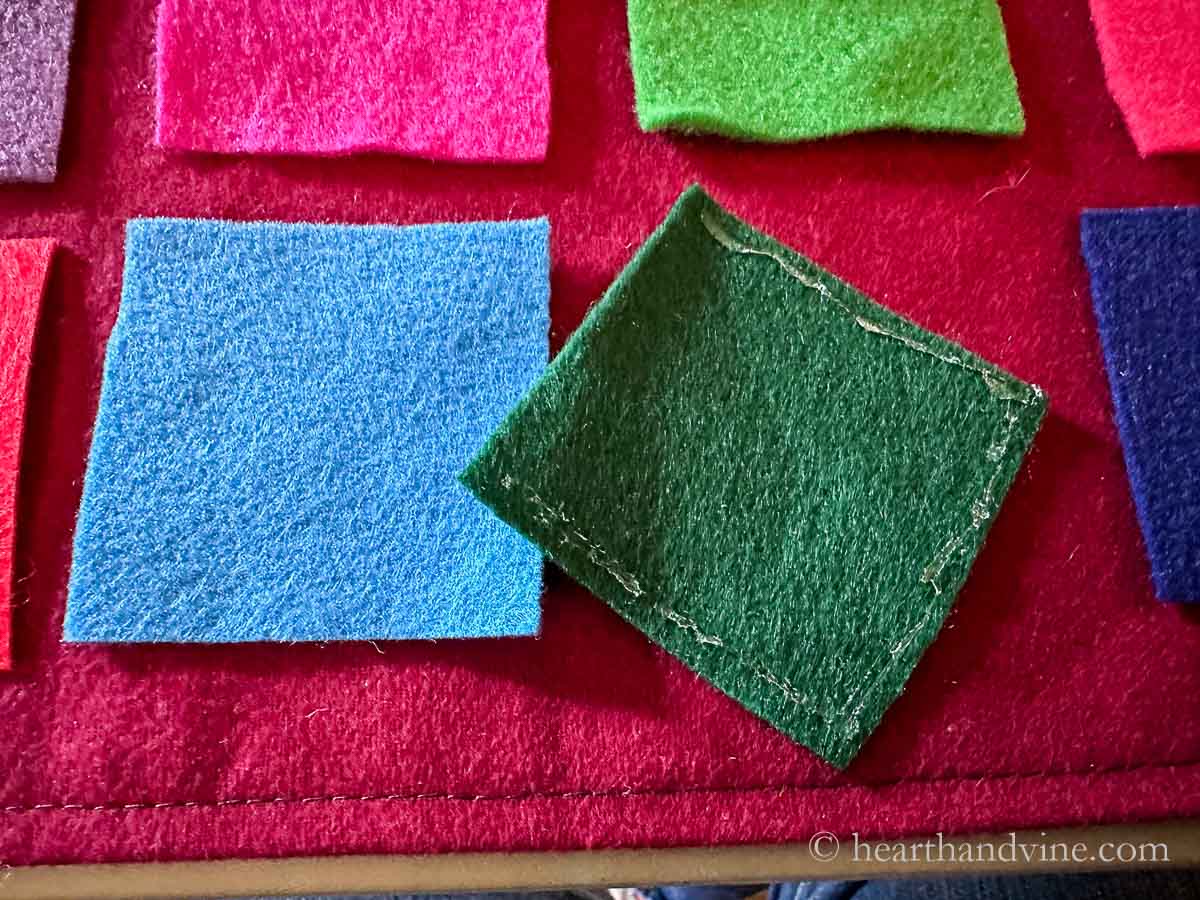
Start by cutting out 2.5 inch square pieces of felt. Cut out a piece of cardboard first and use it as an easy template to cut out the felt squares.
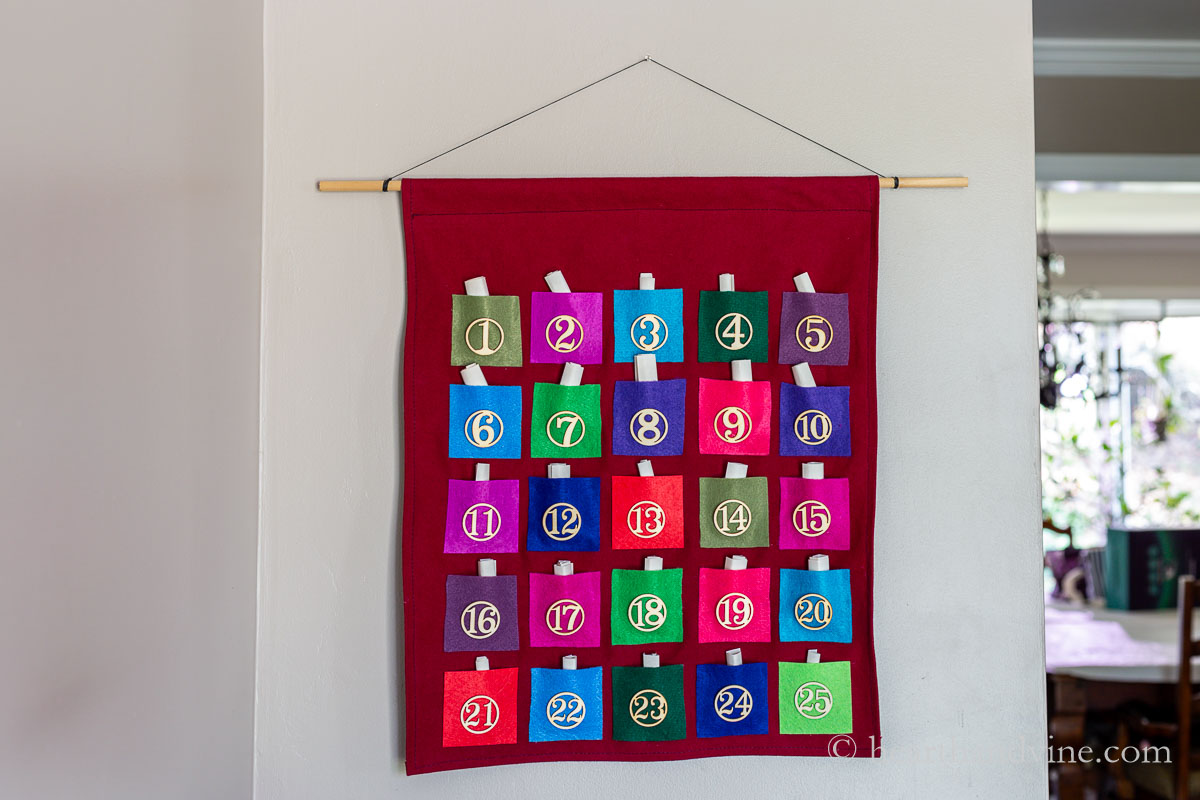
You can use one or more colors. I used 12 or 13 different colors for a fun colorful calendar.

Choose a backing material for your advent calendar. I used some dark red flannel that looks festive but you could use red felt or anything with a bit of weight to it.
Fold over the raw edges and press them with an iron.
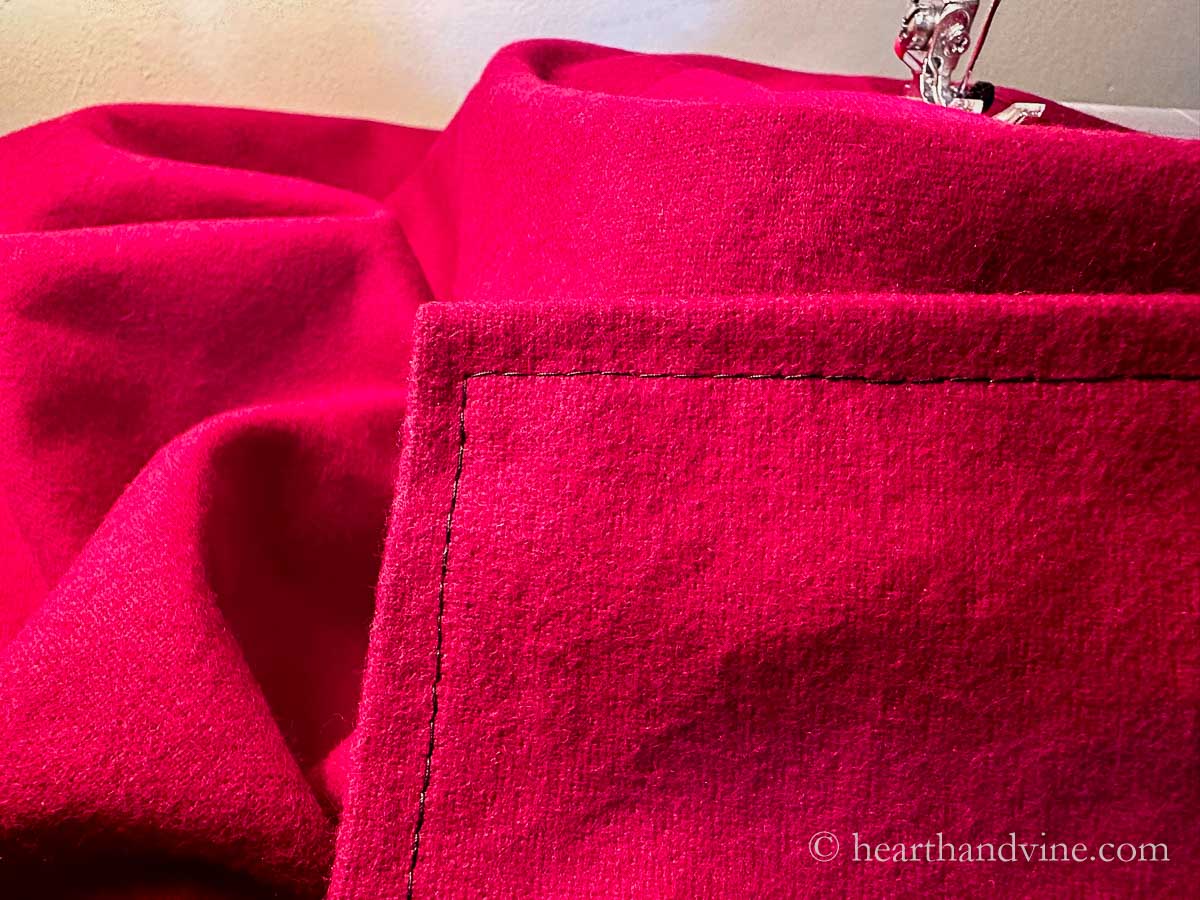
Then use a large stitch on your sewing machine in a contrasting color to finish the edge. However, you could use stitch witchery or fabric glue if you don't have a sewing machine.
Next, fold over about .5 - 1 inch on the top to create a slot for your dowel rod to go through. Sew or glue into place.
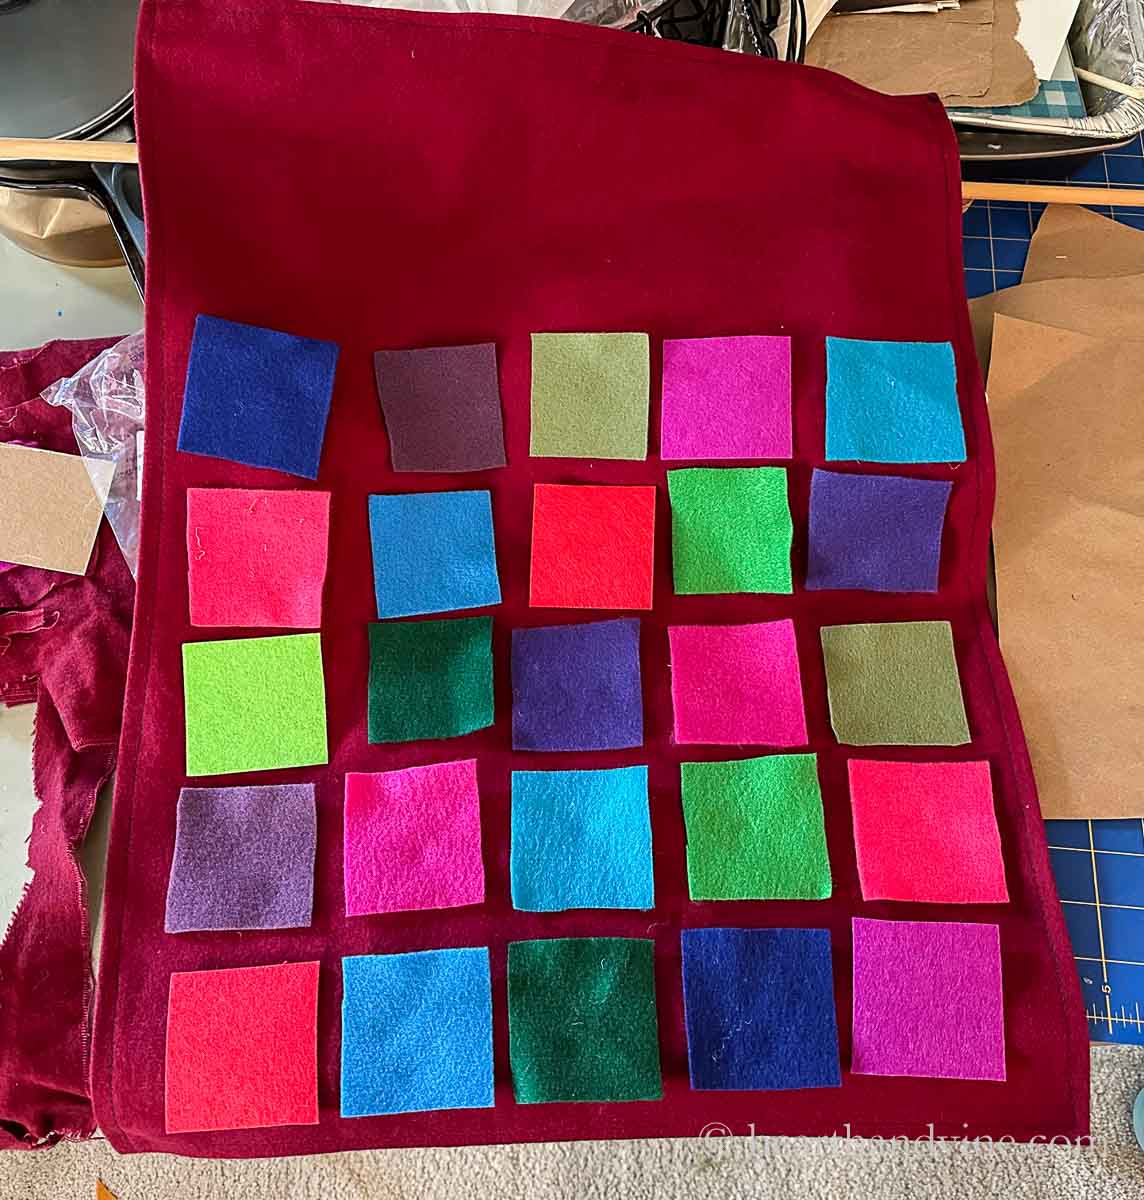
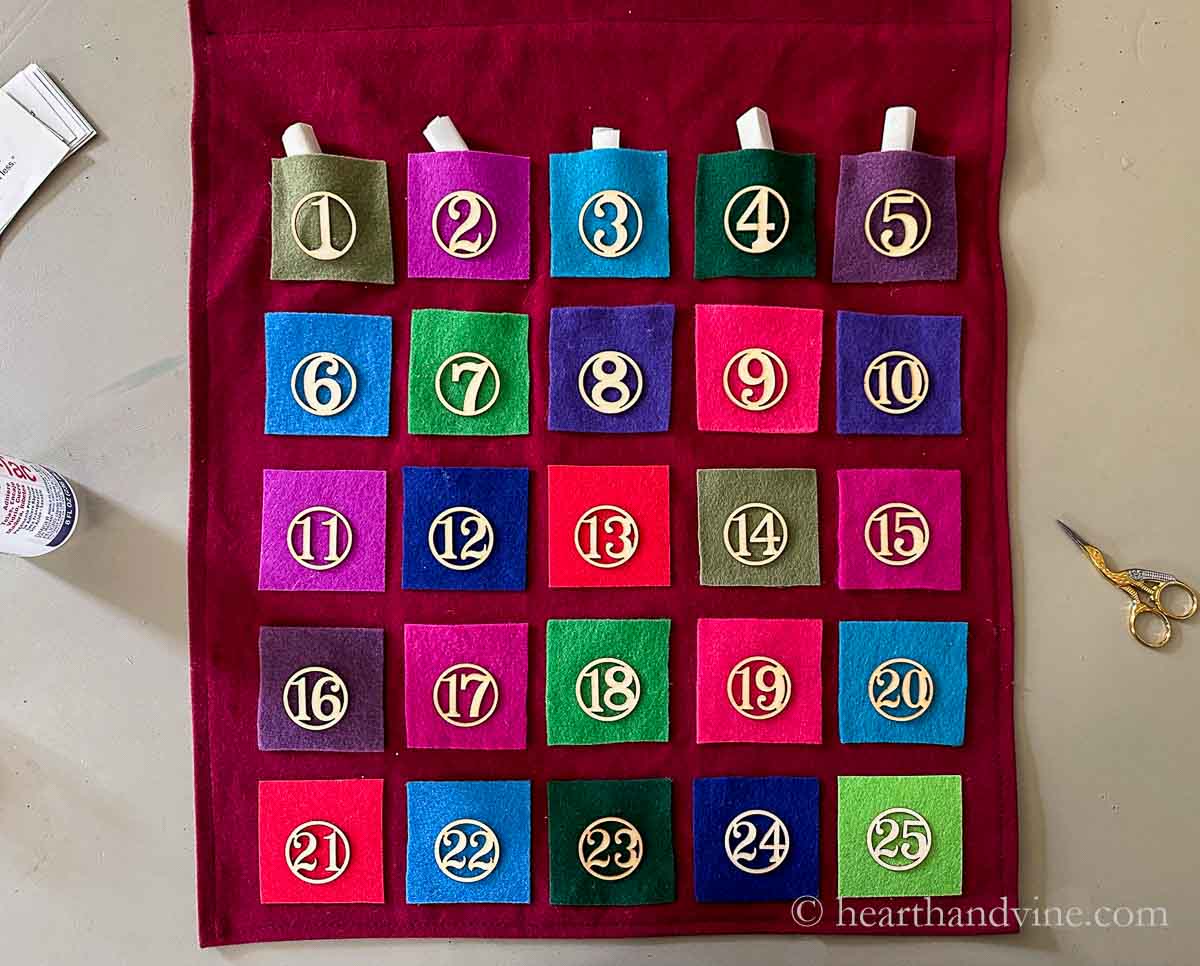
If you are using different colors lay out your pattern first.
Then use some fabric glue on the sides and bottom of each square to adhere them to the backing material. You could also use a low temp hot glue gun, or sew on the squares.
Start with the middle of the bottom row and work out to the sides. Then move up from the middle square to the top row. This will help you keep the squares in line.
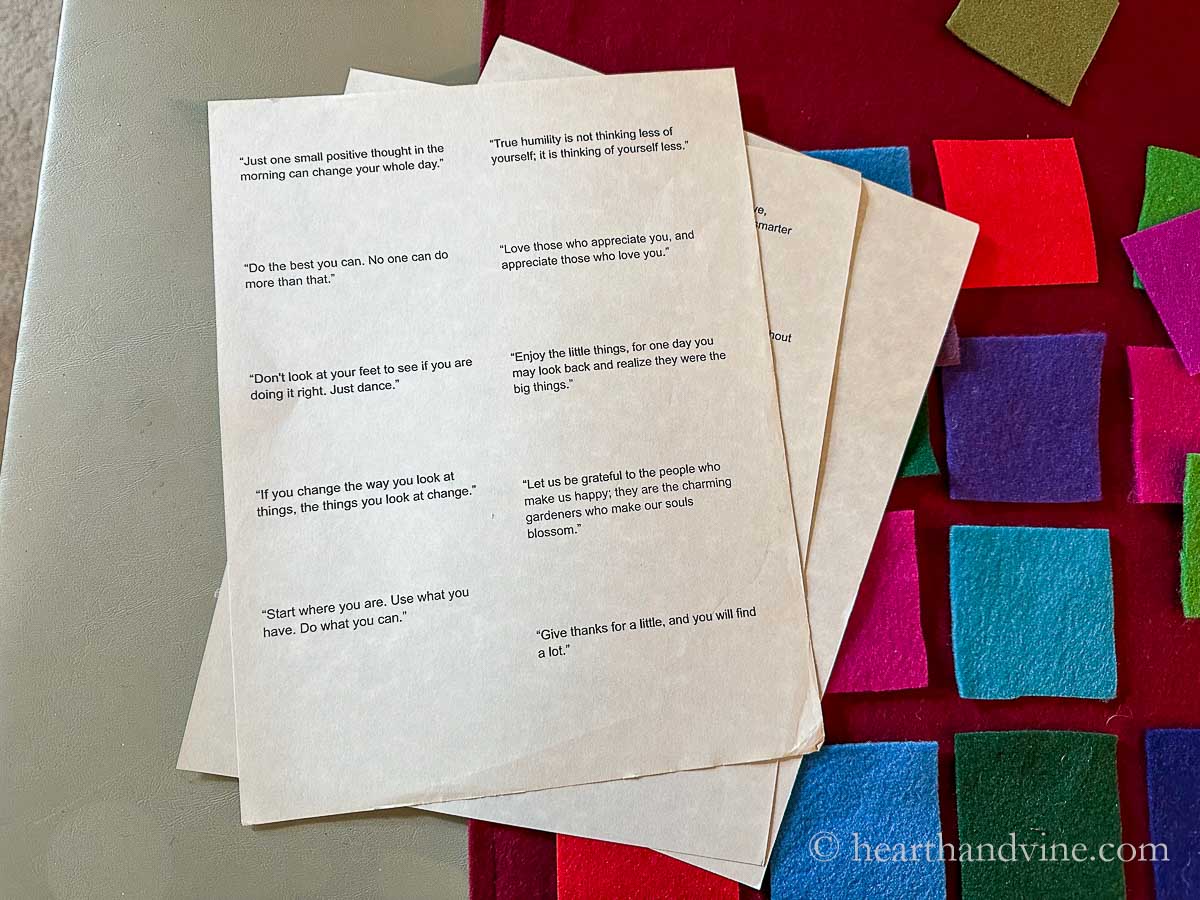
Print out the inspirational quotes and cut them out.
You can get a PDF of the quotes here.
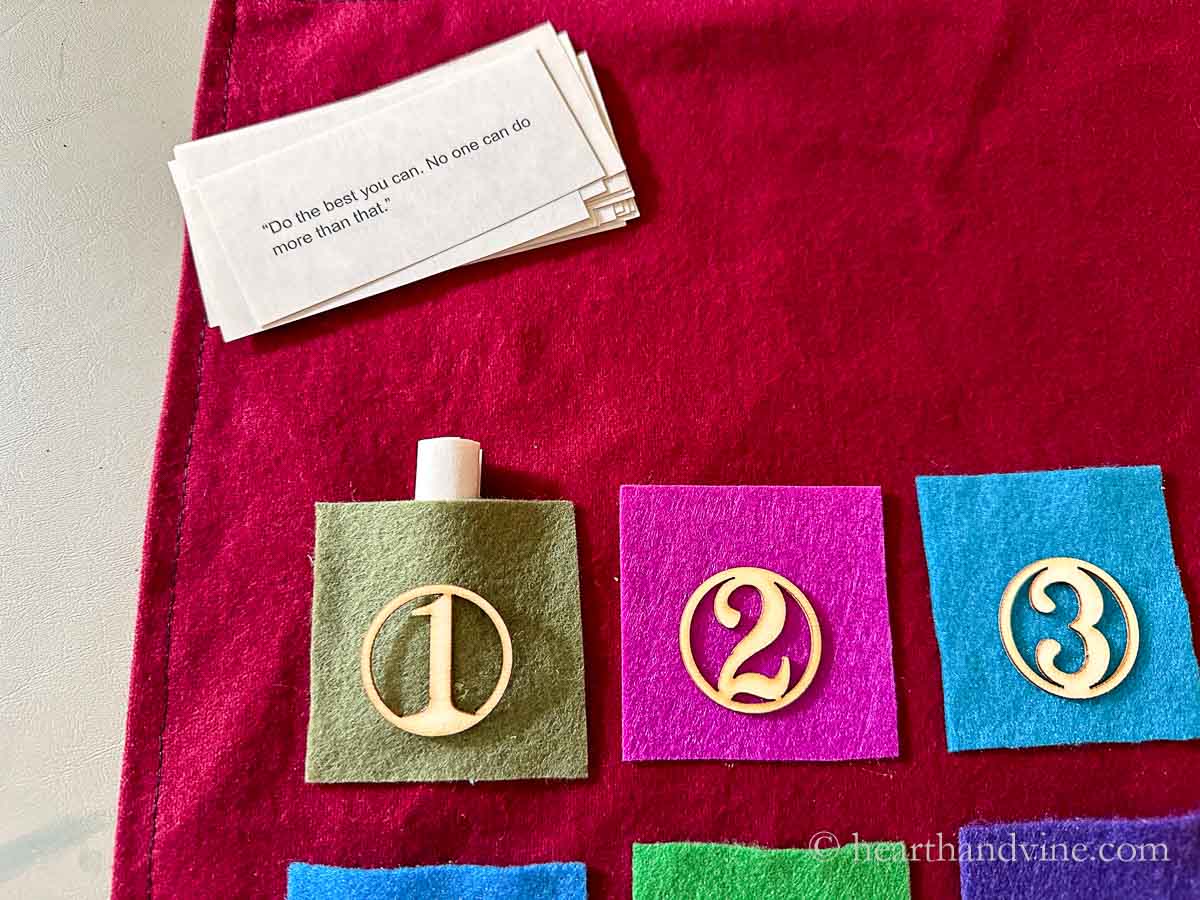
Next, glue on numbers. I used these fun wooden numbers but you could use stickers, embroidery floss, or use fabric markers. I only placed the glue on the number, not the circle portion.
Fold up the papers into little scrolls and place them into the felt pockets. I wrote the quotes with more specific Christmas messages towards the end for the final countdown to Christmas but you can decide which quotes go into each pocket.

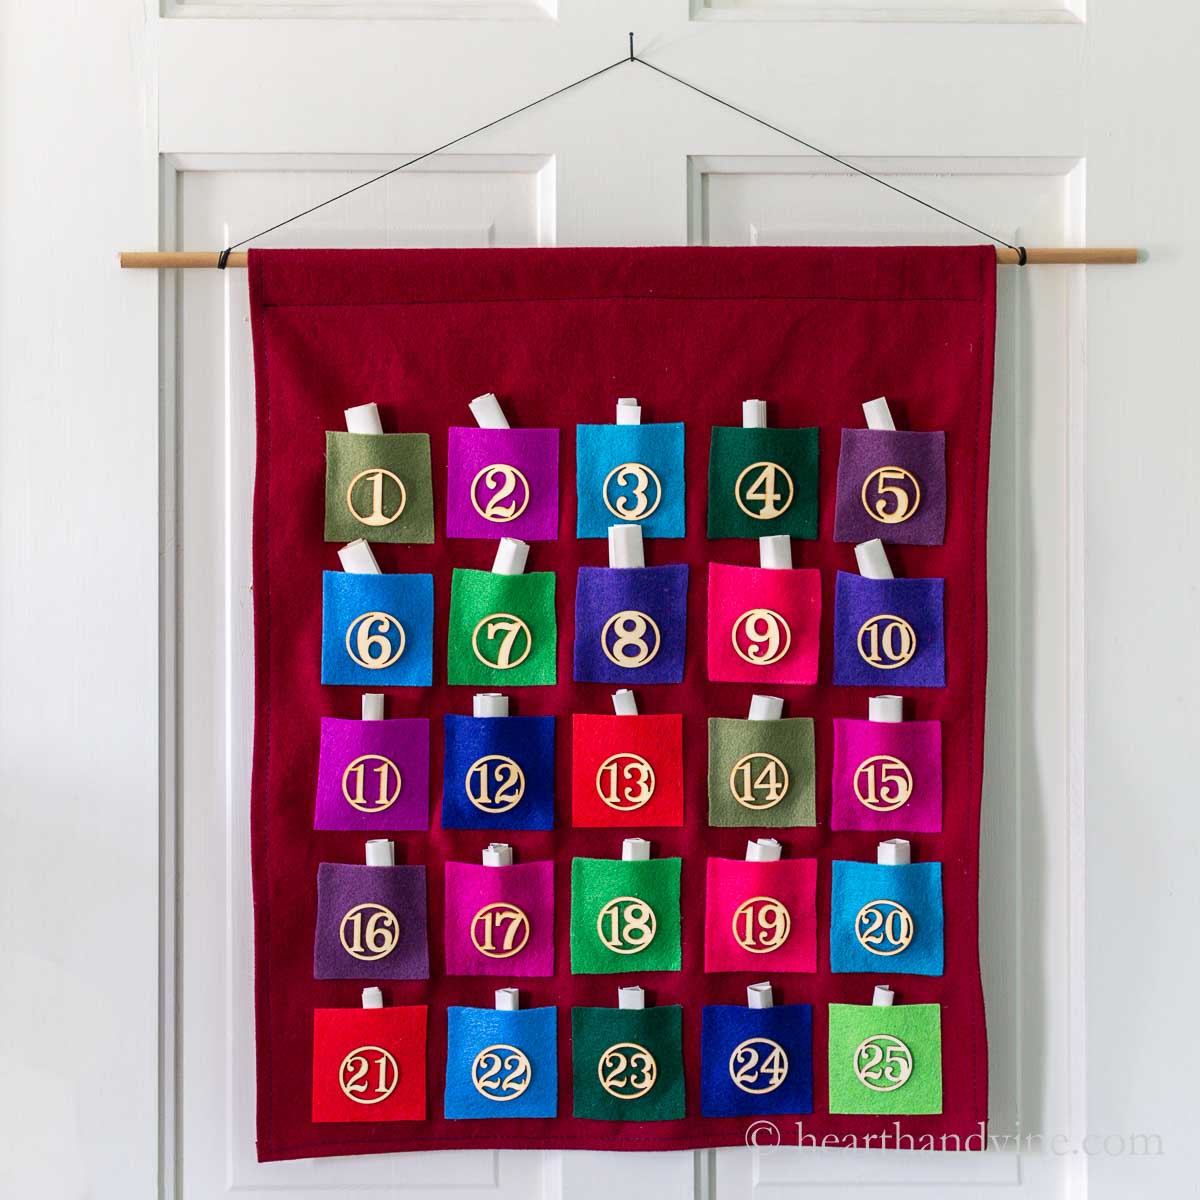
Thread a dowel rod through the top and tie on some string, ribbon, or twine to create a hanger.
Enjoy reading the inspirational quotes each day by yourself, with your kids, or the whole family for a very happy holiday season.

More Christmas Decor Ideas
DIY Felt Advent Calendar
Equipment
- Sewing Machine
- Iron
- Scissors
- Marking Pencil
- Ruler
Materials
- Backing Material - Felt, Flannel or Cotton 20" x 24"
- Different Colored Felt 25 pieces of 2 inch squares
- Fabric Tac Glue
- Wooden Numbers
- 24 inch Small Wooden Dowel Rod
- Thread or twine
Instructions
- Cut out your backing material approximately 20 by 24 inches
- Press under the edges about 3/8 inch.
- Topstitch the edges or glue them down.
- Sew or glue the top inch of the backing material to create a pocket for the dowel rod.
- Cut out 25 squares of felt 2.5 inch by 2.5 inch
- Place them on the backing material in a pattern you like.
- Place a bead of glue on the sides and bottom of each felt square and set in place on the backing material.
- Start with the bottom center square and work out to complete the bottom row. Then move up the center row. This will help to keep the squares even and balanced.
- Glue the number on top of the squares.
- Print and cut out inspirational quotes.
- Roll up each quote and place them into the felt pockets.
- Thread the dowel rod into the top sleeve of the advent calendar.
- Tie some string or twine to one end of the rod and then the other side leaving enough extra to hand on a nail or picture hanger.
- Hang and enjoy.
Leave a Reply