


Learn how to make this easy DIY hanging macrame planter from garden or butcher's twine for all your indoor plants.
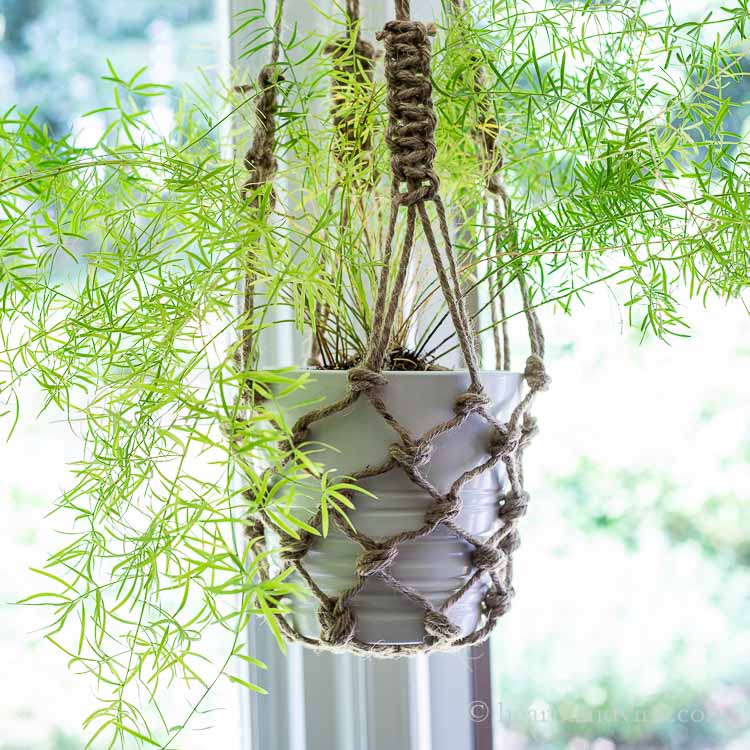
When you start to have a lot of indoor plants or just a small living space, eventually you will want to hang more plants to take advantage of the light. This is obviously a good idea for vining plants, and today I wanted to share some simple ideas on how to make a fishnet-like macrame hanging planter out of twine.
I showed something similar when I created this hanging teacup planter. However, these are more detailed and just as easy.
More Hanging Planter Ideas: Hanging Embroidery Hoop Planter.....Globe Moss Hanging Planter.....Hanging Herb Garden
This post contains some affiliate links (that means if you make a purchase after clicking a link, there's no additional cost to you, but I will earn a very small commission. ) i.e. as an Amazon Associate, I earn from qualifying purchases. Click here to read my full disclosure policy.
Making a Hanging Macrame Planter
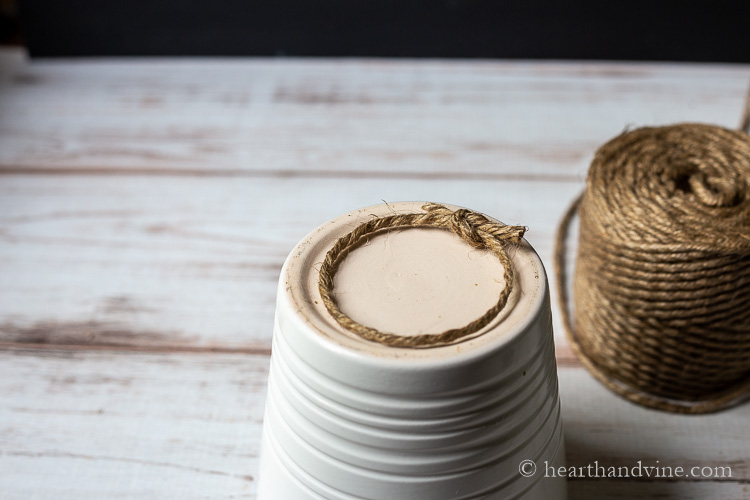
Start by turning your pot upside down. If you want to create a hanger for a pot that already has a plant in it, see if you can find an empty pot or a can that is a similar size. You can reverse the process, but it may be a little difficult if this is new to you.
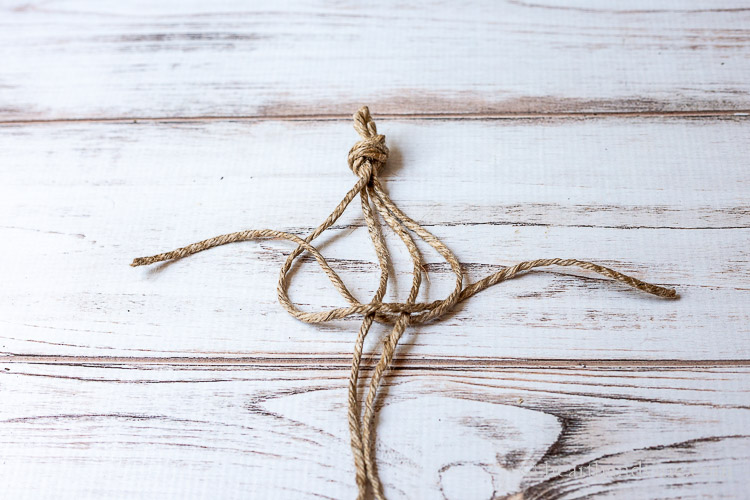
Take a small piece of twine and make a circle large enough to fit in the inside edge of the bottom of your pot.
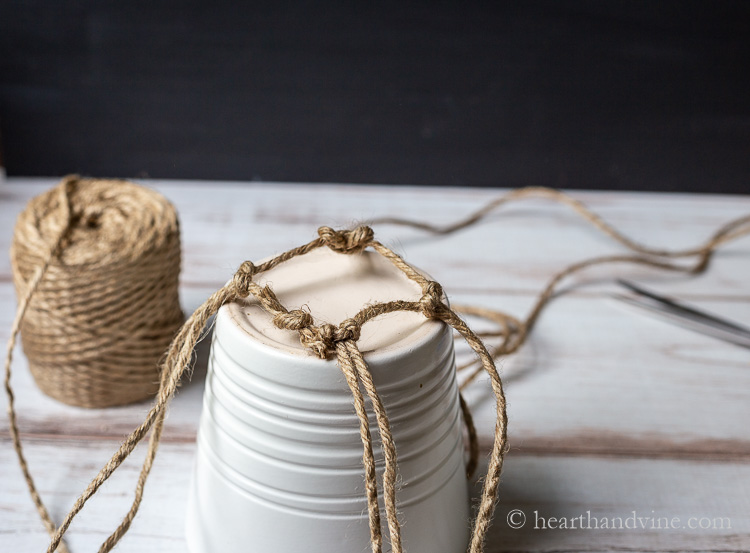
Cut eight pieces of twine for the sides, about 6 yards each, and fold them in half.
Slip the folded end of one of the pieces of twine under the circle, and then thread the ends over the circle and through the fold to create a knot on the circle.
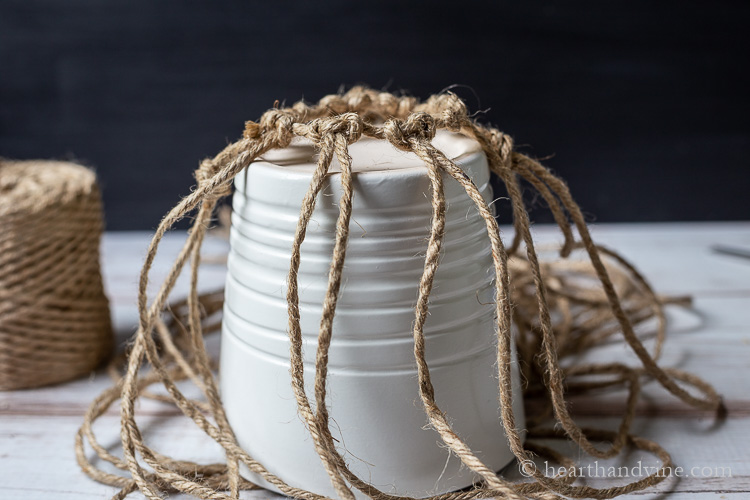
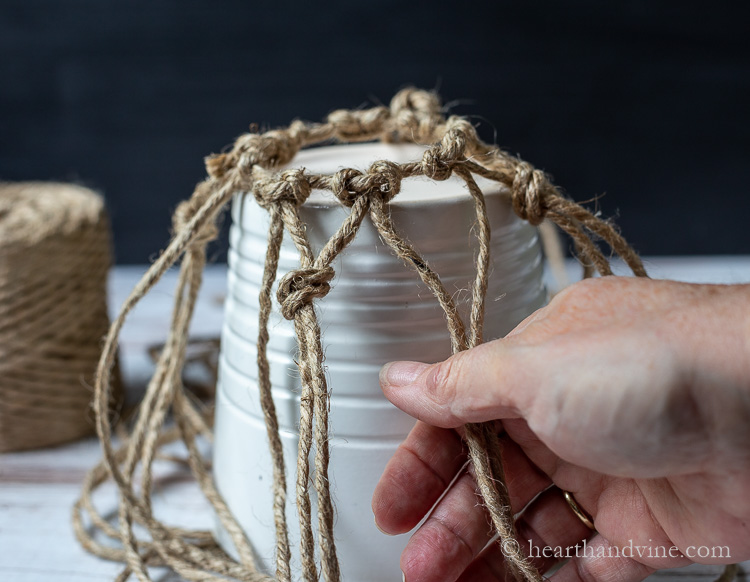
Next, continue around with each piece evenly spaced until you have 8 knots on the top and 16 pieces of twine coming down the sides.
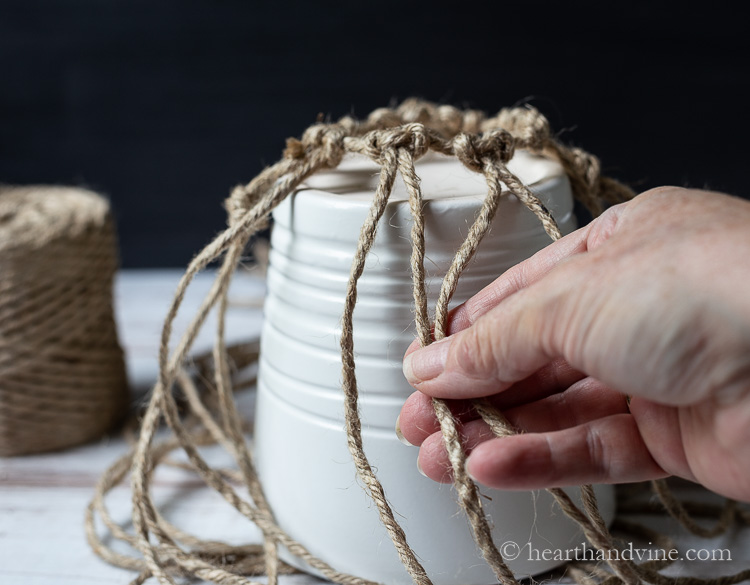
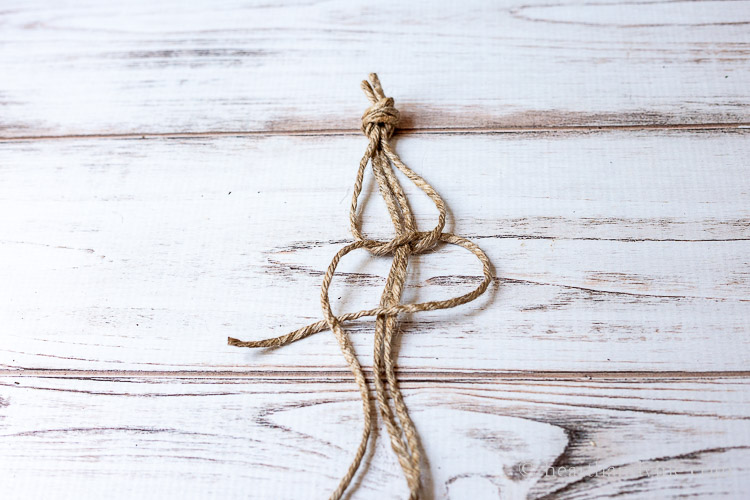
Start making overhand knots about 1 - 1.5 inches down the pot. The twine is in 8 pairs. Start with the right piece on one pair and the left piece on the pair to the right, and make an overhand knot.
Then move on to the next two pieces of twine to your right. Tie another overhand knot at about the same length. Continue around the pot.
For the next row, continue creating overhand knots about 1- 1.5 inches below the first row.
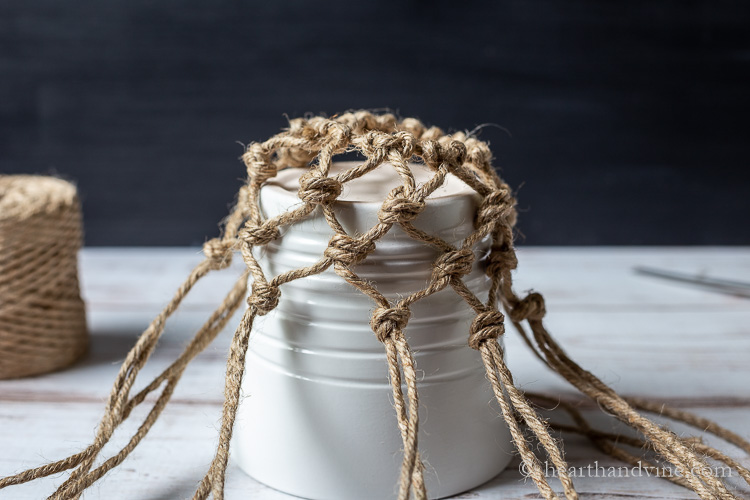
You will see a diamond pattern that looks like a fishnet emerging. Continue making rows of overhand knots until you reach the top of the pot.
Making Square Knots on the Sides


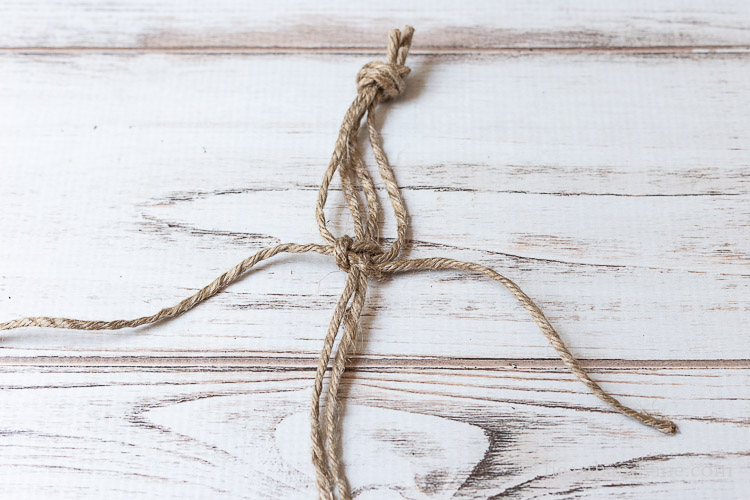
Once you get to the top of the pot, you can be finished. However, you can also make some square knots on the sides as shown below.
You will need four pieces of twine that will create four square knot sections at whatever place you want them to be on the hanger. Since this hanger already has 16 pieces, you can make 4 sides with square knots.
Above are the steps for the square knots. If you want to watch it, here's a video that may be helpful.

You can make as many square knots as you like.
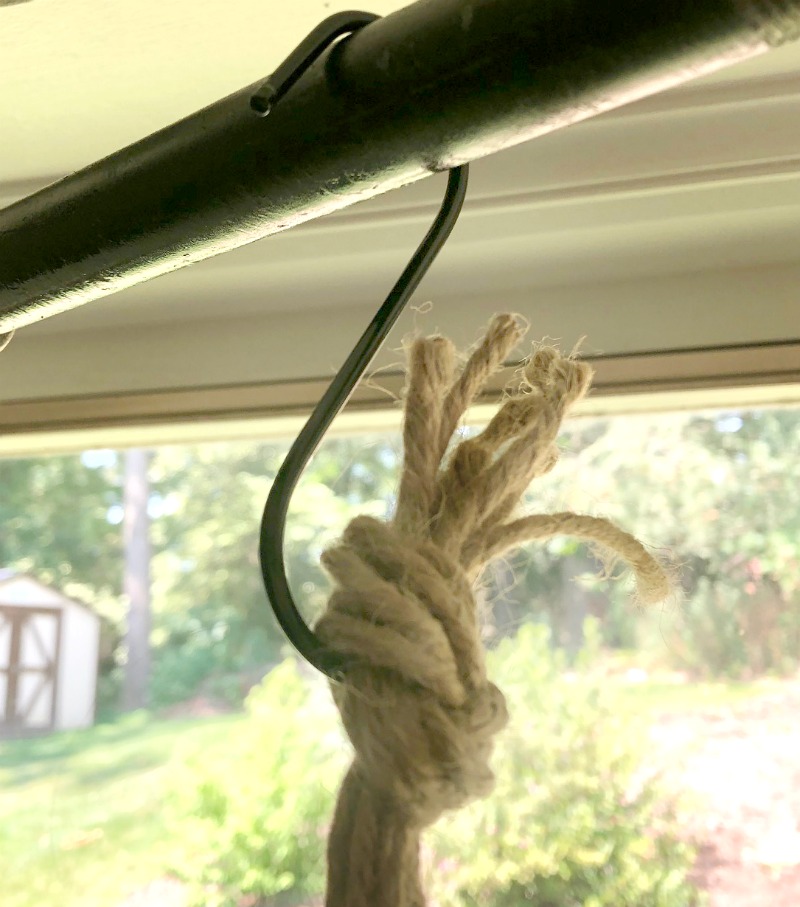
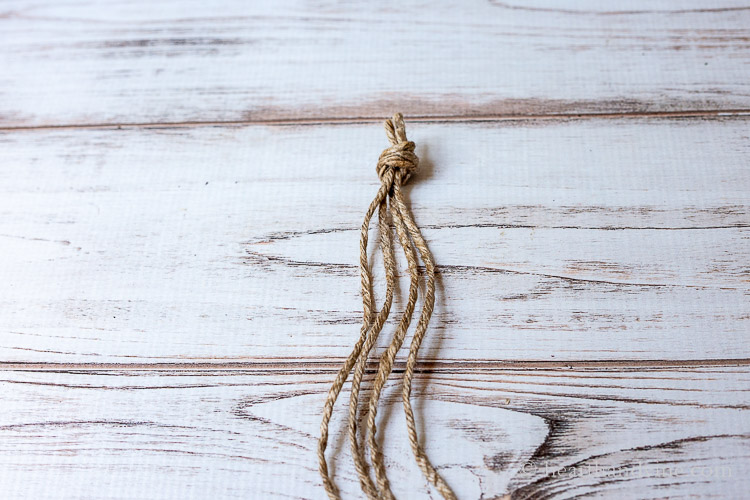
Finish by tying all the twine together in a knot and slipping on an S-hook for hanging.
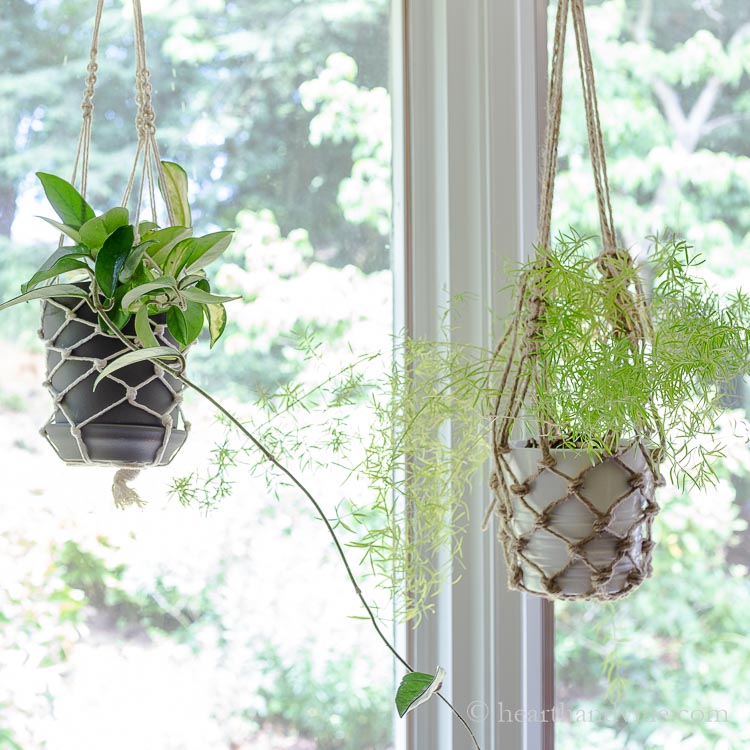
This technique works great with butcher's twine (gray pot on the left) as well. You can also create one for a jar or a basket.
A macrame hanging planter is an easy, affordable, and decorative way to hang all your precious plants.


DIY Hanging Macrame Planter
Equipment
- Scissors
Materials
- Twine
- Planter
Instructions
- Cut eight pieces of twine for the sides about 6 yards each. Fold them in half.
- Slip the folded end of one piece of twine under the circle.
- Thread the ends over the circle and through the fold to create a knot onto the circle.
- Continue with each piece evenly spaced until you have 8 knots on top and 16 pieces of twine coming down the sides.
- Make overhand knots about 1 - 1.5 inches down the pot.
- The twine is in 8 pairs. Start with the right piece on one pair and the left piece on the pair to the right and make an overhand knot.
- Move on to the next two pieces of twine to your right.
- Tie another overhand knot at about the same length. Continue around the pot.
- Continue creating overhand knots about 1- 1.5 inches below the first row.
- Make rows of overhand knots until you reach the top of the pot.
- Tie all the twine together in a knot and slip on an S-hook for hanging.
Angeles Engalla
Hi Patti, I am a retired employee still adjusting with my retirement I find your DIY ideas very interesting and helpful to make my day productive. I am now starting my little garden on my rooftop. Thank you for sharing your bright ideas. God bless you richly in every way.
Patti Estep
Thank you for those kind words Angie. Glad to hear you are enjoying the blog.