• Skip to primary navigation
  • Skip to main content
  • Skip to primary sidebar
  • Home
  • DIY Projects
    • Homemade Bath and Body
    • Sewing - Fabric Crafts
    • Flower Crafts/Decor
    • Thrift Store/Vintage
  • Gardening
    • Flower Gardens
    • Container Gardening
    • Houseplants
    • Indoor Gardening
    • Landscaping
    • DIY Garden Art
  • Decorate
    • Spring Decor
    • Summer Decor
    • Fall Decor
    • Winter Decor
    • Home Decor Projects
  • Recipes
    • Breakfast Recipes
    • Lunch Recipes
    • Dinner Recipes
    • Dessert
    • Salad Recipes
    • Soups and Stews
    • Side Dish Recipes
    • Appetizers and Snacks
    • Healthy Recipes
  • Holidays
    • Valentine's Day
    • Easter
    • Mother's Day
    • Halloween
    • Thanksgiving
    • Christmas
Hearth and Vine
menu icon
go to homepage
  • About
  • DIY
    • ...Flower/Gardening Crafts
    • ... Bath and Body
    • ...Sewing/Fabric Crafts
    • ...Thrift Store/Upcycle
  • Gardening
    • ...Flower Gardens
    • ...Container Gardening
    • ...Indoor Gardening
    • ...DIY Garden Art
  • Decorate
    • ...Home Decor Projects
    • ...Spring Decor
    • ...Summer Decor
    • ...Fall Decor
    • ...Winter Decor
    • ...Room Makeovers
  • Recipes
    • ...Appetizers and Snacks
    • ...Dinner Recipes
    • ...Side Dish Recipes
    • ...Salad Recipes
    • ...Dessert
    • ...Drinks
  • Holidays
    • ...Valentine's Day
    • ...Easter
    • ...Mother's Day
    • ...Halloween
    • ...Thanksgiving
    • ...Christmas
  • Subscribe
  • Instagram
    • Facebook
    • Instagram
    • Pinterest
    • Twitter
  • subscribe
    search icon
    Homepage link
    • About
    • DIY
      • ...Flower/Gardening Crafts
      • ... Bath and Body
      • ...Sewing/Fabric Crafts
      • ...Thrift Store/Upcycle
    • Gardening
      • ...Flower Gardens
      • ...Container Gardening
      • ...Indoor Gardening
      • ...DIY Garden Art
    • Decorate
      • ...Home Decor Projects
      • ...Spring Decor
      • ...Summer Decor
      • ...Fall Decor
      • ...Winter Decor
      • ...Room Makeovers
    • Recipes
      • ...Appetizers and Snacks
      • ...Dinner Recipes
      • ...Side Dish Recipes
      • ...Salad Recipes
      • ...Dessert
      • ...Drinks
    • Holidays
      • ...Valentine's Day
      • ...Easter
      • ...Mother's Day
      • ...Halloween
      • ...Thanksgiving
      • ...Christmas
    • Subscribe
    • Instagram
    • Facebook
    • Instagram
    • Pinterest
    • Twitter
  • ×
    Home » DIY Projects

    How to Make Sea Glass Earrings

    by Patti Estep · Apr 3, 2024

    Jump to How-to Card
    Three sets of green sea glass earrings over the supplies to make them.

    This easy sea glass jewelry tutorial will show you how to make beautiful cultured sea glass earrings that look great and cost very little to make.

    Three pairs of sea glass earrings in shade of green.

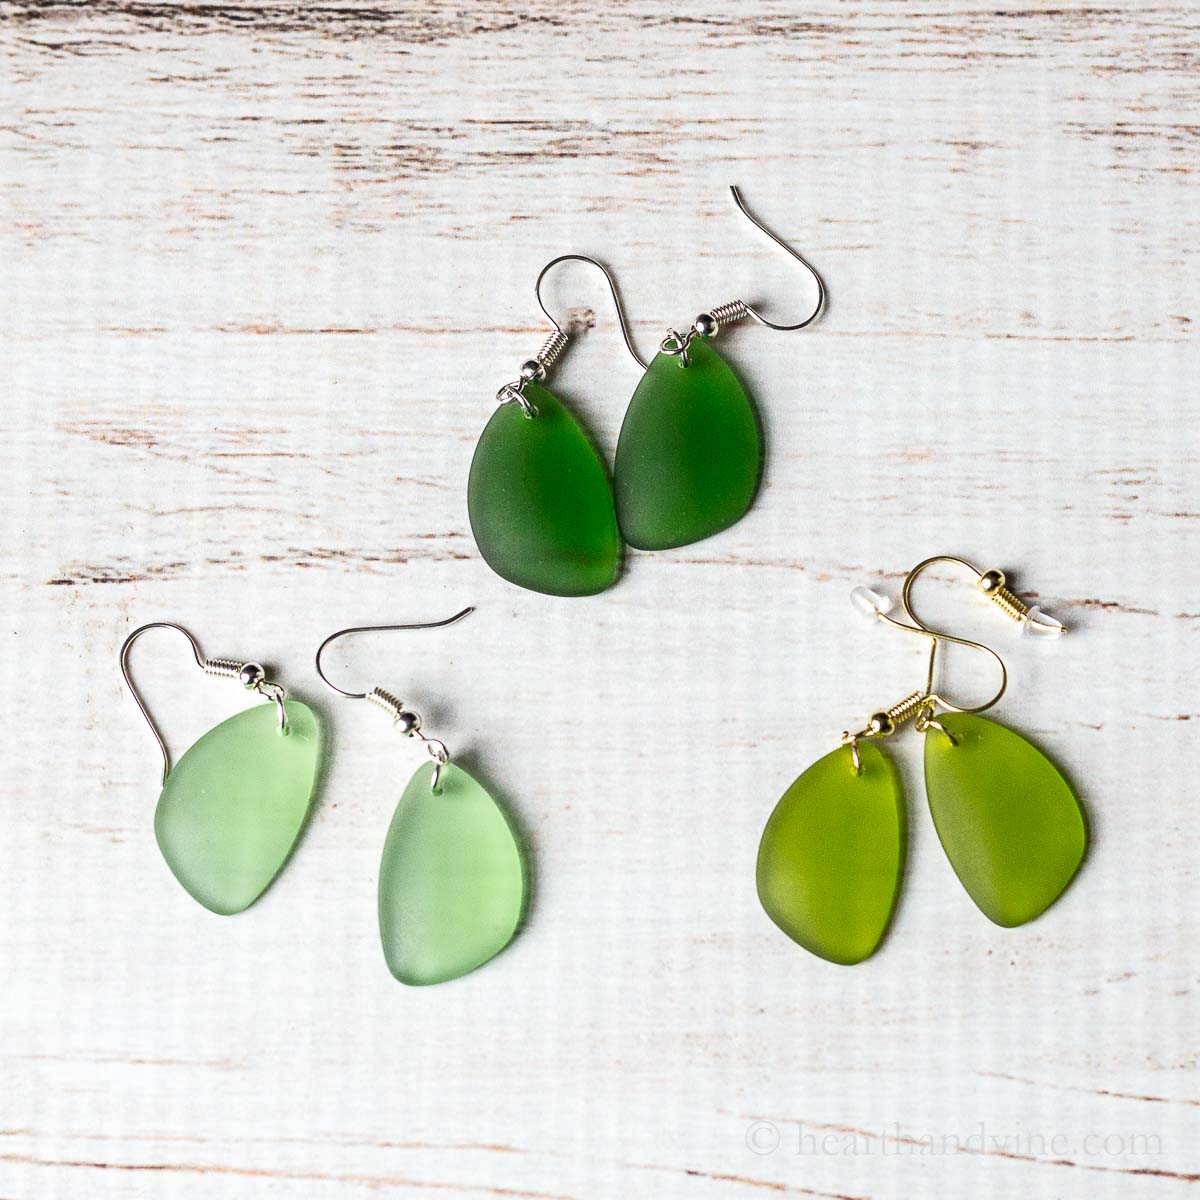
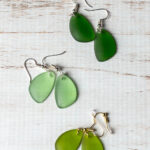
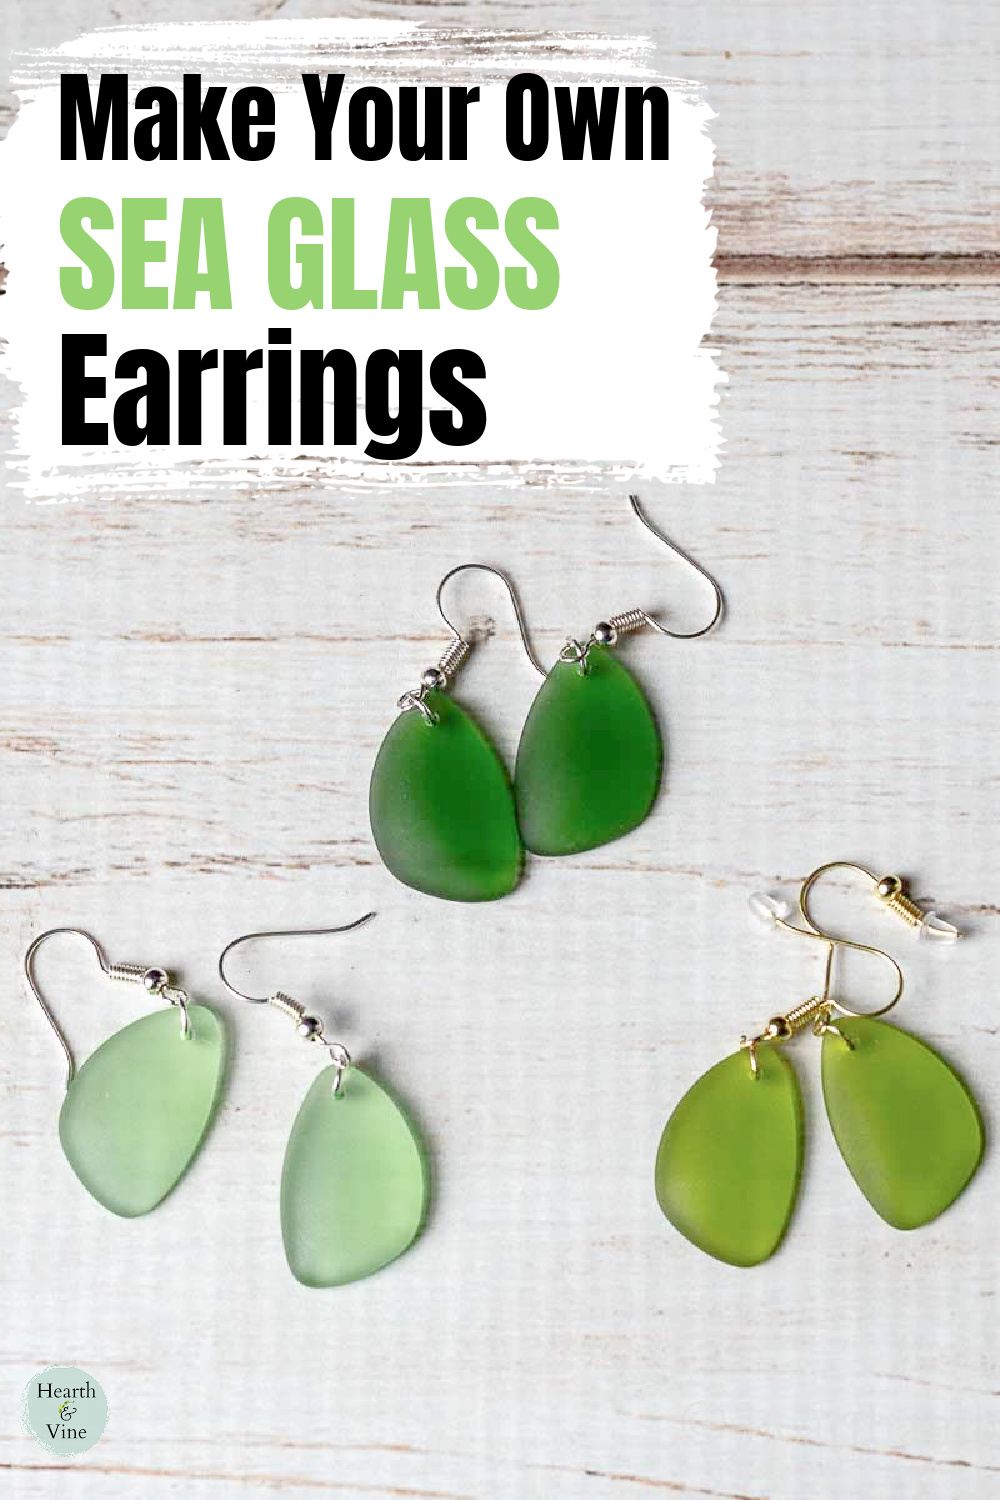
    I used to have a pair of green glass earrings that I loved and somehow I lost one. So while I was browsing through Etsy I found the most beautiful cultured sea glass with drilled holes. They come in several colors including a set of three that I bought in shades of green.

    This post contains some affiliate links (that means if you make a purchase after clicking a link, there’s no additional cost to you, but I will earn a very small commission. ) i.e. as an Amazon Associate, I earn from qualifying purchases. Click here to read my full disclosure policy.
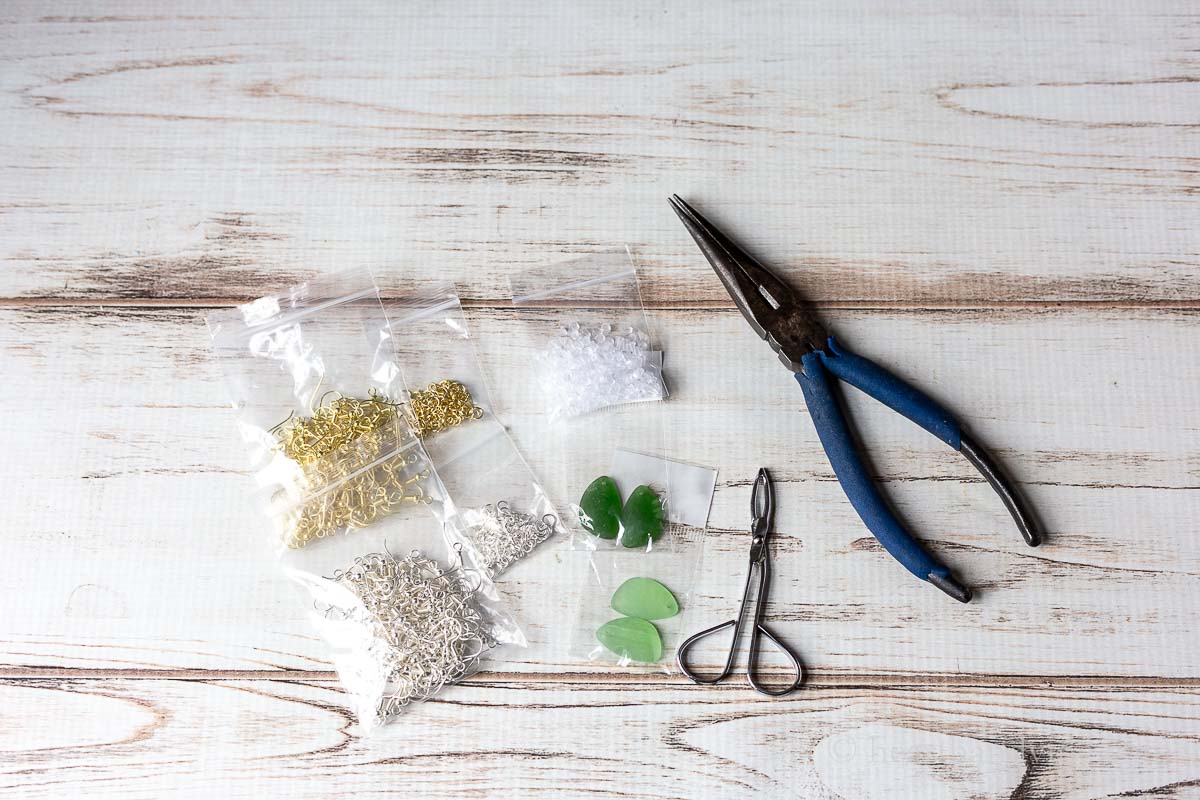
    Supplies for earring including pliers, tweezers, sea glass pendant and earring hoop kit.

    What You'll Need

    • Matching cultured sea glass pendants
    • Earring making kit
    • Tweezers
    • Needle nose pliers
    Two sea glass pendants with holes and two jump rings and two earring hoops.

    How to Make Sea Glass Earrings

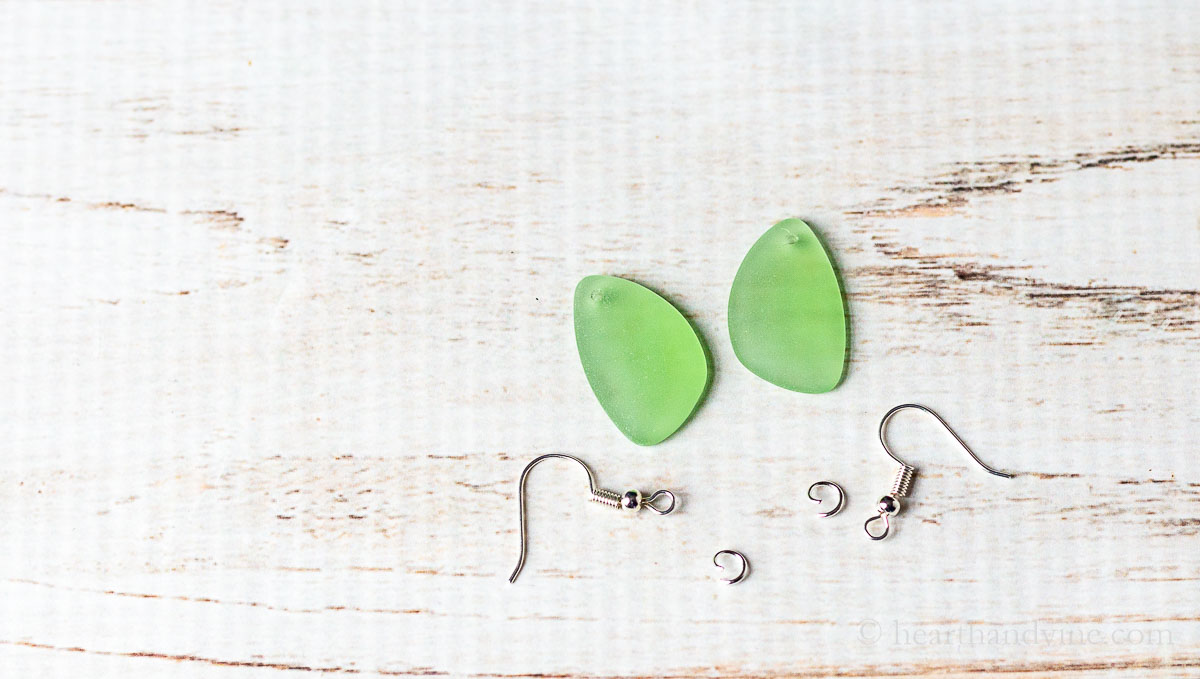
    Step 1: Gather two jump rings, two hoops, and two pendants

    Opening a jump ring with tweezers and pliers.

    Step 2: Use your tweezers to hold the jump ring in one hand and then open it up with the needle nose pliers with your other hand.

    Sliding a hoop earring onto a jump ring holding the ring with tweezers.

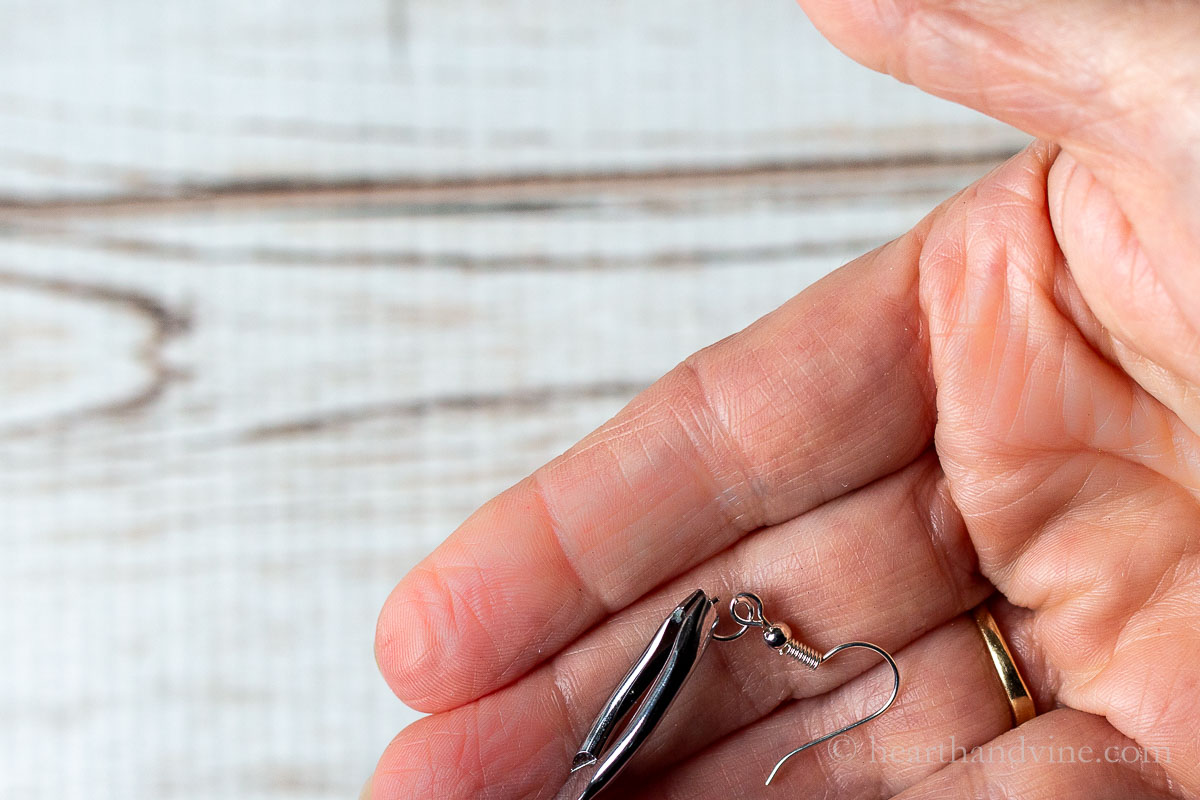
    Step 3: Slide the bottom loop of the hoop onto the jump ring while still holding the jump ring with the tweezers.

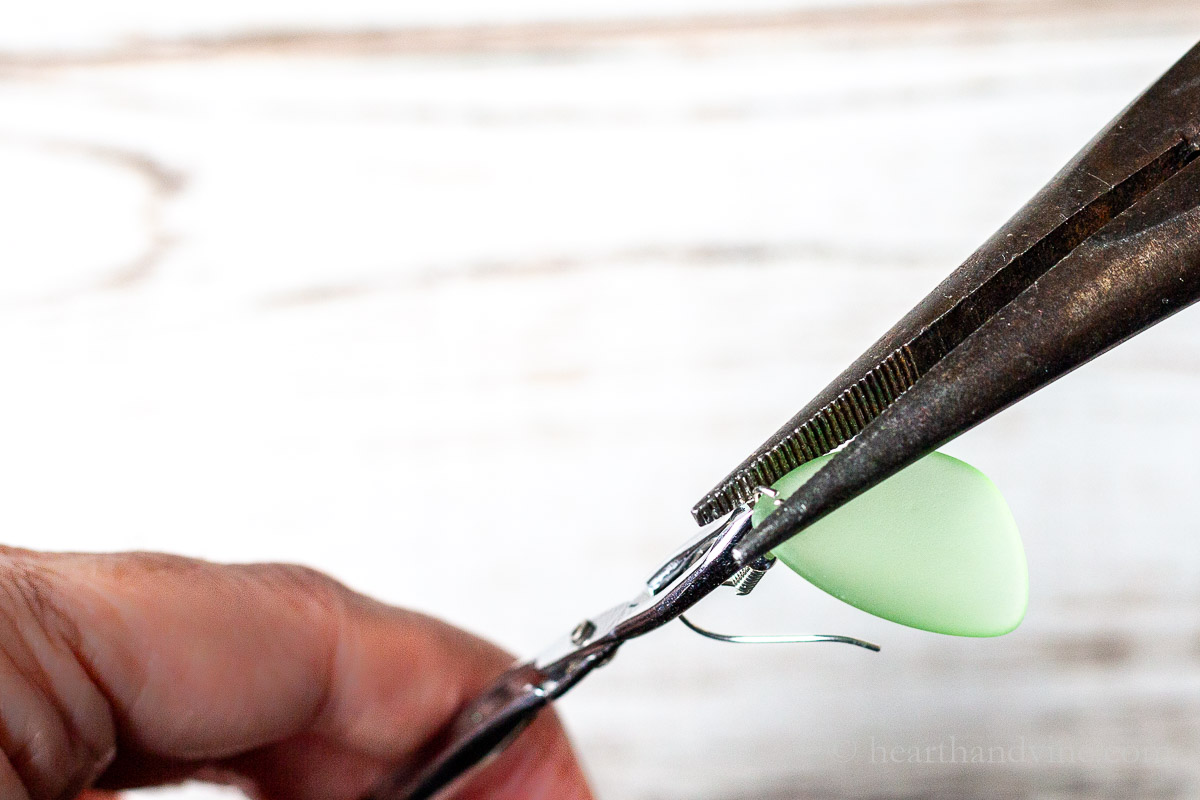
    Step 4: Thread the jump ring through the hole in the sea glass.

    Sliding the sea glass onto the jump ring and closing it with pliers.

    Step 5: Use the needle nose pliers to squeeze the jump ring closed.

    The completed sea glass earring setting on fingers.

    Step 6: You then may want to twist the hoop a little to make sure that the front of the sea glass stone is facing the correct way. You can do this by hand or with the pliers, but be gentle.

    Three sets of sea glass earring in three different shades of green.

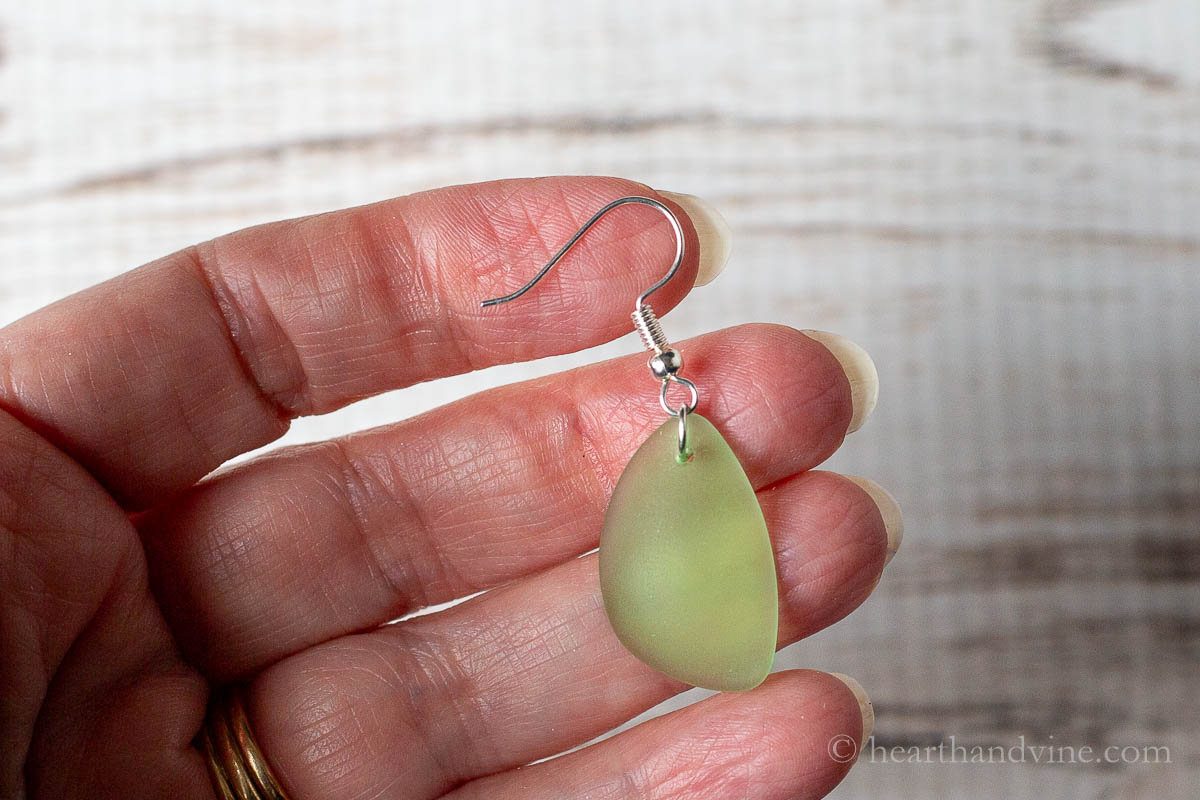
    That's it! The kit even comes with the little clear rubber backs to keep it from falling out of your ear. Also with this kit, you can decide whether to use gold hoops or silver.

    I wear silver jewelry most of the time so I created two with silver and one with gold. I think they look good either way.

    A partial view of a face wearing one of the earrings.

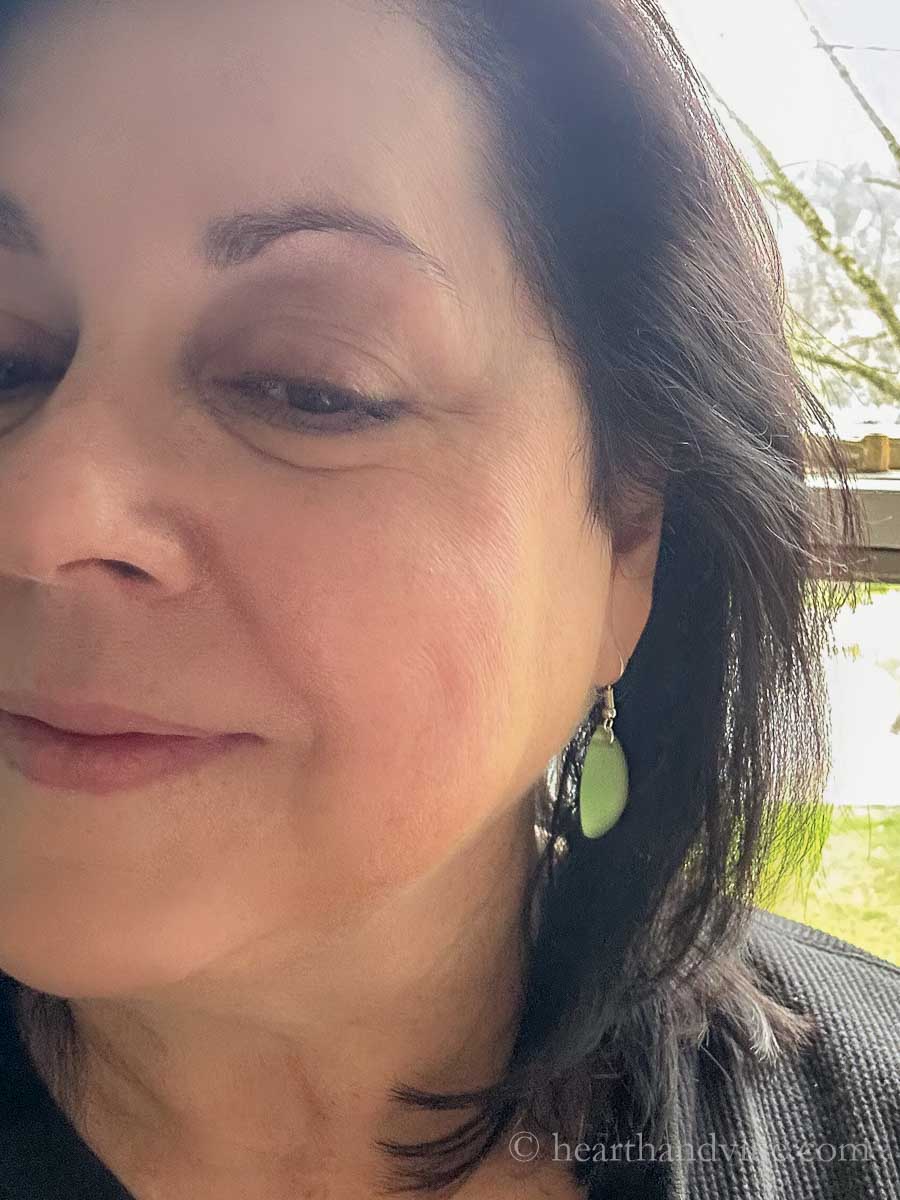
    Here's how one looks on me so you can get a sense of how big they are. At first, I was worried that they were too big but once I put them on I really liked the way they look.

    Not bad for a 20-minute craft, huh?

    Patti signature

    More Jewelry Craft Ideas

    • Healing Stone Bracelets
    • DIY Washer Necklace
    • Floral Wooden Bracelet
    • Tila Bead Bracelet
    • DIY Diffuser Necklace
    Three sets of sea glass earring in three different shades of green. Two with silver hoops and the third is gold.
    Three pairs of sea glass earrings in shade of green.
    Print

    How to Make Sea Glass Earrings

    Follow these step by step instructions to make sea glass earrings from cultured stones and jewelry parts. An easy craft even beginners can enjoy.
    Active Time20 minutes mins
    Total Time30 minutes mins
    Yield: 3 sets
    Cost: $17 for 3 sets

    Equipment

    • Tweezers
    • Needle nose pliers

    Materials

    • set of matching cultured stone pendants
    • earring making supply kit

    Instructions

    • Use tweezers and pliers to open up a jump ring.
    • With the tweezers hold the ring in one hand and slide the earring hoop onto the ring.
    • Next thread the ring through the hole in the stone.
    • Use the pliers to squeeze the ring closed.
    • Use your hand or pliers to slightly bend the hoop so that the stone faces the correct way.

    Notes

    The stones I bought were about an inch long. However, they come in larger and smaller sizes.
    Tried this project?Tag @hearthnvine on Instagram
    « Lungwort: A Beautiful Spring Perennial with a Funny Name
    Lemon Chicken Baked in the Oven »

    About Patti Estep

    Patti is the creator of Hearth and Vine, a home and garden blog filled with projects to inspire your creative side. She loves crafting, gardening, decorating and entertaining at her home in Pennsylvania. When she is not working on a project at home or searching for treasures at nurseries and thrift stores with her girlfriends, you’ll probably find her with family and friends, at a restaurant, or home party enjoying new and different food adventures.

    Reader Interactions

    Comments

    1. Marie

      April 03, 2024 at 8:13 am

      These are beautiful Patti!

      Reply
      • Patti Estep

        April 03, 2024 at 8:43 am

        Thanks Marie. I'm happy with the way they turned out.

        Reply
    2. Evie Ruch-Graham

      April 03, 2024 at 8:09 am

      Hi Patti. I'm a long time subscriber and thank you for all your cool posts. I wondered if there's a reason that you don't make all your posts Pinable. I like to save what I can to Pinterest for later use, like this one for sea glass jewelry.

      Reply
      • Patti Estep

        April 03, 2024 at 8:57 am

        Evie, I'm so glad you like the earrings. If you are viewing the post on a desktop there is a strip on the left side of the screen that allows you to share the post to Pinterest, or Facebook, Twitter (now X) etc... Also I always include a long image at the bottom with text for Pinterest. There should be a circle with a P inside as you scroll to pin to Pinterest. I do not have the same strip on mobile but the red circle P should show up on the same image at the bottom.

        Reply

    Leave a Reply Cancel reply

    Your email address will not be published. Required fields are marked *

    Recipe Rating


    Primary Sidebar

    Patti Estep Profile Picture

    Hi!

    I'm Patti

    Join me to create lots of fun DIY projects, including crafts, gardening, home decor, and tasty recipes

    More about me

    Popular Posts

    • Pressed flower are in two dark frames.
      DIY Pressed Flower Art
    • Pilea peperomioides
      Pilea Plant - The Pass It On Friendship Plant
    • Serving of cream of crab soup in a red bowl.
      Easy Cream of Crab Soup
    • Small indoor water fountain
      DIY Indoor Water Fountain
    • Chicken oscar on a plate
      Easy Chicken Oscar Recipe Made with Hollandaise Sauce
    • Fabric bowl covers in 3 prints
      How to Make Fabric Bowl Covers

    Footer

    ^ back to top

    About
    Contact
    Privacy Policy
    Disclosure Policy
    Terms of Service

    Sign Up Here!
    for our
    newsletter &
    special offers

    Follow Me

    facebook
    Pinterest
    instagram

    As an Amazon Associate, I earn from qualifying purchases. i.e. as an Amazon Associate, I earn from qualifying purchases.

    Copyright © 2026 Hearth and Vine

    Rate This Recipe

    Your vote:


    A rating is required
    A name is required
    An email is required